Continuation of my resto/build. Be sure to check out PART 1 & 2 of the garage
About this Mopar:
- Year
- 1965
- Make
- Plymouth
- Model
- Satellite
Needed to start another garage cause my build is so detailed.

here’s part 1 and part 2 if you haven’t seen them yet.
Part 1: Getting the 65 back on the street ~ PART 1
Part 2: Getting the 65 back on the street ~ PART 2
3/24/22
so as not to combine my projects, I have been posting in the 4spd garage I created to document the progress of the conversion. I did finish most of it aside if the console so I’ll keep updating this one as I go. I had the time to address the rusted floor and make the patches for it. Here is the link to part 1 of the 4spd conversion: 65 Satellite 4spd swap
I did get a pair of 67 b body floors from the garage and since this isn’t a full on restoration, I decided to use these for some patches. Not the same contour but made them work.


After tracing out the patch, I drilled out the spot welds and used a cutoff wheel to cut out the bad sections.


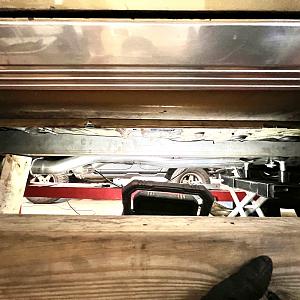
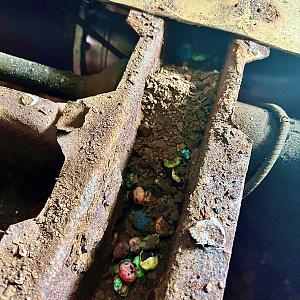
Found a little snack inside the frame rails when I removed the floor. Apparently there was a whole bag of skittles stored in there.

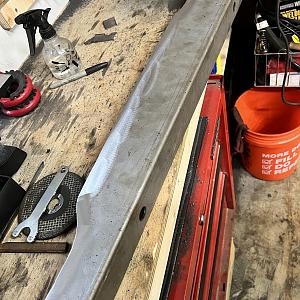
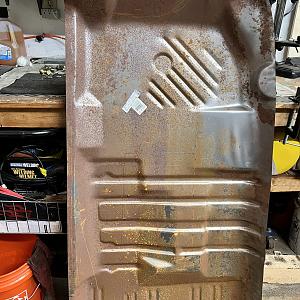
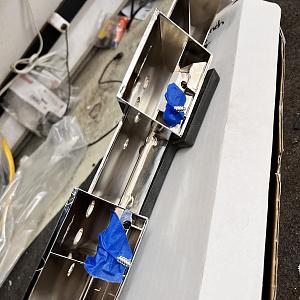
Patch panels are trimmed and prepped to weld in


Before welding them in, I treated the inside of the frame with Rust Seal to prevent further rust.


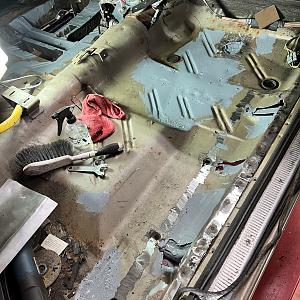
On the passenger side, I used some 16ga sheet metal and made my own patches as it wasn’t too bad. Mostly the bad spots were where the floor met the subframe and the seat brackets.

Driver patches rough welds before cleaning them up


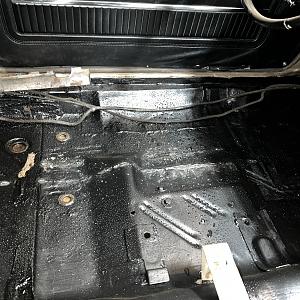
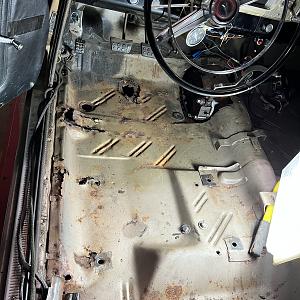
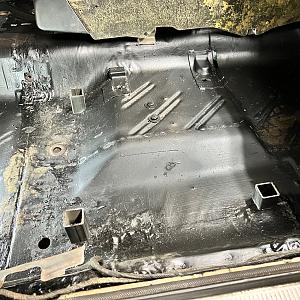
Cleaned the welds and then sealed the welds with seam sealer. Then a nice coat of Rust Seal on the whole floor.


After i finished the floor and painted it, I totally forgot to weld in my subframe connectors. Fortunately I didn’t start putting the interior in. My subframe connectors are from US Car Tool and fit fairly well. I needed to do some minor trimming and grinding to get them to fit correctly.


Once they were trimmed to fit, i scribed the floor and then cleaned it down to bare metal to weld them.

Good thing the interior wasn’t in cause we had a couple fires to put out from the welding catching the new interior paint on fire.

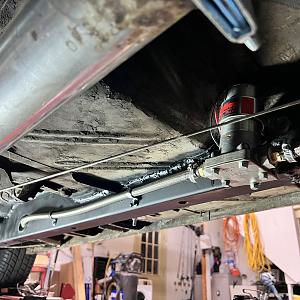
8 hours later, we have two welded im subframe connectors. Still need to grind down the welds, put a layer of seam sealer on the welds and give them a coat of paint to match the subframe.

Now I can clean up the interior….again…and retouch the paint where I welded. Once that is done I can work on making custom brackets for my SRT8 seats.

5/3/22
Its been a little while since I had time to work on her so I finally got some stuff done.
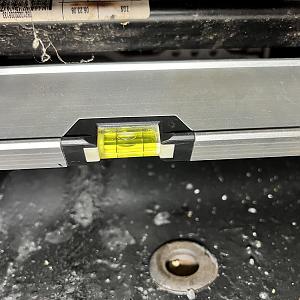
It was now time to fabricate some custom brackets to mount the SRT seats. Given the height of the seats, I needed to make sure the brackets were as short as possible to not sacrifice headroom. When placing the seats in, the two front holes of the SRT seats matched PERFECTLY with the factory seat mount holes in the floor. I ended up using some 1" square stock and some angle bracing to make a bracket to align 3 of the holes. After several measurements we got a nice level bracket that works.


Completed bracket. The seats use the factory hole in the top of the hump of the floor.

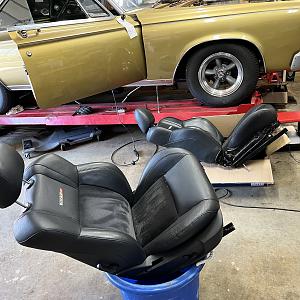
Cleaned up the seats and removed all the factory brackets and wiring not needed

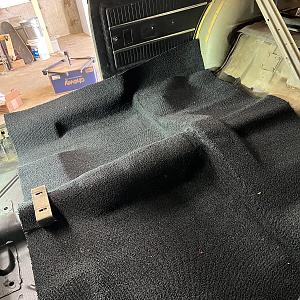
Left the carpet sitting in the driveway for several hours to lay out then dropped it in the car. I used a carpet kit from OC Carpets. The contours fit really well and with minimal trimming, it laid out nicely.


As part of the carpet kit, I also ordered the matching 4spd carpet and recarpeted the console.


Here is the 4spd console completed after taking apart two consoles (1 automatic and 1 4spd) and making one nice unit.


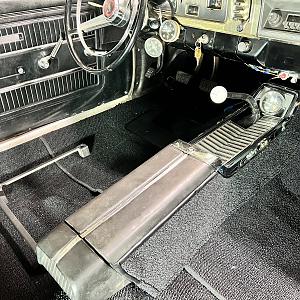
Mounted the console in and set the new seat brackets in place to make sure the seats fit correctly with the console


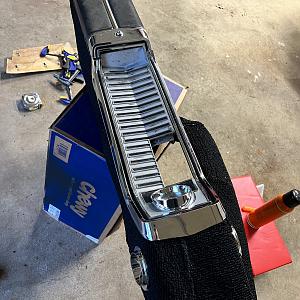
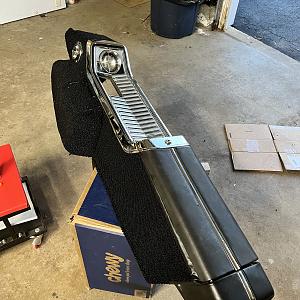
Completed console installed with the new custom shifter and boot installed


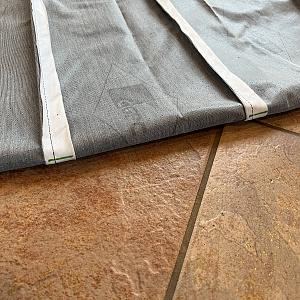
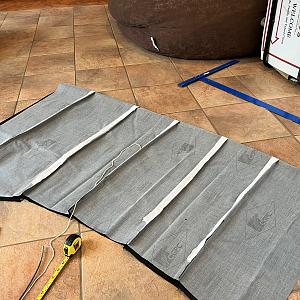
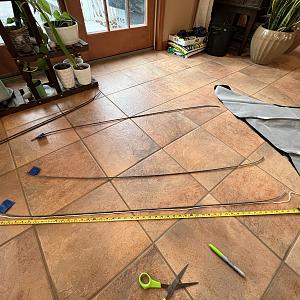
Next it was time to tackle the headliner. ***please note that if you dont have patience, then hire an upholstery company to do this. This was a very tedious and frustrating install for me. I marked and removed the bows from the roof and slid them into the liner. Placed the liner up and attempted to reattach the bows and it was not having it. The liner was not straight and would not sit right.


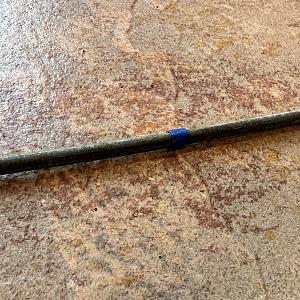
I ended up taking the bows out and using a tape measure to find the dead middle of the bow on each one. I then used a small piece of tape to wrap around the middle of the bow a few times so that I could feel it inside the liner. I then marked the dead middle of the liner with a marker. When I slid each bow into the appropriate spot, I was able to line up the mark on the liner with the small tape that I could feel on each bow


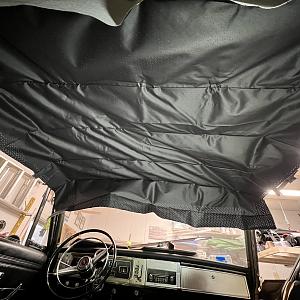
Now I was able to put the headliner up, starting with the rear and using the factory clip then worked my way forward install the the bows. Then I used a small plastic putty knife and slowly started working the edges under the liner trim. Now the fun part was using a heat gun and heating and stretching and tucking and heating and stretching and tucking. Starting from the rear corners and then going to the opposite front corners. Each time pull the wrinkles out while using the putty knife to tuck under the sides.

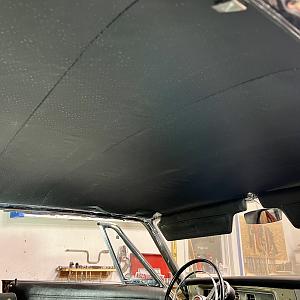
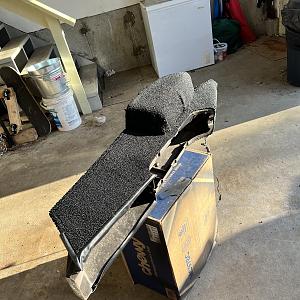
Finished liner installed and all the trim back in place. A few small wrinkles left but Im certain that once it sits out in the sun for a few hours, it will settle them down. All and all im very happy with how it turned out for my first one. Def saved some money but honestly if I had to do it again, I would pay someone to do it!


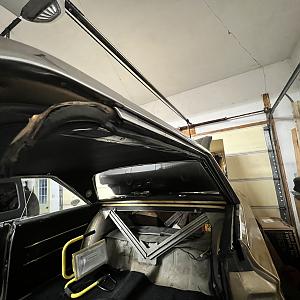
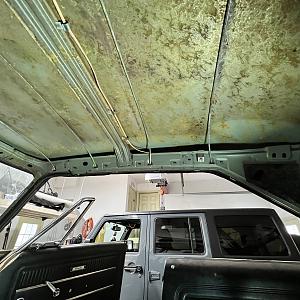
I then replaced all the rubber trim around the roof and windows

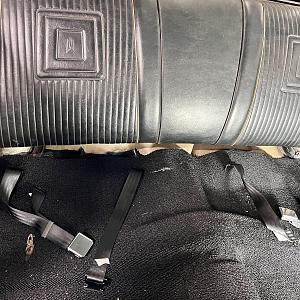
Installed some seat belts in the rear of the car (the wifes request). This car didnt have any from the factory so I ended up drilling holes and then adding sheet stock and huge washers underneath for added support

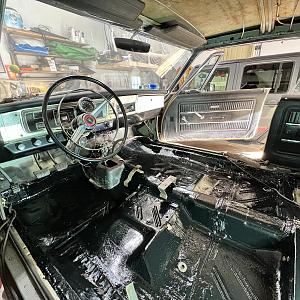
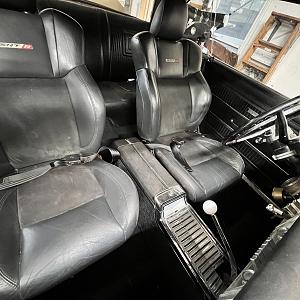
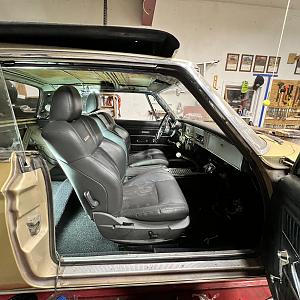
Put the back seat back in and mounted the front seats and tightened everything down. Here is the completed interior aside of running a power lead to power the seats


5/9/22
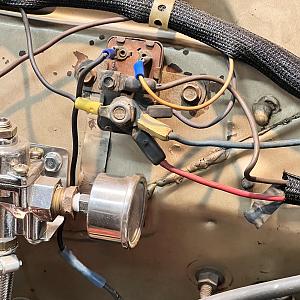
did a few things over the past couple days. Ran a power lead from the battery into the car to give the seats power. Ended up using a breaker and a fuse for extra protection. While I was in there, I cleaned up the wires under the dash and re mounted my gauges.
Went under the car and had to drill a hole through the subframe connectors to re route the fuel line. Once the hole was drilled, I seam sealed the connectors and then gave them a little paint to cover the bare metal. Here is the seam seal.

Fresh paint


Here’s the re run fuel line


After this was done, I filled up the trans, engine and radiator with fluid and fired it up for the first time in 7 months! She started right up and I actually drove it off the lift and down the street. What an awesome feeling! Almost forgot that I had to ground the neutral safety switch so the starter would work.


After going for a quick ride, I found a couple leaks. The reverse light switch is leaking and had to order a new one and the driveshaft was leaking through the pin hole in the yolk.


While I was waiting for the parts to come in, I finished the interior. Replaced the two front armrests.

pulled the door panels off to replaced the window felts

all back together

After struggling with the screws falling out of the armrests each time as I was trying to put them up, I came up with a quick way to hold the screws in place. Masking tape and poke the screws through and they stay in place.

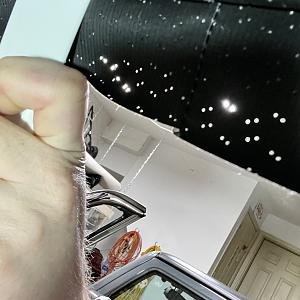
lastly today I added the chrome window trim to the windows. After cleaning them up real good, I used clear gorilla glue in the channel and used painters tape to hold them in place while the glue dries. Once dried, I’ll pull off the tape and use a sharp razor blade to remove the excess glue.

5/18/22
Took the tape off and cleaned up the extra glue. Gave the car a good bath and added some nice floor mats


Took her out for the maiden voyage. 25 mile trip and she did great! Couple small leaks to fix. Got some fluid leaking from the reverse switch on the tranny and one out the little weep hole on the driveshaft yolk.

added a very fitting sticker

Here’s a quick video of her out of the shop.
10/17/22
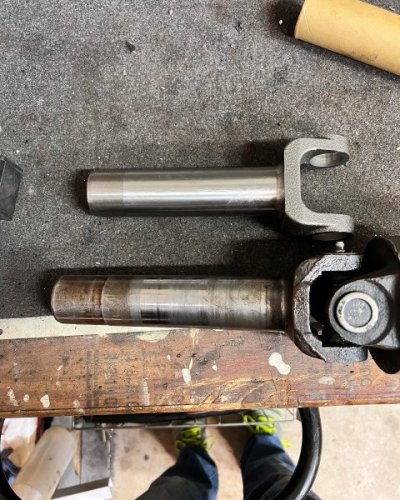
Been quite a while since I updated so wanted to circle back around. Been out enjoying the summer and cruising around. Working out the bugs here and there. After the maiden voyage, we did have a couple of leaks that needed to get addressed. Once was the speedo was leaking and the other was fluid getting into the driveshaft yolk and leaking.

Ordered a new slip yolk to hopefully take care of the leak

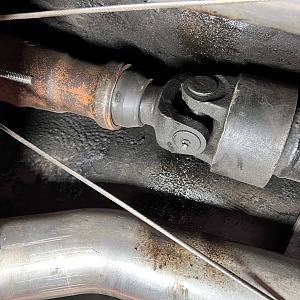
This shows how much fluid was getting through the yolk and leaking all over the exhaust

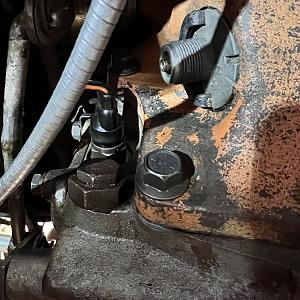
Here is the speedo leak

Another view of the leaking slip yolk

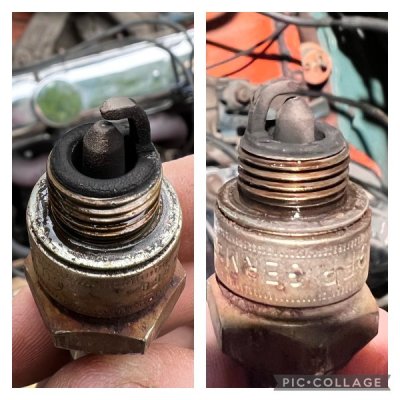
Once I got that squared away (or so I thought) I needed to address the carb issue. I was using a VS Holley 750 and it would run pig rich no matter what I did and there was a horrible flat spot that I could not get rid of. I tried to adjust it, played with the floats, the needles, the PV and nothing worked so I decided to look at getting a new Holley double pumper. I cam across this Summit version that seemed promising and had good reviews so figured I give it a shot.

After putting this on and playing with all the adjustments, I just couldn't get this to run quite right and she would lean out quite a bit under heavy throttle. Not only that but for some reason, it kept washing the cylinders down with fuel after sitting overnight and the floats would empty out. I did keep checking plugs to see how it was performing but after not being able to source the wash down leak, and having to change the oil twice in 20 miles, I decided it was defective.


I took the Summit carb off and put the VS Holley back on as I knew it ran and didn't leak so I would use that until I got a new carb. I did let the car sit for about a week and then I started it up and heard a horrible lower end knocking noise. My heart went into my stomach and after listening with a long extension, I determined it was def coming from the oil pan. My first thought was it spun a bearing from all the fuel in the oil. Figuring it was a out of commission for the rest of the season, I loaded it on the trailer and brought it to a friends shop who had a full size lift. We pulled the pan and oddly there was no metal. After further investigation, I found the noise! It was actually the windage tray. It had such a close tolerance that it actually warped slightly and it was just touching one of the crank mains. Took it out, bought a couple new gaskets and put the original metal one in and voila, no more noise. Crisis averted.


While it was up in the air, I replaced the o-ring again on the speedo and then ran it through the gears to see if was still leaking. No leak while it was on the lift (even though now its still leaking like a siv in my garage). We did notice that while running the car in the air, it seemed that the driver side axle was slightly bent and the wheel had a shimmy. Rather than playing any games, I just ordered two brand new axles with brand new bearings and decided to install them. While I was at it, I decided to swap the 3.55 sure-grip out for the 4.10 locker again. The 3.55's proved to be very ineffective for street use with the new 4-spd due to the OD gears.
Here are the new axles and the two pigs


After the new axles, I still had a driveline vibration that I can't seem to get to go away. Ive changed axles, differentials, re-balanced the tires, had the driveshaft balanced again and even checked to make sure the clutch and flywheel were tight. It seems to only vibrate when im cruising down the road and put the clutch in and let it coast. No change whether the car is running or not so that tells me its def driveline and not internal. That's a chase for another day.
After going back and forth, I decided to pull the trigger on an Edelbrock 800 carb (since its a street car, the Eddy always seemed to treat me better for cruising in my other cars). I also went ahead and got a Wideband sensor so I could really tune the carb. Lots of adjustments but right now it seems to be doing ok. I should really put the sensor closer to the header but this will do for now to get me close. eventually I will set up so dyno time and really dial it in.


The car ran great with the new carb. She's a lot of fun with the 4spd in it. Went to a friends BBQ and was leaving and everyone was egging me on to rip it up. I didn't want to beat on the car so I was reluctant to do so. Of course my wife was in the passenger seat and said "cmon just do it" so I caved and from a rolling start, stuffed the throttle and the tires lit up, banged second gear and they were still smoldering, then hit 3rd gear and it fell flat on its face like someone just the engine off...... guess the gear ratios in the trans for the OD are way too spread out from 2-3 so I may reconsider the OD this winter.
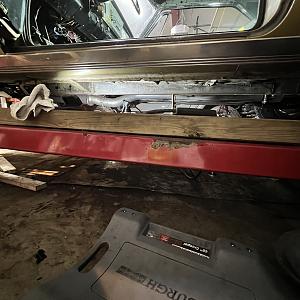
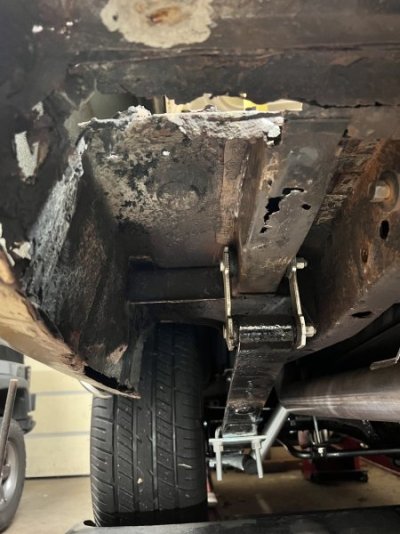
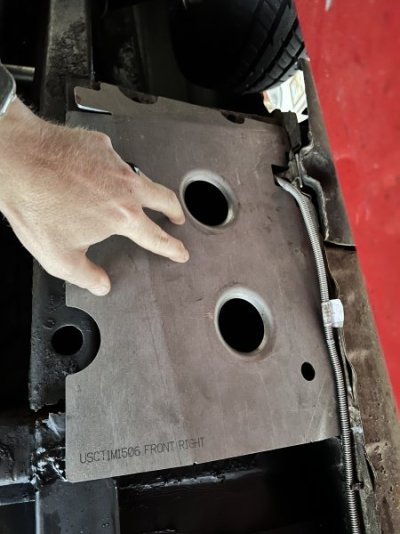
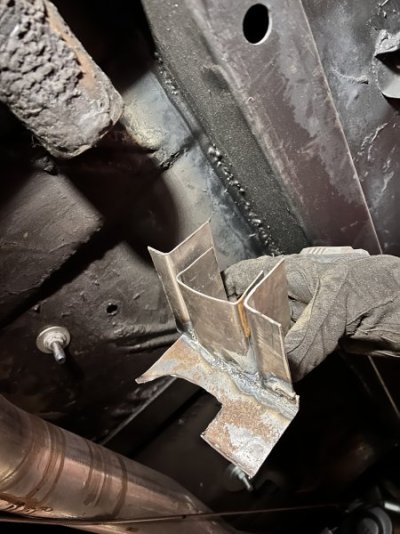
Driving home from the BBQ, as I was slowing down at stop signs, I began to hear a creaking and moaning of sorts that wasn't there before. Not really sure what it was, I took it easy until I got home. Put it on the lift and found out that I actually cracked my frame where the front frame rail attaches to the torsion bar crossmember. It was a little weak from some apparent rust/rot and Im sure the frame connectors didn't help cause it kept the car stiff. Welp, that was the end of the season for me cause we need to fix that. Since I still have the Torque Boxes from USCar Tool to install, I decided to patch the frame with some 14ga steel and then weld the torque boxes in. The torque boxes will literally tie in all 4 corners so replacing that frame rail was really not needed.
Here is the cracked frame

Here is what the torque box would cover. Totally attaches to solid frame and ties it all together

Here is the patch that I fabricated. Actually fabricated additional structure that will sit inside the frame to help stiffen it. This was never in there from the factory so this repair in my opinion is actually stronger than factory and with the torque box installed as well, she won't be going anywhere.

Since I was dealing with this repair, I figured it was time to tackle the rust issues in the rear that I was procrastinating. There were a couple small sections of rear frame rail that needed to be addressed as well as the driver side trunk extension, a section of the trunk floor and the crossmember that goes right in front of the tail panel. I ended up scoring a set of AMD trunk extensions and decided that the rust repair on the trunk pan was small enough that I could just fabricate that rather than replacing the whole pan. I fabricated repair pieces for the rear crossmember and used some 14ga steel to fabricate some frame pieces to fix the rear rails.
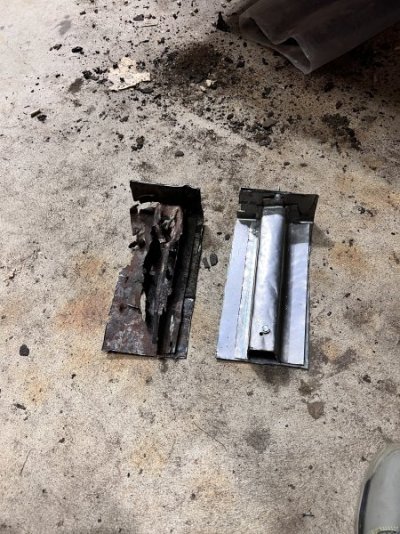
Here is the small section of rear frame rail that needed to be repaired. This was where the leaf spring shackle mounts. The sides are solid as a rock, it just rotted out on the bottom from what appears to be moisture that was trapped from the trunk holes.

Here is small section that was weak and rotted where the factory hole is for the exhaust hangar. The rail was solid everywhere else so in this case, I am just going to weld a section of flat stock from INSiDE the frame rail while I have the trunk floor section out. ill then coat inside the rails with Rust Seal and re-drill the hole for the exhaust

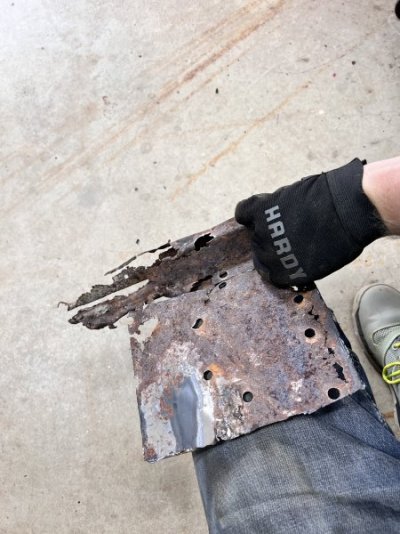
Here is all the rotted sheet metal from the trunk, trunk extension and the rear cross brace.


Fabricated small sections of the rear cross brace


Trunk floor section cut out, mocked up with cardboard and the new panel cut. Next step is to start trimming and fitting all the fabricated pieces and then I can start welding them in. Ill keep you all posted once I get them welded in


here’s part 1 and part 2 if you haven’t seen them yet.
Part 1: Getting the 65 back on the street ~ PART 1
Part 2: Getting the 65 back on the street ~ PART 2
3/24/22
so as not to combine my projects, I have been posting in the 4spd garage I created to document the progress of the conversion. I did finish most of it aside if the console so I’ll keep updating this one as I go. I had the time to address the rusted floor and make the patches for it. Here is the link to part 1 of the 4spd conversion: 65 Satellite 4spd swap
I did get a pair of 67 b body floors from the garage and since this isn’t a full on restoration, I decided to use these for some patches. Not the same contour but made them work.
After tracing out the patch, I drilled out the spot welds and used a cutoff wheel to cut out the bad sections.
Found a little snack inside the frame rails when I removed the floor. Apparently there was a whole bag of skittles stored in there.
Patch panels are trimmed and prepped to weld in
Before welding them in, I treated the inside of the frame with Rust Seal to prevent further rust.
On the passenger side, I used some 16ga sheet metal and made my own patches as it wasn’t too bad. Mostly the bad spots were where the floor met the subframe and the seat brackets.
Driver patches rough welds before cleaning them up
Cleaned the welds and then sealed the welds with seam sealer. Then a nice coat of Rust Seal on the whole floor.
After i finished the floor and painted it, I totally forgot to weld in my subframe connectors. Fortunately I didn’t start putting the interior in. My subframe connectors are from US Car Tool and fit fairly well. I needed to do some minor trimming and grinding to get them to fit correctly.
Once they were trimmed to fit, i scribed the floor and then cleaned it down to bare metal to weld them.
Good thing the interior wasn’t in cause we had a couple fires to put out from the welding catching the new interior paint on fire.
8 hours later, we have two welded im subframe connectors. Still need to grind down the welds, put a layer of seam sealer on the welds and give them a coat of paint to match the subframe.
Now I can clean up the interior….again…and retouch the paint where I welded. Once that is done I can work on making custom brackets for my SRT8 seats.
5/3/22
Its been a little while since I had time to work on her so I finally got some stuff done.
It was now time to fabricate some custom brackets to mount the SRT seats. Given the height of the seats, I needed to make sure the brackets were as short as possible to not sacrifice headroom. When placing the seats in, the two front holes of the SRT seats matched PERFECTLY with the factory seat mount holes in the floor. I ended up using some 1" square stock and some angle bracing to make a bracket to align 3 of the holes. After several measurements we got a nice level bracket that works.
Completed bracket. The seats use the factory hole in the top of the hump of the floor.
Cleaned up the seats and removed all the factory brackets and wiring not needed
Left the carpet sitting in the driveway for several hours to lay out then dropped it in the car. I used a carpet kit from OC Carpets. The contours fit really well and with minimal trimming, it laid out nicely.
As part of the carpet kit, I also ordered the matching 4spd carpet and recarpeted the console.
Here is the 4spd console completed after taking apart two consoles (1 automatic and 1 4spd) and making one nice unit.
Mounted the console in and set the new seat brackets in place to make sure the seats fit correctly with the console
Completed console installed with the new custom shifter and boot installed
Next it was time to tackle the headliner. ***please note that if you dont have patience, then hire an upholstery company to do this. This was a very tedious and frustrating install for me. I marked and removed the bows from the roof and slid them into the liner. Placed the liner up and attempted to reattach the bows and it was not having it. The liner was not straight and would not sit right.
I ended up taking the bows out and using a tape measure to find the dead middle of the bow on each one. I then used a small piece of tape to wrap around the middle of the bow a few times so that I could feel it inside the liner. I then marked the dead middle of the liner with a marker. When I slid each bow into the appropriate spot, I was able to line up the mark on the liner with the small tape that I could feel on each bow
Now I was able to put the headliner up, starting with the rear and using the factory clip then worked my way forward install the the bows. Then I used a small plastic putty knife and slowly started working the edges under the liner trim. Now the fun part was using a heat gun and heating and stretching and tucking and heating and stretching and tucking. Starting from the rear corners and then going to the opposite front corners. Each time pull the wrinkles out while using the putty knife to tuck under the sides.
Finished liner installed and all the trim back in place. A few small wrinkles left but Im certain that once it sits out in the sun for a few hours, it will settle them down. All and all im very happy with how it turned out for my first one. Def saved some money but honestly if I had to do it again, I would pay someone to do it!
I then replaced all the rubber trim around the roof and windows
Installed some seat belts in the rear of the car (the wifes request). This car didnt have any from the factory so I ended up drilling holes and then adding sheet stock and huge washers underneath for added support
Put the back seat back in and mounted the front seats and tightened everything down. Here is the completed interior aside of running a power lead to power the seats
5/9/22
did a few things over the past couple days. Ran a power lead from the battery into the car to give the seats power. Ended up using a breaker and a fuse for extra protection. While I was in there, I cleaned up the wires under the dash and re mounted my gauges.
Went under the car and had to drill a hole through the subframe connectors to re route the fuel line. Once the hole was drilled, I seam sealed the connectors and then gave them a little paint to cover the bare metal. Here is the seam seal.
Fresh paint
Here’s the re run fuel line
After this was done, I filled up the trans, engine and radiator with fluid and fired it up for the first time in 7 months! She started right up and I actually drove it off the lift and down the street. What an awesome feeling! Almost forgot that I had to ground the neutral safety switch so the starter would work.
After going for a quick ride, I found a couple leaks. The reverse light switch is leaking and had to order a new one and the driveshaft was leaking through the pin hole in the yolk.
While I was waiting for the parts to come in, I finished the interior. Replaced the two front armrests.
pulled the door panels off to replaced the window felts
all back together
After struggling with the screws falling out of the armrests each time as I was trying to put them up, I came up with a quick way to hold the screws in place. Masking tape and poke the screws through and they stay in place.
lastly today I added the chrome window trim to the windows. After cleaning them up real good, I used clear gorilla glue in the channel and used painters tape to hold them in place while the glue dries. Once dried, I’ll pull off the tape and use a sharp razor blade to remove the excess glue.
5/18/22
Took the tape off and cleaned up the extra glue. Gave the car a good bath and added some nice floor mats
Took her out for the maiden voyage. 25 mile trip and she did great! Couple small leaks to fix. Got some fluid leaking from the reverse switch on the tranny and one out the little weep hole on the driveshaft yolk.
added a very fitting sticker
Here’s a quick video of her out of the shop.
10/17/22
Been quite a while since I updated so wanted to circle back around. Been out enjoying the summer and cruising around. Working out the bugs here and there. After the maiden voyage, we did have a couple of leaks that needed to get addressed. Once was the speedo was leaking and the other was fluid getting into the driveshaft yolk and leaking.
Ordered a new slip yolk to hopefully take care of the leak
This shows how much fluid was getting through the yolk and leaking all over the exhaust
Here is the speedo leak
Another view of the leaking slip yolk
Once I got that squared away (or so I thought) I needed to address the carb issue. I was using a VS Holley 750 and it would run pig rich no matter what I did and there was a horrible flat spot that I could not get rid of. I tried to adjust it, played with the floats, the needles, the PV and nothing worked so I decided to look at getting a new Holley double pumper. I cam across this Summit version that seemed promising and had good reviews so figured I give it a shot.
After putting this on and playing with all the adjustments, I just couldn't get this to run quite right and she would lean out quite a bit under heavy throttle. Not only that but for some reason, it kept washing the cylinders down with fuel after sitting overnight and the floats would empty out. I did keep checking plugs to see how it was performing but after not being able to source the wash down leak, and having to change the oil twice in 20 miles, I decided it was defective.
I took the Summit carb off and put the VS Holley back on as I knew it ran and didn't leak so I would use that until I got a new carb. I did let the car sit for about a week and then I started it up and heard a horrible lower end knocking noise. My heart went into my stomach and after listening with a long extension, I determined it was def coming from the oil pan. My first thought was it spun a bearing from all the fuel in the oil. Figuring it was a out of commission for the rest of the season, I loaded it on the trailer and brought it to a friends shop who had a full size lift. We pulled the pan and oddly there was no metal. After further investigation, I found the noise! It was actually the windage tray. It had such a close tolerance that it actually warped slightly and it was just touching one of the crank mains. Took it out, bought a couple new gaskets and put the original metal one in and voila, no more noise. Crisis averted.
While it was up in the air, I replaced the o-ring again on the speedo and then ran it through the gears to see if was still leaking. No leak while it was on the lift (even though now its still leaking like a siv in my garage). We did notice that while running the car in the air, it seemed that the driver side axle was slightly bent and the wheel had a shimmy. Rather than playing any games, I just ordered two brand new axles with brand new bearings and decided to install them. While I was at it, I decided to swap the 3.55 sure-grip out for the 4.10 locker again. The 3.55's proved to be very ineffective for street use with the new 4-spd due to the OD gears.
Here are the new axles and the two pigs
After the new axles, I still had a driveline vibration that I can't seem to get to go away. Ive changed axles, differentials, re-balanced the tires, had the driveshaft balanced again and even checked to make sure the clutch and flywheel were tight. It seems to only vibrate when im cruising down the road and put the clutch in and let it coast. No change whether the car is running or not so that tells me its def driveline and not internal. That's a chase for another day.
After going back and forth, I decided to pull the trigger on an Edelbrock 800 carb (since its a street car, the Eddy always seemed to treat me better for cruising in my other cars). I also went ahead and got a Wideband sensor so I could really tune the carb. Lots of adjustments but right now it seems to be doing ok. I should really put the sensor closer to the header but this will do for now to get me close. eventually I will set up so dyno time and really dial it in.
The car ran great with the new carb. She's a lot of fun with the 4spd in it. Went to a friends BBQ and was leaving and everyone was egging me on to rip it up. I didn't want to beat on the car so I was reluctant to do so. Of course my wife was in the passenger seat and said "cmon just do it" so I caved and from a rolling start, stuffed the throttle and the tires lit up, banged second gear and they were still smoldering, then hit 3rd gear and it fell flat on its face like someone just the engine off...... guess the gear ratios in the trans for the OD are way too spread out from 2-3 so I may reconsider the OD this winter.
Driving home from the BBQ, as I was slowing down at stop signs, I began to hear a creaking and moaning of sorts that wasn't there before. Not really sure what it was, I took it easy until I got home. Put it on the lift and found out that I actually cracked my frame where the front frame rail attaches to the torsion bar crossmember. It was a little weak from some apparent rust/rot and Im sure the frame connectors didn't help cause it kept the car stiff. Welp, that was the end of the season for me cause we need to fix that. Since I still have the Torque Boxes from USCar Tool to install, I decided to patch the frame with some 14ga steel and then weld the torque boxes in. The torque boxes will literally tie in all 4 corners so replacing that frame rail was really not needed.
Here is the cracked frame
Here is what the torque box would cover. Totally attaches to solid frame and ties it all together
Here is the patch that I fabricated. Actually fabricated additional structure that will sit inside the frame to help stiffen it. This was never in there from the factory so this repair in my opinion is actually stronger than factory and with the torque box installed as well, she won't be going anywhere.
Since I was dealing with this repair, I figured it was time to tackle the rust issues in the rear that I was procrastinating. There were a couple small sections of rear frame rail that needed to be addressed as well as the driver side trunk extension, a section of the trunk floor and the crossmember that goes right in front of the tail panel. I ended up scoring a set of AMD trunk extensions and decided that the rust repair on the trunk pan was small enough that I could just fabricate that rather than replacing the whole pan. I fabricated repair pieces for the rear crossmember and used some 14ga steel to fabricate some frame pieces to fix the rear rails.
Here is the small section of rear frame rail that needed to be repaired. This was where the leaf spring shackle mounts. The sides are solid as a rock, it just rotted out on the bottom from what appears to be moisture that was trapped from the trunk holes.
Here is small section that was weak and rotted where the factory hole is for the exhaust hangar. The rail was solid everywhere else so in this case, I am just going to weld a section of flat stock from INSiDE the frame rail while I have the trunk floor section out. ill then coat inside the rails with Rust Seal and re-drill the hole for the exhaust
Here is all the rotted sheet metal from the trunk, trunk extension and the rear cross brace.
Fabricated small sections of the rear cross brace
Trunk floor section cut out, mocked up with cardboard and the new panel cut. Next step is to start trimming and fitting all the fabricated pieces and then I can start welding them in. Ill keep you all posted once I get them welded in