I’ve been doing a full coverage of all the work being done on my 65 in the garage. Ran out of space in Part 1 so had to create a new one to continue updating. Be sure to check out Part 1 to follow my progress from the day she came home
About this Mopar:
Part 2
If you haven’t been following my last one, here is the link to Part 1: https://www.forbbodiesonly.com/moparforum/showcase/getting-the-65-back-on-the-street-part-1.5529/
I want to thank everyone who’s commented and liked my first part of my progress update. I’m glad a lot of you are getting some good info out of it. Since we ran out of room in our previous garage (max of 25,000 words) we created this second part for you all to follow. Hope you enjoy!
5/2/21
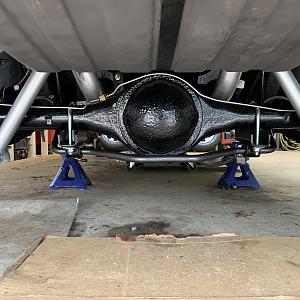
Had to work this morning but still had time this afternoon to tackle the rear sway bar install. I was considering splurging and getting the Hellwig 7/8 rear sway bar but saw that Summit Racing had the identical bar (the instructions were exactly the same as the Hellwig) and it was about $100 cheaper. I went with that one.
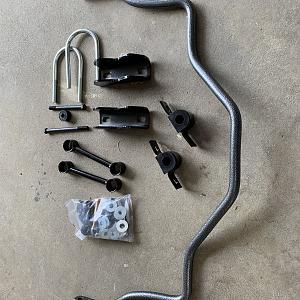
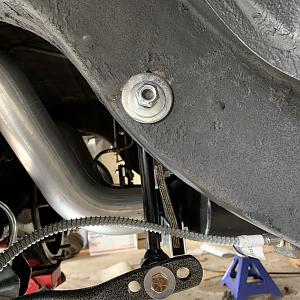
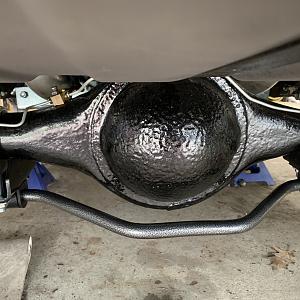
It was a pretty straightforward install......for those with a lift. I’ll admit, working on the floor using jacks and jack stands for this job was quite a pain in the a$$. In any event I laid it all out and starting fitting everything in place. The bar itself clamps to the rear end housing with u-bolts and that was pretty easy. Next I needed to get the stabilizer links put together and the easiest way to do that was to use the vice and put the supplied lubricant all over the bushings and press them into the end links. Once that was done I lubed up the metal spacer and pressed those into the bushings. I attached one end to the sway bar and the next step was the most difficult and time consuming. That was lining up the sway bar to mark where to drill holes in the frame. This required that the suspension be resting on its full weight so fir me, the car was on jack stands so I used a floor jack under the diff and raised it up until the weight was off the jack stands. I lined up the upper end link to where I believe it should go on the frame and made a mark and center punched it. Then I used some cardboard to make a template so I could use that template on both sides of the frame rail and then also transfer it to the opposite frame rail for the other side. Once the template was made, I closed my eyes, crossed my fingers and drilled through the frame. Thankfully my template worked and the holes were perfect and centered!
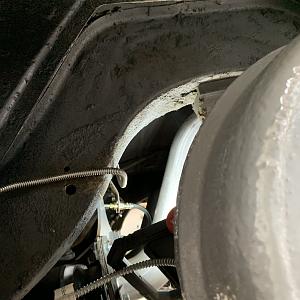
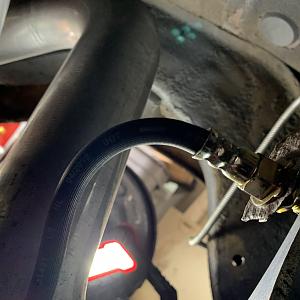
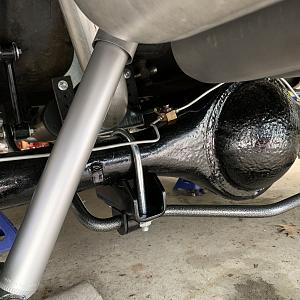
Once the holes were drilled it was a matter of just putting the sleeves through the frame and then bolting everything together. Once it was all loosely I place, I made sure everything was centered and adjusted correctly and torqued everything to specs. Very happy with the finished product
5/7/21
Just a couple little things were buttoned up today. I installed the electric fuel pump relay and safety shut off. Bunch of wiring but tucked everything under the dash.
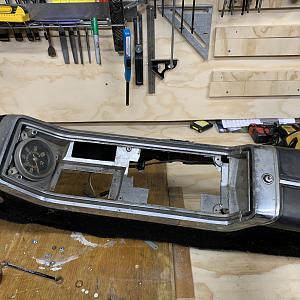
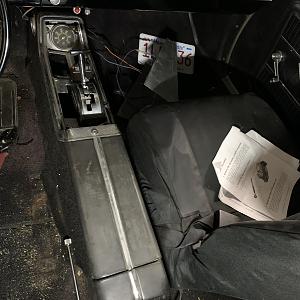
While I was inside, I kept looking at the original console and wondering how I could get it to work with the aftermarket shifter. It didn’t fit so the previous owner just had the console in the trunk. Well I popped off the trim plate and noticed someone had started cutting the console under the trim. Since it was already cut a little I figured I’d cut it out and fit it to the shifter. Well it worked. I had to move the shifter forward about 8” and re-route the cable under the car but it all lined up and bolted into place. It’s not the best looking but it’s 100x better than the make-shift console that was in there. As I mentioned before, I’m converting to a 4 spd next winter so I’ll have a new console anyway so this will work for this season.
Old make-shift console
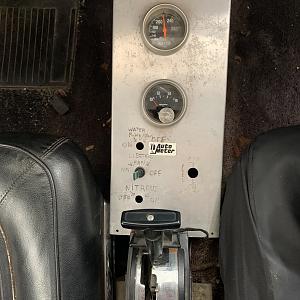
Original console after I finished trimming (if you put trim plate on you can’t see anything that’s been cut)
Installed in the car
5/10/21
Yesterday was Mother’s Day so took the day off to spend with my wife and kids so today I was able to get a few things done.
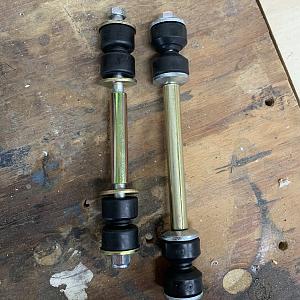
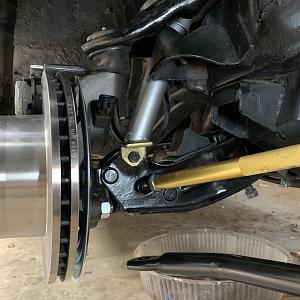
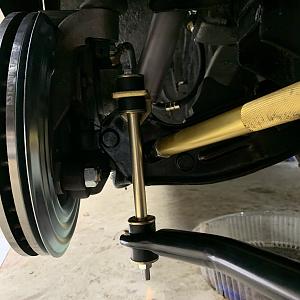
i was having issues with my end links of my front sway bar hitting the strut rods and was working with PST to come up with a solution. They sent me some longer bolts and I was able to rotate the top shock mount bracket 180 degrees and use the longer bolts and sleeves. That was able to get the bracket and bushings away from the strut rods and I have all sorts of clearance now.
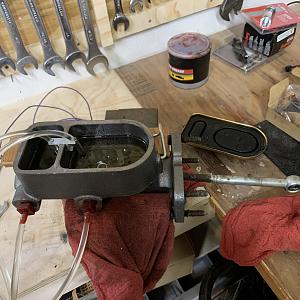
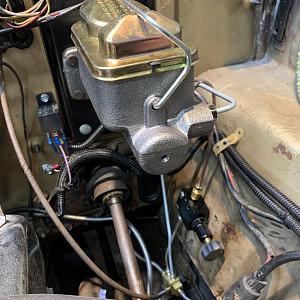
After I fixed that, it was back to brake saga..... got under the dash and unbolted the master cylinder....again. I bought a new master cylinder bench bleed kit and ended up getting some air bubbles out of the front reservoir. Not sure if those were in there or if I created them when I pulled the master out. Either way, I bled it for a bit until there was no more air bubbles coming out. I’m still using my factory push rod but if it still have travel issues, I’ll attempt to install the adjustable one. If I go that route, I’ll need to plumb in a brake light pressure switch as the adjustable push rod doesn’t work with the factory brake light switch at the pedal.
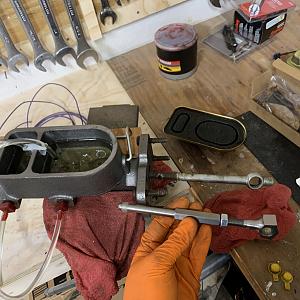
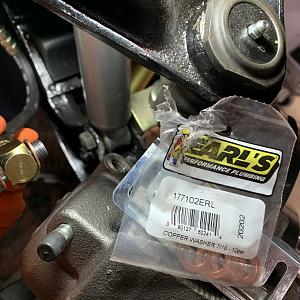
I let the master sit for a little bit and tackled the leaking banjo bolts again. I ordered a pack of new crush washers and replaced both of them on both sides. While it was apart, I inspected the surface of the caliper and the hoses and all seemed good. I torqued them down and we will see if that works to stop the leaking when I go to bleed the system.
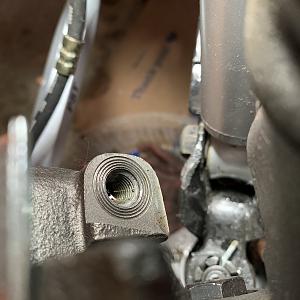
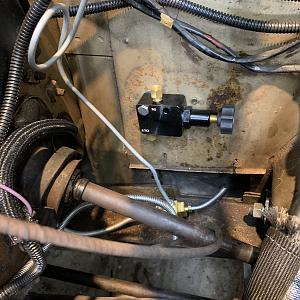
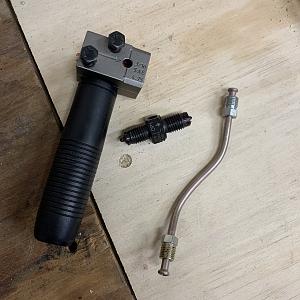
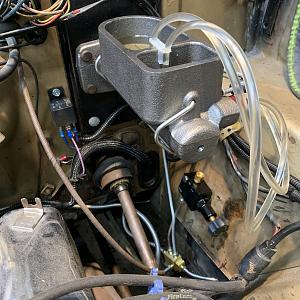
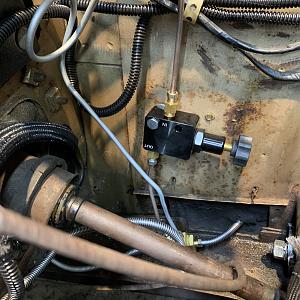
Lastly, I plumbed in the adjustable proportioning valve into the rear brake line. While the master cylinder was out, it was easy to work in that area. I bought the Earls tool for flaring the line rather than my cheapo flaring kit and it worked perfect. Once the lines were bent and flared, I mounted the master cylinder back in and attached the lines to that. Tightened all the connections, dried everything off good and we will see if there are signs of any seepage tomorrow. If not, we will start to bleed the system again and see if we can get the brakes working.
5/15/21
Feeling pretty accomplished today. Had the majority of the day to work in the garage. Finally got the rear end from the diff shop. After throwing it on the bench next to the other one, I realized that the yolks were a different size. I ended up swapping yolks and then swapping the pinion snubber to the new unit. Out with the 4.10 solid spool and in with a 3.55 sur-grip. I’ll keep the spool foe the occasional track day.
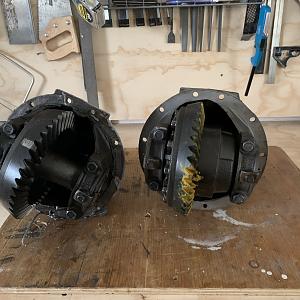
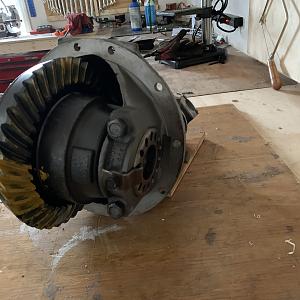
After swapping them around, got a little help from the boy and we muscled the diff into the housing. What a pain doing that on your back with the car on jack stands. In any event, it went together nicely. Slid the axles in and adjusted the end play.
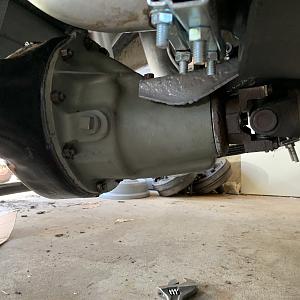
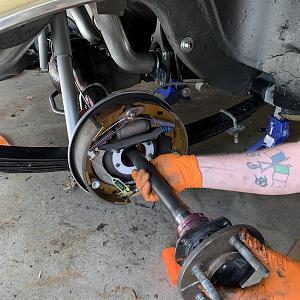
Once we finished that, we got the drums RE-installed and bleed the brakes for a good hour until all the air seemed to dissipate. They pedal is still a little soft but figured I’d get the car moving and see how it was while driving it. I may have to install a different push rod or switch from the 15/16 master to one with a bigger piston.
After that, we got the wheels on, dropped her down on her own weight, adjusted the torsion bars to raise it up a little and sat back and admired it.
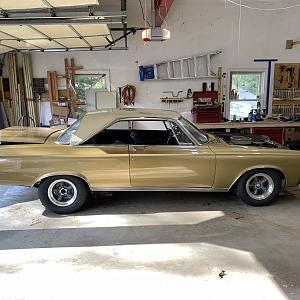
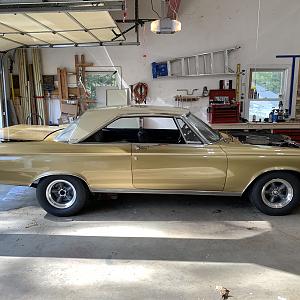
Wanted to start it up and pull it outside so cleaned everything around it, filled the gas tank (as it was empty from refurbishing it) and poured a little fuel down the carb. Fired up with just a tickle of the key.....but wouldn’t stay running....for some reason the electric fuel pump isn’t pumping. The pump runs but doesn’t pump fuel. Disconnected the fuel hose to put it in a gas can to test to make sure it wasn’t the tank and no go. It won’t pump. No suction if I put my finger on the hose.....I’m assuming the pump crapped out unless I’m missing something. After banging my head on the wall for a little bit, I called it a night. Guess I’ll order a new pump and wait another week to start it up.
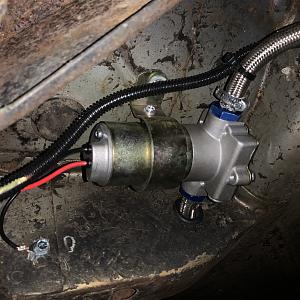
5/21/21
well it’s been a few days and I ended up ordering a new pump. After 4 days of waiting it came in and didn’t have any fittings so had to go out and get those too. Figured I’d pick up another fuel filter that I could plumb between the tank and the pump and got some new hose and clamps
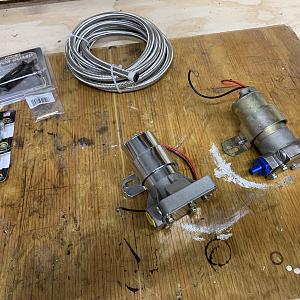
Since the old one was mounted horizontally inside the rear torque box, I figured nows the best time to relocate it so I can weld my torque box stiffening plates and mount the pump vertical like it’s supposed to. Since I’m running big 3” exhaust, there really wasn’t any room any further back so determined this was the best spot to mount it just inside the frame
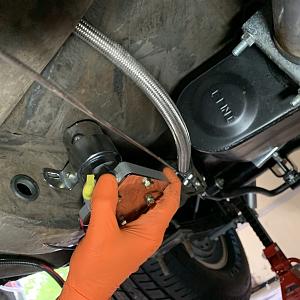
Well after mounting it, wiring it back up, it was defective and would not push the fuel. Primed it, and it would not send fuel. Took it apart and the vanes were all messed up....so returned it and ordered a 3rd one. This one is the Holley Red. Third times a charm right?
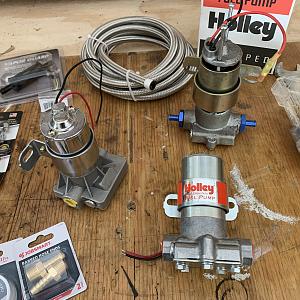
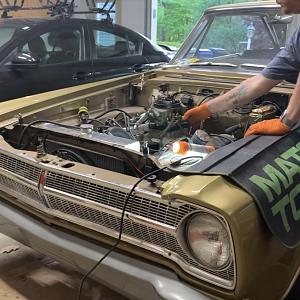
Well I mounted the new Holley pump, added a small micron filter between the tank and the pump and put a new filter after the pump up to the regulator. Wired it up and primed it. Squirted a little fuel in the carb and it fired right up!! It stalled for lack of flow but i squirted a little more fuel in the carb and started it up and it stayed running. First time she’s ran in 7 months and boy did I love that sound.
If you look closely at this picture, you can actually hear her idling
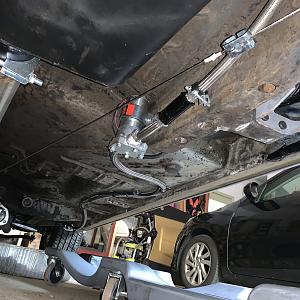
Here’s how I ran the new pump and fuel lines
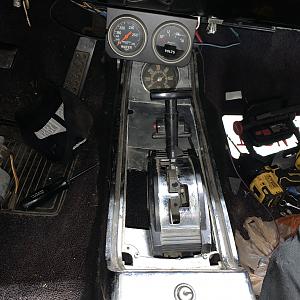
On a side note, while I was waiting for the new pump to come in, I fitted the original center console better with the after market shifter. I used some scrap aluminum to make a make-shift trim panel to cover the holes in the console from the original auto trim plate. I mounted the volt gauge and water temp gauge under the dash. This is all temp for this summer until I swap out the auto setup for the 4-spd. Doesn’t look the prettiest but it will do and it’s a lot better than the ugly aluminum console that was in it
This weekend gonna clean up and secure the fuel lines, put the wheels back on, bolt down the front seat and take it for a quick spin to check the brakes and seat the front suspension. Then just need to retorque the front end and bring it to an alignment shop to make sure everything is good.
5/23/21
so been fighting with the ride height of this. The torsion bar bolts are almost all the way up and I still have a slight rub at full turn when the suspension compresses. I knew I was going to have to go up a little higher when going from 14” wheels to the 15” wheels but I’m lost at the moment. I’ve double checked the clocking of the lever a couple times now. I getting to be a pro at removing the T-bars!!
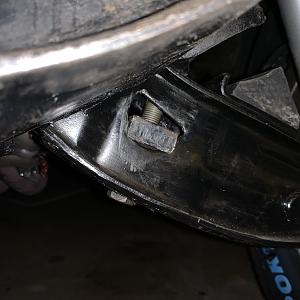
I actually went as far as loosening the pivot shaft bolt, tapping it to make sure it was free, removing the sway bar links, removing the shock nut in the engine compartment and removing the bump stop. Then jacked it up and let it hang. Pulled the t-bar out and clocked the lever all the way down til it was touching the adjusting block and the t-bar would not line up. I had to rotate it up slightly for the t-bar to slide in. Put it all back together, adjusted the bolts up to be level with the lower control arm and the car still was too low. I actually now have the passenger side bolt just barley sticking down below the bottom of the control arm and the driver side is about a 1/2” inside the control arm and they are even measuring from the ground to the bottom of the fender. Still a little low but I do have clearance when turning lock to lock. Just need to be careful turning going over any bumps. I think I may splurge and order a set of 1.03 torsion bars from @PST.
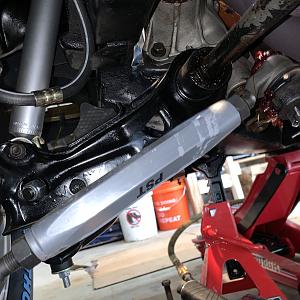
5/25/21
Well some days are good and some are not so good. Today was one of those mixed days. Started the day with getting the car loaded on the trailer to get it to the alignment shop.
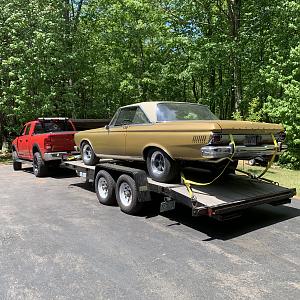
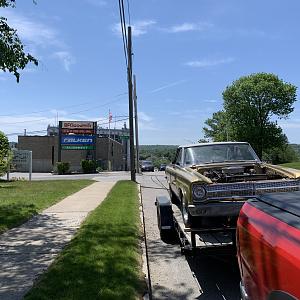
Got to the shop and had to park in the road and get it unloaded. Of course it happened to be next to a park and when I started it, a few people wandered over and were asking lots of questions about the car. Of course, I was happy to chat a little bit.
Well got it in and on the rack and at first look, she was damn near perfect. Of course that was with me just eyeballing everything. Remember, the WHOLE front end was out and replaced so to be that close was pretty amazing.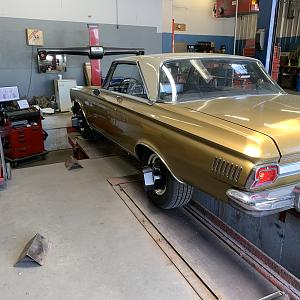
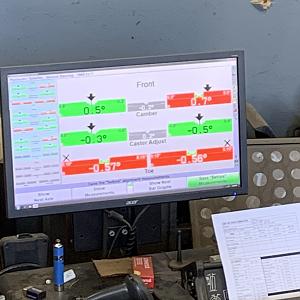
I had them crank the torsion bars up some more and double checked everything and made some slight adjustments. They were surprised how easy it was to adjust and the QA1 strut rods were a nice touch. After they were done and everything was torqued to spec, the outcome was perfect.
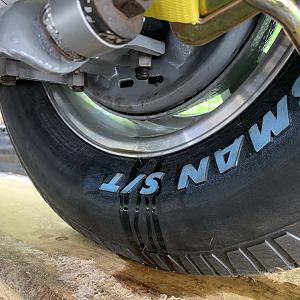
Drove it down the street and it went straight as an arrow and no more running. Loaded it back on the trailer and headed home. Was excited to get home cause my son was looking forward to going for his first ride in it this year. Pulled into the driveway and started to unstrap it when to my disappointment, there was a puddle next to the right rear tire. Smelled it and figured out it was gear oil.....blew the seal....brand new seal. So back in the garage it goes and now we have to take it apart again and figure out why it’s leaking. Hoping it’s something simple as I nicked the seal with the spline gong together. Hoping it’s not anything worse cause the side that is leaking is also the side that has the axle adjustment to set the end play. Guess we will see when it comes apart.
Heading camping for the long Memorial Day weekend so we will get back at it next week.
6/6/21
So it’s been a little bit but got back to it the past couple days.
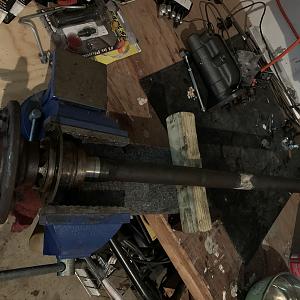
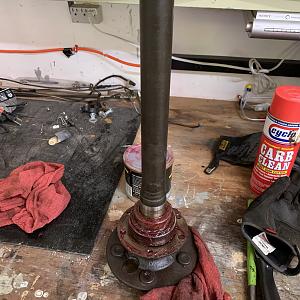
Well figured out the issue, the axle adjuster was cross threaded from someone so it wouldn’t adjust all the way. When I put it together I checked the end play and all seemed good. Problem was that I didn’t properly set the bearing fully in the housing putting it together. So when I drove the car on and off the trailer, the bearing set and the end play was so much that it leaked oil past the seal. I ended up just ordering a set of Green bearings and when they come in, I will have the new bearings pressed on and not have to worry about the adjuster anymore. In the meantime, since it’s gonna be a week before the bearings come in and another week or so before I can get the axles to a machine shop, I went to a friends and he let me borrow an axle from one of his parts cars. Low and behold, with the adjuster working correctly I was able to seat the bearings and take care of all the end play. Best thing was I took her for a nice ride for the first time in months!! It felt great
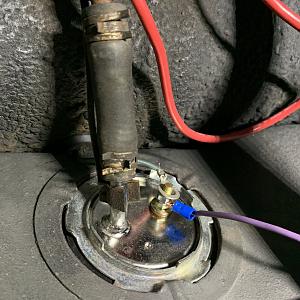
I also figured out my gas gauge dilemma. I was giving up on the factory gauge and bought an after market AutoMeter gauge just to have something and when I was running wires to connect it, I realized the stud that the sending unit wire attaches to was loose and could turn. I had the wife sitting in the car and as I turned the stud the gauge went to full (it grounded out) and then if I turned the other way it went to empty (no ground at all) but if I fiddled with it, I could get it to read to about 3/4 which is about what’s in the tank. Gonna need to pull the sender out and either fix it or replace it again but at least I know it will work so I can return the aftermarket gauge
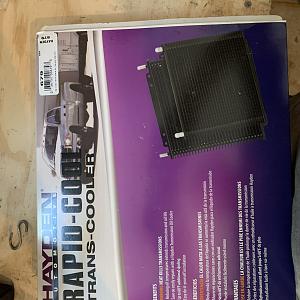
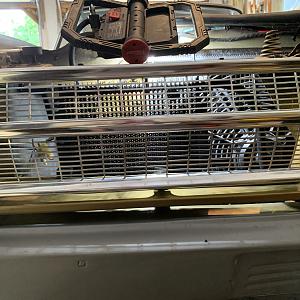
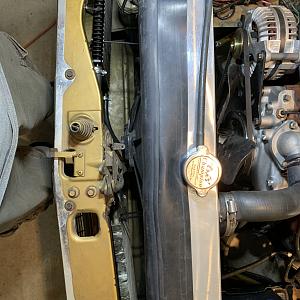
Lastly, since I bypassed the tranny cooler in the radiator when I replaced it, I installed a second auxiliary one to help keep it cool. It’s not the prettiest install but it works for now. I have two coolers in tandem. That should work this year. I’m not too worried about the overall look cause next year it’s getting swapped over to a 4spd so there won’t be any coolers needed and I can remove them.
finally gave her bath after a little ride and she posed for a quick photo shoot
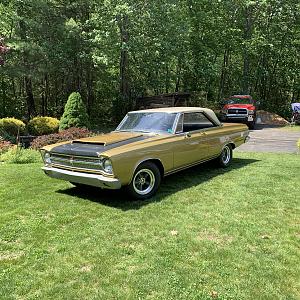
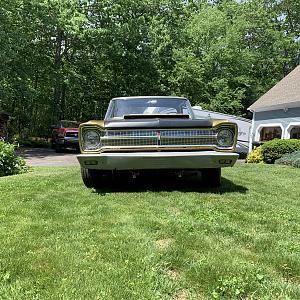
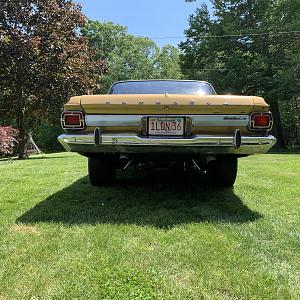
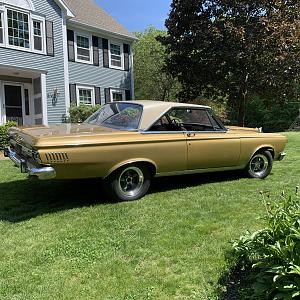
Still lots of little things to do but at least I can drive her while doing the other stuff! I keep you all posted on her progress
6/9/21
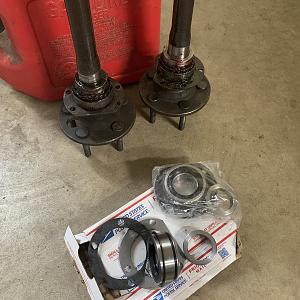
Green bearings came in today. Pulled the axles and off to the diff shop to use their press to replace these.
6/27/21
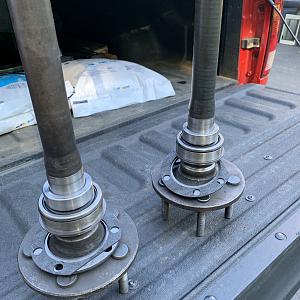
it’s been a couple weeks since I updated so figured I would let you know where we are at. I got the new axles back and installed them and everything tightened up nicely.
After they were installed I took her out for a nice ride. Everything seemed nice and tight….at first. After about 10 miles or so, I started hearing a knocking in the front end when going over bumps and occasionally when in reverse and turning to the right, I would get some rubbing on the left front fender. Brought it back in the garage and put a tape measure to fender and noticed that the suspension settled and actually was about 3/4” lower on the driver side with no one in the car. Gave it a couple more turns of the t-bars and it leveled out. Still had a knocking in the front so brought to a friends house and put on a lift and checked and re torqued all the suspension front and back. Glad I did cause there were some loose bolts/nuts. Figured out the knocking was my sway bar end links so cranked them down and no more noise. While it was up in the air, I did notice the pinion seal leaking on the new diff so need to address that. Otherwise all looked pretty good. It was nice and clean underneath too
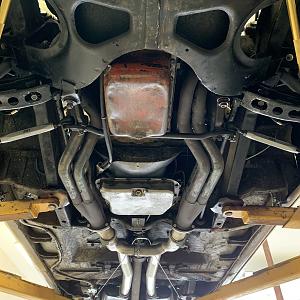
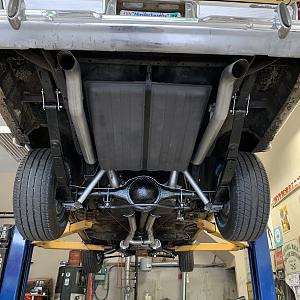
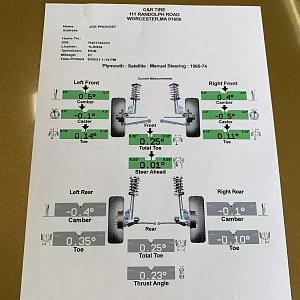
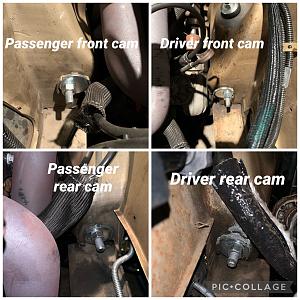
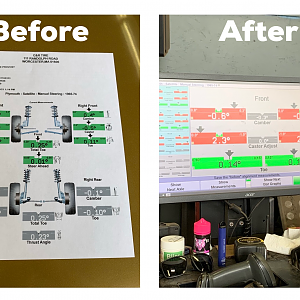
Decided to really stomp on it and see how it handles on the straight away and around corners. She corners nice but man when I really jump on it in a straight line, it’s a little scary as the front of the car feels like it’s floating on a cloud. At first I thought maybe cause the front wheels were slightly coming up but I realized it felt that way at higher cruising speeds. I think I may need to go back to alignment shop and see if they can give me a little more caster. I’ll sacrifice the ease of steering with manual steering for a little more stability. Not sure how much more adjustment I have though. Here’s the current setup.
The most important thing was I was able to get it on the road and driving in time to bring my son and his friends to their 8th grade semi formal dance and was able to bring him to his “drive through” 8th grade graduation. The look on his face and his excitement makes it all worth it!
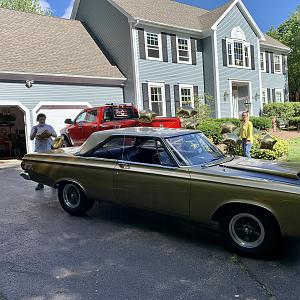
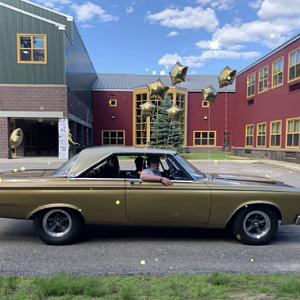
Just got a carb gasket kit, some more interior pieces, new trim clips and some misc items to work on. Will get the diff leak fixed and work out the front end alignment and keep you all posted. Gonna try and hit the first cruise night this week. May not be the prettiest at the moment but she deserves some attention!
7/3/21
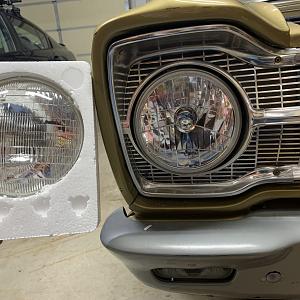
Needed to replace the headlights so converted it to H4 bulb lights. Small little upgrade but definitely a lot brighter
8/3/21
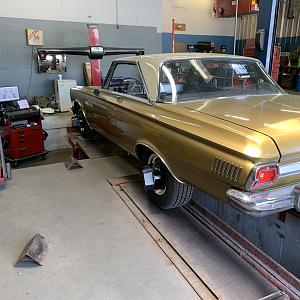
it’s been a little bit since my last post. Been enjoying driving her. I did manage to get it back to the alignment shop and when they put it on the rack, the front end really settled and was all out of whack. I was still dealing with the floating front end at higher speeds so told them I wanted as much caster as we could put in. They adjusted the camber and then we’re able to tweak the caster using the QA1 adjustable strut rods. Took it for a cruise and it’s a little better but still seems a little unstable at higher speeds. Not sure where to go from here.
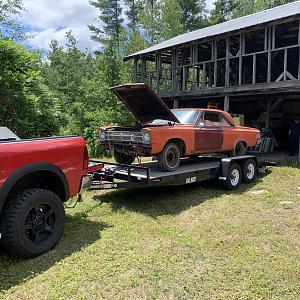
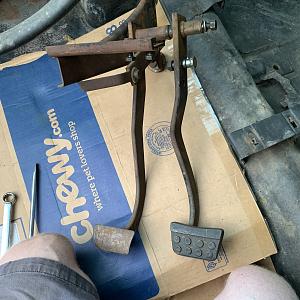
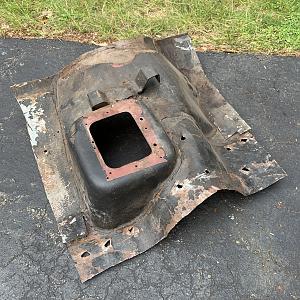
In the meantime, I picked up another parts car and managed to get a few pieces I needed. I was missing a couple pieces of trim, the rocker trim clips and sun visors. This car had some other things I salvaged too. It had a battery relocation kit to the trunk so I grabbed that. I also took the factory wiring harness as mine has been cut and spliced 40,000 times while it was a race car. This parts car was an original big block 4spd so I took the pedals, the shifter, console and even cut out the 4spd bump as a spare. As you read previously I’m converting this to a 4spd so it’s nice to have extra parts just in case.
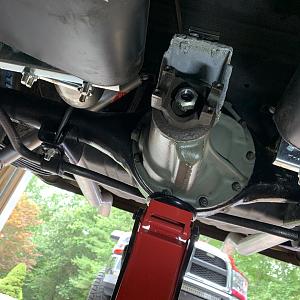
Got a couple leaks to fix now. The new rear end is leaking at the pinion seal and my oil pan started leaking. Off to get some more gaskets.
8/29/21
had some time today to do a couple things. I picked up a new pinion seal and picked up a larger pinion yolk. I ended up getting the conversion u-joint because my driveshaft has the smaller joint. Swapped out the seal, the yolk and changed the u-joint. Put on about 30 miles and she’s dry as a bone. Finally something that was easy and quick.
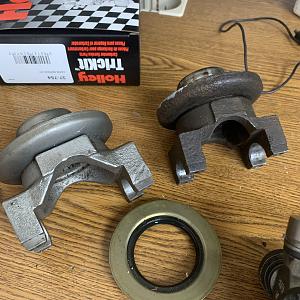
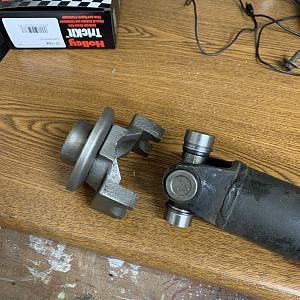
11/13/21
it’s been a little while since I updated you all. Been out enjoying her. With the snow getting closer here in New England it’s almost time to put her away for the winter. Since I will be doing the 4 speed swap over the winter, I was looking for an inexpensive alternative to jack stands as I wanted to get it high enough to work on but also keep it on its suspension because I’ll also be doing my subframe connectors and torque boxes. I was considering building some wheel cradles out of wood like this:
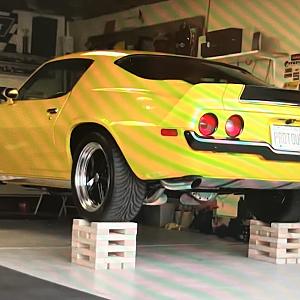
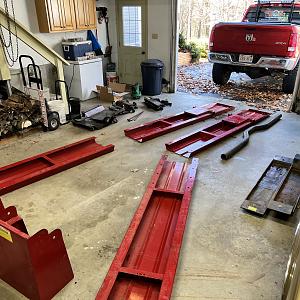
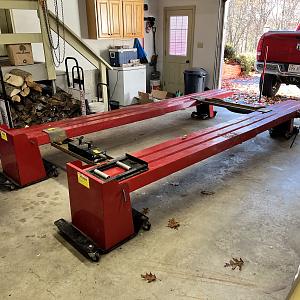
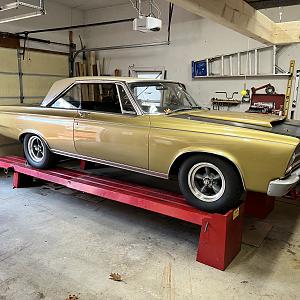
I then was searching on the marketplace and scored this older heavy duty 7000lb version of the Kwik-lift. I picked this up cheap and it came with the lift, all 4 casters to roll it around, 2 cross braces to use as jacking points to further raise the car off the ramps and a jack that works on the cross braces. I couldnt pass it up so scooped it up and put it together today. She fits nicely and it’s gonna make for a great winter!
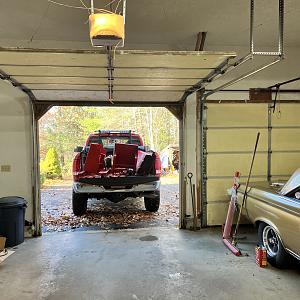
12/2/21
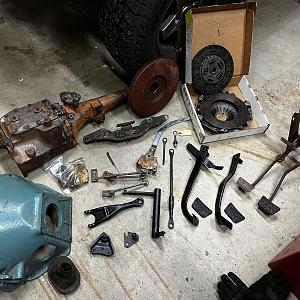
Very exciting day today. I got my package with the last couple misc items I needed for my 4spd conversion! Thanks to Dan Brewer at Brewers Performance. I now have everything I need to start tearing her apart. She’s on the lift and I’ll start pulling the interior to expose the floor and the. The auto trans comes out. Once that is out, I can cut the floor to weld in the floor hump and start the fun part of making her ready to bang some gears.
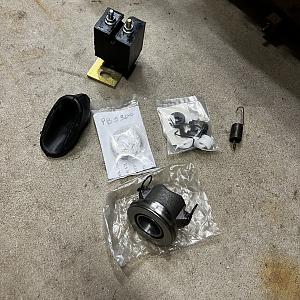
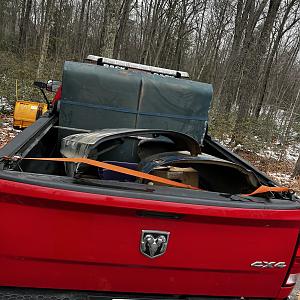
as a bonus while I was up getting the parts for trans swap, I scored a solid and straight decklid as mine has some rust and I also grabbed a spare drivers door (mine apparently has some filler in the bottom I was unaware of) and picked up a couple decent front fenders to replace my fiberglass ones. I’d prefer steel fenders so I can attach my hood hinges and run a steel hood vs the lift off fiberglass one I have. I don’t plan on winning any more races with her so the extra weight won’t bother me. I’ll keep y’all posted as I start the conversion.
Here’s my 4 speed swap garage documentation
https://www.forbbodiesonly.com/moparforum/showcase/65-satellite-4spd-swap.5634/
Here is Part 3 of Getting the 65 back on the street: https://www.forbbodiesonly.com/moparforum/showcase/getting-the-65-back-on-the-street-part-3.5653/
If you haven’t been following my last one, here is the link to Part 1: https://www.forbbodiesonly.com/moparforum/showcase/getting-the-65-back-on-the-street-part-1.5529/
I want to thank everyone who’s commented and liked my first part of my progress update. I’m glad a lot of you are getting some good info out of it. Since we ran out of room in our previous garage (max of 25,000 words) we created this second part for you all to follow. Hope you enjoy!
5/2/21
Had to work this morning but still had time this afternoon to tackle the rear sway bar install. I was considering splurging and getting the Hellwig 7/8 rear sway bar but saw that Summit Racing had the identical bar (the instructions were exactly the same as the Hellwig) and it was about $100 cheaper. I went with that one.

It was a pretty straightforward install......for those with a lift. I’ll admit, working on the floor using jacks and jack stands for this job was quite a pain in the a$$. In any event I laid it all out and starting fitting everything in place. The bar itself clamps to the rear end housing with u-bolts and that was pretty easy. Next I needed to get the stabilizer links put together and the easiest way to do that was to use the vice and put the supplied lubricant all over the bushings and press them into the end links. Once that was done I lubed up the metal spacer and pressed those into the bushings. I attached one end to the sway bar and the next step was the most difficult and time consuming. That was lining up the sway bar to mark where to drill holes in the frame. This required that the suspension be resting on its full weight so fir me, the car was on jack stands so I used a floor jack under the diff and raised it up until the weight was off the jack stands. I lined up the upper end link to where I believe it should go on the frame and made a mark and center punched it. Then I used some cardboard to make a template so I could use that template on both sides of the frame rail and then also transfer it to the opposite frame rail for the other side. Once the template was made, I closed my eyes, crossed my fingers and drilled through the frame. Thankfully my template worked and the holes were perfect and centered!


Once the holes were drilled it was a matter of just putting the sleeves through the frame and then bolting everything together. Once it was all loosely I place, I made sure everything was centered and adjusted correctly and torqued everything to specs. Very happy with the finished product


5/7/21
Just a couple little things were buttoned up today. I installed the electric fuel pump relay and safety shut off. Bunch of wiring but tucked everything under the dash.
While I was inside, I kept looking at the original console and wondering how I could get it to work with the aftermarket shifter. It didn’t fit so the previous owner just had the console in the trunk. Well I popped off the trim plate and noticed someone had started cutting the console under the trim. Since it was already cut a little I figured I’d cut it out and fit it to the shifter. Well it worked. I had to move the shifter forward about 8” and re-route the cable under the car but it all lined up and bolted into place. It’s not the best looking but it’s 100x better than the make-shift console that was in there. As I mentioned before, I’m converting to a 4 spd next winter so I’ll have a new console anyway so this will work for this season.
Old make-shift console

Original console after I finished trimming (if you put trim plate on you can’t see anything that’s been cut)

Installed in the car

5/10/21
Yesterday was Mother’s Day so took the day off to spend with my wife and kids so today I was able to get a few things done.
i was having issues with my end links of my front sway bar hitting the strut rods and was working with PST to come up with a solution. They sent me some longer bolts and I was able to rotate the top shock mount bracket 180 degrees and use the longer bolts and sleeves. That was able to get the bracket and bushings away from the strut rods and I have all sorts of clearance now.


After I fixed that, it was back to brake saga..... got under the dash and unbolted the master cylinder....again. I bought a new master cylinder bench bleed kit and ended up getting some air bubbles out of the front reservoir. Not sure if those were in there or if I created them when I pulled the master out. Either way, I bled it for a bit until there was no more air bubbles coming out. I’m still using my factory push rod but if it still have travel issues, I’ll attempt to install the adjustable one. If I go that route, I’ll need to plumb in a brake light pressure switch as the adjustable push rod doesn’t work with the factory brake light switch at the pedal.


I let the master sit for a little bit and tackled the leaking banjo bolts again. I ordered a pack of new crush washers and replaced both of them on both sides. While it was apart, I inspected the surface of the caliper and the hoses and all seemed good. I torqued them down and we will see if that works to stop the leaking when I go to bleed the system.


Lastly, I plumbed in the adjustable proportioning valve into the rear brake line. While the master cylinder was out, it was easy to work in that area. I bought the Earls tool for flaring the line rather than my cheapo flaring kit and it worked perfect. Once the lines were bent and flared, I mounted the master cylinder back in and attached the lines to that. Tightened all the connections, dried everything off good and we will see if there are signs of any seepage tomorrow. If not, we will start to bleed the system again and see if we can get the brakes working.


5/15/21
Feeling pretty accomplished today. Had the majority of the day to work in the garage. Finally got the rear end from the diff shop. After throwing it on the bench next to the other one, I realized that the yolks were a different size. I ended up swapping yolks and then swapping the pinion snubber to the new unit. Out with the 4.10 solid spool and in with a 3.55 sur-grip. I’ll keep the spool foe the occasional track day.


After swapping them around, got a little help from the boy and we muscled the diff into the housing. What a pain doing that on your back with the car on jack stands. In any event, it went together nicely. Slid the axles in and adjusted the end play.


Once we finished that, we got the drums RE-installed and bleed the brakes for a good hour until all the air seemed to dissipate. They pedal is still a little soft but figured I’d get the car moving and see how it was while driving it. I may have to install a different push rod or switch from the 15/16 master to one with a bigger piston.
After that, we got the wheels on, dropped her down on her own weight, adjusted the torsion bars to raise it up a little and sat back and admired it.


Wanted to start it up and pull it outside so cleaned everything around it, filled the gas tank (as it was empty from refurbishing it) and poured a little fuel down the carb. Fired up with just a tickle of the key.....but wouldn’t stay running....for some reason the electric fuel pump isn’t pumping. The pump runs but doesn’t pump fuel. Disconnected the fuel hose to put it in a gas can to test to make sure it wasn’t the tank and no go. It won’t pump. No suction if I put my finger on the hose.....I’m assuming the pump crapped out unless I’m missing something. After banging my head on the wall for a little bit, I called it a night. Guess I’ll order a new pump and wait another week to start it up.

5/21/21
well it’s been a few days and I ended up ordering a new pump. After 4 days of waiting it came in and didn’t have any fittings so had to go out and get those too. Figured I’d pick up another fuel filter that I could plumb between the tank and the pump and got some new hose and clamps

Since the old one was mounted horizontally inside the rear torque box, I figured nows the best time to relocate it so I can weld my torque box stiffening plates and mount the pump vertical like it’s supposed to. Since I’m running big 3” exhaust, there really wasn’t any room any further back so determined this was the best spot to mount it just inside the frame

Well after mounting it, wiring it back up, it was defective and would not push the fuel. Primed it, and it would not send fuel. Took it apart and the vanes were all messed up....so returned it and ordered a 3rd one. This one is the Holley Red. Third times a charm right?

Well I mounted the new Holley pump, added a small micron filter between the tank and the pump and put a new filter after the pump up to the regulator. Wired it up and primed it. Squirted a little fuel in the carb and it fired right up!! It stalled for lack of flow but i squirted a little more fuel in the carb and started it up and it stayed running. First time she’s ran in 7 months and boy did I love that sound.
If you look closely at this picture, you can actually hear her idling

Here’s how I ran the new pump and fuel lines

On a side note, while I was waiting for the new pump to come in, I fitted the original center console better with the after market shifter. I used some scrap aluminum to make a make-shift trim panel to cover the holes in the console from the original auto trim plate. I mounted the volt gauge and water temp gauge under the dash. This is all temp for this summer until I swap out the auto setup for the 4-spd. Doesn’t look the prettiest but it will do and it’s a lot better than the ugly aluminum console that was in it

This weekend gonna clean up and secure the fuel lines, put the wheels back on, bolt down the front seat and take it for a quick spin to check the brakes and seat the front suspension. Then just need to retorque the front end and bring it to an alignment shop to make sure everything is good.
5/23/21
so been fighting with the ride height of this. The torsion bar bolts are almost all the way up and I still have a slight rub at full turn when the suspension compresses. I knew I was going to have to go up a little higher when going from 14” wheels to the 15” wheels but I’m lost at the moment. I’ve double checked the clocking of the lever a couple times now. I getting to be a pro at removing the T-bars!!
I actually went as far as loosening the pivot shaft bolt, tapping it to make sure it was free, removing the sway bar links, removing the shock nut in the engine compartment and removing the bump stop. Then jacked it up and let it hang. Pulled the t-bar out and clocked the lever all the way down til it was touching the adjusting block and the t-bar would not line up. I had to rotate it up slightly for the t-bar to slide in. Put it all back together, adjusted the bolts up to be level with the lower control arm and the car still was too low. I actually now have the passenger side bolt just barley sticking down below the bottom of the control arm and the driver side is about a 1/2” inside the control arm and they are even measuring from the ground to the bottom of the fender. Still a little low but I do have clearance when turning lock to lock. Just need to be careful turning going over any bumps. I think I may splurge and order a set of 1.03 torsion bars from @PST.


5/25/21
Well some days are good and some are not so good. Today was one of those mixed days. Started the day with getting the car loaded on the trailer to get it to the alignment shop.

Got to the shop and had to park in the road and get it unloaded. Of course it happened to be next to a park and when I started it, a few people wandered over and were asking lots of questions about the car. Of course, I was happy to chat a little bit.

Well got it in and on the rack and at first look, she was damn near perfect. Of course that was with me just eyeballing everything. Remember, the WHOLE front end was out and replaced so to be that close was pretty amazing.


I had them crank the torsion bars up some more and double checked everything and made some slight adjustments. They were surprised how easy it was to adjust and the QA1 strut rods were a nice touch. After they were done and everything was torqued to spec, the outcome was perfect.

Drove it down the street and it went straight as an arrow and no more running. Loaded it back on the trailer and headed home. Was excited to get home cause my son was looking forward to going for his first ride in it this year. Pulled into the driveway and started to unstrap it when to my disappointment, there was a puddle next to the right rear tire. Smelled it and figured out it was gear oil.....blew the seal....brand new seal. So back in the garage it goes and now we have to take it apart again and figure out why it’s leaking. Hoping it’s something simple as I nicked the seal with the spline gong together. Hoping it’s not anything worse cause the side that is leaking is also the side that has the axle adjustment to set the end play. Guess we will see when it comes apart.

Heading camping for the long Memorial Day weekend so we will get back at it next week.

6/6/21
So it’s been a little bit but got back to it the past couple days.
Well figured out the issue, the axle adjuster was cross threaded from someone so it wouldn’t adjust all the way. When I put it together I checked the end play and all seemed good. Problem was that I didn’t properly set the bearing fully in the housing putting it together. So when I drove the car on and off the trailer, the bearing set and the end play was so much that it leaked oil past the seal. I ended up just ordering a set of Green bearings and when they come in, I will have the new bearings pressed on and not have to worry about the adjuster anymore. In the meantime, since it’s gonna be a week before the bearings come in and another week or so before I can get the axles to a machine shop, I went to a friends and he let me borrow an axle from one of his parts cars. Low and behold, with the adjuster working correctly I was able to seat the bearings and take care of all the end play. Best thing was I took her for a nice ride for the first time in months!! It felt great


I also figured out my gas gauge dilemma. I was giving up on the factory gauge and bought an after market AutoMeter gauge just to have something and when I was running wires to connect it, I realized the stud that the sending unit wire attaches to was loose and could turn. I had the wife sitting in the car and as I turned the stud the gauge went to full (it grounded out) and then if I turned the other way it went to empty (no ground at all) but if I fiddled with it, I could get it to read to about 3/4 which is about what’s in the tank. Gonna need to pull the sender out and either fix it or replace it again but at least I know it will work so I can return the aftermarket gauge

Lastly, since I bypassed the tranny cooler in the radiator when I replaced it, I installed a second auxiliary one to help keep it cool. It’s not the prettiest install but it works for now. I have two coolers in tandem. That should work this year. I’m not too worried about the overall look cause next year it’s getting swapped over to a 4spd so there won’t be any coolers needed and I can remove them.


finally gave her bath after a little ride and she posed for a quick photo shoot


Still lots of little things to do but at least I can drive her while doing the other stuff! I keep you all posted on her progress
6/9/21
Green bearings came in today. Pulled the axles and off to the diff shop to use their press to replace these.

6/27/21
it’s been a couple weeks since I updated so figured I would let you know where we are at. I got the new axles back and installed them and everything tightened up nicely.

After they were installed I took her out for a nice ride. Everything seemed nice and tight….at first. After about 10 miles or so, I started hearing a knocking in the front end when going over bumps and occasionally when in reverse and turning to the right, I would get some rubbing on the left front fender. Brought it back in the garage and put a tape measure to fender and noticed that the suspension settled and actually was about 3/4” lower on the driver side with no one in the car. Gave it a couple more turns of the t-bars and it leveled out. Still had a knocking in the front so brought to a friends house and put on a lift and checked and re torqued all the suspension front and back. Glad I did cause there were some loose bolts/nuts. Figured out the knocking was my sway bar end links so cranked them down and no more noise. While it was up in the air, I did notice the pinion seal leaking on the new diff so need to address that. Otherwise all looked pretty good. It was nice and clean underneath too


Decided to really stomp on it and see how it handles on the straight away and around corners. She corners nice but man when I really jump on it in a straight line, it’s a little scary as the front of the car feels like it’s floating on a cloud. At first I thought maybe cause the front wheels were slightly coming up but I realized it felt that way at higher cruising speeds. I think I may need to go back to alignment shop and see if they can give me a little more caster. I’ll sacrifice the ease of steering with manual steering for a little more stability. Not sure how much more adjustment I have though. Here’s the current setup.

The most important thing was I was able to get it on the road and driving in time to bring my son and his friends to their 8th grade semi formal dance and was able to bring him to his “drive through” 8th grade graduation. The look on his face and his excitement makes it all worth it!


Just got a carb gasket kit, some more interior pieces, new trim clips and some misc items to work on. Will get the diff leak fixed and work out the front end alignment and keep you all posted. Gonna try and hit the first cruise night this week. May not be the prettiest at the moment but she deserves some attention!
7/3/21
Needed to replace the headlights so converted it to H4 bulb lights. Small little upgrade but definitely a lot brighter

8/3/21
it’s been a little bit since my last post. Been enjoying driving her. I did manage to get it back to the alignment shop and when they put it on the rack, the front end really settled and was all out of whack. I was still dealing with the floating front end at higher speeds so told them I wanted as much caster as we could put in. They adjusted the camber and then we’re able to tweak the caster using the QA1 adjustable strut rods. Took it for a cruise and it’s a little better but still seems a little unstable at higher speeds. Not sure where to go from here.


In the meantime, I picked up another parts car and managed to get a few pieces I needed. I was missing a couple pieces of trim, the rocker trim clips and sun visors. This car had some other things I salvaged too. It had a battery relocation kit to the trunk so I grabbed that. I also took the factory wiring harness as mine has been cut and spliced 40,000 times while it was a race car. This parts car was an original big block 4spd so I took the pedals, the shifter, console and even cut out the 4spd bump as a spare. As you read previously I’m converting this to a 4spd so it’s nice to have extra parts just in case.


Got a couple leaks to fix now. The new rear end is leaking at the pinion seal and my oil pan started leaking. Off to get some more gaskets.
8/29/21
had some time today to do a couple things. I picked up a new pinion seal and picked up a larger pinion yolk. I ended up getting the conversion u-joint because my driveshaft has the smaller joint. Swapped out the seal, the yolk and changed the u-joint. Put on about 30 miles and she’s dry as a bone. Finally something that was easy and quick.


11/13/21
it’s been a little while since I updated you all. Been out enjoying her. With the snow getting closer here in New England it’s almost time to put her away for the winter. Since I will be doing the 4 speed swap over the winter, I was looking for an inexpensive alternative to jack stands as I wanted to get it high enough to work on but also keep it on its suspension because I’ll also be doing my subframe connectors and torque boxes. I was considering building some wheel cradles out of wood like this:

I then was searching on the marketplace and scored this older heavy duty 7000lb version of the Kwik-lift. I picked this up cheap and it came with the lift, all 4 casters to roll it around, 2 cross braces to use as jacking points to further raise the car off the ramps and a jack that works on the cross braces. I couldnt pass it up so scooped it up and put it together today. She fits nicely and it’s gonna make for a great winter!


12/2/21
Very exciting day today. I got my package with the last couple misc items I needed for my 4spd conversion! Thanks to Dan Brewer at Brewers Performance. I now have everything I need to start tearing her apart. She’s on the lift and I’ll start pulling the interior to expose the floor and the. The auto trans comes out. Once that is out, I can cut the floor to weld in the floor hump and start the fun part of making her ready to bang some gears.


as a bonus while I was up getting the parts for trans swap, I scored a solid and straight decklid as mine has some rust and I also grabbed a spare drivers door (mine apparently has some filler in the bottom I was unaware of) and picked up a couple decent front fenders to replace my fiberglass ones. I’d prefer steel fenders so I can attach my hood hinges and run a steel hood vs the lift off fiberglass one I have. I don’t plan on winning any more races with her so the extra weight won’t bother me. I’ll keep y’all posted as I start the conversion.

Here’s my 4 speed swap garage documentation
https://www.forbbodiesonly.com/moparforum/showcase/65-satellite-4spd-swap.5634/
Here is Part 3 of Getting the 65 back on the street: https://www.forbbodiesonly.com/moparforum/showcase/getting-the-65-back-on-the-street-part-3.5653/


