Continuing with my build, here is my ongoing documentation of the 4spd swap for my 65 Satellite. I’ll update this daily/weekly as I go
About this Mopar:
If you haven’t been following my other garage where I documented getting this car on the road, you can check it out here:
Part 1: https://www.forbbodiesonly.com/moparforum/showcase/getting-the-65-back-on-the-street-part-1.5529/
Part 2:
https://www.forbbodiesonly.com/moparforum/showcase/getting-the-65-back-on-the-street-part-2.5551/
Since there is a lot going into this conversion, I wanted to start a new garage. Hope you enjoy
11/28/21
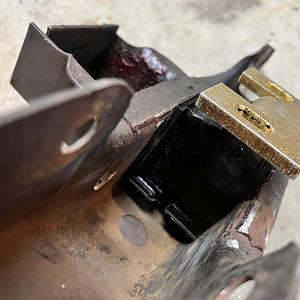
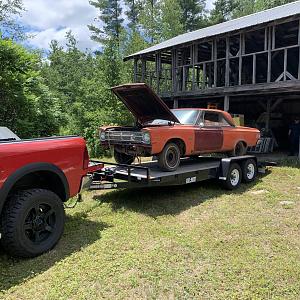
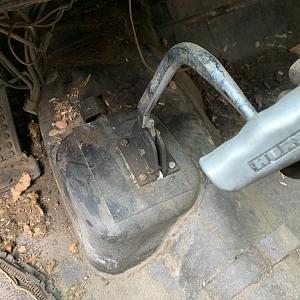
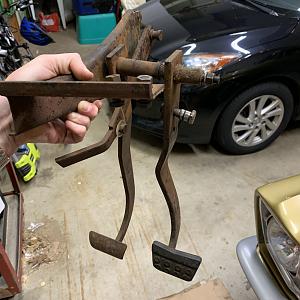
Finally got the rest of the parts to tackle this project. Pulled a lot of parts including the floor hump out of my 65 satellite big block 4spd parts car. The rest of the parts came from sourcing them from fellow Mopar guys, my father and some misc stuff from Brewers.
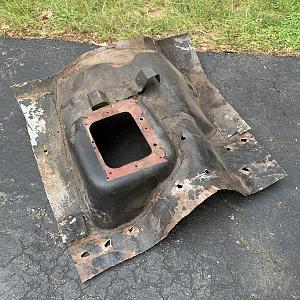
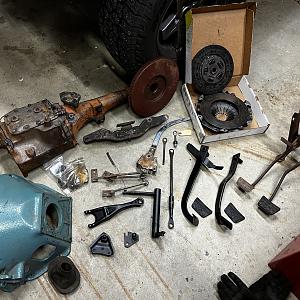
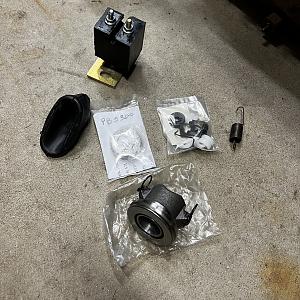
11/11/21
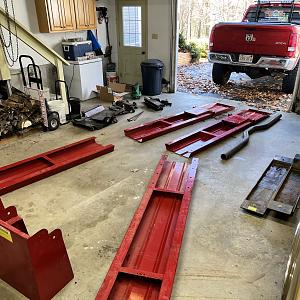
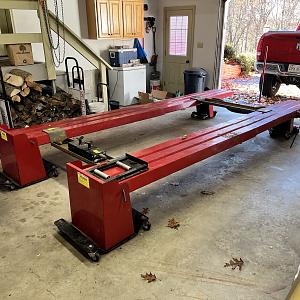
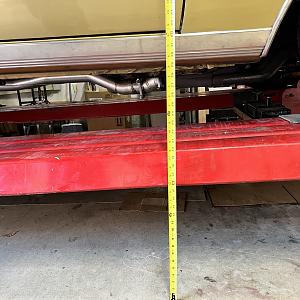
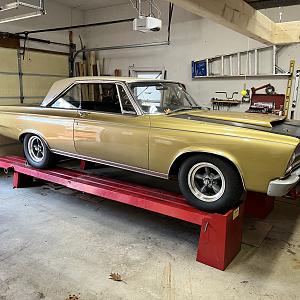
Decided that working on jack stands wasn’t going to be fun so I scored this Quick Lift from Facebook marketplace and set it up in the garage. This thing is perfect and puts the car high enough to comfortably work on it. Got it set up and put the old girl on it to get started.
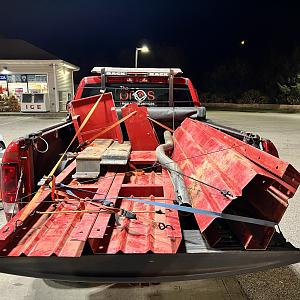
1/11/22
Got started today with pulling the old automatic out. It was going fairly well until I ran into an issue with my TTI headers on the passenger side. They are so tight, that it was impossible to get a wrench or socket on the lower bellhousing bolt that comes from the front.
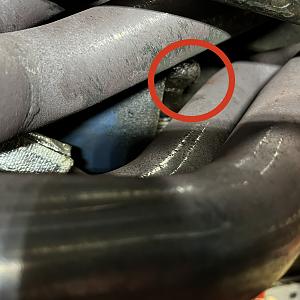
After fighting for over 30 minutes, figured I would just loosen the header flange bolts to see if I could get the header to move. Of course that was a project in itself. Pulled the plug wires and plugs and started to loosen the bolts and totally forgot that the bolts go into water jackets so quickly had to drain the lower radiator hose! Once that was done, I was able to move the header enough to get a wrench on it and move it about 1/8 turn each time. Once that was out, a little bit of muscling and the old auto was out on the ground! Once conversion is done, going to figure out what I’m gonna do with all the auto parts. This is a built 727 with Cheetah reverse manual valve body and 3000 stall converter. Trans was built nicely.
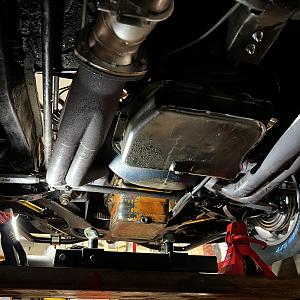
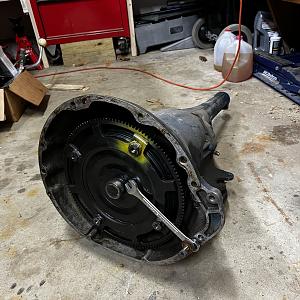
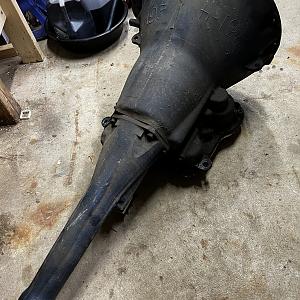
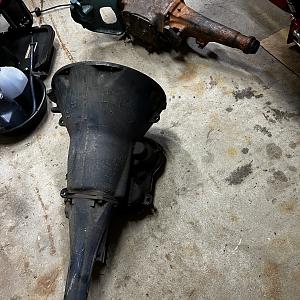
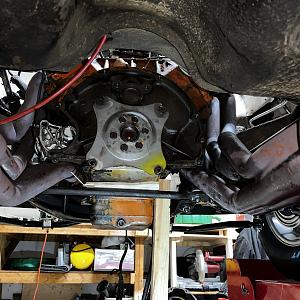
Next up is to pull the flex plate and inspect the rear main seal. I have a little leak so now seems like the perfect time to replace rear main, oil pan gasket and inspect the oil pump. I’ll keep you posted as I progress.
1/15/22
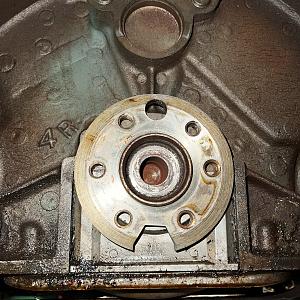
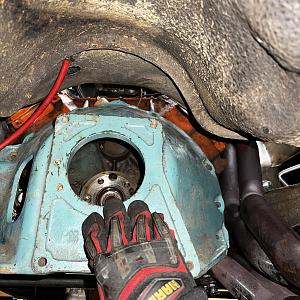
It was a blustery 3 degrees outside today and the garage only got up to about 39 so needless to say, it was a little chilly out there. I decided that I was going to finish pulling all the automatic stuff and then get cleaned up to start the next step. I ended up pulling the flex plate and it looks like the rear main isn't very wet. It appears to be mostly the oil pan gasket. What do you guys think??
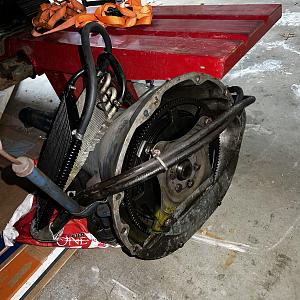
I then pulled the transmission lines out and took the grill off so that I could get both of the transmission coolers out that I previously installed. I kept everything together and plan on selling the whole automatic setup once I finish the swap. Transmission, stall converter, flex plate, transmission lines, two coolers (one is heavy duty and literally installed about 200 miles ago), the Cheetah shifter and possibly the center console.
Once the coolers were out, I put the grill back in and tackled the interior. I have to remove the whole interior in order to cut the floor out for the 4spd hump as well as I plan on welding in my subframe connectors and torque boxes and need to make sure there is nothing inside the car so it doesn't cause any fires. Seats came out pretty easy and then I pulled the console and lastly pulled out the Cheetah shifter.
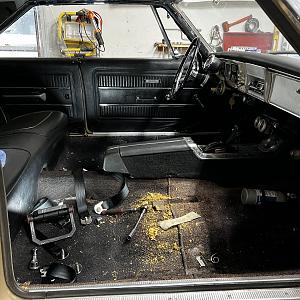
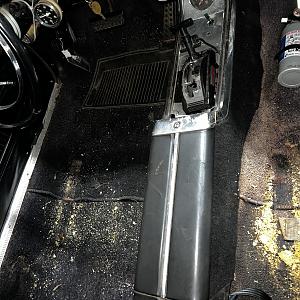
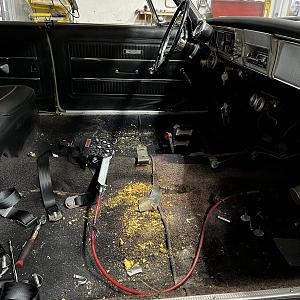
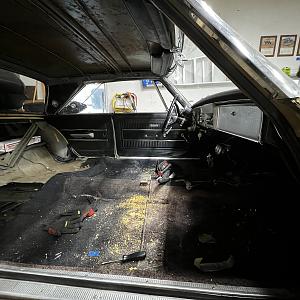
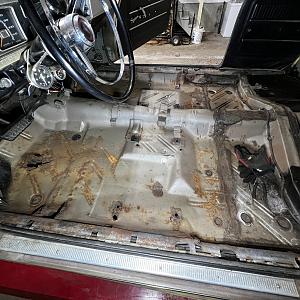
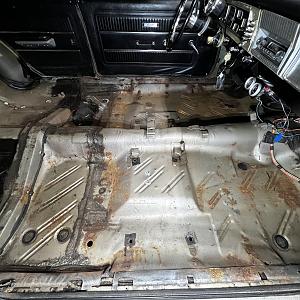
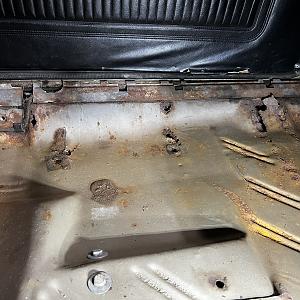
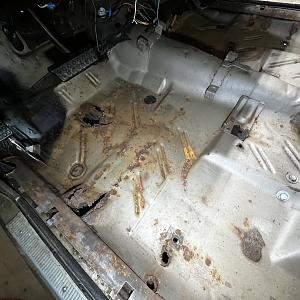
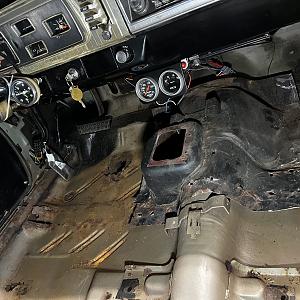
Once all the interior pieces were out, I was able to get the carpet out. After I pulled it, I was a little disheartened as I found quite a few spots that were rotted through. I was bummed out because I could not see any of those from under the car. I ended up taking a screw driver and poking the floor to find the soft spots so I could dig them out. I expected to do some floor work for having to cut out the hump and weld in the 4spd hump but wasn't expecting to need to do some floor patches. Now need to decide if I want to just cut out and patch the holes, or go the route of getting floor pans for the car. You can see in the pics where its rotted, and the rest of the floor seems to be fairly solid. Its just concerning cause there are rot holes by both the holes where the seat mounts and again where the seat belts bolt into the floor.
Swept out the interior and put everything away for the night. Before I finished, I did jump back under the car to make sure the bell housing will fit without any interference of the headers and that seems like it will be ok. I plan on just mounting the bell housing with a couple bolts, then setting the trans in place with a couple bolts and using that as a guide to make sure the hole in the floor is in the right spot. I did place the floor hump over the tunnel for a visual and lined it up using the factory spot welds and then traced out the inside of the hump to get an idea of where to start cutting it out.
1/22/22
I wanted to get the oil pan gasket taken care of while I had a lot of room under the car. I went ahead and temporarily bolted the bellhousing up so I could use that as a spot to lift to support the motor while I took the pan off. I used a jackstand, a block of wood and my center lift of my lift and it worked perfect.
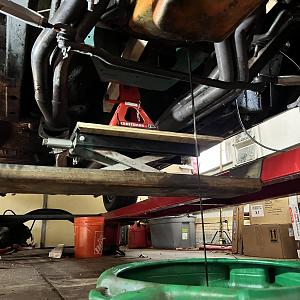 Drained the oil and dropped the center link to give me more room to pull the pan out. The front bolts above the K frame were a little fussy but eventually came out. Once all the bolts were out, the pan slid out nice and easy. Then I took the windage tray out. Both gaskets came out nice too so there was no baked on gasket to do a lot of scraping.
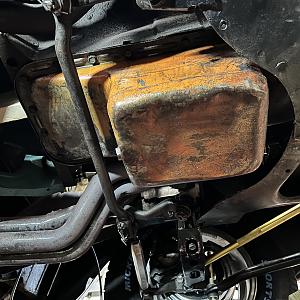
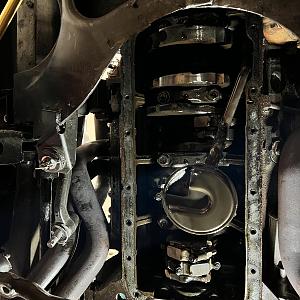
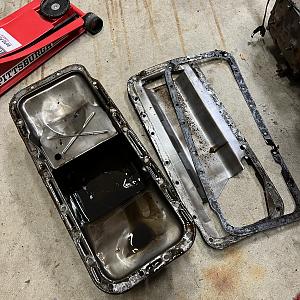
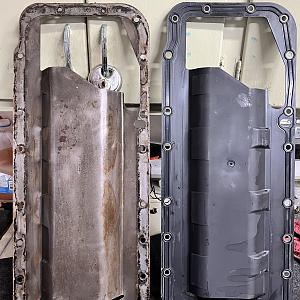
Once the pan was out, I inspected the lower end for anything loose or broken, checked the oil pump and screen and shined a light to see the cylinder walls. All seemed to be in good shape…..then I looked inside the oil pan and found about a 1/4” of sludge. Pretty thick and silvery gray shiny showing signs of metal. Not really sure why considering I was told this motor had been rebuilt. To me it looks a lot like a stock lower end with a high volume oil pump and a pan that was enlarged for a higher oil capacity. Cleaned out the gunk and cleaned up the oil pan.
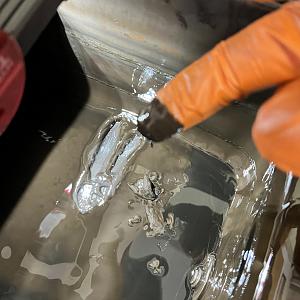
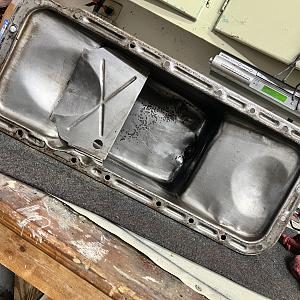
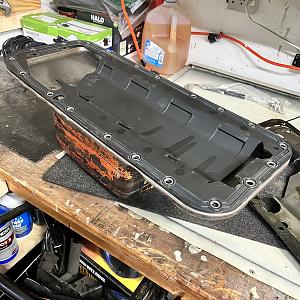
I bought a rubber windage tray with the built in gaskets to make the install easier but apparently the aftermarket one has additional bumps on the side that interfere with the oil pump tube and I couldn’t get it to fit. I pulled out my gasket kit but unfortunately there is only one oil pan gasket and I will need another one to use the factory windage tray. So need to head to parts store for a gasket so I’ll call it a day today.
1/23/22
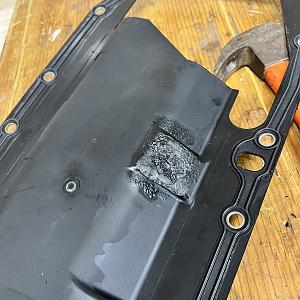
Made several calls to parts stores and all they carry is the cheap versions of the gaskets so rather than waiting, since I was told that I couldn’t return my windage tray I bought because it was “installed”, I decided to use a heat gun and heat the tray enough that it got soft enough that I could hammer it to clear the oil pickup tube. Once I did that, it fit perfect and all the bolt holes line up. It doesn’t look the prettiest but it works. (It didn’t melt enough to burn through in case you may be thinking that)
Once I got the pan back on, I re-attached the center link and supported the motor with some blocks of wood so I could remove the jack from the trans bellhousing to continue back there.
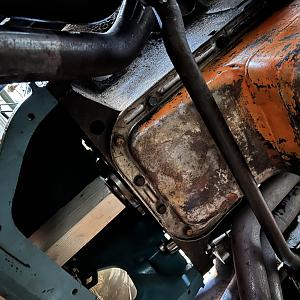
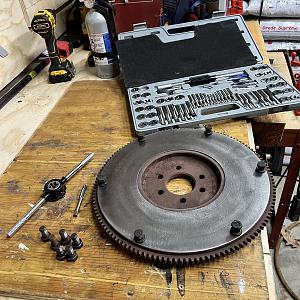
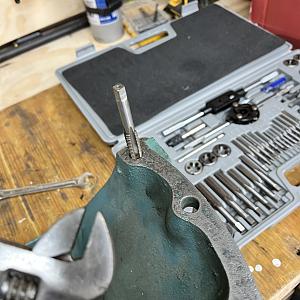
The next thing was I got the flywheel and hardware cleaned and ready. Had to buzz wheel the flywheel down to get the primer off it and then used my tap and die set and chased the threads in the flywheel for the pressure plate, and then chased the threads for the pressure plate bolts and flywheel bolts. Will bolt up the flywheel then put the bellhousing on and check the run out.
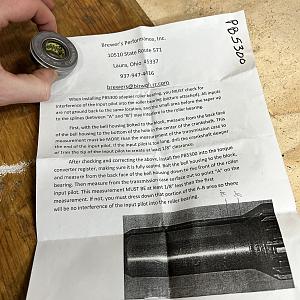
Lastly, I pulled out the pilot bearing and checked to make sure it fully rode on the input shaft with no obstructions and took a few measurements to make sure everything would line up. That oil pan and gasket kicked my butt this weekend so didn’t get as much done as I wanted but progress is progress. I’ll update again in a couple days when I get back out to the garage.
2/6/22
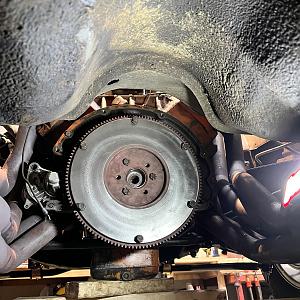
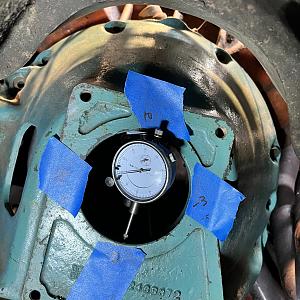
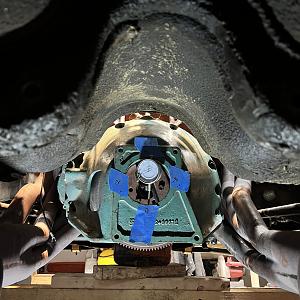
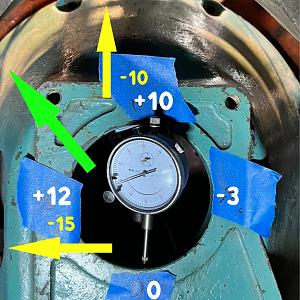
Its been a couple weeks since I had some time to work on her but today was very productive. My list of things is so overwhelming so I just decided to start jumping into things. I ended up just putting the flywheel on and bolting up the bell housing. I then grabbed my dial indicator and checked the runout on the bell housing. I did it a couple of times and it came out the same. After doing the math, I determined that I will need to get a set of offset dowels (.007 ones) and install those. I ordered them and they will be in later this week.
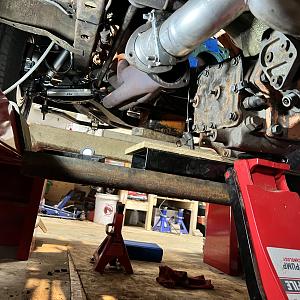
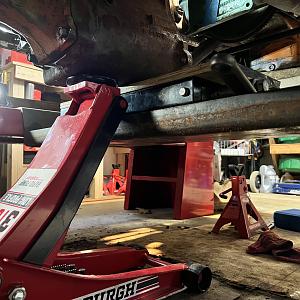
Since I have to wait for the dowels, I decided to set the tranny up in place and mock out the floor and trim up the tunnel hump. Thankfully I have the cross support for my lift and it has a jack built into it cause it came in very handy. I was able to lift the tranny up with my floor jack and then slide it onto the lift jack to get it up into position.
Once it was up, I then headed inside to tackle the floor and get it all cut out. If you recall, I cut the tunnel out of my 4spd parts car and cut it way bigger than I needed. I set it over the tunnel and marked out a small square to cut out as a starting reference point before trimming the floor hump and fitting it into place
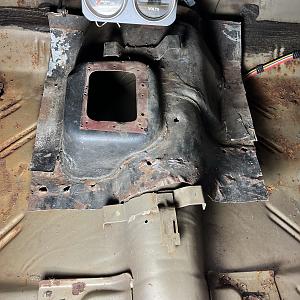
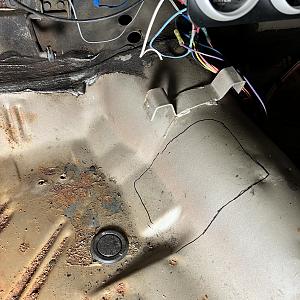
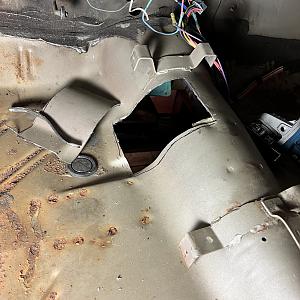
Next step was to clean up and trim the floor hump and make it pretty. I ended up carefully cutting along the seam and trimming away all the bad metal and clean the edges to make a nice flange.
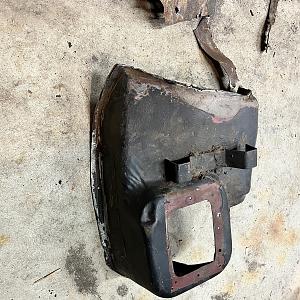
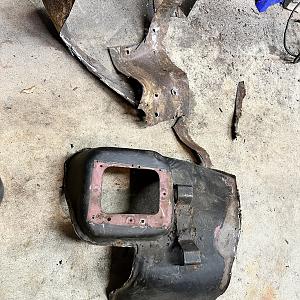
Next was to set it in place and trace it out on the floor. I realized that since my parts car was a console car, it had the bracket for the console welded onto it so I carefully removed my bracket from the floor. I wanted to keep all the original sheet metal I cut out in case I ever put the car back to an auto, or if I ever sell it, I can give the floor to a new owner.
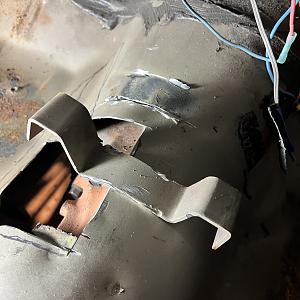
Now I set the freshly trimmed 4spd hump on the floor to make sure it fit and it fit like a glove so I traced around the outer edge. I then took it off and drew a line about an inch on the inside to create a lip that I can weld to once I cut it out. I then marked what needed to be cut and used my cutoff wheel to remove the floor.
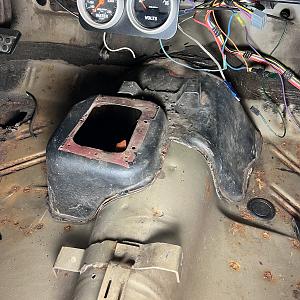
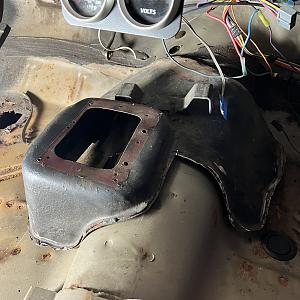
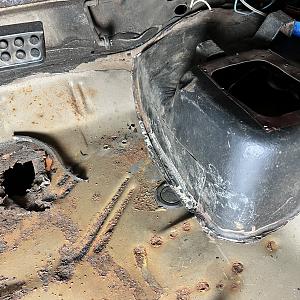
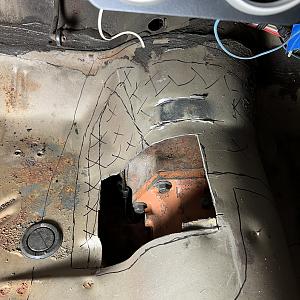
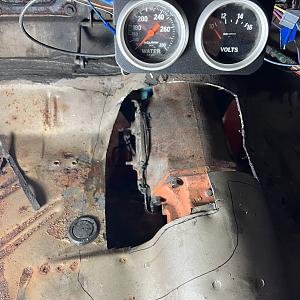
Mocked up the shifter, had to do a little more trimming and got it all lined up. Set the hump back in place and rowed through the gears to make sure everything moved as it should without hitting anything and all is good.
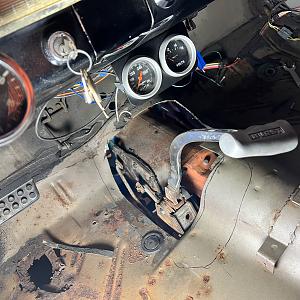
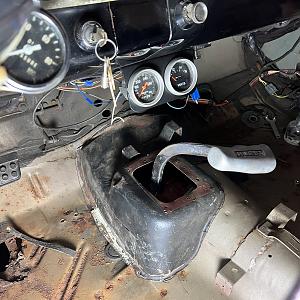
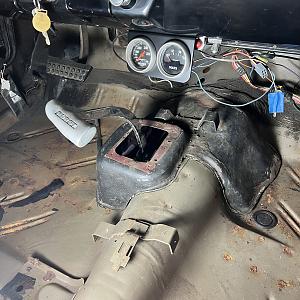
Not that its all fit, next step is to pull the tranny back out so I can work on getting the pilot bearing installed, put the flywheel back on, set up the clutch and all the linkage and install the bell housing with the new dowels. Before I can put the tranny back in, I have some repair work to do on the floor and it will be easier with the tranny out. I will be patching the floor and welding the hump in. Still need to get the pedals in too so that will be easier with the tunnel out too. Til next time
2/8/22
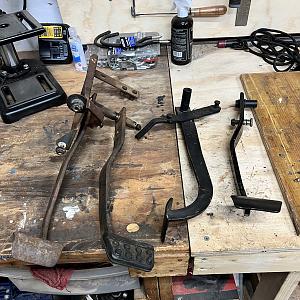
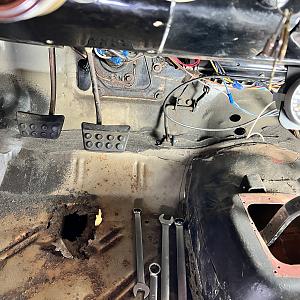
Decided to just get the pedals out of the way and start setting up the topside clutch linkage and parts. For starters, lets get rid of that ugly big pedal to make room for a couple smaller ones
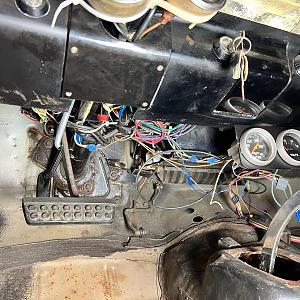
These 65's are pretty simple and mother Mopar made some things pretty easy. To remove the auto pedal, simply pull the bolt holding the master cylinder rod and then the through bolt holding the pedal to the brake bracket. Once that is out, then pull the two 1/2" nut and bolts as that is where the clutch pedal bracket will mount.
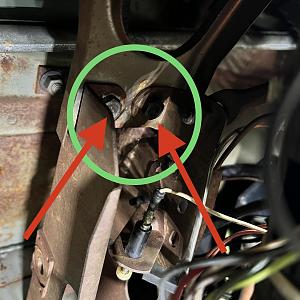
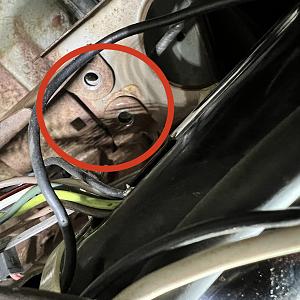
Next from under the dash, you will see two factory dimples in the firewall. These are from the factory and this is where the clutch bracket will mount to firewall. Simply drill them out from inside the engine compartment. You will want to step them up and start with a small bit and work your way up to a 5/16" hole
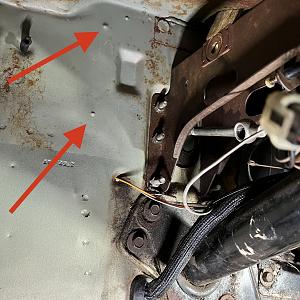
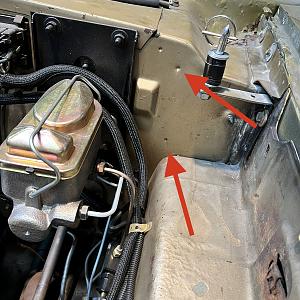
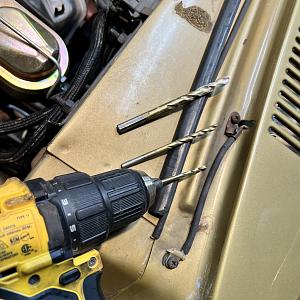
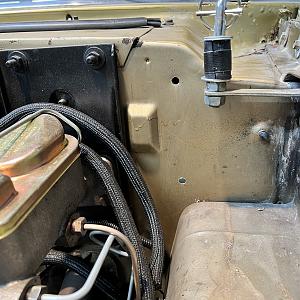
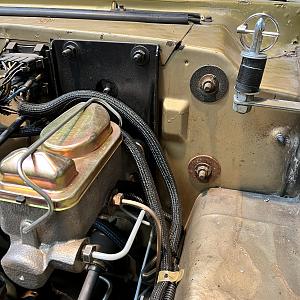
Once the holes are drilled out, you will slide the clutch pedal bracket in under the dash. The studs on the bracket will go through the firewall in the newly drilled holes and the top of the bracket will line up above the brake pedal bracket where you took out the two 1/2" bolts in the previous step. Put the two 1/2" bolts in first (you may need to use a pry bar and gently pry the bracket over to line up the holes. Snug them down but don't tighten them. Now put the large washer and the nut on the studs coming through the firewall in the engine compartment. Tighten those nuts down. Once they are tight, you can then tighten the two 1/2" nut and bolts under the dash. Now just slide the brake clutch pedal up and put the long bolt through it, then slide the brake pedal up and push the long bolt the rest of the way through. Tighten the long bolt going through both pedals. Re-install the master cylinder rod to the brake pedal and voila, you now have 3 pedals!
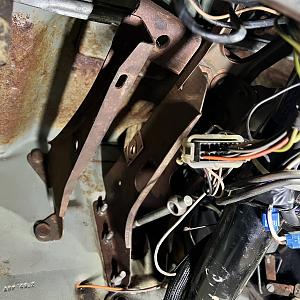
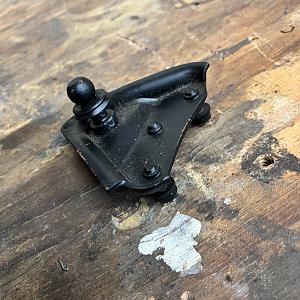
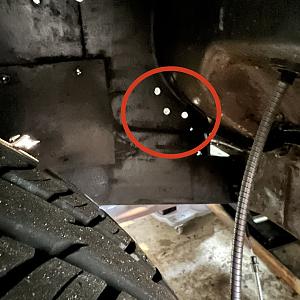
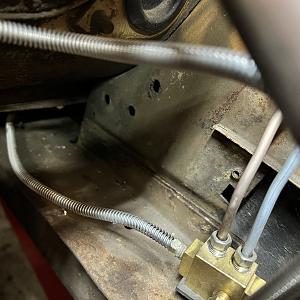
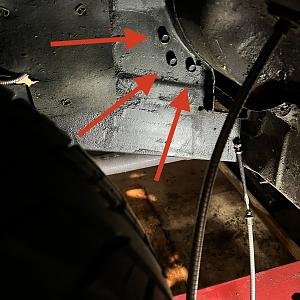
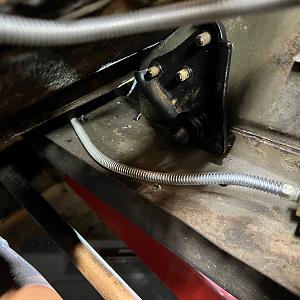
The other nice thing about the 65 is the ball stud bracket that attaches to the frame, bolts in place! No need to weld it on these cars. You can see the 3 holes if you look through the driver side wheel well. Hold the bracket in place inside the engine compartment and put the bolts in from inside the wheel well. Bracket only goes on one way so tighten up the bolts.
2/12/22
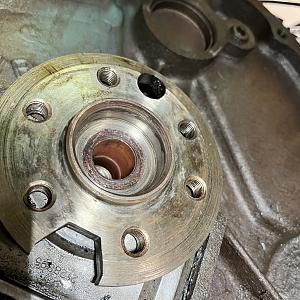
Another productive day and its a good feeling when things start coming together. Started today with removing the shifter and pulling the trans and bell housing back out. I had only put them in place for mockup purposes. So now that they were out, it was time to start putting things back in the way they belong. I started with removing the flywheel and installing the pilot bearing. This bearing is in lieu of a pilot bushing in the crank. This bearing sits in the front of the flywheel where the torque converter hub would sit. Its made for cranks that aren't drilled completely from the factory. My crank was drilled but I opted for the bearing instead of the bushing
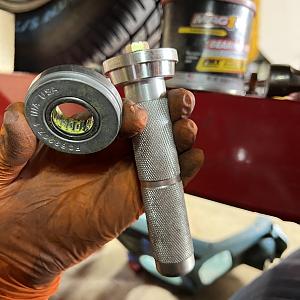
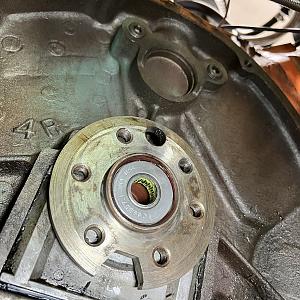
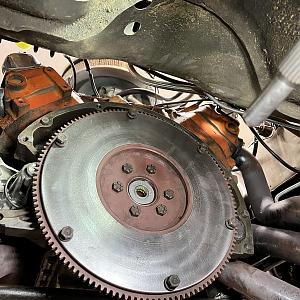
Once the bearing was in, I put the flywheel back and torqued the bolts to 55ft/lbs then installed the clutch disc with the alignment tool and followed that with the clutch pressure plate and torqued those bolts down to 30ft/lbs.
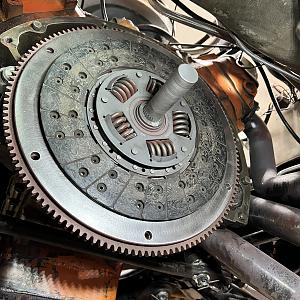
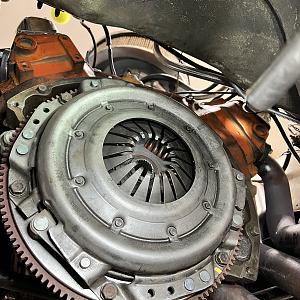
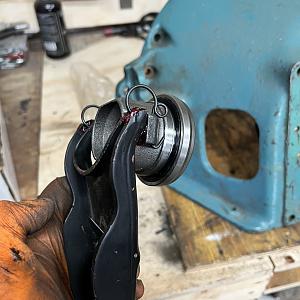
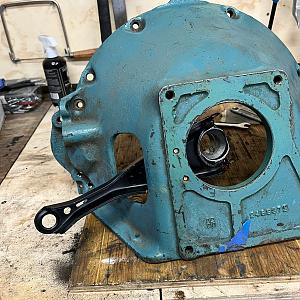
Next was to get the bell housing prepared. I cleaned the mating surfaces again to make sure there were no high spots or excess paint and then most importantly I used my tap and die set to clean ALL the threads to make sure the bolts all went in nice and easy. This is the most important step so you aren't fighting with it under the car. Better to find out now you have a messed up thread than when its installed. Once I cleaned the threads, I attached the clutch fork pivot bracket inside the bell housing and put the new throwout bearing on the fork then clipped it into place in the bell housing. Then carefully installed the bell to the block and tightened everything down. While I was there, I reattached the starter and tighten that into place.
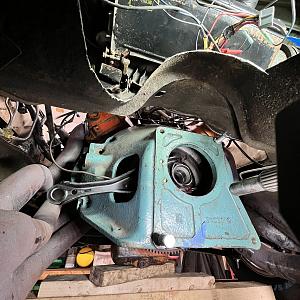
Once it was in place, it was time to slide the tranny back in. With a little bit of fighting, I was able to get it to line up and eventually slide into place. Ended up putting the linkage into gear and using a pair of channel locks wrapped with a rag to turn the output shaft to line it up. Once it was in place, I jacked it up to install the crossmember and realized I have the wrong one. The auto one doesn't work and the manual one I got is not for my car..... so I temporarily just installed the auto one and rested the tail shaft on it so I could get the jack out of the way. I am going to see if I can modify my auto to work without having to buy another crossmember.
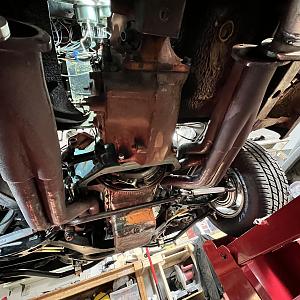
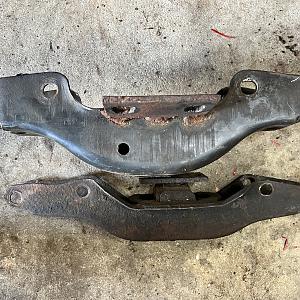
Now I can finish installing the clutch linkage. First need to rebuild the torque shaft and then we can get that all installed and make sure the pedal works as it should.
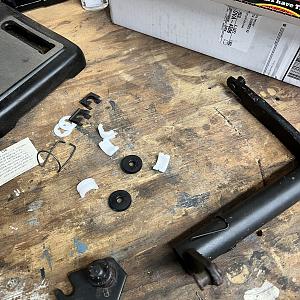
2/13/22
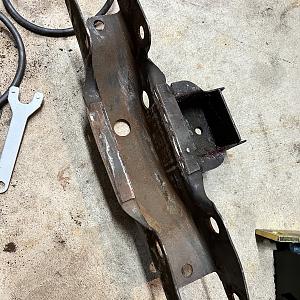
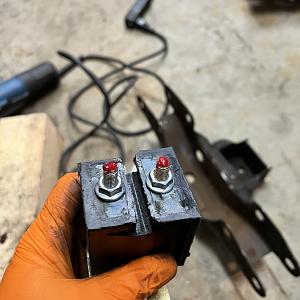
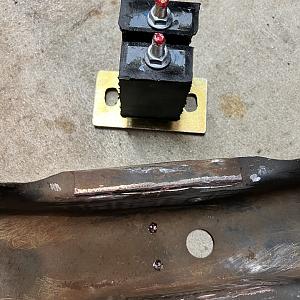
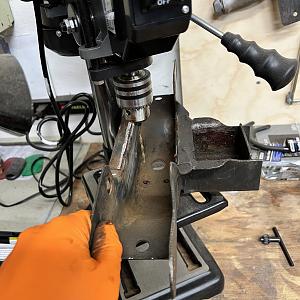
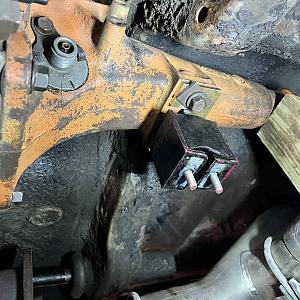
Today I decided to modify my original crossmember and it actually came out good and works perfect. I ended up first cutting the metal plate out of the center and then cutting off the makeshift adapter plate someone welded on at one point in time. Ground down the edges to get rid of all the sharp edges. Since it didn't have any holes in the center, I ended up taking a little bit of grease on the threads of the mount and gently pushed the mount into place so that the grease made marks inside the crossmember. Once the marks were there, I was able to set it in the drill press and gradually drill out the holes to accommodate the mount. Mounted the mount on the trans, reversed the crossmember and then slid the crossmember up. With a little prying, got it all lined up, bolted in and set in place. Very happy with how it worked. I even left the original auto mount basket in place in case I ever put back to an auto.
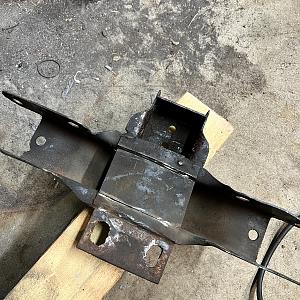

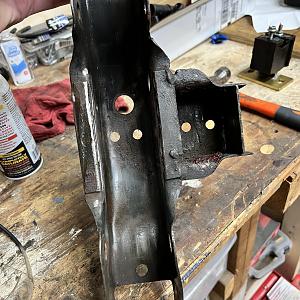
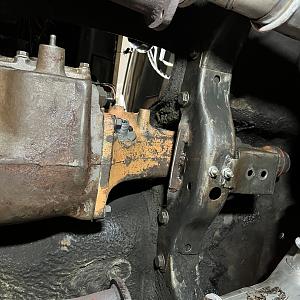
Once the tranny was all set, I went on to set up the torque shaft and get that all ready to go. Put the new bushings into the torque shaft, and put the rubber grommets on the pivot balls. Slid everything together and carefully put into place. Once it was all lined up, bolted it to the bell housing and bolted it to the frame.
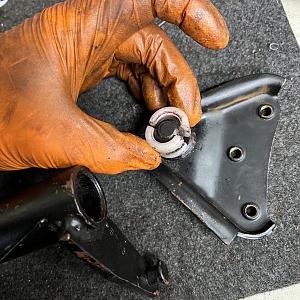
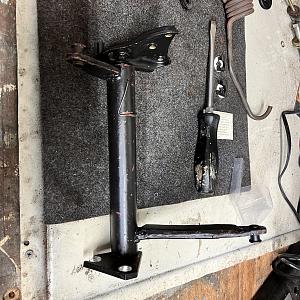
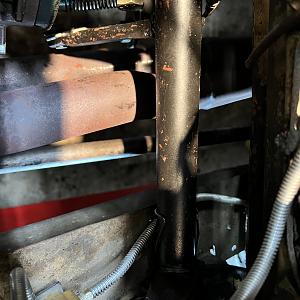
Went to put the clutch adjustment rod in and realized it was a little too short. I need to order a longer one so we will get back to that.
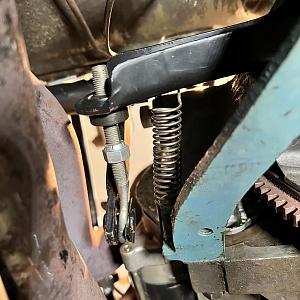
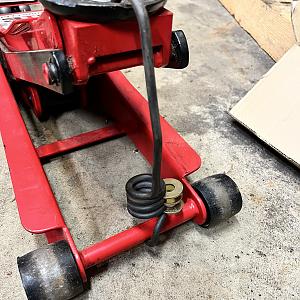
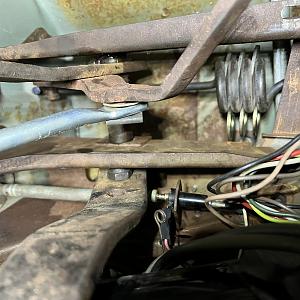
In the meantime, put in the new clutch linkage rod under the dash and installed the over center spring. To make it easier to install, I put the spring in my jack and jacked it up to put some spacers between the springs to stretch it out to make it easier to install under the dash. Once it was in place, I pulled the washers out and it sat in place.
2/19/22
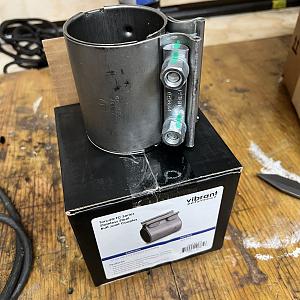
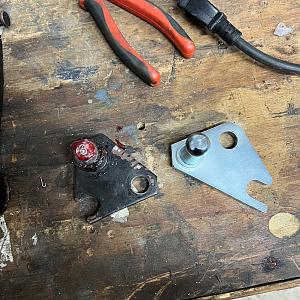
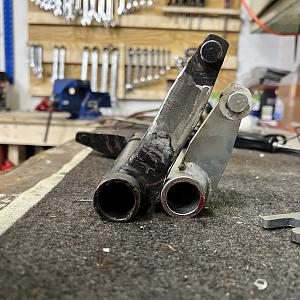
Well after further inspection, I realized that the z-bar was wrong as well as the bellhousing pivot ball. The ball I had was for a 62-64 big block. Ended up ordering a new bell housing ball and z-bar from brewers and went to put them in today. I also ordered a new steel dust cover and an exhaust sleeve to clamp my H-Pipe (more on that later). From the pics, you can see the difference in the pivot ball bracket and the z-bars.
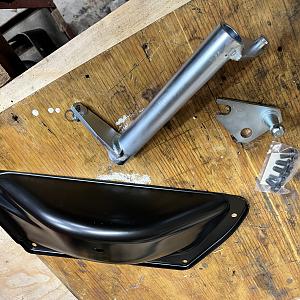
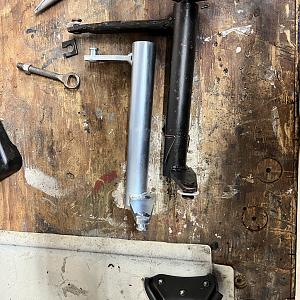
All put together and ready to install. Got it in, mounted to the frame and the bell housing and noticed that the arm on the new z-bar was too short to reach the clutch fork!! The old z-bar was too long (previously altered) and the new one is too short. Apparently, the clutch fork pivot bracket inside the bell housing must be wrong cause the fork is approx 1.5" lower than it needs to be. This was a big disappointment. After trying a few different way to get the fork out, I realized the only way to do it was to pull the whole tranny again and there was no way I was doing that!!
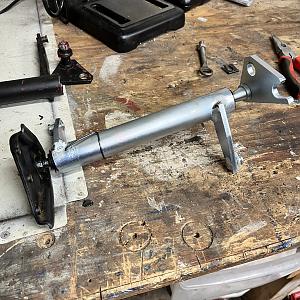
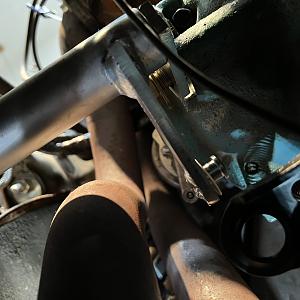
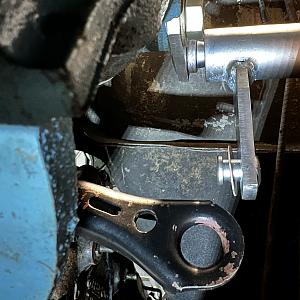
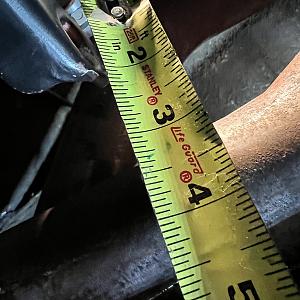
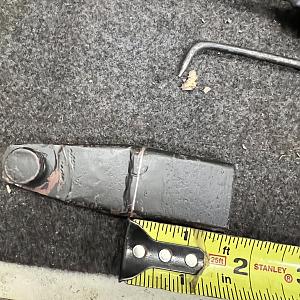
So I decided to make some custom work. I took the old z-bar and cut the long arm off. I measured the cut end 1.5" from the cut and marked it. I then cut that 1.5" section out. Ground it down, and clamped the two pieces together. Then I tack welded it on both sides to check for straightness. Once I confirmed it was straight, I then put the z-bar and the ball studs together and test fit them in the car. It all lined up as it need to and the clutch adjustment fit as it should. Once it was all in place and looked good, I removed it all and welded it solid, ground down the welds and painted it. Looks perfect and works as it should and didn't have to pull the tranny.
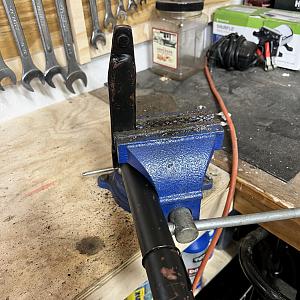
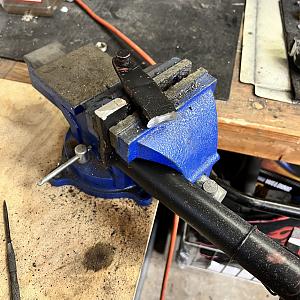
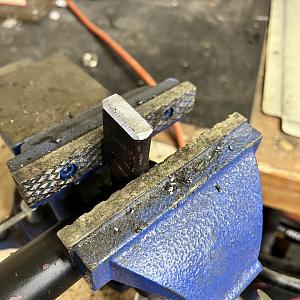
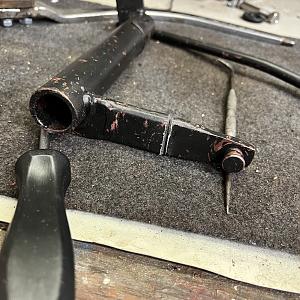
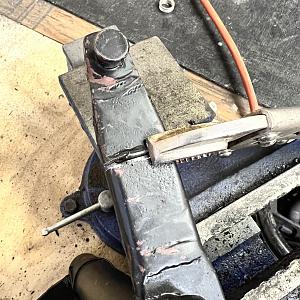
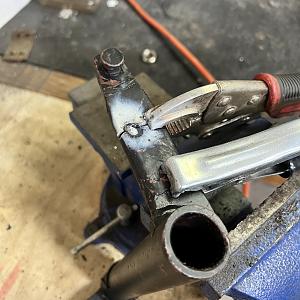
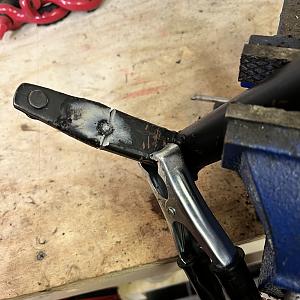
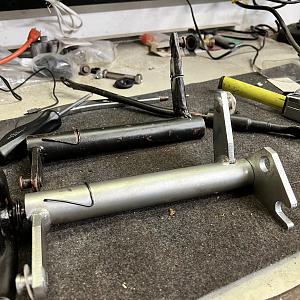
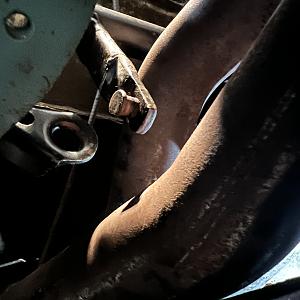
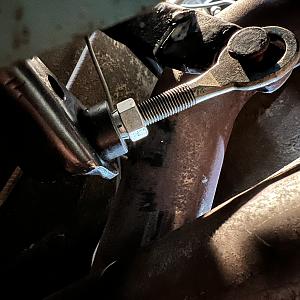
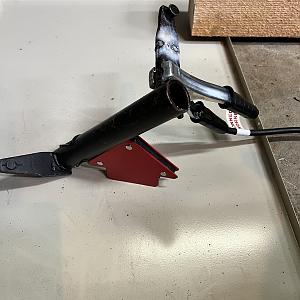
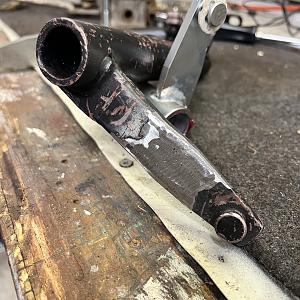
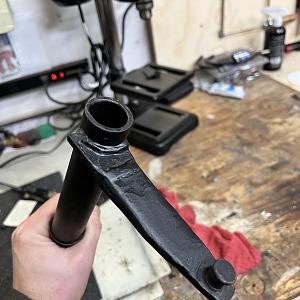
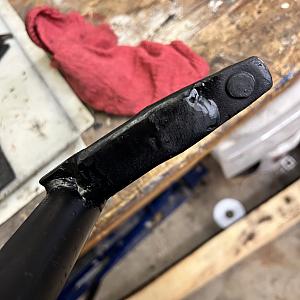
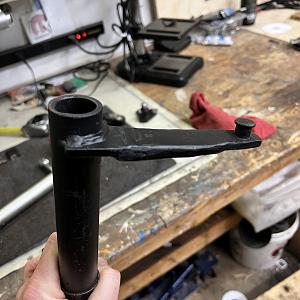
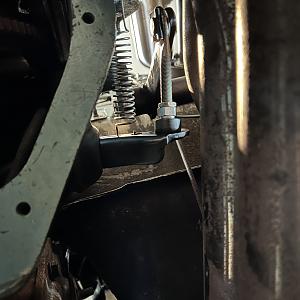
Once it was all back in place, I lined up the adjustment rod and its adjusted all the way out and it seems like it needs to adjust a little more, there is too much free play in the pedal and I don't think its fully engaging the clutch. I am going to order a longer rod and see how that goes. Once that is done, I can put the dust cover on, throw the drive shaft back in (which I just got back from the balancing shop and had it balanced) and button up the exhaust.
2/27/22
Ran out of room on this garage so need to create a part 2 for this build. You can continue to part 2 here: https://www.forbbodiesonly.com/moparforum/showcase/65-satellite-4-speed-swap-part-2.5643/
Part 1: https://www.forbbodiesonly.com/moparforum/showcase/getting-the-65-back-on-the-street-part-1.5529/
Part 2:
https://www.forbbodiesonly.com/moparforum/showcase/getting-the-65-back-on-the-street-part-2.5551/
Since there is a lot going into this conversion, I wanted to start a new garage. Hope you enjoy
11/28/21
Finally got the rest of the parts to tackle this project. Pulled a lot of parts including the floor hump out of my 65 satellite big block 4spd parts car. The rest of the parts came from sourcing them from fellow Mopar guys, my father and some misc stuff from Brewers.


11/11/21
Decided that working on jack stands wasn’t going to be fun so I scored this Quick Lift from Facebook marketplace and set it up in the garage. This thing is perfect and puts the car high enough to comfortably work on it. Got it set up and put the old girl on it to get started.


1/11/22
Got started today with pulling the old automatic out. It was going fairly well until I ran into an issue with my TTI headers on the passenger side. They are so tight, that it was impossible to get a wrench or socket on the lower bellhousing bolt that comes from the front.

After fighting for over 30 minutes, figured I would just loosen the header flange bolts to see if I could get the header to move. Of course that was a project in itself. Pulled the plug wires and plugs and started to loosen the bolts and totally forgot that the bolts go into water jackets so quickly had to drain the lower radiator hose! Once that was done, I was able to move the header enough to get a wrench on it and move it about 1/8 turn each time. Once that was out, a little bit of muscling and the old auto was out on the ground! Once conversion is done, going to figure out what I’m gonna do with all the auto parts. This is a built 727 with Cheetah reverse manual valve body and 3000 stall converter. Trans was built nicely.


Next up is to pull the flex plate and inspect the rear main seal. I have a little leak so now seems like the perfect time to replace rear main, oil pan gasket and inspect the oil pump. I’ll keep you posted as I progress.
1/15/22
It was a blustery 3 degrees outside today and the garage only got up to about 39 so needless to say, it was a little chilly out there. I decided that I was going to finish pulling all the automatic stuff and then get cleaned up to start the next step. I ended up pulling the flex plate and it looks like the rear main isn't very wet. It appears to be mostly the oil pan gasket. What do you guys think??

I then pulled the transmission lines out and took the grill off so that I could get both of the transmission coolers out that I previously installed. I kept everything together and plan on selling the whole automatic setup once I finish the swap. Transmission, stall converter, flex plate, transmission lines, two coolers (one is heavy duty and literally installed about 200 miles ago), the Cheetah shifter and possibly the center console.

Once the coolers were out, I put the grill back in and tackled the interior. I have to remove the whole interior in order to cut the floor out for the 4spd hump as well as I plan on welding in my subframe connectors and torque boxes and need to make sure there is nothing inside the car so it doesn't cause any fires. Seats came out pretty easy and then I pulled the console and lastly pulled out the Cheetah shifter.


Once all the interior pieces were out, I was able to get the carpet out. After I pulled it, I was a little disheartened as I found quite a few spots that were rotted through. I was bummed out because I could not see any of those from under the car. I ended up taking a screw driver and poking the floor to find the soft spots so I could dig them out. I expected to do some floor work for having to cut out the hump and weld in the 4spd hump but wasn't expecting to need to do some floor patches. Now need to decide if I want to just cut out and patch the holes, or go the route of getting floor pans for the car. You can see in the pics where its rotted, and the rest of the floor seems to be fairly solid. Its just concerning cause there are rot holes by both the holes where the seat mounts and again where the seat belts bolt into the floor.


Swept out the interior and put everything away for the night. Before I finished, I did jump back under the car to make sure the bell housing will fit without any interference of the headers and that seems like it will be ok. I plan on just mounting the bell housing with a couple bolts, then setting the trans in place with a couple bolts and using that as a guide to make sure the hole in the floor is in the right spot. I did place the floor hump over the tunnel for a visual and lined it up using the factory spot welds and then traced out the inside of the hump to get an idea of where to start cutting it out.


1/22/22
I wanted to get the oil pan gasket taken care of while I had a lot of room under the car. I went ahead and temporarily bolted the bellhousing up so I could use that as a spot to lift to support the motor while I took the pan off. I used a jackstand, a block of wood and my center lift of my lift and it worked perfect.
 Drained the oil and dropped the center link to give me more room to pull the pan out. The front bolts above the K frame were a little fussy but eventually came out. Once all the bolts were out, the pan slid out nice and easy. Then I took the windage tray out. Both gaskets came out nice too so there was no baked on gasket to do a lot of scraping.


Once the pan was out, I inspected the lower end for anything loose or broken, checked the oil pump and screen and shined a light to see the cylinder walls. All seemed to be in good shape…..then I looked inside the oil pan and found about a 1/4” of sludge. Pretty thick and silvery gray shiny showing signs of metal. Not really sure why considering I was told this motor had been rebuilt. To me it looks a lot like a stock lower end with a high volume oil pump and a pan that was enlarged for a higher oil capacity. Cleaned out the gunk and cleaned up the oil pan.


I bought a rubber windage tray with the built in gaskets to make the install easier but apparently the aftermarket one has additional bumps on the side that interfere with the oil pump tube and I couldn’t get it to fit. I pulled out my gasket kit but unfortunately there is only one oil pan gasket and I will need another one to use the factory windage tray. So need to head to parts store for a gasket so I’ll call it a day today.


1/23/22
Made several calls to parts stores and all they carry is the cheap versions of the gaskets so rather than waiting, since I was told that I couldn’t return my windage tray I bought because it was “installed”, I decided to use a heat gun and heat the tray enough that it got soft enough that I could hammer it to clear the oil pickup tube. Once I did that, it fit perfect and all the bolt holes line up. It doesn’t look the prettiest but it works. (It didn’t melt enough to burn through in case you may be thinking that)

Once I got the pan back on, I re-attached the center link and supported the motor with some blocks of wood so I could remove the jack from the trans bellhousing to continue back there.

The next thing was I got the flywheel and hardware cleaned and ready. Had to buzz wheel the flywheel down to get the primer off it and then used my tap and die set and chased the threads in the flywheel for the pressure plate, and then chased the threads for the pressure plate bolts and flywheel bolts. Will bolt up the flywheel then put the bellhousing on and check the run out.

Lastly, I pulled out the pilot bearing and checked to make sure it fully rode on the input shaft with no obstructions and took a few measurements to make sure everything would line up. That oil pan and gasket kicked my butt this weekend so didn’t get as much done as I wanted but progress is progress. I’ll update again in a couple days when I get back out to the garage.

2/6/22
Its been a couple weeks since I had some time to work on her but today was very productive. My list of things is so overwhelming so I just decided to start jumping into things. I ended up just putting the flywheel on and bolting up the bell housing. I then grabbed my dial indicator and checked the runout on the bell housing. I did it a couple of times and it came out the same. After doing the math, I determined that I will need to get a set of offset dowels (.007 ones) and install those. I ordered them and they will be in later this week.


Since I have to wait for the dowels, I decided to set the tranny up in place and mock out the floor and trim up the tunnel hump. Thankfully I have the cross support for my lift and it has a jack built into it cause it came in very handy. I was able to lift the tranny up with my floor jack and then slide it onto the lift jack to get it up into position.


Once it was up, I then headed inside to tackle the floor and get it all cut out. If you recall, I cut the tunnel out of my 4spd parts car and cut it way bigger than I needed. I set it over the tunnel and marked out a small square to cut out as a starting reference point before trimming the floor hump and fitting it into place


Next step was to clean up and trim the floor hump and make it pretty. I ended up carefully cutting along the seam and trimming away all the bad metal and clean the edges to make a nice flange.


Next was to set it in place and trace it out on the floor. I realized that since my parts car was a console car, it had the bracket for the console welded onto it so I carefully removed my bracket from the floor. I wanted to keep all the original sheet metal I cut out in case I ever put the car back to an auto, or if I ever sell it, I can give the floor to a new owner.

Now I set the freshly trimmed 4spd hump on the floor to make sure it fit and it fit like a glove so I traced around the outer edge. I then took it off and drew a line about an inch on the inside to create a lip that I can weld to once I cut it out. I then marked what needed to be cut and used my cutoff wheel to remove the floor.


Mocked up the shifter, had to do a little more trimming and got it all lined up. Set the hump back in place and rowed through the gears to make sure everything moved as it should without hitting anything and all is good.


Not that its all fit, next step is to pull the tranny back out so I can work on getting the pilot bearing installed, put the flywheel back on, set up the clutch and all the linkage and install the bell housing with the new dowels. Before I can put the tranny back in, I have some repair work to do on the floor and it will be easier with the tranny out. I will be patching the floor and welding the hump in. Still need to get the pedals in too so that will be easier with the tunnel out too. Til next time
2/8/22

Decided to just get the pedals out of the way and start setting up the topside clutch linkage and parts. For starters, lets get rid of that ugly big pedal to make room for a couple smaller ones

These 65's are pretty simple and mother Mopar made some things pretty easy. To remove the auto pedal, simply pull the bolt holding the master cylinder rod and then the through bolt holding the pedal to the brake bracket. Once that is out, then pull the two 1/2" nut and bolts as that is where the clutch pedal bracket will mount.


Next from under the dash, you will see two factory dimples in the firewall. These are from the factory and this is where the clutch bracket will mount to firewall. Simply drill them out from inside the engine compartment. You will want to step them up and start with a small bit and work your way up to a 5/16" hole


Once the holes are drilled out, you will slide the clutch pedal bracket in under the dash. The studs on the bracket will go through the firewall in the newly drilled holes and the top of the bracket will line up above the brake pedal bracket where you took out the two 1/2" bolts in the previous step. Put the two 1/2" bolts in first (you may need to use a pry bar and gently pry the bracket over to line up the holes. Snug them down but don't tighten them. Now put the large washer and the nut on the studs coming through the firewall in the engine compartment. Tighten those nuts down. Once they are tight, you can then tighten the two 1/2" nut and bolts under the dash. Now just slide the brake clutch pedal up and put the long bolt through it, then slide the brake pedal up and push the long bolt the rest of the way through. Tighten the long bolt going through both pedals. Re-install the master cylinder rod to the brake pedal and voila, you now have 3 pedals!


The other nice thing about the 65 is the ball stud bracket that attaches to the frame, bolts in place! No need to weld it on these cars. You can see the 3 holes if you look through the driver side wheel well. Hold the bracket in place inside the engine compartment and put the bolts in from inside the wheel well. Bracket only goes on one way so tighten up the bolts.


2/12/22
Another productive day and its a good feeling when things start coming together. Started today with removing the shifter and pulling the trans and bell housing back out. I had only put them in place for mockup purposes. So now that they were out, it was time to start putting things back in the way they belong. I started with removing the flywheel and installing the pilot bearing. This bearing is in lieu of a pilot bushing in the crank. This bearing sits in the front of the flywheel where the torque converter hub would sit. Its made for cranks that aren't drilled completely from the factory. My crank was drilled but I opted for the bearing instead of the bushing


Once the bearing was in, I put the flywheel back and torqued the bolts to 55ft/lbs then installed the clutch disc with the alignment tool and followed that with the clutch pressure plate and torqued those bolts down to 30ft/lbs.


Next was to get the bell housing prepared. I cleaned the mating surfaces again to make sure there were no high spots or excess paint and then most importantly I used my tap and die set to clean ALL the threads to make sure the bolts all went in nice and easy. This is the most important step so you aren't fighting with it under the car. Better to find out now you have a messed up thread than when its installed. Once I cleaned the threads, I attached the clutch fork pivot bracket inside the bell housing and put the new throwout bearing on the fork then clipped it into place in the bell housing. Then carefully installed the bell to the block and tightened everything down. While I was there, I reattached the starter and tighten that into place.


Once it was in place, it was time to slide the tranny back in. With a little bit of fighting, I was able to get it to line up and eventually slide into place. Ended up putting the linkage into gear and using a pair of channel locks wrapped with a rag to turn the output shaft to line it up. Once it was in place, I jacked it up to install the crossmember and realized I have the wrong one. The auto one doesn't work and the manual one I got is not for my car..... so I temporarily just installed the auto one and rested the tail shaft on it so I could get the jack out of the way. I am going to see if I can modify my auto to work without having to buy another crossmember.


Now I can finish installing the clutch linkage. First need to rebuild the torque shaft and then we can get that all installed and make sure the pedal works as it should.

2/13/22
Today I decided to modify my original crossmember and it actually came out good and works perfect. I ended up first cutting the metal plate out of the center and then cutting off the makeshift adapter plate someone welded on at one point in time. Ground down the edges to get rid of all the sharp edges. Since it didn't have any holes in the center, I ended up taking a little bit of grease on the threads of the mount and gently pushed the mount into place so that the grease made marks inside the crossmember. Once the marks were there, I was able to set it in the drill press and gradually drill out the holes to accommodate the mount. Mounted the mount on the trans, reversed the crossmember and then slid the crossmember up. With a little prying, got it all lined up, bolted in and set in place. Very happy with how it worked. I even left the original auto mount basket in place in case I ever put back to an auto.


Once the tranny was all set, I went on to set up the torque shaft and get that all ready to go. Put the new bushings into the torque shaft, and put the rubber grommets on the pivot balls. Slid everything together and carefully put into place. Once it was all lined up, bolted it to the bell housing and bolted it to the frame.


Went to put the clutch adjustment rod in and realized it was a little too short. I need to order a longer one so we will get back to that.

In the meantime, put in the new clutch linkage rod under the dash and installed the over center spring. To make it easier to install, I put the spring in my jack and jacked it up to put some spacers between the springs to stretch it out to make it easier to install under the dash. Once it was in place, I pulled the washers out and it sat in place.


2/19/22
Well after further inspection, I realized that the z-bar was wrong as well as the bellhousing pivot ball. The ball I had was for a 62-64 big block. Ended up ordering a new bell housing ball and z-bar from brewers and went to put them in today. I also ordered a new steel dust cover and an exhaust sleeve to clamp my H-Pipe (more on that later). From the pics, you can see the difference in the pivot ball bracket and the z-bars.


All put together and ready to install. Got it in, mounted to the frame and the bell housing and noticed that the arm on the new z-bar was too short to reach the clutch fork!! The old z-bar was too long (previously altered) and the new one is too short. Apparently, the clutch fork pivot bracket inside the bell housing must be wrong cause the fork is approx 1.5" lower than it needs to be. This was a big disappointment. After trying a few different way to get the fork out, I realized the only way to do it was to pull the whole tranny again and there was no way I was doing that!!


So I decided to make some custom work. I took the old z-bar and cut the long arm off. I measured the cut end 1.5" from the cut and marked it. I then cut that 1.5" section out. Ground it down, and clamped the two pieces together. Then I tack welded it on both sides to check for straightness. Once I confirmed it was straight, I then put the z-bar and the ball studs together and test fit them in the car. It all lined up as it need to and the clutch adjustment fit as it should. Once it was all in place and looked good, I removed it all and welded it solid, ground down the welds and painted it. Looks perfect and works as it should and didn't have to pull the tranny.


Once it was all back in place, I lined up the adjustment rod and its adjusted all the way out and it seems like it needs to adjust a little more, there is too much free play in the pedal and I don't think its fully engaging the clutch. I am going to order a longer rod and see how that goes. Once that is done, I can put the dust cover on, throw the drive shaft back in (which I just got back from the balancing shop and had it balanced) and button up the exhaust.
2/27/22
Ran out of room on this garage so need to create a part 2 for this build. You can continue to part 2 here: https://www.forbbodiesonly.com/moparforum/showcase/65-satellite-4-speed-swap-part-2.5643/


