Installation Instructions
Hurst Competition Plus Installation Kit
Fits: Dodge, Plymouth & Chrysler w/New Process Transmission
1. Remove the boot and console. Remove the stock shifting linkage.
2. Install the mounting plate on the transmission. Tighten the 3 flat-head socket screws evenly.
3. Place the spacer plate on the mounting plate. Install the shifter on the spacer plate and tighten the
mounting bolts.
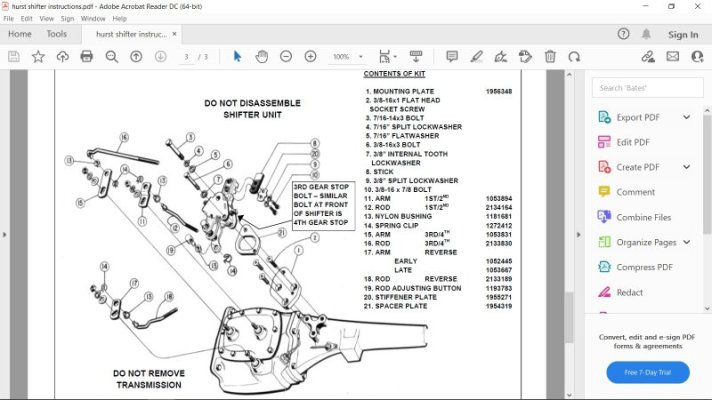
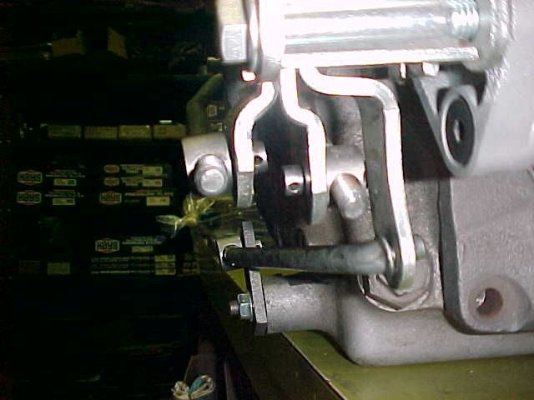
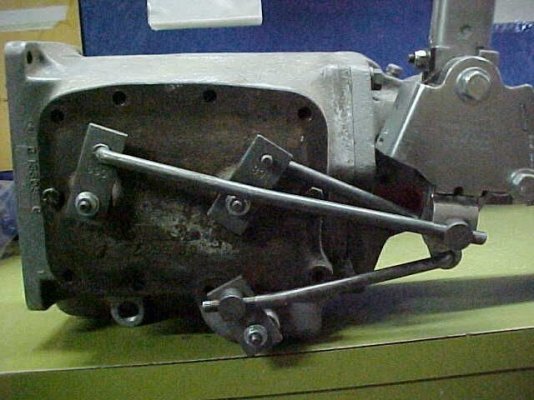
4. Assemble the rods and arms using nylon bushings and fasten with spring clips. See the exploded
assembly view for proper parts combinations. Screw the rod adjusting buttons onto the rods, to the
middle of the threaded length of each rod.
5. Bolt the stick to the shifter and tighten both bolts.
6. Install the arms onto the transmission shafts. Refer to the exploded assembly view.
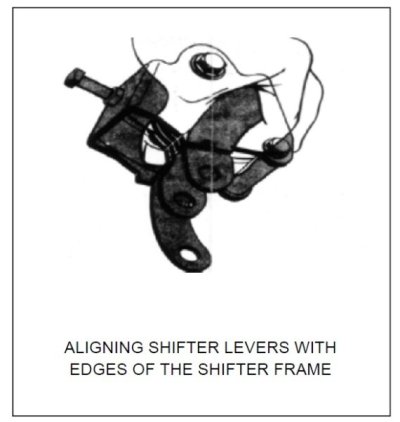
7. Align all three shifter levers at Neutral by grasping them between the thumb and forefingers and
aligning all three levers together with the edges of the shifter frame. SEE THE ILLUSTRATION.
IMPORTANT
BE CAREFUL TO AVOID DISTURBING THE POSITIONS OF THE LEVERS WHILE INSTALLING
THE BUTTONS.
8. Rotate the transmission arms backward and forward. At the middle of the travel you will feel the
NEUTRAL detent of 1 – 2 and 3 – 4 arms. Position both of these arms at Neutral. Turn the Reverse
control arm all the way FORWARD (DISENGAGED POSITION).
NOTE: Do not move any of the arms from these positions while the Neutral alignment is being
adjusted.
9. Adjust the button on each rod until it fits freely into the nylon bushing without moving the lever.
Fasten the buttons with spring clips.
10. Test the shifter. The stick should move freely from side to side at Neutral (between 1 – 2 and 3 –
4 shifting paths). An increased pull toward the operator should engage the reverse lever. If the shifter
operates properly, proceed to number 12.
11. If the stick CANNOT be moved freely between 1 – 2 and 3 – 4 or REVERSE path, one or more of
the rod button adjustments must be corrected. Move the stick forward to 3rd, then back to 4th then into
Neutral.
12. Adjust the shifter stop bolts. Back both bolts out of the shifter frame until only a few threads
remain engaged. Push the stick firmly into 3rd gear and hold. Screw the 3rd gear stop bolt in until
contact is felt. Back the bolt out one turn and tighten the lock nut. Pull the stick firmly back into 4th
gear, screw the 4th gear stop bolt in until contact is made then back stop the bolt out one turn and
tighten the lock-nut.
13. Replace the console and boot.
View attachment 1349752
View attachment 1349753
These are the original instructions for a Comp Plus Hurst shifter installation. I hope they're clear enough to be useful.
It's in PDF format originally and this site doesn't allow me posting those type files, sadly.


