carnuts94
Member
As a warning to the Mopar community, the bench seat headrest mounting rebuild kit (part# MD2048) from Classic Industries has a major issue that requires extensive work to the seat frames to use the top headrest shaft guide/spacer! It needs to be re-engineered to correctly fit the factory mounting provisions in the seat frame tops! I did fill out their "please write a review" for this purchased item and added pictures to show the engineering flaw of the top headrest shaft guide/spacer, and I was hoping to copy & paste the review here, but they have NOT added my review to this item on their website. Huh, wonder why?
https://www.classicindustries.com/shop/1969/plymouth/roadrunner/parts/?q=md2048
The top guide/spacer's "bottom shaft guide protrusion" won't drop into the 3/4" factory hole on the top of the seat frame, which would allow the spacer to sit flush & sturdy before mounting with screw.
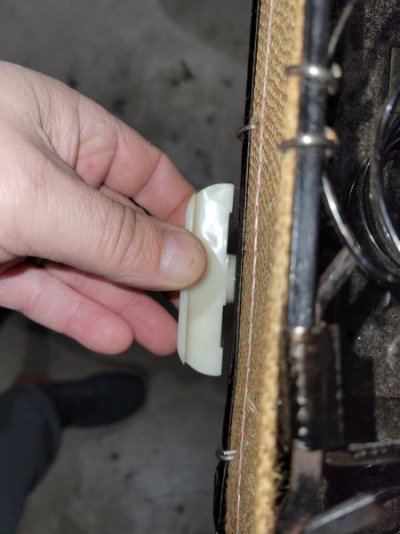
This was a problem with all four top guides/spacers that came in this kit. The issue is that the "bottom shaft guide protrusion" is not totally round, like the factory hole in the seat frame. Correct size from side-to-side, but too large from front-to-back.
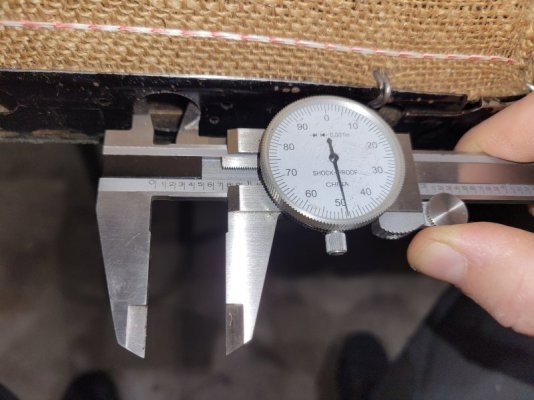
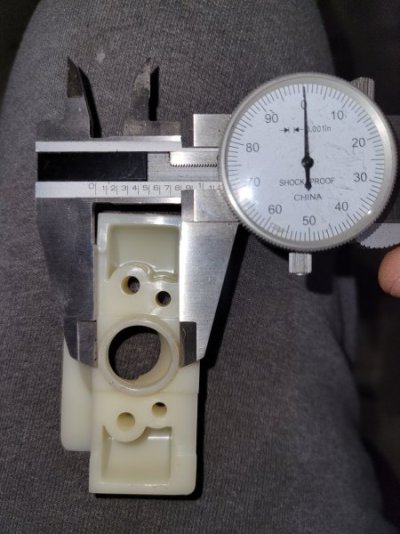
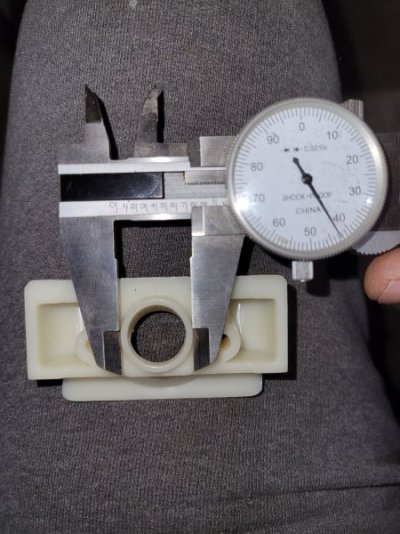
I tried filing the "bottom shaft/guide protrusion" off of one of the plastic guide/spacers to test as a solution. Once it was flush and mounted with screws into the factory seat frame holes the top guide/spacer shaft hole did not align with the 3/4" factory hole in the seat frame. This involved elongating the 3/4" seat frame holes for proper clearance for the headrest shaft. Since filing was needed anyway, I decided to keep the "bottom shaft/guide protrusion" on the remaining 3 of 4 (for additional headrest shaft support).
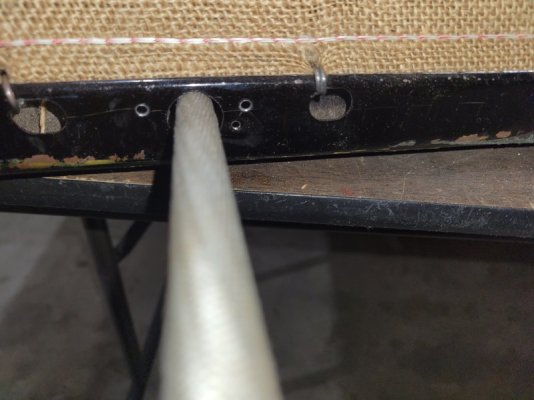
But even after the "bottom shaft/guide protrusion" dropped into the hole and everything was flush and sturdy for mounting, the screw holes did not line up. This required more filing of the big hole, IN THE SAME DIRECTION.
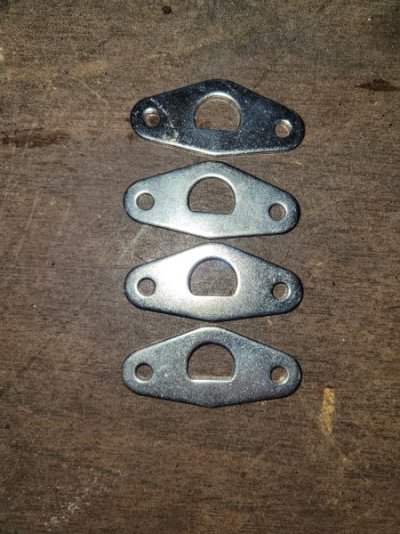
Hours later, the top guides/spacers were mounted. I didn't have any issues installing the bottom guides & indent springs. Although, there were 4 metal brackets with D shaped holes that stumped me because the headrest shafts are round all the way to the bottom. Caveman logic= Round peg, D shaped hole, uhhh no fit. I can only assume that mopar had some headrests that have D shaped shafts toward the bottom.
With all guides installed, it's time to slide the headrest in and check function and clearances.
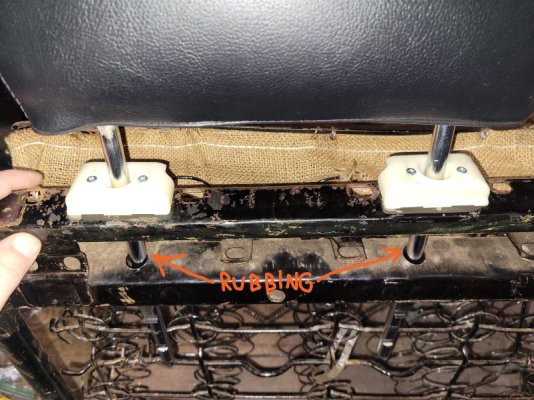
More filing...four letter words!
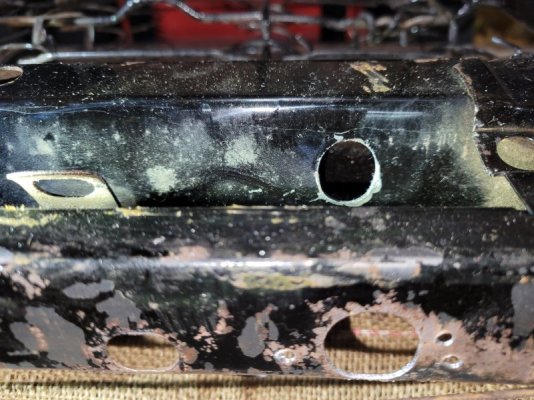
Finally done filing and grinding for clearance and have the added headrests that I was wanting. Now time to disassemble for the prime & paint stage.
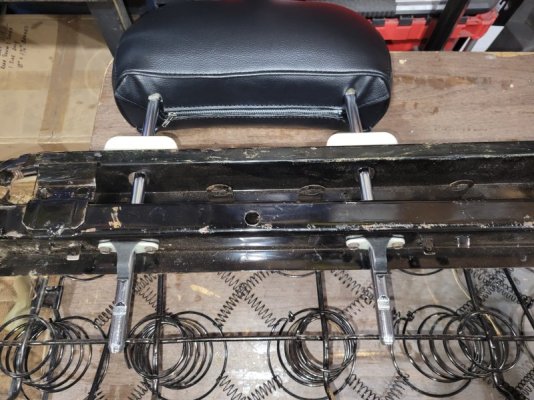
This 1-2 hour job took 6-8 hours of time, due to the crappy engineering of the top plastic spacers/guides. The rest of the kit fit well, although the only hardware included was the 8 screws to mount the chrome bezels. The customer has to source all of the hardware to mount the guides and detent springs to the seat frame. This isn't a problem for those who already have headrests, but is for the customers that are ADDING headrests. Some instructions wouldn't hurt, either.
In conclusion, I DO NOT RECOMMEND this kit. I will try a different manufacturer/supplier on my next headrest addition project!
https://www.classicindustries.com/shop/1969/plymouth/roadrunner/parts/?q=md2048
The top guide/spacer's "bottom shaft guide protrusion" won't drop into the 3/4" factory hole on the top of the seat frame, which would allow the spacer to sit flush & sturdy before mounting with screw.

This was a problem with all four top guides/spacers that came in this kit. The issue is that the "bottom shaft guide protrusion" is not totally round, like the factory hole in the seat frame. Correct size from side-to-side, but too large from front-to-back.


I tried filing the "bottom shaft/guide protrusion" off of one of the plastic guide/spacers to test as a solution. Once it was flush and mounted with screws into the factory seat frame holes the top guide/spacer shaft hole did not align with the 3/4" factory hole in the seat frame. This involved elongating the 3/4" seat frame holes for proper clearance for the headrest shaft. Since filing was needed anyway, I decided to keep the "bottom shaft/guide protrusion" on the remaining 3 of 4 (for additional headrest shaft support).

But even after the "bottom shaft/guide protrusion" dropped into the hole and everything was flush and sturdy for mounting, the screw holes did not line up. This required more filing of the big hole, IN THE SAME DIRECTION.
Hours later, the top guides/spacers were mounted. I didn't have any issues installing the bottom guides & indent springs. Although, there were 4 metal brackets with D shaped holes that stumped me because the headrest shafts are round all the way to the bottom. Caveman logic= Round peg, D shaped hole, uhhh no fit. I can only assume that mopar had some headrests that have D shaped shafts toward the bottom.

With all guides installed, it's time to slide the headrest in and check function and clearances.

More filing...four letter words!

Finally done filing and grinding for clearance and have the added headrests that I was wanting. Now time to disassemble for the prime & paint stage.

This 1-2 hour job took 6-8 hours of time, due to the crappy engineering of the top plastic spacers/guides. The rest of the kit fit well, although the only hardware included was the 8 screws to mount the chrome bezels. The customer has to source all of the hardware to mount the guides and detent springs to the seat frame. This isn't a problem for those who already have headrests, but is for the customers that are ADDING headrests. Some instructions wouldn't hurt, either.
In conclusion, I DO NOT RECOMMEND this kit. I will try a different manufacturer/supplier on my next headrest addition project!


