• When you click on links to various merchants on this site and make a purchase, this can result in this site earning a commission. Affiliate programs and affiliations include, but are not limited to, the eBay Partner Network.

Console Installation

Gospel Runner

Well-Known Member
Local time
10:28 PM
Joined
Nov 24, 2008
Messages
314
Reaction score
136
Location
CT
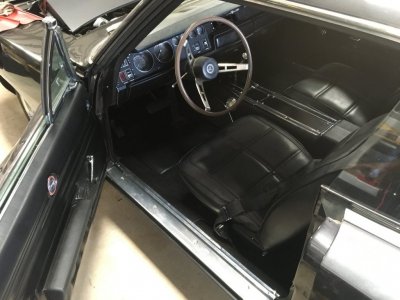
I have a 1970 Road Runner that was an original manual shift, that I have changed to an automatic. I have also acquired an original console, but I have no measurements or diagram to guide me in attaching it. I just sent away for the brackets to attach it, but I would like to know if anyone here can share any pictures, diagrams or measurements that will guide me in properly placing this console in the original position? Your input will be appreciated!
 
I have a 1970 Road Runner that was an original manual shift, that I have changed to an automatic. I have also acquired an original console, but I have no measurements or diagram to guide me in attaching it. I just sent away for the brackets to attach it, but I would like to know if anyone here can share any pictures, diagrams or measurements that will guide me in properly placing this console in the original position? Your input will be appreciated!
It is hard for me believe that no one can help me with this issue. Oh well, I will figure it out.
 
I cant give you what your asking for. But I can tell you to mount your shifter first if your going with the factory unit. The round hole on the hump has to be centered where the rod goes through. Then put the brackets on the console and set it to fit the shifter frame. I couldn't find the information either and this is how I did mine. It came out perfect. Good luck.
 
I assume your car was a floor shift without a console? Did you get a floor shift console? I'm have a 66 Satellite if it was a Belvedere floor shift no consol. you could use the hump from the console to get it close. Dreamcatcher had good advice by putting linkage first. Do you have a complete linkage shift lever package and an auto console top. I would say work from trans backward to the console. This way you can set the console last and it will be located in the right position.
 
trans linkage.jpg
 
I went through this recently with my 69. It was a pain but I measured and measured. I found a diagram when I searched it on the forums. I think it was on here. Guy took a b body and measured it all out. Chassis do vary due to tolerances so I took that then mocked it up based off that and eyeballed it.
IMG_0710.JPG
IMG_0710.JPG
 
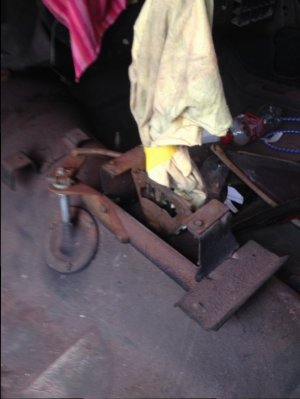
After thinking about how to position console the trans bracket is the key. If you have a floor shift hump you may want to remove it. I would remove carefully, you may want it someday. The torque shaft goes straight up through floor and connects to the shifter mechanism. The shifter should be mounted to the bracket so you can position the shifter. You might tack weld it or hold in place some other way and test fit the console and the console top.
 
You could go to Photo Garages and look at pictures in Rick & Bubba's wicked 70 Road Runner. Has a picture of auto floor shifter with console off.
 
You could go to Photo Garages and look at pictures in Rick & Bubba's wicked 70 Road Runner. Has a picture of auto floor shifter with console off.
Thanks for all of the replies, but this is a complete aftermarket build with a Cheetah shifter. I took the original console and place the shifter on top after cutting out a rectangle to fit the shifter. I drilled a hole for the cable and looped it around the back of the transmission tail shaft.

I need to know where to place the console. I will try to find the pics you suggested. Thank you!
 
I have my 69 interior out. I will take some pictures with a tape measure showing placement. I will have to do this tomorrow. But for now here is the console blown apart. I could be mistaken but the insert picture is for a manual.

console assembly.png
 
Last edited:
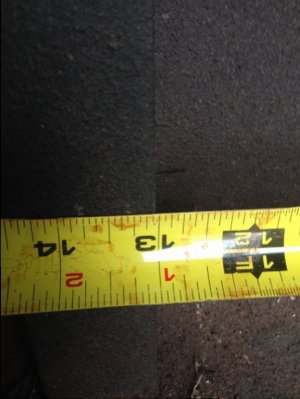
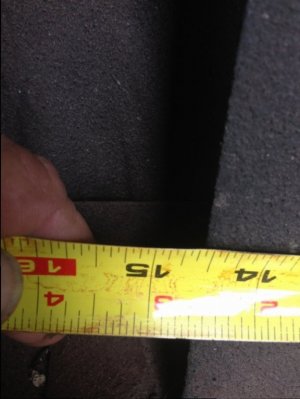
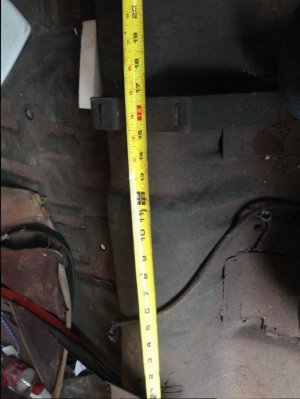
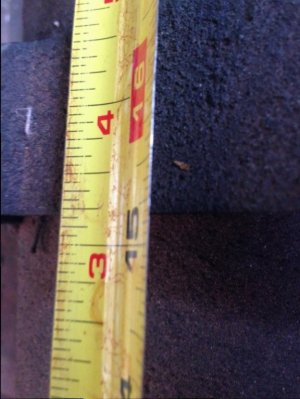
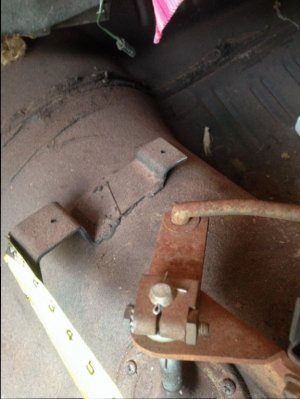
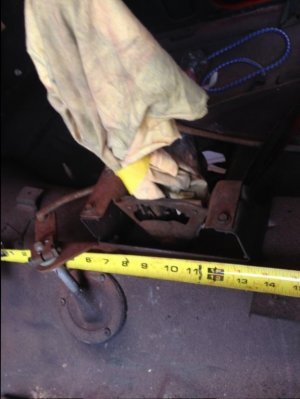
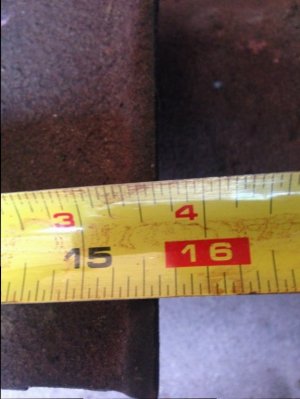
from the front edge of the rear floor pan its 13 inches to the back side of the first bracket which is the rear most bracket. From front side of rear flange to the rear flange of the shifter its 15 1/4 inches. And if you hook onto the very front bracket and pull back to the rear side of the shifter flange its 15 5/8. This should get you close.
IMG_0801.JPG

IMG_0802.JPG

IMG_0803.JPG

IMG_0804.JPG

IMG_0805.JPG

IMG_0806.JPG

IMG_0807.JPG

IMG_0808.JPG

IMG_0809.JPG

console assembly.png
 
Last edited:
I have a 1970 Road Runner that was an original manual shift, that I have changed to an automatic. I have also acquired an original console, but I have no measurements or diagram to guide me in attaching it. I just sent away for the brackets to attach it, but I would like to know if anyone here can share any pictures, diagrams or measurements that will guide me in properly placing this console in the original position? Your input will be appreciated!
 
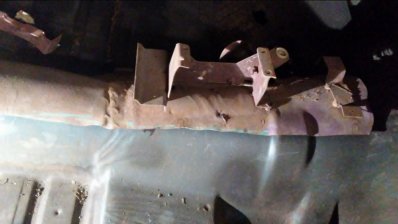
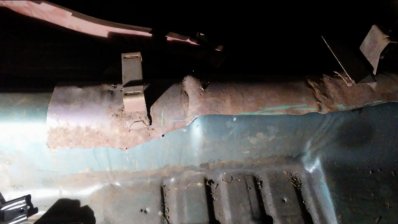
I have a similar issue. I have a 68 b body. Which was originally an auto on the column. Bench seat car. Now im changing it to an auto floor console shift. With bucket seats. I bought the whole top of a trans tunnel ( with brackets welded in place ) from an auto floor console car. I thoght this would help with locating the exact placement. But stil not sure how cut the brackets out and place them exactly. Any suggestions ?

20170205_193744.jpg 20170205_193809.jpg
 
A little late, but IMHO they rattle, are misaligned mostly, and collect junk...as mine does. Sell it and try to recoup some of the small fortune already invested. Less can be more.
 
I have a similar issue. I have a 68 b body. Which was originally an auto on the column. Bench seat car. Now im changing it to an auto floor console shift. With bucket seats. I bought the whole top of a trans tunnel ( with brackets welded in place ) from an auto floor console car. I thoght this would help with locating the exact placement. But stil not sure how cut the brackets out and place them exactly. Any suggestions ?

View attachment 393691 View attachment 393693
If you have harbor freight near you they sell a spot weld cutter works great. I gave the measurements from the rear pan forward. You could just leave it like you have it and drill a small hole in the new pan part. Then use a small punch or scribe and make a small spot on your OE pan for placement. That will put the center of your bracket on the right spot. Then use a spot weld cutter to drill out the factory spot welds on the old pan and seperate it. Then just line up your original hole with the punch mark.. Screw it in or if you have a welder fill weld the spot welds onto your OE pan.
 
If you have harbor freight near you they sell a spot weld cutter works great. I gave the measurements from the rear pan forward. You could just leave it like you have it and drill a small hole in the new pan part. Then use a small punch or scribe and make a small spot on your OE pan for placement. That will put the center of your bracket on the right spot. Then use a spot weld cutter to drill out the factory spot welds on the old pan and seperate it. Then just line up your original hole with the punch mark.. Screw it in or if you have a welder fill weld the spot welds onto your OE pan.
There are no spot welds on these brackets. I can see welding wire remnants. But thanks for the spotter hole idea.
 
This diagram has been very helpful to me. I am installing an auto trans console shift in my car. I have the main shaft and boot. And the lower shift rod. I still need the swivel assembly, the trans mounted torque bracket, and upper rod. I've found companies with it all. Except for the swivel. Anyone have any or all of this for sale ?
 
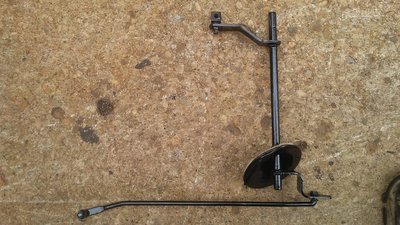
I"m not certain i have the correct part here. The top seems different than the drawing.

20170521_124542.jpg
 
This is definitely the wrong part. Can anyone use it ? It seems now i need everything.
 
Auto Transport Service
Back
Top