• When you click on links to various merchants on this site and make a purchase, this can result in this site earning a commission. Affiliate programs and affiliations include, but are not limited to, the eBay Partner Network.

Custom or home made tools? Lets see them!

Kern Dog

Life is full of turns. Build your car to handle.
FBBO Gold Member
Local time
10:47 AM
Joined
Apr 13, 2012
Messages
39,714
Reaction score
146,506
Location
Granite Bay CA
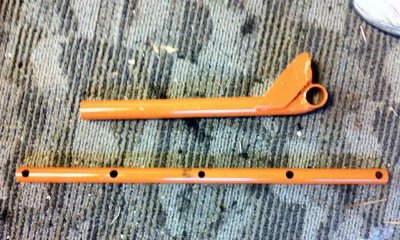
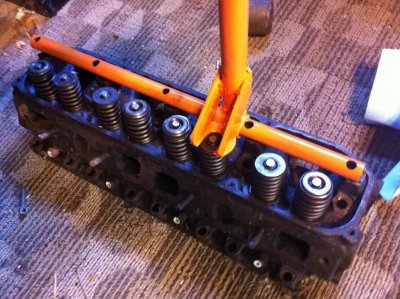
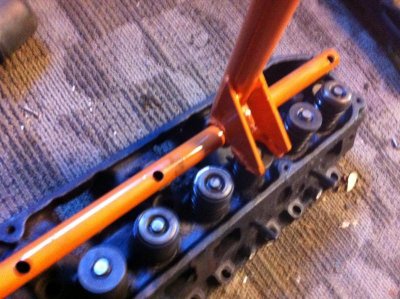
I'm doing a cam swap in the 440/493 in the Charger. This will include changing the valvesprings. I wanted a PowerMaster valve spring compressor, but Summit didn't expect to have them for 2 weeks. I figured I'd try to make my own.


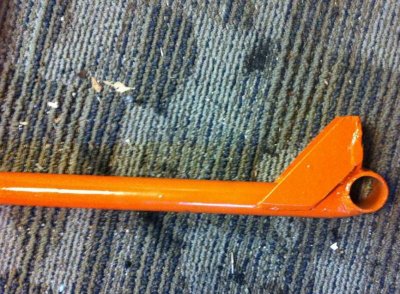
I made the loop narrow enough for this to work on both big blocks and small. Please forgive the sloppy welds!
Materials cost: About $5. The Powermaster tool is over $100. SCORE!

- - - Updated - - -

I wanted to give the tool a high visibilty color. It didn't occur to me that it turned out Harbor Freight orange...
Uuuuugh!
IMG_0449.jpg IMG_0443.jpg IMG_0446.jpg IMG_0447.jpg
 
Neccessity is the mother of inventions....good job!!!
 
Yeah, good job on the spring compressor.

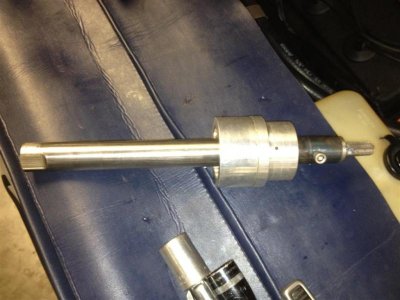
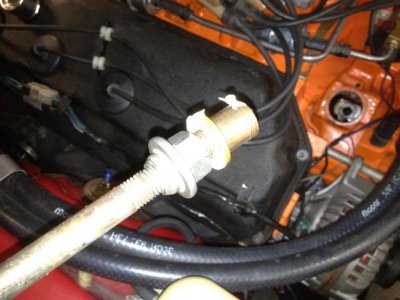
I had to change the distributor bushing in my hemi and make a tool to remove it. The long bar is and old cluster gear shaft that became my tap wrench and I used a slide hammer to remove the bushing. It worked slicker than snot.

Distributor bushing removal tool 002 (Large).jpgDistributor bushing removal tool 001 (Large).jpg

- - - Updated - - -

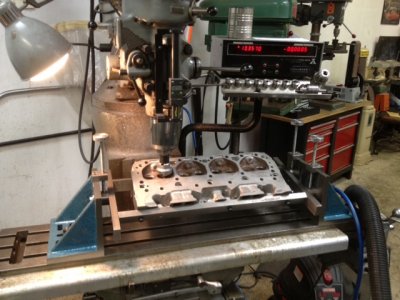
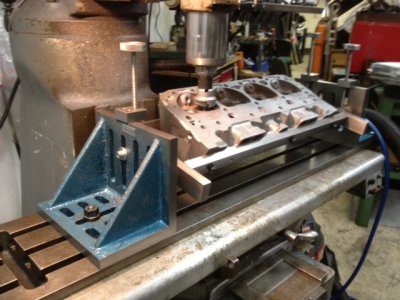
Then a buddy needed some major head work on his SBC marine heads so I made a holding fixture that also allows easy leveling adjustment. It will also work on many other heads if I drill the proper bolt pattern on the long bars. I've been wanting to do this anyway and this was a good excuse to come up with a fixture for my mill. Worked great!

Head fixture2.JPGHead fixture1.JPG
 
I enjoy the challenge of making a tool or jig rather than buying one.
 
Very cool, I also have a few home made tools, adjustable pushrod, solid lifter, oil primer, power steering pulley puller, rotisserie, engine stand (can run the motor) and several metal fab tools. Most are lent out the moment to a friend.
 
Made myself a Piston Stop for finding TDC with the heads on. Things you will need:

Long reach spark plug

3/8 x 16 x 2 1/4 bolt

Hack saw

5/16 drill bit

3/8 x 16 tap

20160521_124147.jpg


Cut the shoulder that's holding the porcelain all the way around. Don't saw straight through. Turn the plug as you go, stopping when you hit the porcelain. Tap around the hex on the plug to release the glue that's holding it in. Cut off the ground strap and tap the electrode and porcelain out. Also remove the sealing ring on the threads.

Useing a 5/16 drill bit, drill through the center. The inside diameter is already 5/16 but there is a shoulder halfway down. Follow up with a 3/8 x 16 thread tap.
Use a 2 1/4 bolt with at least 1 1/4 of thread.

20160521_124946.jpg


That's all there is to it

20160521_124236.jpg


To use the stop:

Remove all the spark plugs in the engine.

Find the piston top, by turning the crank by hand, useing a wire, or what I like to use, a plastic wire tie, in the #1 plug hole. Try to find the TDC by hand first before inserting the tool. Then back if off just a little. Then insert the tool with the bolt backed off. Run the bolt in until you feel it just touch the piston. Make a mark on the damper.

20160521_124327.jpg


Now rotate the crank in the opposite direction until you feel it touch the stop. Go slow and let the compression bleed off. When the piston contacts the stop, make a mark on the damper.

20160521_124512.jpg


Half the distance between the marks is your TDC.

Fine tuning where you set the bolt, can narrow the distance between your marks. A little practice and patience will get you good results. Great for checking your dampner's accuracy.
 
Auto Transport Service
Back
Top