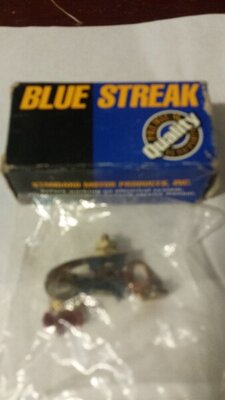
old school, get a points file out or some emery paper. get Points gap dialed in with dwell meter.
some good information.....
by 440roadrunner FBBO
1--voltage function. Useful, to limits of the meter's accuracy, for checking charging voltage, and troubleshooting ignition problems
2--Points resistance. This is important, different meters use different procedures, but this checks how much resistance IE "how dirty" the points contacts are
3--Dwell. The main function. This is how you should adjust breaker gap, NOT with a feeler gauge.
4--Tach. Useful for adjusting idle mixture and speed.
SO a quick review of "how stuff works."
The coil receives power "in series" -- from the ignition switch -- through the ballast resistor -- through the coil -- to the points -- closed to ground.
Current flows, and builds up a magnetic field in the coil core
The distributor rotates, the points open --- and current stops flowing. NOW the magnetic field in the coil's core COLLAPSES and INDUCES voltage in the secondary windings of the coil, sending a huge jolt up through the coil tower connection. AT the same time, this collapsing field CHARGES UP the condenser, and at some point, just like a ball rolling down one side of a canyon and back up the other, STOPS. At this point the condenser is CHARGED, and the voltage in the condenser "wants' to get out, so this charge FLOWS through the coil primary in the opposite direction, AGAIN building up a magnetic field in the coil, and DIScharging the condenser. All this instant in time, the points are still OPEN.
This charge/ discharge is known as RINGING and is ESSENTIAL for a good hot spark IF YOU REMOVE the condenser, most engines will not start or run. A bad condenser, obviously, can cause the same problem. The condenser might be "weak," or completely bad
So:
1--Important that the distributor is not worn, so that the points open and close properly, wear can do bad things like change timing from 1/2 revolution, etc, or even be bad enough to NOT open and close the points at all for some cylinder(s)
2--Important the condenser is "good." A NEW condenser does NOT guarantee "functionally good."
3--Important the points are decent quality, something, I agree, might be tough to get nowadays.
SETTING points
Once you "get good" at setting points, you never touch a feeler. You can toss them in, adjust them "by eye," and hook up the dwell meter and run the dwell "on the starter." I used to be able to hold the remote starter in one hand with one screwdriver, and the second screwdriver in the other hand, and adjust "on the starter" to get them close.
You can start by first using a CLEAN DRY feeler to "rough" them, then check dwell and adjust from there. You must be sure to LUBE the rubbing block a TINY amount of grease on the APPROACH side of the cam. Be very delicate with the feeler, as it's easy to effectively become a "pry" bar with the feeler and get a false reading.
Then install the cap, start engine, and check the dwell. Adjust by trial and error. You want DWELL to be (single points) on the "28 side" of 28--32, because this is the WIDER gap, and they will WEAR closed, which RETARDS timing.
REcheck dwell (and timing)after 500 miles or so!!!!!
Set timing AFTER DWEL, because points gap affects timing. More gap, lower dwell numbers ADVANCE timing. Larger dwell numbers, less gap, RETARDS timing.
AFTER you have set 1--dwell, 2--timing, then 3-- warm engine up to full temp and set idle speed and idle mixture,
Checking spark. First check the cap and rotor for grease, dirt, moisture, damage, carbon. Use your ohmeter to check the plug wires and the coil wire.
MAKE SURE cranking voltage is OK. Two ways to check
1:---Hook your meter battery positive to ground, crank the engine, and note the reading while cranking, let's say 11V
Next, hook your meter from coil+ to ground, again crank the engine, and note the reading, let's say 10.5 This means you have 1/2 Volt drop from battery to coil
2:---Second method reads the above directly in one test Clip one probe of your meter to coil+, the other probe to battery +. Crank the engine, using the key, and take the reading, let's say----.5V
The above .5 means that in the circuit path from battery -- starter relay -- fuse link -- bulkhead connector -- ignition switch connector -- through the switch -- back out the switch (brown bypass wire) --back out the bulkhead connector -- to coil + side of ballast
--------means you have 1/2 volt drop. This is SUBSTANTIAL and really should be looked into.
In any case, you need MORE than 10V at the coil for starting. If the voltage at the coil is LESS than 10V during "crank" you need to look into this
====================================
"Rig" a test gap from a plug opened up, or you can buy "made" spark testers. Hook to the coil tower using a SOLID CORE wire, NOT a resistor wire
IMPORTANT to check this by cranking the engine USING THE KEY and NOT by jumpering the start relay. That is because the coil resistor (ballast) bypass circuit is in the switch.
You should get a nice, hot, snappy blue spark, at the least 3/8" and typically 1/2"
Once again, poor points resistance or a bad condenser can also cause weak spark AS WELL AS LOW VOLTAGE


