Hello everyone, I'm trying to replace the rubber insulators on the motor mounts without pulling the engine. My car is a 1969 Super Bee, 383 auto, P/S, A/C. The service manual makes it sound like a piece of cake, but I'm finding it to be anything but. The car is on blocks under the tires and I'm on a creeper. I have a shop crane attached to the engine where the carb goes. I removed the long bolt that attaches the rubber insulator to the frame on both sides. When I raise the engine to separate the motor mounts from the frame the front of the car lifts. I don't want to lift the car to high for fear of a sudden release and the chassis drops onto the lifted engine/trans and damages something. Am I missing something? Do I need to unbolt (impossible to get to with the engine in) nuts and bolts that hold the metal motor mount plates to the block? Any advice is greatly appreciated and thank you in advance.
You are using an out of date browser. It may not display this or other websites correctly.
You should upgrade or use an alternative browser.
You should upgrade or use an alternative browser.
Motor mount insulator replacement with engine still in car.
- Thread starter Brian A
- Start date
R413
Well-Known Member
It’s not that easy with power steering.
The nut that holds the rubber mount to the bracket is between the bracket and the engine so the whole thing has to come out on each side.
You take the long bolt out, then you take the 3 bolts off that hold the bracket to the ears on the block.
Then take the whole thing out of the car and swap the rubber mount.
I've done this with power steering and you have to raise the engine up pretty high for the drivers side.
6872n73
Well-Known Member
Just did it this weekend. I actually took the long bolt out of both mounts and loosened the fan shroud. And I lifted the engine probably three to four inches before I can get the mount out and yes it takes a collection of deep well sockets short extensions long extensions and wiggle joints and a large amount of patience. And watch out for any wiring you have on top of your transmission getting pinched on the tunnel pinch weld.
Slap Stick
Well-Known Member
Its so easy I was doing it on Dad's Challenger when I was 15.
I jacked up one side of the engine with a bottle jack.
I jacked up one side of the engine with a bottle jack.
And watch out for any wiring you have on top of your transmission getting pinched on the tunnel pinch weld.[/QUOTE said:Thanks for this advice. I wouldn't have thought about that. I moved it out of the way then lifted the drive train.
I got them out and new ones installed. I loosened the fan shroud and relocated the harness going to the transmission as mentioned above. Then I disconnected the throttle linkage at the transmission and at the carb. I pulled the long bolts out that connect the rubber insulator to the frame. Pulling the alternator gave me a lot of access to the passenger side mount. Once they were out I was able to lift the engine up enough to get the passenger side out. The drivers side was a different story because of the steering box. With both long bolts still out, I lifted the engine just enough to get it suspended then used a bottle jack on the drivers side of the engine near the transmission and raised that side of the engine. By raising just the drivers side of the engine it lifted and rolled the engine up and away from the steering box giving me enough clearance to remove and re-install the new mount assembly.
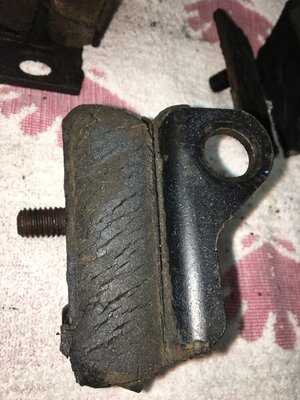
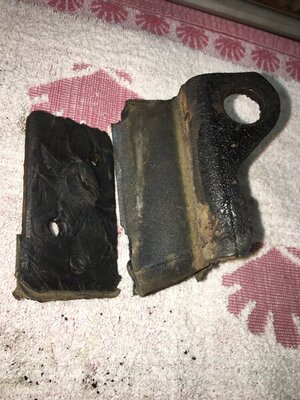
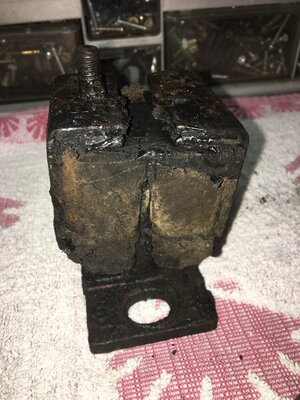
To get the transmission mount out I had to drop the passenger side exhaust to get the cross member removed to replace the trans mount. SO glad that job is done. On a side note: When I was reconnecting the trans linkage at the carb, I noticed the spring that keeps the trans kick down linkage pulled forward was missing. I put a new spring on and my transmission shifts much better now. Here are pictures of the old insulators. No wonder I had a "clunk" noise when I got on it.
Thank you for everyone's quick and experienced response. It was greatly appreciated.
Brian


Similar threads
- Replies
- 4
- Views
- 654
- Replies
- 4
- Views
- 880
- Replies
- 8
- Views
- 721


