Texas charger 73
Well-Known Member
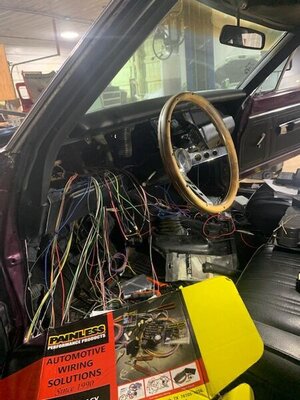
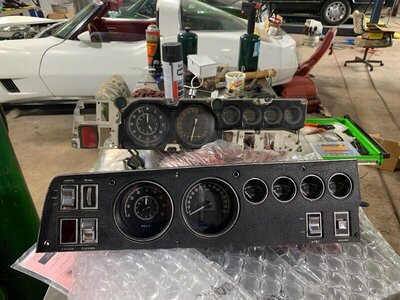
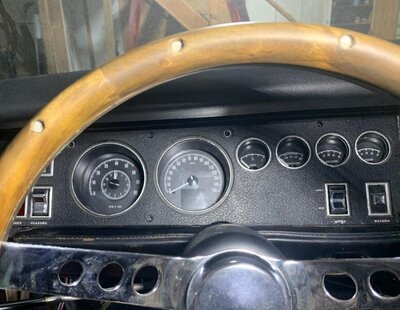
so my next project is the rewire and convert my 73 charger standard dash to a rallye dash... this should be a blast to do.....i despise wiring, but this is something i really want done..


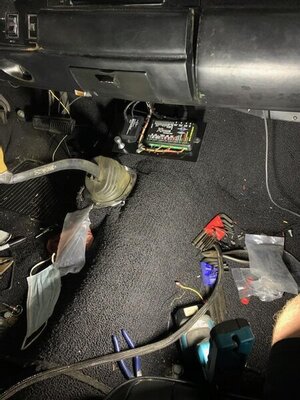
See im gonna pull my whole dash and work over it through the winter... the dash comes out of my 73 pretty easy... i want an American Autowire Harness, but dont have the extra $909 so ill be rebuilding the 72 Harness i have laying on the shelf.I installed a complete harness into my 69 and ungraded from Stock Rallye to a Dakota Digital system its not fun BUT i found the key element is time!! Take your time and label, mark, take pictures of everything! and when it gets frustrating just walk away.. it will be there waiting when you get back.
View attachment 1188644 View attachment 1188645 View attachment 1188646 View attachment 1188647
It's your car, but if it were mine I would try and keep a 1971 suberbee 440 6 pack as original as possible.I just rewired my entire car (71 Charger) with the American Autowire harness. Took me about 70 hours of actual work, so plan accordingly. The harness is very well documented and marked, but there are a bizillion connectors to be crimped. I also took the time to solder every connector because I just don't trust crimps.
The dash harness is amazing as it connects to the under-dash harness with two connectors, not the 563 separate wires and bulbs the factory harness required. This means you can wire the new harness on your bench and check every connection there instead of on your back with you feet in the air as is currently require.
What you should consider though is the bulkhead connection. The American Autowire harness comes with a new and excellent fuse box and a new bulkhead connector that does not mate with the original factory connector. I decided, based on that mostly, to go ahead and rewire the entire car. Good decision on my part.
Follow their instructions completely. Lots of connections from the original wires and colors to the new harness that need to be double and triple checked (and soldered). When I was brave enough to reconnect the battery (after running down a couple of direct shorts) I was amazed that all of the lights, turn signals etc worked!
I am just now starting to wrap things up. Everything works, well, except the engine won't fire. Turns over, just no spark. Working on that now.
So yesterday i recieved my American Autowire Harness... AS it didnt come with Crimp tools for the connectors are there Crimp tool a MUST HAVE? also i see that it changes to a single wire alternator.. does that by pass the amp gauge as well or is it still hooked up with just a stronger wire and fusible link? i might need some help here and there and pick your brainI just rewired my entire car (71 Charger) with the American Autowire harness. Took me about 70 hours of actual work, so plan accordingly. The harness is very well documented and marked, but there are a bizillion connectors to be crimped. I also took the time to solder every connector because I just don't trust crimps.
The dash harness is amazing as it connects to the under-dash harness with two connectors, not the 563 separate wires and bulbs the factory harness required. This means you can wire the new harness on your bench and check every connection there instead of on your back with you feet in the air as is currently require.
What you should consider though is the bulkhead connection. The American Autowire harness comes with a new and excellent fuse box and a new bulkhead connector that does not mate with the original factory connector. I decided, based on that mostly, to go ahead and rewire the entire car. Good decision on my part.
Follow their instructions completely. Lots of connections from the original wires and colors to the new harness that need to be double and triple checked (and soldered). When I was brave enough to reconnect the battery (after running down a couple of direct shorts) I was amazed that all of the lights, turn signals etc worked!
I am just now starting to wrap things up. Everything works, well, except the engine won't fire. Turns over, just no spark. Working on that now.
It's your car, but if it were mine I would try and keep a 1971 suberbee 440 6 pack as original as possible.
Aside from the alternator charge wire I've never had a significant issue with any wiring or bulkhead connections on a Mopar.
But I do live in the North so my stuff doesn't see the extreme heat like many do farther south.
I would invest in the crimp tools American Autowire offers, it's really tough to make a good crimp otherwise. AND, I would highly recommend soldering every connector as well, pain in the butt but well worth it.So yesterday i recieved my American Autowire Harness... AS it didnt come with Crimp tools for the connectors are there Crimp tool a MUST HAVE? also i see that it changes to a single wire alternator.. does that by pass the amp gauge as well or is it still hooked up with just a stronger wire and fusible link? i might need some help here and there and pick your brain
Well, Looks like i will wait till after Christmas to rewire.. took all my money for the wiring.. dont have the extra for the crimp tools at momentI would invest in the crimp tools American Autowire offers, it's really tough to make a good crimp otherwise. AND, I would highly recommend soldering every connector as well, pain in the butt but well worth it.
You will convert to a single-wire alternator and it does eliminate the ammeter from the system. I don't like non-functioning dash components to at some point I will wire the ammeter back in by splitting the charging circuit and running two heavy wires back to the ammeter. I already switched to headlight relays so there isn't really that much current flowing through the ammetrer now.
They provide some extra connectors to practice on, maybe you are better at it than I am. Try doing some crimps with a strong needle-nose plier, see what they look like. If you commit to soldering, the crimp quality is less important.Well, Looks like i will wait till after Christmas to rewire.. took all my money for the wiring.. dont have the extra for the crimp tools at moment
Could be worse!
It's atrocious how some of the plants I go into treat their panels.
View attachment 1193638
I work for a connector manufacturer. Please don’t use pliers to make a crimp. The correct crimp tool with good quality components actually compresses and fuses the individual strands of wire inside of the crimp and is air tight. If you achieve this with your crimps, nothing will ever come loose. Soldering isn’t necessary and since the crimp is air tight, solder won’t flow between wires and terminal. Soldering won’t hurt unless you apply too much to prevent the terminal from going into the connector housing or if you melt the wire insulation. If you want to solder after crimping, the ideal scenario is to adjust the crimp to be looser (we’re talking thousandths of an inch) and then solder - this enables the solder to flow between the strands of wire and the crimp. Adjusting the hand crimp tool is probably not possible though.
Do you have a specific crimper that you would recommend?
I did all the ends on both sides of my bulkhead along with a few random ends and this set ($30ish at Home Depot) worked pretty well for me.In my experience no one crimper does it all or does it all well, I personally have like 4 different crimper that sometimes are used in combination to get a good crimp or one I like.
