Last year I had my '68 Satellite painted and now it's finally in the interior shop. I'm basically just doing a stock restore on the interior, but with a couple of minor custom touches and changing the interior color from white with wood grain dash trim to black and brushed aluminum dash trim.
The interior shop is about 50% done with what I requested. I'll post more photos as things progress and when it's all finished.
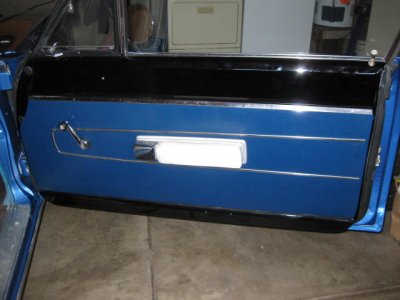
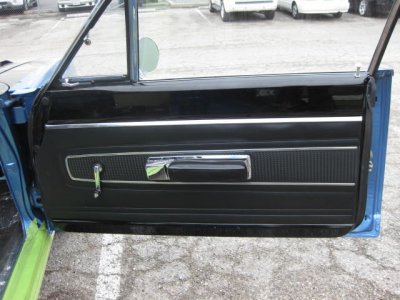
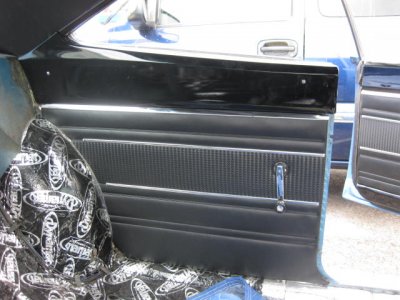
My old door panels were blue, but I was fortunate enough that they had the original chrome. Legendary makes off-the-shelf black door panels with reed grain inserts for '69 B bodies, but none for '68 like mine, so I had them make a custom set. Ordered all new window crank handles, door release and base and had the shop dye my white arm rests black. The shop also polished the original trim. I think they came out awesome.


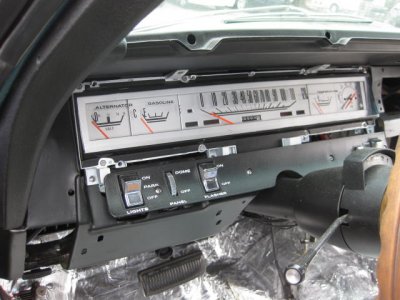
Also sent out my non-ralley dash gauge cluster to Redline Gauge Works. They did an awesome job. I had them convert the face color from black with white letter lens to brushed metal with black letter lens, paint the needles, install new fuel gauge, new calibrated tach, new temp gauge with numeric markings, swap my ammeter for custom voltmeter with numeric markings, swap out old back lights for white LED's inside, and on the rear install the solid state voltage regulator I supplied. Haven't seen it at night yet, but in daylight it looks killer.

- - - Updated - - -
not sure if you can see it, but the clear lens has a 1/2-inch scratch right below the speedo needle. My interior shop pointed it out after the install. I don't remember it being there, so I'm not sure if it was like that when I sent it to Redline, if it jumped out and grew after Redline finished, or if the interior shop created the scratch during install. I have a chrome surround bezel on the way, but am undecided if I want to install it or not. Do you think it will go up far enough to cover the scratch and look good or will the chrome bezel detract from the look of the brushed metal gauge faces?
The interior shop is about 50% done with what I requested. I'll post more photos as things progress and when it's all finished.
My old door panels were blue, but I was fortunate enough that they had the original chrome. Legendary makes off-the-shelf black door panels with reed grain inserts for '69 B bodies, but none for '68 like mine, so I had them make a custom set. Ordered all new window crank handles, door release and base and had the shop dye my white arm rests black. The shop also polished the original trim. I think they came out awesome.


Also sent out my non-ralley dash gauge cluster to Redline Gauge Works. They did an awesome job. I had them convert the face color from black with white letter lens to brushed metal with black letter lens, paint the needles, install new fuel gauge, new calibrated tach, new temp gauge with numeric markings, swap my ammeter for custom voltmeter with numeric markings, swap out old back lights for white LED's inside, and on the rear install the solid state voltage regulator I supplied. Haven't seen it at night yet, but in daylight it looks killer.

- - - Updated - - -
not sure if you can see it, but the clear lens has a 1/2-inch scratch right below the speedo needle. My interior shop pointed it out after the install. I don't remember it being there, so I'm not sure if it was like that when I sent it to Redline, if it jumped out and grew after Redline finished, or if the interior shop created the scratch during install. I have a chrome surround bezel on the way, but am undecided if I want to install it or not. Do you think it will go up far enough to cover the scratch and look good or will the chrome bezel detract from the look of the brushed metal gauge faces?


