• When you click on links to various merchants on this site and make a purchase, this can result in this site earning a commission. Affiliate programs and affiliations include, but are not limited to, the eBay Partner Network.

Rebuilding my trans tomorrow...wish me luck

Donniejr81

Well-Known Member
Local time
9:14 AM
Joined
Aug 22, 2011
Messages
62
Reaction score
8
Location
Sonora, Ky
Tomorrow I'm doing a tear down and rebuild on the 727 out of my Charger. I have the overhaul kit, B&M shift kit (I love their stage 1 RV upgrade), diagrams with torque specs, trans book, ATF, u-joints, trans mount, cleaner, neutral safety switch, shifter bushings, speedo cable, clutch pack tool, 12 pack of beer...have I forgotten anything?
 
good luck Donnie. i would recommend the 12 pack at the end of the day as there are lots of tiny parts to deal with. i did my tranny with the same kit in another car and went the street/strip route. you're gonna like the improvement.
 
Hey Donnie,

I have the tranny out of my car and I'm contemplating doing the rebuild myself too. Which rebuild kit are using?
 
Take pictures on treardown. Count the friction plates and shims. Have some ss lockwire handy to group parts. Draw a map of the ball location in your valve body. Observe and work logically. I resealed and installed new frictions in my 727 last year and its doing fine. Never was inside an automatic before. Good luck!
 
I got my kit from Advance Auto Parts. Its part #KS18. I think its made by ProKing but not sure. Looks to have new frictions, steels, seals, bushings, and gaskets. Not a bad buy for $68 plus tax (I got a discount :headbang:) I also picked up new snap ring pliers today, and my wife is donating a bed sheet to cover my work bench with...only she doesn't know she's donating it yet lol.

- - - Updated - - -

Hey Donnie,

I have the tranny out of my car and I'm contemplating doing the rebuild myself too. Which rebuild kit are using?

The TF727 kit I bought fits 71-up trannys and the kit that fits 70-earlier 727's is I "THINK" part# KS183 but not 100% sure. I do know there are some subtle differences inside...wavy vs flat washers...stuff like that. The B&M shift kit is different too. Mine is #10225 and I think the 10226 is for the pre-70 727's.
 
Actually the 71 up trans has some major differences. Reaction shaft support and forward drum are different. The clutches in the forward drum are bigger.
 
Enjoy, I've rebuilt all three brands and liked the 727 best for ease of assembly. I don't know about "counting plates" the manual clearly list the clearances for all the different setups (Hemi, 440, etc) checked with a feeler gauge? I also used the B&M shift kit but used a Hughes rebuild kit but mostly because mine was so badly worn that I needed everything including the thrust washers and bushings. Don't know what kind of power your putting out but heard the sprags were the weak link so I went ahead and installed a bolt in sprag while I was at it. Good luck
 
Ooohhh...ok gotcha. I knew there were some differences in the kits, but didn't know it was THAT much difference in the trannys themselves. That's good to know.
 
more info

need a 1/4" torque wrench for band adjustment. be carefull and slow as you teardown. as 747 said a good feeler gauge set is necessary. a place to lay every part is good. nothing in bucket or box. every part has a place. there is a lot more to a total rebuild than just changing parts. good clean air source and regulator for setting servos and pressure. You can never be clean enough. I even wear a hat or sometimes a hairnet to prevent hair contamination. some rags loose fibers that can get into or on sharp edges. and the biggest no-no of all, do not get close to oil dry no matter how much mess you make. a good manual and you can probably do good.
pt in tennessee
 
Ok, the rebuild is well under way. Surprisingly, it doesn't look too bad inside at all. It was probably a low mileage unit or even a reman not long before it was put in my Charger about 30 or so years ago. There's almost no wear on the bands, clutches, or anything. Just full of damn dead bugs...go figure.

Couldn't find the Skynyrd to play, so it's Johnny Cash and Old Crow Medicine Show. Its getting the job done. Oh and lots of Gatorade, it's a tad warm today.
 
A little something else for you to do for reassurance, once you get the tranny buttoned up minus the valve body you can do an air test on the bands and clutch pistons by applying air to the correct ports (any good tranny book should show how to do this). Doing this will allow you to see that all of the bands and clutches are working, you'll find any binding or leak issues before it's in the car. If your book doesn't show this I can post a pic from my book, Enjoy.
 
A pic of that page would be great. Mine only shows one port to pressure test, then just says apply pressure to the others to assure proper function as well. Thanks.

A little something else for you to do for reassurance, once you get the tranny buttoned up minus the valve body you can do an air test on the bands and clutch pistons by applying air to the correct ports (any good tranny book should show how to do this). Doing this will allow you to see that all of the bands and clutches are working, you'll find any binding or leak issues before it's in the car. If your book doesn't show this I can post a pic from my book, Enjoy.
 
http://i542.photobucket.com/albums/gg408/dodgeboy8/AirTest727904.jpg

- - - Updated - - -

Hope this pic helps, found it online but it's the exact pic in my manual. A rubber tipped air nozzle works best because the less air leaking around your nozzle means the better you'll be able to hear other leaks. Just apply pressure to one port at a time and watch or listen for movement, if applying enough pressure you'll hear a thunk as the clutch engages. A really good way to test for leaks is to put tranny oil in the ports first then apply pressure while the tranny is right side up where the oil will drip out making it easy to spot (a bit of a pain). Pretty simple
 
Assembly lube

Assembly lube, front pump/converter bushing, tailshaft bushing, paint can, etc.

You can put the pump assembly upside down on top of an old open paint can, and then put the clutch packs on, and pressure test the clutch packs using the holes in the pump. For the front clutches, I just use a dial indicator to verify clutch clearance when pressure testing. For the rear clutch, I just use a feeler gauge. If you try to use the dial indicator on the rear when pressure testing, the whole clutch tries to raise up.
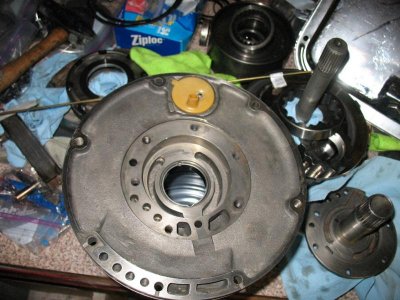
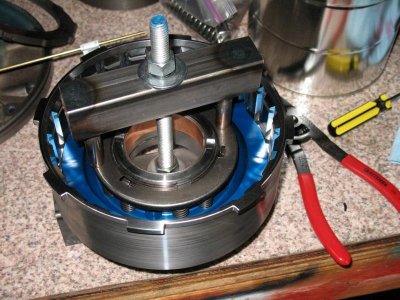
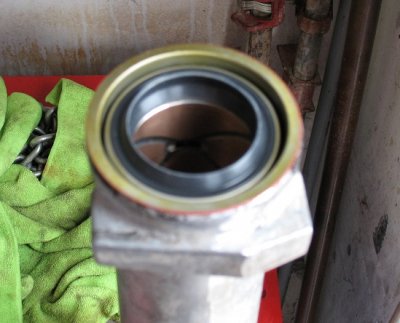
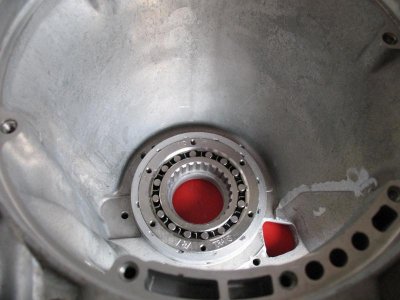
A good way to stake the front pump bushing is to use the round shaft of a phillips screwdriver. A few pics using my home made clutch compressor. For the trans experts, is the rear bushing installed correctly with the hole to the top of the tailshaft housing?

Clutchs.jpgBushing.jpgCompressor.jpgrearBushing.jpgSuperSprag.jpg
 
The hole in the tailshaft bushing should be down. There is a groove in the case where the bushing goes. The hole needs to line up with that groove so oil can get in there and lubricate it
 
Assembly lube, front pump/converter bushing, tailshaft bushing, paint can, etc.

You can put the pump assembly upside down on top of an old open paint can, and then put the clutch packs on, and pressure test the clutch packs using the holes in the pump. For the front clutches, I just use a dial indicator to verify clutch clearance when pressure testing. For the rear clutch, I just use a feeler gauge. If you try to use the dial indicator on the rear when pressure testing, the whole clutch tries to raise up.
A good way to stake the front pump bushing is to use the round shaft of a phillips screwdriver. A few pics using my home made clutch compressor. For the trans experts, is the rear bushing installed correctly with the hole to the top of the tailshaft housing?

View attachment 194696View attachment 194697View attachment 194698View attachment 194699View attachment 194700

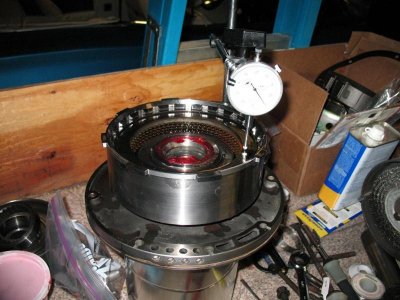
I'm surprised that compressor worked out for you, I did something very similar only with a press but as soon as I started compressing the spring the spring retainer started to bend. I ended up making something that covered a much larger area so it wouldn't bend the retainer.

- - - Updated - - -

The hole in the tailshaft bushing should be down. There is a groove in the case where the bushing goes. The hole needs to line up with that groove so oil can get in there and lubricate it

I remember doing what Hemi Rebel is referring to, wouldn't be a good idea to not have them lined up.
 
Thanks for the pics. Huge help. I was second guessing my work, but now I'll know for sure. This has been a re-learning experience. It's been about 13 or so years since I've done more than a fluid change on a trans.
 
Auto Transport Service
Back
Top