• When you click on links to various merchants on this site and make a purchase, this can result in this site earning a commission. Affiliate programs and affiliations include, but are not limited to, the eBay Partner Network.

Restoring a washer reservoir

patrick66

Well-Known Member
Local time
4:28 PM
Joined
Aug 20, 2014
Messages
4,456
Reaction score
6,838
Location
OK
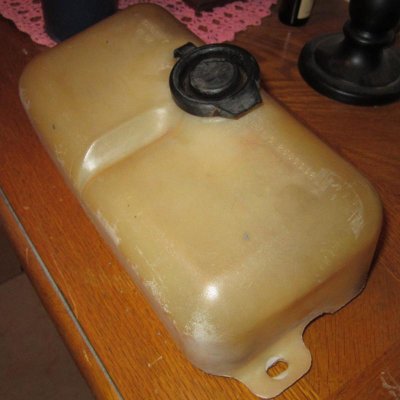
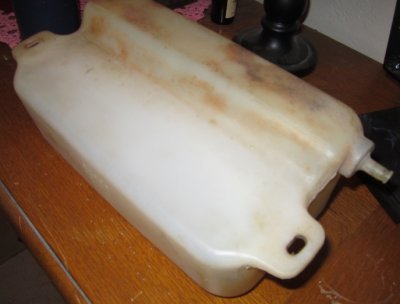
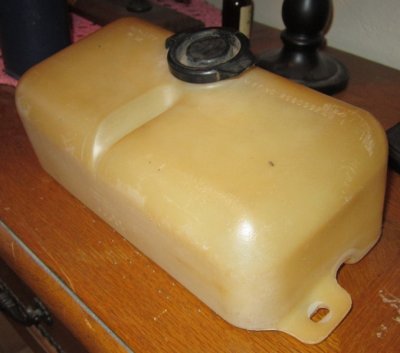
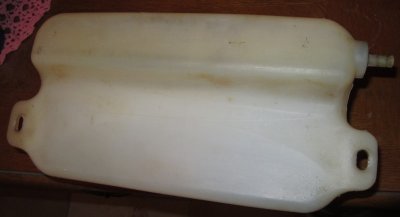
I was looking for a couple of parts from my boxes of '66 Coronet-only bits, and I found a washer reservoir ('66-only!) wrapped at the bottom! I had forgotten completely about this! Years ago, my original cracked so bad that it became unusable. I sourced a '67 - '70 reservoir new from Chrysler (this was 1995), along with the later washer pump, and installed it. Recently, that replacement pump went out, so I was looking for another identical pump I had when I ran across this '66 reservoir, sitting dirty and semi-forgotten at the bottom of the box. I was pretty pumped about finding it, as it and the working original pump are going back in the Coronet!

A couple of pics of the '66 bottle below...Anyone have a good idea about cleaning this to the point of getting rid of the black marks on the outside? I took some dishwashing liquid and a dish brush, and scrubbed what I could off the part. I've tossed around using bleach, but I really am unsure about what to use on this 50-year-old part without harming it, or making it brittle as a result...Ideas???
 

Attachments

  • IMG_0607.JPG
    IMG_0607.JPG
    90.4 KB · Views: 511
  • IMG_0608.jpg
    IMG_0608.jpg
    55.9 KB · Views: 475
  • IMG_0609.JPG
    IMG_0609.JPG
    81.8 KB · Views: 484
  • IMG_0610.JPG
    IMG_0610.JPG
    69.2 KB · Views: 470
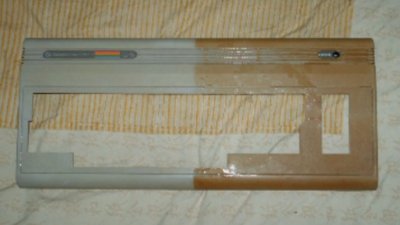
One thing that works on taking the yellow off certain plastics - such as computers - is to soak the part in peroxide with a little bit of oxyclean added to it. If you want to make a gel, include cornstarch until it's thick enough.

This is what it does to old computer parts:
retrobright yellow removal.jpg

Search for 'retrobright' to learn more of this process.
 
Patrick
I cleaned up my rad overflow bottle(basically same plastic) ,but quite discoloured and dirty after 40 years. Used a small brush and all purpose cleaner from the dollar store to get most of the grime off. The cleaner didnt do much to bring it back to like new colour, so once dry, gave it a fine mist with Krylon for Plastic white spray paint. It is now almost new looking, and the texture of the plastic remains visible.
 
Interesting - I'll have to try that first method on another bottle I have that is cracked (C-body). Thanks for the tips, guys!
 
I've had good results using hand cleaner and a brush.
 
Magic eraser and a little bit of dawn dish soap will get rid of the black marks. As always, test out on an inconspicuous area first.
 
I used the magic eraser and some dish soap, since I had that at-hand. It really cleaned the bottle up nicely, without any damage at all! Plus, it matches the overall finish of everything else under the hood now, in terms of it "belonging" there and not sticking out like a sore thumb like a new bottle would. I'm plenty happy with the results! It's going on the car this weekend - it's too damn cold to be out in an unheated shop to do much of anything resembling work!
 

Attachments

  • IMG_0624.JPG
    IMG_0624.JPG
    100.3 KB · Views: 208
  • IMG_0625.JPG
    IMG_0625.JPG
    87 KB · Views: 191
  • IMG_0626.JPG
    IMG_0626.JPG
    58.9 KB · Views: 198
  • IMG_0627.JPG
    IMG_0627.JPG
    61.6 KB · Views: 204
Very happy to see that worked out for you.

I have the problem with my coolant bottle not matching my new washer bottle, but nobody repops the coolant bottle I need so it is what it is.
 
Auto Transport Service
Back
Top