You are using an out of date browser. It may not display this or other websites correctly.
You should upgrade or use an alternative browser.
You should upgrade or use an alternative browser.
1966 Dodge Coronet 2 door Sedan WE 21
- Thread starter Rodney
- Start date
Rodney
Well-Known Member
Coming right along Rodney, did you paint it the original WW1 Spinnaker White?
yes I did.
the urethane single stage which is PPG Omni is what I used under the hood, floor trunk and when I get to it the underside of the floors. The Omni matched pretty much right on.
The Lacquer is not as good a match of course since that it the color that really matters to me!. it is darker and doesn't have the yellow oxide look to it. I wasn't planning on blending into the OEM paint on the deck lid or hood but I may do that. OR mix a little Omni and blend the tops of the fenders and 1/4's will see later on.
Right now I found a problem with my engine which had only a couple hundred mile on it before parking and neglecting the car for to many years. I have a flat camshaft! it was a repro mopar 375 hp now it is dead. and not much $$ to fix it?
I hate to do it but am looking at this one from Summit ** or this one
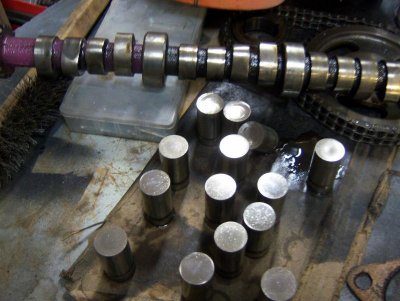
probably not a good plan but may give it one of em try until I get more funds? right now I just need something to make it run so I can put it back together and finish the body and paint.
kb67mopar
Well-Known Member
I'm not the guy to answer your cam shaft dilemma but i will say make sure you clean out the engine really well. Pull the oil pan and clean out any metal flakes you have in there to avoid bearing damage. If you don't want to pull the pan I'd dump a few quarts of diesel through there an let it drain all out into a big pan....
Rodney
Well-Known Member
Flat camshaft
yep already a done deal I will also pull the oil pump and inspect and clean it up.
I also removed # 4 piston just to check that no material was in-beaded in the bearings everything there is good to go.
after talking with my machinist he reminded me that when I assembled the engine 8 or 9 years ago was about the time the Zinc was being removed from the oils and I don't remember if I added a zinc additive or used break in oil or what I did back then. I'd guess I just used Valvoline and ran it. This time it well be getting the Zinc for sure, I already bought it and will have the cam { I chose the smaller one} on Friday so should be back to where I was by Monday if all goes well and I don't freeze it was 4 degrees here this AM.
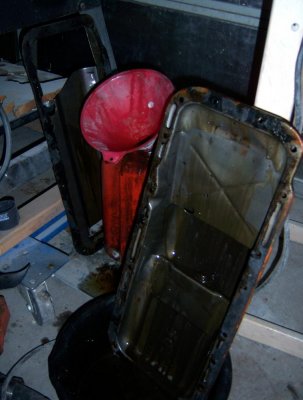
I was able to get the pan off after removing the center link and without raising the engine. that was handy.
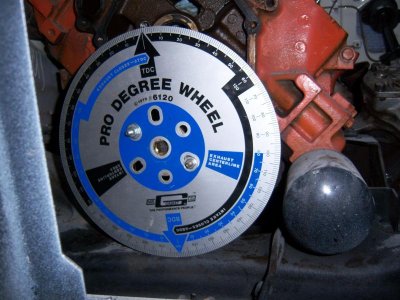
And my small degree wheel fits with the engine bolted in.
I'm not the guy to answer your cam shaft dilemma but i will say make sure you clean out the engine really well. Pull the oil pan and clean out any metal flakes you have in there to avoid bearing damage. If you don't want to pull the pan I'd dump a few quarts of diesel through there an let it drain all out into a big pan....
yep already a done deal I will also pull the oil pump and inspect and clean it up.
I also removed # 4 piston just to check that no material was in-beaded in the bearings everything there is good to go.
after talking with my machinist he reminded me that when I assembled the engine 8 or 9 years ago was about the time the Zinc was being removed from the oils and I don't remember if I added a zinc additive or used break in oil or what I did back then. I'd guess I just used Valvoline and ran it. This time it well be getting the Zinc for sure, I already bought it and will have the cam { I chose the smaller one} on Friday so should be back to where I was by Monday if all goes well and I don't freeze it was 4 degrees here this AM.

I was able to get the pan off after removing the center link and without raising the engine. that was handy.
And my small degree wheel fits with the engine bolted in.

Rodney
Well-Known Member
Calculating compression ratio
While the engine is tore down I did the calculations for the true compression for the 400 engine. I didn't do this when assembling the engine several years ago.
the 516 heads with new valves came to 80 cc's.
my tools for measuring may not be as accurate as a lab but get me pretty close. I've verified the cc's from the syringe with other measuring containers.

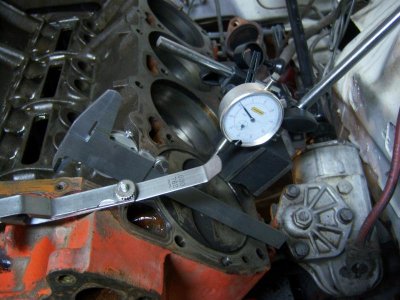
deck clearance of .030 was measured at TDC after the degree wheel was installed and calibrated.
steel shim head gasket thickness .020 after crush
Keith black KB240 piston valve relief 8 cc's
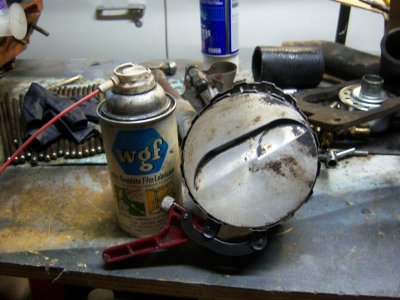
with cylinder and head gasket bore figured and using an on line Calculator came to 9.299 to 1
While the engine is tore down I did the calculations for the true compression for the 400 engine. I didn't do this when assembling the engine several years ago.
the 516 heads with new valves came to 80 cc's.
my tools for measuring may not be as accurate as a lab but get me pretty close. I've verified the cc's from the syringe with other measuring containers.

deck clearance of .030 was measured at TDC after the degree wheel was installed and calibrated.

steel shim head gasket thickness .020 after crush
Keith black KB240 piston valve relief 8 cc's

with cylinder and head gasket bore figured and using an on line Calculator came to 9.299 to 1
Rodney
Well-Known Member
spotting in a scratch
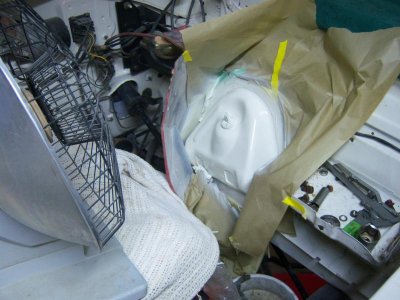
When I was installing the master cylinder I dropped it on the shock tower and of course didn't lay any protection down first in case if fell. I usually have a piece of cardboard or a piece of padded upholstery material handy to use but of course not this time :{ {some times my hands don't work to good thanks to sever arthritis}
since the head was off it was an easy repair, I cleaned the panel with wax and grease remover sanded with 400 wet, masked, cleaned again and painted it.
Good as new and a reminder to protect that fresh paint when working around it.
When re-coating urethane paint I make sure it is dry by giving it a couple days dry time and make sure it gets heated to 70 degrees for several hours so there is not reaction between the two applications of paint.

Rodney
Well-Known Member
new cam installed and degreed to 106 c/l
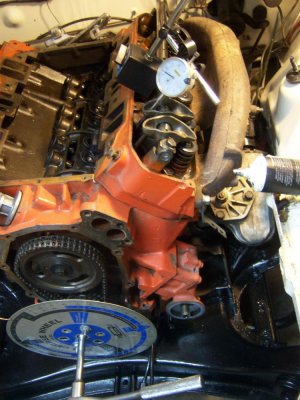
got the engine just about back together the cam went in straight up @ 106 I can live with that.
installing the fuel tank and new vent hose was a real PITA. First thing the 3/4 inch vent tube came right off when I was pushing the hose on it.
I removed the tank cleaned the solder off and welded it in the tank. since I had the option I stuck the tube in the tank a little further to make the straight piece of 3/4 inch fuel hose make the 90 easier to the filler neck. I couldn't find any 3/4 inch fuel grade 90 degree bend hose but NAPA had the hose @ 10.00 a foot it only took a foot so pretty good deal.
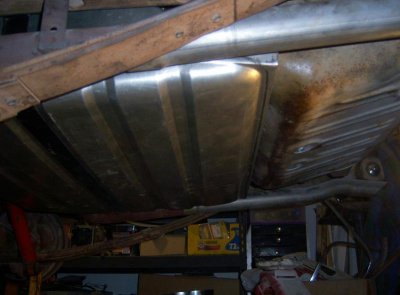
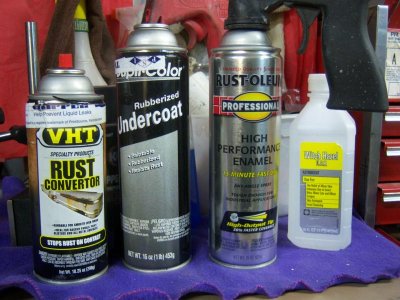
I am using VHT rust converter in a spray now good stuff when you need it and much easier to apply than the liquid for doing under the body. It has a nice spray that reaches into the hard to reach areas. I am cleaning the areas with a scotch brite applying the converter and let it dry well. then under coat as I go. once I get the car as a driver I will take it back to the race car shop which has a lift and paint the rest of the trunk and underside of the floor using the lift.
got the engine just about back together the cam went in straight up @ 106 I can live with that.

installing the fuel tank and new vent hose was a real PITA. First thing the 3/4 inch vent tube came right off when I was pushing the hose on it.
I removed the tank cleaned the solder off and welded it in the tank. since I had the option I stuck the tube in the tank a little further to make the straight piece of 3/4 inch fuel hose make the 90 easier to the filler neck. I couldn't find any 3/4 inch fuel grade 90 degree bend hose but NAPA had the hose @ 10.00 a foot it only took a foot so pretty good deal.

I am using VHT rust converter in a spray now good stuff when you need it and much easier to apply than the liquid for doing under the body. It has a nice spray that reaches into the hard to reach areas. I am cleaning the areas with a scotch brite applying the converter and let it dry well. then under coat as I go. once I get the car as a driver I will take it back to the race car shop which has a lift and paint the rest of the trunk and underside of the floor using the lift.

kb67mopar
Well-Known Member
Yeah those fuel tanks can be a real pain in the arse. I had one heck of a time getting my fuel filler in with the new gasket the first time. I also never found the fuel hose (have since found where they are sold) but ended up making the straight stuff work for me as well. the 90 at the filler by the quarter has a slight kink in it but flows enough air to prevent problems during filling.
What exhaust are your running on your car?
What exhaust are your running on your car?
Rodney
Well-Known Member
Yeah those fuel tanks can be a real pain in the arse. I had one heck of a time getting my fuel filler in with the new gasket the first time. I also never found the fuel hose (have since found where they are sold) but ended up making the straight stuff work for me as well. the 90 at the filler by the quarter has a slight kink in it but flows enough air to prevent problems during filling.
What exhaust are your running on your car?
I found some 90 degree elbows at the hardware store to make the bend using a couple short pieces of hose to attach them to the tubing. since I changed the tube to the tank side I didn't need that one but will use one for the other hose going to the filler neck.
I had the exhaust built by a local shop using some flow master type mufflers. after working under the car and checking out the quality of the job I paid for I am not real pleased with the job. Granted there isn't much room between the fuel tank, springs and sub frame rails they could have done a better job.
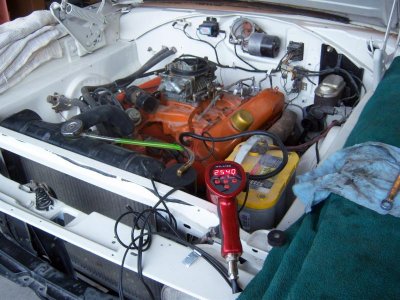
Primed the oil system again and finished putting the feathers on the project and ran the engine @ 2000 -2500 rpm for 20 - 30 minutes. The engine is back to where I was last Monday now back to the body and interior.
I am going to take a break from the 66 once I get to a good stopping point. I have a 1973 Charger coming my way for a new windshield, vinyl top and some other things depending on what the owner wants done. It always turns into more once the owner sees progress on their hot rod. I could use a little vacation from the Coronet and this will give me a change to drive the 66 instead of working on it.
- Local time
- 11:47 AM
- Joined
- Oct 16, 2014
- Messages
- 29,605
- Reaction score
- 73,204
- Location
- Salisbury, Vermont
Rodney you are wailing away on that 66 ! I feel like i'm standing still. In my defense though what is really taking some time is waiting for the DOD to get my army retirement finished so I have some money to spend. Until then all I can do is fart around out there and do small stuff. Wish I could get going on it. Your thread is going to help me out.
Rodney
Well-Known Member
Carter AVS installed
believe me I have been standing still for several years myself. Not to worry things will start to go your way.
After I had a knee replacement then another surgery to fix the new knee and several other surgeries on the other knee, shoulders and hands... Then healing up and after a couple years recouping things are starting to move again as they will for you. There is a lot of busy work a guy can do cleaning, scraping rust removal, organizing and getting a plan for starters that don't cost a lot.
I've been getting a lot of satisfaction using parts that need reconditioned, cleaned up painted and reused rather than whipping out the credit card and paying usually to much for the same thing or worse aftermarket junk. It may take a little more time but I have much more time than $$ these days and the parts have more character and aren't going to the land fill or junk yard
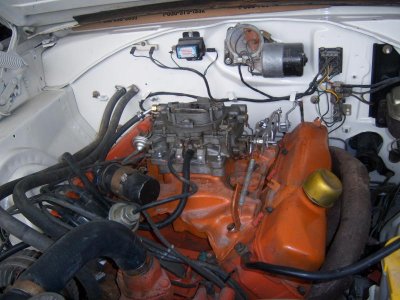
I've had a couple Carter AVS 625 cfm carburetor tucked away for 20 years or so, cleaned them up to see what I had and decided on the earlier 4401 which from what I gather came off a 68 383. It is a nice solid carb and seems to be working fine on the engine. As I usually do when starting a fresh engine I used my Dyno Carb which is proven to work well. After the cam was broke in and all else was looking good I bolted the AVS on and did some more tuning.
now to find the correct cast intake so I won't have to use the adapter between the carb and intake and find a more correct air cleaner for the 66.
Rodney you are wailing away on that 66 ! I feel like i'm standing still. In my defense though what is really taking some time is waiting for the DOD to get my army retirement finished so I have some money to spend. Until then all I can do is fart around out there and do small stuff. Wish I could get going on it. Your thread is going to help me out.
believe me I have been standing still for several years myself. Not to worry things will start to go your way.
After I had a knee replacement then another surgery to fix the new knee and several other surgeries on the other knee, shoulders and hands... Then healing up and after a couple years recouping things are starting to move again as they will for you. There is a lot of busy work a guy can do cleaning, scraping rust removal, organizing and getting a plan for starters that don't cost a lot.
I've been getting a lot of satisfaction using parts that need reconditioned, cleaned up painted and reused rather than whipping out the credit card and paying usually to much for the same thing or worse aftermarket junk. It may take a little more time but I have much more time than $$ these days and the parts have more character and aren't going to the land fill or junk yard
I've had a couple Carter AVS 625 cfm carburetor tucked away for 20 years or so, cleaned them up to see what I had and decided on the earlier 4401 which from what I gather came off a 68 383. It is a nice solid carb and seems to be working fine on the engine. As I usually do when starting a fresh engine I used my Dyno Carb which is proven to work well. After the cam was broke in and all else was looking good I bolted the AVS on and did some more tuning.
now to find the correct cast intake so I won't have to use the adapter between the carb and intake and find a more correct air cleaner for the 66.

Rodney
Well-Known Member
finished the body work primed and painted
Need to finish or at least get to a good stopping point on the Coronet so I can get a Charger in the garage and start work on it.
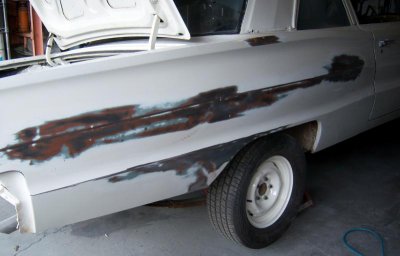
The right side had a few door dings other that that just a scuff, prime, block and paint. Next is to finish the headliner and install the interior.
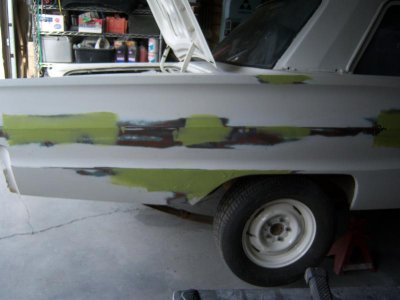
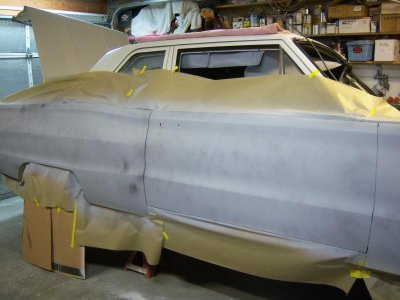
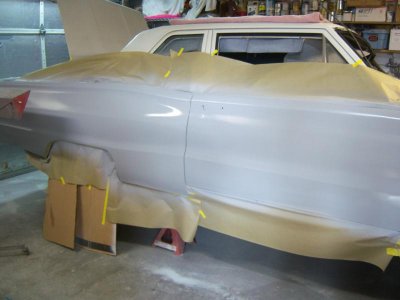
After I finished the Satellite my neighbor wanted his little pick up painted where the paint was pealing so had to take some time and make him happy. {he pretty much wouldn't take no for an answer} We have to take care of our seniors, he is a WW2 vet @ about 85 years old. neat guy.
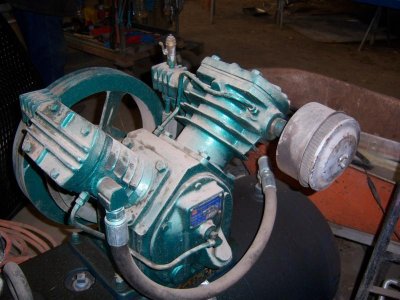
Of course when I was doing his job my small compressor died so it was time to buy a 5 hp motor and get my "Real" compressor up and running. I should have done this years ago, very nice to have 20 CFM to work with.
Need to finish or at least get to a good stopping point on the Coronet so I can get a Charger in the garage and start work on it.
The right side had a few door dings other that that just a scuff, prime, block and paint. Next is to finish the headliner and install the interior.


After I finished the Satellite my neighbor wanted his little pick up painted where the paint was pealing so had to take some time and make him happy. {he pretty much wouldn't take no for an answer} We have to take care of our seniors, he is a WW2 vet @ about 85 years old. neat guy.
Of course when I was doing his job my small compressor died so it was time to buy a 5 hp motor and get my "Real" compressor up and running. I should have done this years ago, very nice to have 20 CFM to work with.

Similar threads
- Replies
- 7
- Views
- 640
- Replies
- 5
- Views
- 631
- Replies
- 36
- Views
- 2K


