Follow along with the video below to see how to install our site as a web app on your home screen.
Note: This feature may not be available in some browsers.
When you click on links to various merchants on this site and make a purchase, this can result in this site earning a commission. Affiliate programs and affiliations include, but are not limited to, the eBay Partner Network.
Engine:
Delstar DAR Acrylic Enamel (1) + Acrylic Enamel Reducer (1) – Roger Gibson
Front and Rear Wheel Wells: Undercoating (Before applying undercoating – fuel tank, brake and fuel lines and rear shocks will be installed) – Resto Ricks
Other parts painted base (LL1) and clear coat: Hood Hinges, Hood Latch, Battery Tray and Support Brackets, Trunk Latch and Striker.
The Charger is going to hot looking in that unique color. Personally I would like some contrasting colors on the engine itself. The engine bay looks hot to. Sweet car!
LL1- cool colour! my 68 charger is a factory LL1 car with white interior however previous owner painted it black, dont see many LL1's out there! nice car!
Carburetor Spring return bracket Crankshaft vibration damper and bolt Crankshaft Balancer Cylinder Heads Engine Block Freeze Plugs Exhaust Manifolds and Heat Riser Valve Dip Stick Handle Flex Plates – mounted to the crankshaft Fly Wheel Fuel Pump Ground Strap at back of engine Heat Shields Heater and By-pass Hose Nipples Intake Manifold and Bolts Intake Manifold Fittings, Gaskets andSeals Intake Manifold Vacuum nipple hole istapped off with masking tape Negative Battery Cable – tape end Oil Fill Cap Oil Pan and Plug Oil Pump PVC PVC Grommet Spark Plugs (Installed and Masked offwith tape) Spark Plug Wire Holders (plastic) –purchase the kit Spark Plug Heat Shields (one on theright side and one on the left side) Throttle (bracket, but not the clamp andnut) and Linkage Brackets Timing Chain and Gear Set Covers Torque Converters – mounted to thecrankshaft Valley Pan and Noise Insulation Package Valve Covers – should have studs on thefour corners Valve Cover Gaskets Valve Cover Wire Holders Valve Cover Grommet Water Pump, Water Pump Housing andThermostat Housing – end is masked off with tape
Undercoating: Prep the wheel wells by first installing the front and rear fender splash guards. After installation, I installed the rear fender splash guard gaskets and front fender gaskets. Next, I installed the front metal plates. Both plates are installed on the outside of the inner fender. Finally, I installed the rubber plates.
The larger rubber plate - I installed on the drivers side - on the outside of the inner fender.
The smaller rubber plate - I installed on the passenger side - on the inside of the inner fender.
I purchased the rubber plates and clips from Don Wolfie. It was pretty cool installing a 48 year old set of rubber plates.
Next on the agenda is installing the rear suspension.
I ran into a major problem with the front disc brake calipers. I did not realize that the calipers had a cover bracket. To solve the problem I purchased (4) 9/16-12 x 3.25 bolts and took them to a machine shop (Suspension #2) to tap (5/16). After tapping the bolt I put on the bracket and secured it with the 5/16 x .50 bolt. I also ran into a problem with the knuckle and lower ball joint. I am not sure why but the bolt was put on backwards when I purchased the car. To solve the problem I purchase (4) 5/8-18 x 2.5 inch bolts, cut new threads through the bolt shoulder and then drill a 1/8 size hole in the end for the cotter pin. Finally after dye and drill, blasting, and bluing the bolt fit perfectly (Suspension #1). Still Learning
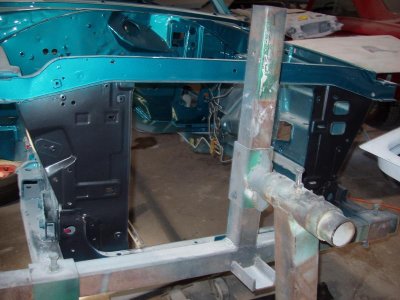
Two steps forward - one step back. Made some progress this week. We installed the radiator, shroud, some fire wall parts, battery box, and vacuum canister. I did make a major mistake that only a junior member would make. I was going through the parts box today and came across a package called torsion bar boot seals. After a few choice four letter words, I came to the realization that I will be taking a step back next week. Still Learning
After installing the torsion bar boot seals, we installed the exhaust, rear tail lights and most of the engine. Next on the list is finishing up the engine, steering column and dash. Still Learning
Yes it is looking great. You'll have to pull those rear bumper brackets off the car & attach them to the bumper first. And don't forget the foam gaskets that slide on top of the bumper bracket attaching bolts.