• When you click on links to various merchants on this site and make a purchase, this can result in this site earning a commission. Affiliate programs and affiliations include, but are not limited to, the eBay Partner Network.

1968 Dodge Charger Nut and Bolt Rotesserie Restoration

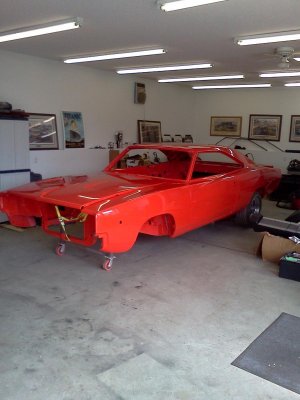
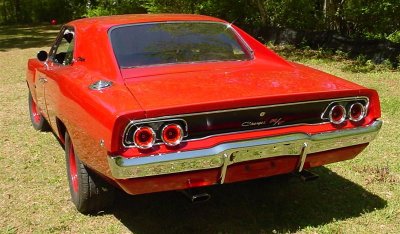
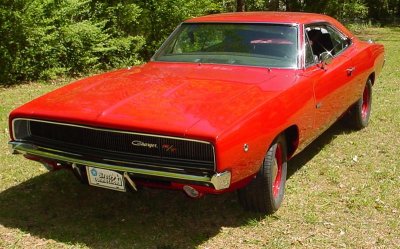
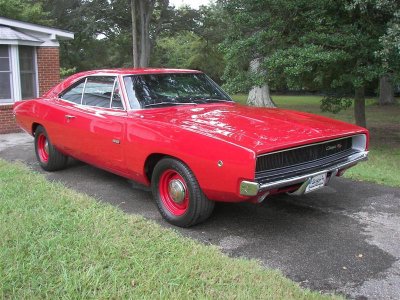
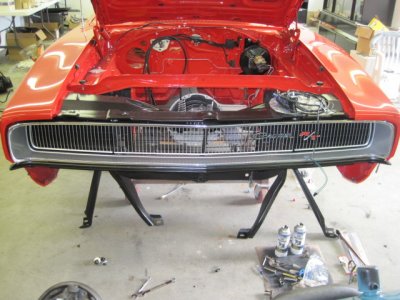
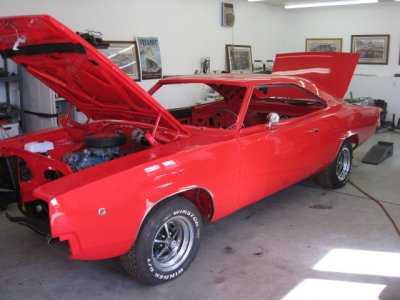
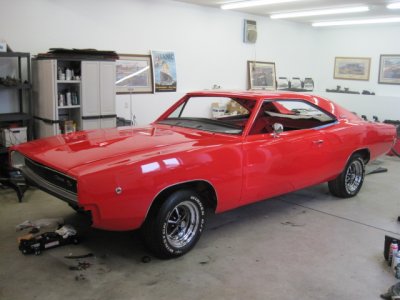
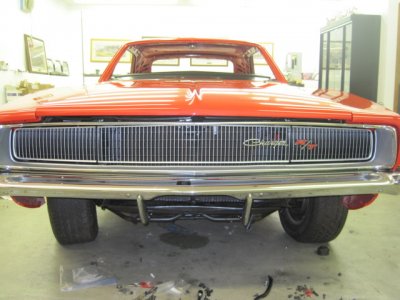
Chargers looking good. Diggin on the rust-free Ramcharger as well. I had an '89 and my father had a '79. I loved that truck, as noted, they literally rusted out around you.
 
It's come a long way and looking good too, keep the updates comming.
 
Looking good my friend will come out real nice once I wish I had one of those machines to turn the car around my car already got painted and everything not the undercarriage(candy paint is expensive) I really wasn't into how they looked painted(undercarriage) but now that I see more and more cars on here painted makes me want to get the bottom painted insead of bed liner. Looks good buddy keep the pics coming were lookin at it check mine out when you get a chance
 
have to catch up on these threads,like how you are coming on your charger and your ramcharger looks good also.
 
nice job in progress,did you run into any bodyflex while on the rottisserie?
 
Charger Finally Home!

It's been quite a while since I have posted any additions to my thread, and much has happened since then. After taking much longer than expected, and a crap load more money, the Charger is finally home. It turned out so much better than I could have expected and I am afraid to touch the damn thing in fear of scratching it. My bodyshop friends went so far beyond the call and did this proud. It is laser straight and every comment I have heard is "amazing". Now comes the daunting task of assembly and many more parts. I have spent over the past year almost obsessively searching, aquiring, and restoring parts to bolt back on when it returned. Now I don't even know where to begin. It is great to have it home and will continue the updates if anyone is still interested.
 

Attachments

  • Charger at home finally.jpg
    Charger at home finally.jpg
    108.8 KB · Views: 1,487
the Charger is finally home. Now comes the daunting task of assembly and many more parts. I have spent over the past year almost obsessively searching, aquiring, and restoring parts to bolt back on when it returned. Now I don't even know where to begin.​


Just for a little encouragement..... Here is my brothers 68 Charger... Finished a year and a half now, after 10 years of restoration......
 

Attachments

  • 68 charger 001 (Medium).jpg
    68 charger 001 (Medium).jpg
    78.4 KB · Views: 1,518
  • 68 charger 002 (Medium).jpg
    68 charger 002 (Medium).jpg
    90.6 KB · Views: 1,461
  • charger in drive front (Medium).jpg
    charger in drive front (Medium).jpg
    118.8 KB · Views: 1,476
Latest updates on the project

It has been a while since I have taken the time to update the latest progress on the car since it has been at home. I never have enough time to sit and post items, but it looks like many of you are watching so i thought I would take a few minutes. Thanks for the kind comments. It has been daunting at times and left the project for about a month and a half this summer but got a wild hair and made huge progress last weekend over labor day. Further than I expected. I managed to marry the K frame and engine and transmission together, by myself, and had my neighbor come over to push under the car. After much head scratching and looking at what I could find as to the best way to get it all underneath without a hoist in my garage. I found a way! I used the engine hoist to lift the car by the front bumper mounts and it worked slick. I was questioned as to whether I tweaked the brackets and they did not move much at all so I don't think so. I'll let everyone know when the bumpers get back from the chrome shop next week. While I would have been happy just getting it moved to next place, we kept going and installed and mounted the whole thing in very short order. It went very smooth and is in its home. A huge feeling of accomplishment that we all spent more time standing back looking at it in the car drinking beer than the time it took to put in.

I had several people ask about the front grille that I had done by Rod Glaser from GSW Restorations. I picked it up from him when he brought it up to Mopars in the Park this summer. WOW! It looks like it came off the shelf at the factory. He is truely an artist and is an expert on the 68 and 69 grilles as well as wood steering wheel restorations. Cost me $1800.00 complete and ready to bolt in no excuses. He was a plesure to deal with and would recommend him to anyone. I kept my other one which is actually in pretty good shape and have several center sections I have been hoarding just in case.

With the marriage complete I will continue working on all of the corrrect markings that were appropriate on this vehicle when it rolled of the assembly line, except for being green. I have spent quite a bit of time researching and studying the correct marks and colors and have had several very good resources for duplicating those items. There were so many possibilities when they were building these that it could be endless.

I will continue to share if your still all out there watching? It is getting fun seeing things coming together. All for today.IMG_1623.JPG

IMG_1624.JPG

IMG_1640.JPG

IMG_1642.JPG

IMG_1646.JPG
 
Here is few more pictures of the grille and steering wheel done by Rod Glaser.
 

Attachments

  • IMG_1632.JPG
    IMG_1632.JPG
    107.6 KB · Views: 1,345
  • IMG_1648.JPG
    IMG_1648.JPG
    132.4 KB · Views: 1,357
  • IMG_1627.JPG
    IMG_1627.JPG
    138.1 KB · Views: 1,374
  • IMG_1626.JPG
    IMG_1626.JPG
    133.2 KB · Views: 1,373
Latest Updates

Here are some of the latest updates if anyone is still watching.

I installed the Variable three speed wiper motor I had done by Passion 4 Mopars. Jerry did an amazing job and had it turned around in just several days. I highly recommend if someone needs theri wiper restored correctly. I had some broken pieces and he made it perfect.

We painted the tail panel in the Organosol Black. I had done much research about this topic with respect to color match, gloss, spray techniques and it turned out about as close to spot on as I have seen. Thanks to all those who have contributed to this topic as it was a huge help.

The car is finally on the ground as you can see and it is nice to be able to move it around if needed. I am hoping to spend the winter getting it to the point of running by no later than spring or sooner. I have several challenges with respect to the air conditioning system that is incomplete, but I have a complete 68 factory system coming and will likely have to go through it all. Anyone have any thoughts on Classic Air as a vendor. I have heard good and bad???

I just received the exhaust system from Gardner Exhaust systems and am excited to get going on installing that. Eric Gardner was a pleasure to deal with and did a outstanding job on a concours exhaust system.
 

Attachments

  • IMG_1727.JPG
    IMG_1727.JPG
    96.3 KB · Views: 1,257
  • IMG_1729.JPG
    IMG_1729.JPG
    104.6 KB · Views: 1,284
  • IMG_1724.JPG
    IMG_1724.JPG
    107.5 KB · Views: 1,290
  • IMG_1723.JPG
    IMG_1723.JPG
    106.3 KB · Views: 1,281
Excellent project. You've done a terrific job. Keep the updates coming.:3gears:
 
Latest updates

Thanks for the requests. I wasn't sure if anyone was still watching. I have been very busy at work getting this thing ready to fire up for the first time in 6 and a half years. I will tell you this! If I knew then what I know now I would have bought one completely done. The amount of money to bring this thing to the level it is at is mind blowing. My wife quit asking! I am quite sure that I am not the only one who has started a project and could not turn back. Thanks to those of you who have answered some of my questions and this site for providing great reference information. I have no Mopar people in my back yard to lean on and have been on my own excpet for some people I can call friends to keep me inspired and motivated to complete this project. I have taken many photos and learned much in wanting to restore this to as close to perfection as the car will allow. With the exception of a color change have kept this true to a factory restoration literally down to the nuts and bolts and even the paint and chalk markings. I am always excited to see restorations that bring back cars to what they were when they rolled off the assmebly line. I hope my thread has been helpful or at least interesting for the many of you who have been watching. I never have enough time to post items to this thread as they progress, but only say the word and I will post piece by piece.
 

Attachments

  • IMG_2094.JPG
    IMG_2094.JPG
    96 KB · Views: 1,160
  • IMG_2097.JPG
    IMG_2097.JPG
    108.2 KB · Views: 1,151
  • IMG_2095.JPG
    IMG_2095.JPG
    116 KB · Views: 1,151
  • IMG_2096.JPG
    IMG_2096.JPG
    106.8 KB · Views: 1,159
  • IMG_2070.JPG
    IMG_2070.JPG
    140.5 KB · Views: 1,165
Beautiful job man...You should be very proud. She turned out awesome. Way to stick with it, do what you needed to do to get to this point and ride it out to the end. Heck of an accomplishment.
 
Auto Transport Service
Back
Top