You are using an out of date browser. It may not display this or other websites correctly.
You should upgrade or use an alternative browser.
You should upgrade or use an alternative browser.
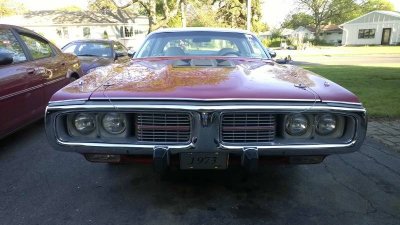
73 charger headlight inserts? trim HOW TOO
- Thread starter mike71ssp
- Start date
WP29440SE
Well-Known Member
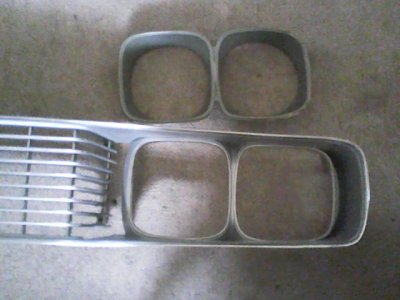
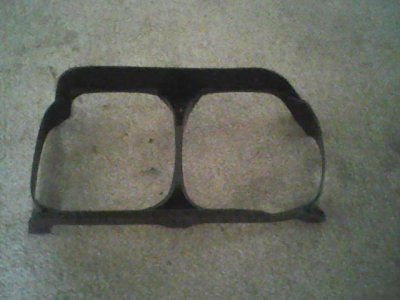
there is a plastic retainer that goes behind them and secures them to the grill that appears to be missing. they fit like **** after years of weather , heat / cold etc. they like to shrink. not much you can do except find a good set.
WP29440SE
Well-Known Member
yep that is it . they are left and right specific. its a tight squeeze when the parts are warped LOL I believe the headlight surrounds are left and right specific as well
grills , everything is new ?
grills , everything is new ?
ODZKing
Well-Known Member
Mike, you found the piece. It fits together and you will be able to tell if it is right or left. The headlamp bezel(s) only go in one way as well and they are the ones that usually shrink. The grille(s) themselves will be marked left or right on the back side they usually say "R" or "L" on them. And if not, the even number is always right.
6 screws, 3 top, 3 bottom. There should be posts on the grille with the little metal caps on them.
If they are older and have hardened up, what I did to get mine back to fitting properly is this.
Boil a very large pot of water. Once it is boiling put the grey pieces, (the bezels) into the water and they will soften quite nicely and be very pliable again. Don't leave them in long or you will never get them back to shape. While the water is boiling get everything ready. Once you dip them you will only have a few seconds to get them in place and put the black section on, so practice first and do one side at a time.
Dip one side in the water for a few seconds, 10-15 then with tongs place it in the grille making sure everything is in it's proper slots. And put the back on. Don't tighten the screws too much but enough to hold it so when it cools, it will stay in place.
PM me if you need any further instruction or pics, let me know.
As you can see, mine came out fine.

mike71ssp
Well-Known Member
HAVING A NEW CAR IN PARTS EVERYWHERE IS CONFUSING. everything is rapped in paper from 1988 so far I'm missing a fuel line. paid $1,400 for car and 11 grand in reciets,,, figure that out..... underbody new/all floor pans, firewall, suspension, all trim new.EVERY NUT BOLT,,, FINISHING IT NOW....
mopar73dge
Well-Known Member
Did the boiling of the water and installing the head light fillers work? wont they just shrink back? any suggestion is appreciated thank you , Mike
- - - Updated - - -
Did the boiling of the water and installing the head light fillers work? wont they just shrink back? any suggestion is appreciated thank you , Mike
- - - Updated - - -
I see yours look like new and fit great, but how would the paint stay on in the hot water? I have to repaint mine they are so old and faded, also the original finish was shiny I have seen untouched original grills on some cars with low miles. I used Totally Auto grill silver for a 69 charger that's all they had that was close.
thank you Mike
- - - Updated - - -
Did the boiling of the water and installing the head light fillers work? wont they just shrink back? any suggestion is appreciated thank you , Mike
- - - Updated - - -
I see yours look like new and fit great, but how would the paint stay on in the hot water? I have to repaint mine they are so old and faded, also the original finish was shiny I have seen untouched original grills on some cars with low miles. I used Totally Auto grill silver for a 69 charger that's all they had that was close.
thank you Mike
Bb70charger500
Well-Known Member
I know the feeling of getting a car in box's .you go threw them once or twice then you start buying parts you already have because you forgot they were there
ODZKing
Well-Known Member
Yes, the water worked on mine but they were already factory gray, I did not have to paint them. I would guess that the paint would not stand up to that.
Once I removed them from the water, I put them either in a mold (I made) or in the grille in their proper place and put the black plastic holder on quickly to secure them. They dried in that position.
The side I made a mild of sorts - see the pictures here: http://www.retrorarities.com/PartsResto/index.html
Similar threads
- Replies
- 2
- Views
- 301
- Replies
- 5
- Views
- 971
- Replies
- 6
- Views
- 233
- Replies
- 2
- Views
- 508
- Replies
- 11
- Views
- 575


