• When you click on links to various merchants on this site and make a purchase, this can result in this site earning a commission. Affiliate programs and affiliations include, but are not limited to, the eBay Partner Network.

Chris' '68 Charger R/T restoration

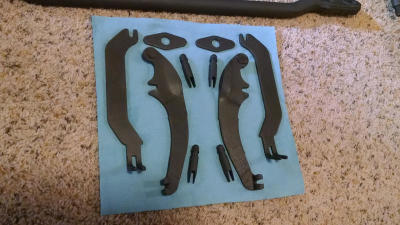
Few more updates. Its been crazy cold here lately....too cold even to work with the heater going in the garage. Ive been continuously working on components in the basement. Before the really cold weather hit, I got my blast cabinet up and running and blasted all of the flaps, brackets and covers for the heater box. Instead of spray painting everything, I decided to zinc phosphate everything. I used the foam kit from DMT and I sent the heater core out to Glen Ray to get restored. Glen Ray did a fantastic job on the heater core and the DMT foam kit was spot on. Very happy with both vendors. I'm really happy with how it turned out being that it was my first one that Ive ever done.

24818788197_1f161d4429_b.jpg
IMG_20171215_193843630 by Chris Campbell, on Flickr

24818784757_ac4cd8f7d5_b.jpg
IMG_20171215_193852338_HDR by Chris Campbell, on Flickr

38978615844_ffaf13a946_b.jpg
IMG_20171215_200945762 by Chris Campbell, on Flickr

24818765237_c13dafd32c_b.jpg
IMG_20171216_115835234_HDR by Chris Campbell, on Flickr

39656395682_e979dd48a9_b.jpg
IMG_20171216_121434152 by Chris Campbell, on Flickr

27909059829_5dc639c6f8_b.jpg
IMG_20171216_124702267 by Chris Campbell, on Flickr

27909057279_9573949cc0_b.jpg
IMG_20171216_130700713 by Chris Campbell, on Flickr

39656384232_6f59b86372_b.jpg
IMG_20171219_194940726 by Chris Campbell, on Flickr

38978544784_bbe7ff34df_b.jpg
IMG_20171220_193958919 by Chris Campbell, on Flickr

24818725167_153b72c910_b.jpg
IMG_20171220_193916420 by Chris Campbell, on Flickr

24818721457_98190f4b93_b.jpg
IMG_20171220_193952538 by Chris Campbell, on Flickr

38978551144_0dbe7f4e88_b.jpg
IMG_20171220_193940763 by Chris Campbell, on Flickr

39687910531_fbce85ae43_b.jpg
IMG_20180109_162939173 by Chris Campbell, on Flickr

38790310835_29ea8b57eb_b.jpg
IMG_20180109_162945696 by Chris Campbell, on Flickr

39656823522_dc0f9c3686_b.jpg
IMG_20180109_163640696 by Chris Campbell, on Flickr

25815395038_c5699232d3_b.jpg
IMG_20180109_170702847 by Chris Campbell, on Flickr

24818676087_36c688cd15_b.jpg
IMG_20180109_170644063 by Chris Campbell, on Flickr

24818723637_09d55decfd_b.jpg
IMG_20171220_193922972 by Chris Campbell, on Flickr

24818719647_c1b2ab1165_b.jpg
IMG_20171220_194016628 by Chris Campbell, on Flickr
 
With the heater box wrapped up, I started messing with the steering box. I disassembled the box and cleaned all of the grease out of it. I'm going to buy a new seal and bearing kit and a resized 24:1 worm gear from Firm Feel. The sector shaft has a pretty gnarly groove in it from the seal. My dad runs a water treatment facility and he told me that there is a company that they use that welds up grooves in their pump shafts. So he is taking the sector shaft to them and they are going to weld the grooves and machine the area back to size. I like this idea better than using a sleeve or counter boring the seal deeper into the box, etc. I turned my blast cabinet air pressure down and lightly blasted the box to freshen it up and then I blasted and phosphate all of the hardware:

38978523584_7333fe1b0d_b.jpg
IMG_20171231_123923558 by Chris Campbell, on Flickr

39687534101_2f2b5ddbdb_b.jpg
IMG_20171231_123902132_HDR by Chris Campbell, on Flickr

27909028309_fd45ee8b27_b.jpg
IMG_20171231_123843950 by Chris Campbell, on Flickr

39687539071_b07bdda774_b.jpg
IMG_20171230_152042873 by Chris Campbell, on Flickr

39656351322_6942aa7be2_b.jpg
IMG_20171231_150701504 by Chris Campbell, on Flickr

39656350022_a7db9fc688_b.jpg
IMG_20171231_150716627 by Chris Campbell, on Flickr

39687524431_4c871f0809_b.jpg
IMG_20171231_150722294 by Chris Campbell, on Flickr

39687521831_deceb1fc67_b.jpg
IMG_20180101_151806273 by Chris Campbell, on Flickr

39656341192_95241fcef2_b.jpg
IMG_20180101_151838844_HDR by Chris Campbell, on Flickr

39687513501_c5760e66ef_b.jpg
IMG_20180101_152226867 by Chris Campbell, on Flickr

27909006759_4a282161f4_b.jpg
IMG_20180101_152218235 by Chris Campbell, on Flickr

39687512591_9054083210_b.jpg
IMG_20180101_174928408 by Chris Campbell, on Flickr

39656322092_2077ea4eb1_b.jpg
IMG_20180101_174947363 by Chris Campbell, on Flickr
 
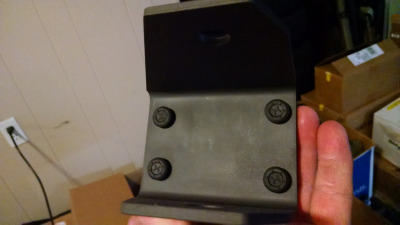
I tore down the buddy seat because the operation of the armrest never seemed right to me. Once I got it disassembled, I noticed that one of the pivot shoulder bolts backed out and was actually pivoting on the threads rather than the shoulder. So this was wearing the bolt out and wearing the pivot areas on the arms. I ended up welding the pivot areas to build up the areas and I will reshape the areas. Since I had the buddy seat in the garage I figured I had better check it in the car to make sure my mounting brackets were welded to the floor correctly:

24468529518_08764d230f_b.jpg
IMG_20171111_133314616 by Chris Campbell, on Flickr

38283690296_e4283fa864_b.jpg
IMG_20171111_133441574 by Chris Campbell, on Flickr

39222410991_1507831ee2_b.jpg
IMG_20171222_131640987 by Chris Campbell, on Flickr

39656360992_ed7df2563c_b.jpg
IMG_20171223_150402385 by Chris Campbell, on Flickr

39656358682_ce53ae9b50_b.jpg
IMG_20171223_150408530 by Chris Campbell, on Flickr

39687550891_cbe4504edc_b.jpg
IMG_20171223_144432193 by Chris Campbell, on Flickr

39656302452_70cfea5905_b.jpg
IMG_20171223_144453986 by Chris Campbell, on Flickr

39656363342_48ba7eec95_b.jpg
IMG_20171223_144509936 by Chris Campbell, on Flickr

24818715327_e9300e0d69_b.jpg
IMG_20171223_144547961 by Chris Campbell, on Flickr
 
I started working on the bumper jack the other day. This jack isn't original to the car, and it took quite a long time to find a correct 68-70 Charger jack that didn't require a second mortgage on the house. This one is in good shape. The date code was 0 E (May of '70). Ive learned that most of the '68 jacks weren't date coded, so I welded up the date code to get rid of it and not having a code at all makes it more correct for the car. I also carefully removed the rivets that hold the jacking mechanism to the bar so I can blast it and paint it better as well as have the bar plated. I will be reusing the rivets so once its back together it will look correct. The jack didn't come with a lug wrench and I finally found a correct longer Charger specific wrench the other day. Its pretty pitted, but I can fix that:

24818672127_5f808c368d_b.jpg
IMG_20180109_191500495 by Chris Campbell, on Flickr

38978499154_84ff6e4bcf_b.jpg
IMG_20180109_191509417 by Chris Campbell, on Flickr

38978493864_f596649450_b.jpg
IMG_20180110_192237966 by Chris Campbell, on Flickr

24818661937_d0eb736fc1_b.jpg
IMG_20180110_192244286 by Chris Campbell, on Flickr

39687476841_796c8f53f4_b.jpg
IMG_20180110_192259975 by Chris Campbell, on Flickr
 
The car is going to have somewhat of a Day 2 feel to it, so some of the engine components aren't going to be stock, however, I don't want to deviate too far from the stock look. I'm going to continue running the Edelbrock CH4B intake manifold and I'm going with a Classic Holley 850 in the gold finish. The problem with the Edelbrock intake is that it moves the ignition coil mounting location. I know that there are brackets out there that move them but I had another wrench thrown into the mix. Im going to be running the factory style unsilenced air cleaner, but Im going to also be running a taller K&N air filter since Im going to be running Stealth heads, larger cam, etc. and want as much air flow as possible. So with the added height of the Edelbrock intake and 3/4" taller air filter than stock, Im running a drop base so the factory air cleaner will clear the hood and hood mat. I did a quick mock up of everything and ended up making my own coil bracket. It doesn't put the coil in the factory location, but with a stock looking coil and stock coil bracket, it will look more correct.

I made a mock up bracket out of poster board, and once I was happy with my dimensions I transferred it to .100" mild steel. I counter sunk the bracket and the bungs in the intake so I could use flat allen screws to hold the bracket down and the coil could sit over top of the bracket screws:

24818834937_b8876fa4ed_b.jpg
IMG_20171121_182103474 by Chris Campbell, on Flickr

24818815397_6d1968cb43_b.jpg
IMG_20171121_182529763 by Chris Campbell, on Flickr

24818828637_41ffc49513_b.jpg
IMG_20171121_182245087 by Chris Campbell, on Flickr

Here you can see where the stock intake bungs puts the coil. It would be fine with a normal air filter base, but with the dropped base it was right into the coil:

24818823437_9ac2d0c2fc_b.jpg
IMG_20171121_182343742 by Chris Campbell, on Flickr

24818818987_40fc93e1fb_b.jpg
IMG_20171121_182401069 by Chris Campbell, on Flickr

38789944335_4389b155c0_b.jpg
IMG_20171121_182419921 by Chris Campbell, on Flickr

With the bracket in place, it moves the coil further away from the air cleaner. This coil is just for mock up, I have a flame thrower coil going on that will be painted black and a green OEM Mopar decal from ECS that will be going on to look stock:

25815477558_c146fb9d99_b.jpg
IMG_20171121_182123304 by Chris Campbell, on Flickr

24818826037_9f8b75d51a_b.jpg
IMG_20171121_182323760 by Chris Campbell, on Flickr

38789937815_bb67e0dc6b_b.jpg
IMG_20171127_163109681 by Chris Campbell, on Flickr

24818806317_222871f0b1_b.jpg
IMG_20171127_163129744 by Chris Campbell, on Flickr

24818812717_829eb7acb5_b.jpg
IMG_20171127_163059058 by Chris Campbell, on Flickr
 
Also before the cold weather set in, I started working on all of the misc. brackets that still need to go on the car. I reused the original rear seat floor brackets and E brake cable bracket. I mounted the seat belt plates to the trans tunnel too. I started separating the rear bumper trunk supports from the surrounding sheet metal. When I was cutting the car apart, I just rough cut the brackets out to save time, so now I have to go back and drill out the spot welds and grind away the stitch welds to get rid of the unneeded metal. Then I blasted the brackets and will get them welded in once it gets a little warmer out:

39656508252_76b5608452_b.jpg
IMG_20171031_190622480 by Chris Campbell, on Flickr

25815532338_fa647323aa_b.jpg
IMG_20171031_190628002 by Chris Campbell, on Flickr

25815523118_4699e2f79d_b.jpg
IMG_20171031_190925378 by Chris Campbell, on Flickr

25815524968_d3d47c0675_b.jpg
IMG_20171031_190847397 by Chris Campbell, on Flickr

39687666691_7d4047b167_b.jpg
IMG_20171031_190947380 by Chris Campbell, on Flickr

24818847927_04aba31969_b.jpg
IMG_20171116_163250399 by Chris Campbell, on Flickr

24818845317_4e37490968_b.jpg
IMG_20171116_163257226 by Chris Campbell, on Flickr

25815486298_2853d1f5a3_b.jpg
IMG_20171116_163309658_HDR by Chris Campbell, on Flickr

24818840507_8e9dd240aa_b.jpg
IMG_20171116_163323820 by Chris Campbell, on Flickr

Did a few little things that needed finished on the shell. I had to rework both quarter flanges where they go into the door jamb. I had done the passenger side previously but never finished the drivers side. I ended up making a new section of the flange where it got kind of funky:

39687666071_71c0eac897_b.jpg
IMG_20171101_185151008 by Chris Campbell, on Flickr

39687665491_7c438f41c5_b.jpg
IMG_20171101_192243238 by Chris Campbell, on Flickr

38978684164_b3ec9cd07e_b.jpg
IMG_20171101_192337222 by Chris Campbell, on Flickr

38978685994_46ff037ebc_b.jpg
IMG_20171101_192308139 by Chris Campbell, on Flickr

Welded up the holes where we had the electronic ignition box mounted. Were still going to run it, but its going to be hidden to give the firewall more of a correct look:

25815528528_7c98a58b4a_b.jpg
IMG_20171031_190818391 by Chris Campbell, on Flickr

Our car never came with a tach, but we are adding a tic toc to it. I drilled the 7/8" hole in the firewall in the factory location for the tach wire and grommet:

25815526728_dac976d52e_b.jpg
IMG_20171031_190830661 by Chris Campbell, on Flickr

That's all for now. Im hoping that it warms up a little bit so I can finish getting my brackets installed then get this thing on the rotisserie so I can clean up the underside and get it ready for dipping and e coat...
 
I had a new tag made for the distributor. I talked with Bill Rolik about making me a tag and we decided to make one that has a fictitious number. Since the Prestolite distributors only came in 4 speeds in '68 and mine is auto, I didn't want a tag that had a 4 speed number on it. So Bill suggested that he make up a number that didn't denote a 4 speed. He made the tag with a date code that coincides with the build date of the car. Very happy with it and Bill's help with everything:

24818856967_296eedc02f_b.jpg
IMG_20171102_184146084 by Chris Campbell, on Flickr

38978669834_03f420723e_b.jpg
IMG_20171102_184315758 by Chris Campbell, on Flickr

38981048864_c536bd6048_b.jpg
IMG_20180114_133617220 by Chris Campbell, on Flickr

38981046394_07e34daf79_b.jpg
IMG_20180114_133645243 by Chris Campbell, on Flickr

I will be adding an advance limiter plate and springs from FBO and the ECU will be a Rev-N-Nator from R/T Garage.
 
Happy Easter! I figured today would be a good day to update the thread. Ive kept a good pace on working on the Charger. Been waiting for the nice weather to hit so I can spend more time in the garage. Ive done a few things on the body since my last update. I got the rear bumper trunk supports welded in place and the bumper jack brackets welded back onto the trunk floor.

26290680357_2e6f808068_k.jpg
IMG_20180125_172942547 by Chris Campbell, on Flickr

40450426484_6738a1ce03_k.jpg
IMG_20180125_172956244 by Chris Campbell, on Flickr

40266995885_ccd03779ca_k.jpg
IMG_20180214_184324016 by Chris Campbell, on Flickr

40266991945_c2db0314c7_k.jpg
IMG_20180214_190127770 by Chris Campbell, on Flickr

Next up was the trunk lid. I measured out my lid to make sure it was square and bolted it on. One spot that I noticed was off was the drivers side quarter panel end cap to the trunk lid. The lid stuck past the ens cap about a quarter inch. I measured the trunk jamb, dutchman panel, rear window opening, etc to make sure that the trunk opening and the surrounding panels were square which they were. The culprit was the stamping in the quarter panel. There was not quite enough angle at the rear of the quarter and that made it not meet the trunk lid like it should have. I sliced the end of the quarter and opened it up until my measurement was the same as the other side and it came out to the edge of the trunk lid:

41162973431_b56aac2def_k.jpg
IMG_20180128_130827979 by Chris Campbell, on Flickr

39352829950_b124fa0fde_k.jpg
IMG_20180129_170803612 by Chris Campbell, on Flickr

39352828450_83cef7d3c3_k.jpg
IMG_20180129_170814237_HDR by Chris Campbell, on Flickr

41162966371_416a430f78_k.jpg
IMG_20180129_170853085_HDR by Chris Campbell, on Flickr

39352825200_596577a3b8_k.jpg
IMG_20180129_172223531 by Chris Campbell, on Flickr

41162961831_a7df0cc9cd_k.jpg
IMG_20180129_172228449_HDR by Chris Campbell, on Flickr

41162955241_391d7de5e2_k.jpg
IMG_20180129_172353479 by Chris Campbell, on Flickr

41162952331_04e3ff0dc8_k.jpg
IMG_20180129_172421068_HDR by Chris Campbell, on Flickr

41119069942_692e107c8d_k.jpg
IMG_20180130_164207598 by Chris Campbell, on Flickr

41162941451_45add6990f_k.jpg
IMG_20180130_164839974 by Chris Campbell, on Flickr

41162935921_e5e56c7375_k.jpg
IMG_20180130_170302848 by Chris Campbell, on Flickr

41162933761_6f033c5acc_k.jpg
IMG_20180130_172830775_HDR by Chris Campbell, on Flickr

26290627167_6f2b0c490a_k.jpg
IMG_20180130_172929585_HDR by Chris Campbell, on Flickr

41162927391_3acaface4c_k.jpg
IMG_20180131_170044372 by Chris Campbell, on Flickr

41162926541_8043887203_k.jpg
IMG_20180131_170049355 by Chris Campbell, on Flickr

40450362234_14c811fb26_k.jpg
IMG_20180131_171854652_HDR by Chris Campbell, on Flickr
 
Now that the trunk lid fits the car decently, I want to address the rear lip before I do any final gapping and fitment of the lid. I knew that the lip was messed with because it was much thicker than it would have been originally. So I started grinding away at it and found a pretty gnarly repair had been made. The lip started rusting out and the person who fixed it just brazed some sheet metal to the top edge of the lip, wrapped it around the lip and seam sealed the other edge up under the lid. Then they slathered mud over everything:

27288982528_04cc95f60c_k.jpg
IMG_20180201_171953535_HDR by Chris Campbell, on Flickr

27288976998_c5e30bdf40_k.jpg
IMG_20180201_172419173 by Chris Campbell, on Flickr

27288972288_0bd153145c_k.jpg
IMG_20180201_173046038 by Chris Campbell, on Flickr

27288970508_7f428f2719_k.jpg
IMG_20180201_173052397 by Chris Campbell, on Flickr

26290575747_00eba2fda1_k.jpg
IMG_20180201_173413188 by Chris Campbell, on Flickr

26290566297_6651cead78_k.jpg
IMG_20180201_174929608_HDR by Chris Campbell, on Flickr

40267074875_7e816ffad9_k.jpg
IMG_20180201_174935019 by Chris Campbell, on Flickr

I also noticed that there were a few pin holes in the structure of the trunk lid further in by the striker. The rust came from the inside out, and at this time i decided to remove the skin from the structure so that way I could assess how bad the inside was. I didnt want to fix the pinholes just to have new ones pop up down the road:

40266988275_6810893f6b_k.jpg
IMG_20180214_191318799 by Chris Campbell, on Flickr

40266978355_dd4219098f_k.jpg
IMG_20180221_185210542 by Chris Campbell, on Flickr

41162845001_013437ec19_k.jpg
IMG_20180221_192109645_HDR by Chris Campbell, on Flickr

41162839571_fae592b031_k.jpg
IMG_20180221_192124418_HDR by Chris Campbell, on Flickr

40266966065_4e90a535cc_k.jpg
IMG_20180221_194633919_HDR by Chris Campbell, on Flickr

27288865978_3c9cc5a312_k.jpg
IMG_20180221_194726821 by Chris Campbell, on Flickr

With the skin removed, the first area that I fixed was the section that had all of the pinholes in it. I cut out the area, cut out a patch and welded it in:

40450241544_a9c334baaa_k.jpg
IMG_20180222_192140150_HDR by Chris Campbell, on Flickr

26290266267_7f5936dc60_k.jpg
IMG_20180222_193447216 by Chris Campbell, on Flickr

40450230574_a953ae4ebf_k.jpg
IMG_20180222_193454162_HDR by Chris Campbell, on Flickr

41118827602_6360263f4a_k.jpg
IMG_20180318_165039646 by Chris Campbell, on Flickr

41118824302_ed8c4b4b88_k.jpg
IMG_20180318_171957210 by Chris Campbell, on Flickr

41118820072_303b826680_k.jpg
IMG_20180318_175053562 by Chris Campbell, on Flickr

39352549770_042c7172bb_k.jpg
IMG_20180318_175207016 by Chris Campbell, on Flickr
 
Next area on the inner structure was the rear lip that was virtually nonexistent. I made up a couple of pieces and bent them up in the brake at work then fit em and welded them in:

40450239584_7765e633dc_k.jpg
IMG_20180222_192157775 by Chris Campbell, on Flickr

39352542400_903481237d_k.jpg
IMG_20180319_181731986 by Chris Campbell, on Flickr

40450158234_548b996c12_k.jpg
IMG_20180319_181758658_HDR by Chris Campbell, on Flickr

40266852515_1393bdf5b6_k.jpg
IMG_20180319_184023151_HDR by Chris Campbell, on Flickr

40266851115_ed375abe7c_k.jpg
IMG_20180319_185324855_HDR by Chris Campbell, on Flickr

40266849425_9f92d119c5_k.jpg
IMG_20180319_185336318_HDR by Chris Campbell, on Flickr

40450073744_1e38fb36a2_k.jpg
IMG_20180319_185456820 by Chris Campbell, on Flickr

40450125504_605bba8499_k.jpg
IMG_20180331_140031295 by Chris Campbell, on Flickr

39352469130_8213b7e956_k.jpg
IMG_20180331_142309260_HDR by Chris Campbell, on Flickr

39352467390_13716c499f_k.jpg
IMG_20180331_143435019 by Chris Campbell, on Flickr

41118696962_380761e4f6_k.jpg
IMG_20180331_144830835_HDR by Chris Campbell, on Flickr

I just finished up the structure yesterday. Ill get the rear lip on the skin fixed soon, then Im going to have the two pieces acid dipped separately. The hot rod shop that I work at does powdercoating, so my boss suggested I powdercoat the inside of the skin and structure before I put them back together which I like.
 
Ive been working on the suspension pieces for the car lately as well. I pulled the front hubs and brakes apart. I blasted the hubs, front backing plates, spindles, etc and zinc phosphated everything to protect them. Then I installed new races and studs in the hubs:

25754614587_fa9bc652d3_k.jpg
IMG_20180211_110405190_HDR by Chris Campbell, on Flickr

38815313160_56b7836723_k.jpg
IMG_20180211_110357877_HDR by Chris Campbell, on Flickr

25754617857_7956a734d0_k.jpg
IMG_20180211_110312597_HDR by Chris Campbell, on Flickr

25754608027_82d019e86d_k.jpg
IMG_20180211_123653066 by Chris Campbell, on Flickr

39729543685_720179b207_k.jpg
IMG_20180211_181658995 by Chris Campbell, on Flickr

39729533865_f24b3f75ea_k.jpg
IMG_20180227_190958778 by Chris Campbell, on Flickr

40758034361_cb2a387179_k.jpg
IMG_20180305_164004537 by Chris Campbell, on Flickr

41118881262_15869370d3_k.jpg
IMG_20180304_125141179 by Chris Campbell, on Flickr

39729540685_4dddfaf840_k.jpg
IMG_20180212_163116919 by Chris Campbell, on Flickr

38947769890_c0856e5edc_k.jpg
IMG_20180311_160758309 by Chris Campbell, on Flickr

I ended up finding a nicer set up upper control arms than what I had. mine were really pitted. I found a good set, pulled the bushings and ball joints, blasted and phosphated them:

41162851751_d977193b56_k.jpg
IMG_20180219_182505450 by Chris Campbell, on Flickr

40624973531_430ace8c11_k.jpg
IMG_20180212_172436182 by Chris Campbell, on Flickr

40266982125_cfc6aa1fd0_k.jpg
IMG_20180219_171925963 by Chris Campbell, on Flickr

40758025921_76c26731b1_k.jpg
IMG_20180311_160813062 by Chris Campbell, on Flickr

38947771800_6b58725b3b_k.jpg
IMG_20180311_160750170 by Chris Campbell, on Flickr

I also phosphated some of the misc. hardware. I did the lower ball joint nuts and bolts and the front drum hardware:

40758036041_f19050415c_k.jpg
IMG_20180310_152606727 by Chris Campbell, on Flickr

25754601527_67aad3d62a_k.jpg
IMG_20180227_190942030 by Chris Campbell, on Flickr

40450189354_180fb5af1c_k.jpg
IMG_20180314_170921329 by Chris Campbell, on Flickr

40450187884_58c52bd114_k.jpg
IMG_20180314_170932238 by Chris Campbell, on Flickr

26290245977_0894ba7864_k.jpg
IMG_20180314_170907543 by Chris Campbell, on Flickr
 
I had to locate a nice original pinion snubber bracket as well. Mine was just too far gone. I located a nice one, and restored the rubber bumper from my snubber and installed in on the new one. I also disassembled the leaf spring hanger brackets and zinc phosphated the brackets and parkerized the studs and nuts. I blasted and zinc phosphated the rear drum hardware too:

25754635817_3b3bfcd38d_k.jpg
IMG_20180120_141955624_HDR by Chris Campbell, on Flickr

40625010941_c6bcde8feb_k.jpg
IMG_20180120_142004711 by Chris Campbell, on Flickr

39352868290_828c5c063f_k.jpg
IMG_20180120_141948492 by Chris Campbell, on Flickr

38815322810_c4418565fe_z.jpg
IMG_20180120_142634779 by Chris Campbell, on Flickr

38815321500_a3228a49d5_k.jpg
IMG_20180120_165527651 by Chris Campbell, on Flickr

26753539128_3151547557_k.jpg
IMG_20180120_142128545 by Chris Campbell, on Flickr

39729564085_e8008e66b4_k.jpg
IMG_20180120_165720619 by Chris Campbell, on Flickr

41118886292_6fd74aba28_k.jpg
IMG_20180304_125052043 by Chris Campbell, on Flickr

26290255157_de18550bbf_k.jpg
IMG_20180304_125041395 by Chris Campbell, on Flickr

40624960561_b2dbfe034e_k.jpg
IMG_20180304_134838509 by Chris Campbell, on Flickr

40624958231_0c985763eb_k.jpg
IMG_20180304_134852211 by Chris Campbell, on Flickr

Blasted and zinc phosphated the shock plates and front strut rods as well:

39352870980_736f20a4fe_k.jpg
IMG_20180116_192424213_HDR by Chris Campbell, on Flickr

26887467958_46c3c755d3_k.jpg
IMG_20180311_160806264 by Chris Campbell, on Flickr

40583138092_b40116a798_k.jpg
IMG_20180203_164328416 by Chris Campbell, on Flickr

26887465628_3f632c9c48_k.jpg
IMG_20180311_160905856 by Chris Campbell, on Flickr40266832555_8105097c2f_k.jpg 40624960561_b2dbfe034e_k.jpg
 
Last edited:
Well, its definitely been a while since Ive updated. I have been working on the Charger here and there, but my main focus over the last couple of summers has been doing a light restoration on my uncles '76 Corvette. He's had the car since 1984 and drove it pretty regularly going on vacations with my aunt in it and cruising around town up until around 2009 when my aunt was diagnosed with brain cancer. She passed in 2010 and the car just sat in the garage collecting dust, mice, etc. I finally convinced him around March of 2018 to pull it out and go over it before it gets too far gone. One thing that hes always wanted was to install a crate motor and get rid of the 180HP stock engine. I had him order a 383 430HP Blue Print crate motor and work began:

I know that this isnt a Chevy forum, but I had a great time spending time with my uncle throughout this process, plus I want you to see my excuse for work not getting done on the Charger lol

This was the day that it all started. We pushed the car out of the corner and outside, gave it a good wash, put it up on jack stands pulled the hood and wheels:

49410261927_a9a3ff0444_b.jpg
2020-01-19_01-33-52 by Chris Campbell, on Flickr

Here was the nasty engine bay. Every system leaked, the wiring was a mess and dont let the orange valve covers fool ya, the rest of the engine was black being totally covered in grease, oil, dirt, etc:

47363793341_7cafa5da65_b.jpg
IMG_20180407_115226282_HDR by Chris Campbell, on Flickr

47363793661_f8e6c3a18f_b.jpg
IMG_20180407_115235252_HDR by Chris Campbell, on Flickr

47311028752_111db46302_b.jpg
IMG_20180407_115311391_HDR by Chris Campbell, on Flickr

Once the engine and trans were pulled, I realized that the transmission needed resealed pretty badly as it was leaking quite a bit. So I decided to pull it all apart, check everything, replace all of the thrust washers and needle bearings and reassemble it. This was my first time ever getting into a transmission, so I was a little intimidated, but I just took my time and took lots of pictures. Notice how caked with gunk the trans was...the entire engine bay and bottom of the car was the same way:

49410310806_fafbc288e6_b.jpg
2020-01-19_02-25-48 by Chris Campbell, on Flickr

32421946087_0730a5ff75_b.jpg
IMG_20180424_194238983_HDR by Chris Campbell, on Flickr

46640668434_6eb3290508_b.jpg
IMG_20180501_174524142_HDR by Chris Campbell, on Flickr

With the transmission done, I started working on the engine. The engine itself was pretty generic looking so I wanted to spruce it up a little. The problem with the engine bays in '76 was that they were kinda boring with all of the smog stuff, so I didnt want to make the engine look like a stock '76 piece, so I decided to mimic the look of a '70-'71 LT1 engine bay. So I had him get the finned valve covers, air cleaner, fuel filter, etc which were all LT1 parts.

46448927695_0e8dccfeda_b.jpg
IMG_20180527_162224329 by Chris Campbell, on Flickr

49409152793_576b0a5233_b.jpg
2020-01-19_12-13-38 by Chris Campbell, on Flickr

49409827417_2fc98bc9a2_b.jpg
2020-01-19_12-13-03 by Chris Campbell, on Flickr

I ended up rebuilding the power steering pump and alternator and all of the black pieces on the engine were powder coated for durability. I made all of the fuel lines out of stainless and made new spark plug wires to route under the stock shielding:

40398410623_0e69f71504_b.jpg
IMG_20180609_203535957 by Chris Campbell, on Flickr

49409378021_13accacc1a_b.jpg
2020-01-19_11-24-58 by Chris Campbell, on Flickr

47311157182_fefa37cab0_b.jpg
IMG_20180623_175647985_HDR by Chris Campbell, on Flickr

Next was the engine bay and interior. I totally gutted the nasty interior since mice overtook it and I also wanted to get everything out of the engine bay so I could prep and paint it better:

49409481787_cbb56ffa79_b.jpg
2020-01-19_11-05-23 by Chris Campbell, on Flickr

49409281111_736121c557_b.jpg
2020-01-19_11-05-14 by Chris Campbell, on Flickr

49409270126_89acee6085_b.jpg
2020-01-19_11-03-14 by Chris Campbell, on Flickr

49408789648_c474f7e49c_b.jpg
2020-01-19_11-02-23 by Chris Campbell, on Flickr

40398427433_92ae4f3666_b.jpg
IMG_20180728_091031039_HDR by Chris Campbell, on Flickr

I used Eastwood Epoxy primer then Underhood Black for the fiberglass engine bay areas and Chassis Black primer and topcoat for the frame.

46640687384_efd3b7ddbc_b.jpg
IMG_20180728_110828115_HDR by Chris Campbell, on Flickr
 
Last edited:
Auto Transport Service
Back
Top