• When you click on links to various merchants on this site and make a purchase, this can result in this site earning a commission. Affiliate programs and affiliations include, but are not limited to, the eBay Partner Network.

Donny's 1969 Satellite

Donny, I can't say much that hasn't already been said. Your work is very impressive. I took me several days of reading a little here and a little there. Well worth it, I've learned a lot from this and your other threads.

Your blasting helmet is air cooled?
 
yeah some A/C in the 90*+/-100*+ heat, we get here in the late spring to early fall here, a cool shop is always nice, my new shop will have A/C & Heat in it for sure... fans help, but it's not the same thing...

It is, also air conditioned, drops temp down about 10 or 15 degrees
 
I've been in hibernation mode too long, been too busy on others' stuff, but, going to be getting busy soon again on this, along with my other B Body (going to post this same posting there too, hahaha). Ordered some more inner wheelhouses, both cars are going to get the widening treatment, and of course the spring relocation kit. The Satellite needs it as I goofed up on some key structural parts years ago, and widening will assist in fixing this issue. I just finished installing a DSE Mini Tub kit on a 69 Camaro and the customer will not need or use the stock shock mounts out back, so, was able to get about 1" more space than DSE indicated I'd have on their kit. Note to anyone contemplating this, it's not a simple task, it wasn't hard either, but, there's a lot of working and moving metal pieces that needs to be accounted for and tracked so you don't have any issues. It's also easier when the qtrs are off. Plus, my helper/contractor/employee dude will free me up from other projects to make some progress on my B Body dual-running rebuilds!
 
Glad to see you get some time to work on your cars Donny. Hope the new helper gives you a little ease of mind. Too much worrying causes gray hair. We don't need that any sooner than when it comes.
 
Finally got some time, some substantial time to work on my car! One things for sure and certain, my work of 10+ yrs ago is not the same as today's! There's a LOT of examples of really bad and embarrassing work I did on this car and left as is for a number of years. Let me try to illustrate a 'cause and effect' of my doing, and solutions.

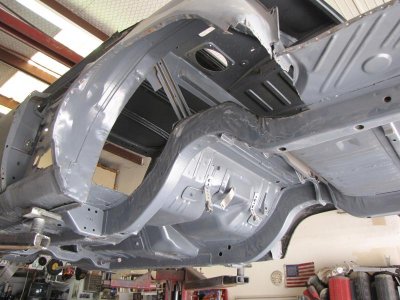
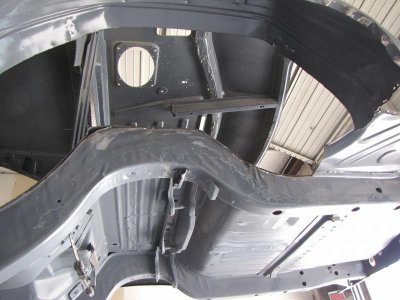
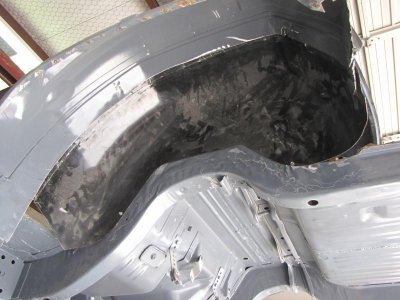
After hanging the qtr panels, the drivers side was just a wee bit too high, this was caused by my replacing the entire section including wheelhouses with a donor piece, this was back in 1999! Today, in undoing this mess, part of this is widening the wheelhouses to the Frame rails. I sectioned out the entire section, dropped it on the floor, then, the 2 piece el-cheapo trunk pan I installed back in 2004, I actually can't believe I didn't plug weld the pan to the Frame Rails! I just layed turd welds down on the Frame to Pan junction! Well, off it came, cut those welds, and ripped the Trunk pan out (well, still ripping it out). And, in the interest of full disclosure, I bought into some idiot's telling people on auto restorer . com to fill the frame rails with expandable foam! Well, yes, I did this, and, I can say that it's absolutely 100% gone now, and I don't read that site, nor do I take 'advice' from too many people on the internet, but, I will always share my folly and mistakes, and successes with you all here in the hopes that mistakes like mine won't be made by ya'll on your cars!

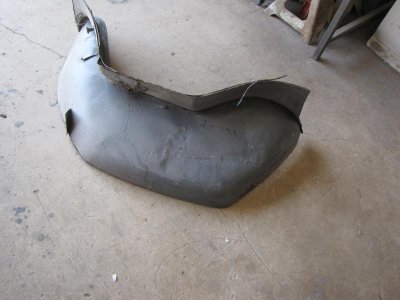
Widening the wheelhouses is actually pretty easy, just have some new inner wheelhouses on deck, cut about 2 3/4" from wheelhouse meeting point of Inner and Outer wheelhouses on the inside section, then use the new wheelhouse and screw it to the frame rail, and then cut the new inner to match the cut on the old inner, then butt weld them together.

I'll have most of this week available to tend to this, hopefully I can source a full AMD trunk pan this week from someone in town, get both wheelhouses done, widened, and new Trunk pan put in, properly and with no foam! Yeah, I only admit to the boneheadedness because I would hope that it may help others. Pics coming...
 
Guilty as charged!! Also have been guilty of doing things 'temporarily' and then fix it right when time allows....but usually, time is never there.
 
I to had a learning curve as well (mostly where not to buy junk sheet metal) but it's good to hear you got it squared away. Those little things haunt you until you dig in and fix them. Congrats
 
Wow, this is one hell of a thread. I was reading something you chimed in on for another members problem. Sounded really solid so I've been reading up on your threads here on the 2 restos. I admire the skills and determination. I always appreciate those that have learned thru the school of hard knocks re: your early work vs how you do it now.

Wish I had some of your skills and problem solving abilities when it come to this stuff. I'm an insurance guy and skills lie in another area.

Continued good luck on the cars. Will love to see them when road ready. I have a 68 GTX.
 
Donny if you even remotely think you want to dehump the outer tub do it now! I'm doing it after the fact and not fun. Also doesn't look as nice as I'd like. Only good thing is probably no one will ever see it.
 
De-humping outer wheelhouse? I've seen strange scars on new outer wheelhouses some builders do, wondering why? Anyone know why this is done? Thanks for the kind words ya'll! Here's a few pics of the current 'state' of this car!
IMG_2381.jpgIMG_2382.jpgIMG_2383.jpgIMG_2385.jpgIMG_2389.jpgIMG_2444.jpg

- - - Updated - - -

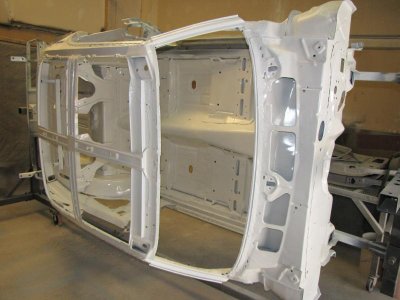
The white car is another project, a paying customer, 69 Camaro; new everything, even Roof skin and braces, Firewall, Floors, etc. EDP coating was blasted off, and white epoxy layed down.
 
very nice work Donnie,I look forward to seeing yours done.
 
I looked at the outer wheelhouses and yes, I now see why they are de-humped; get full movement of the tire in there without hitting the humps. I'll be de-humping mine!
 
Glad you see it. I finished mine up last night. You can make the inside look good, but you have no access to the tub between the quarter and tub. You would have to look for it but it is there. I went up 8" from the lip my intent was to have the fender lip sitting right at the top of the rim, this should give me 2.5-3" of travel clearance.
 
Qtrs are off, so, accessing this is not an issue, in fact, Prolly not going to mess with old metal, going straight to new AMD wheelhouses, not playing with old metal anymore, takes too much time.

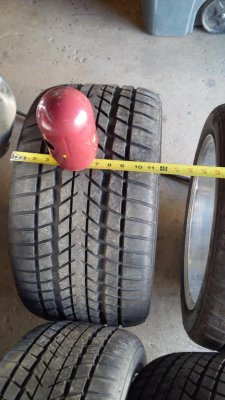
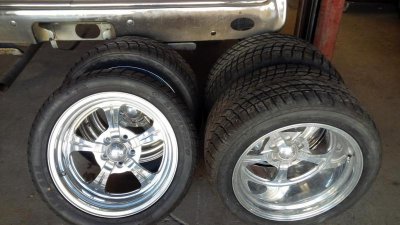
Also, look what I scored today for $800.00! 235/45/17 Front, 315/35/17 Rears. Mopar bolt pattern, B/C/E body fit. I'll have to widen the qtrs on my B Body to make them fit in there, about 2 inches or so.
Wheels1.jpgWheels2.jpgWheels3.jpg
 
Your gonna need all the room you can get with those fatties haha, I'm running 285's and it will rub if you get the axle a little cocked in there (10 rim with zero offset) but on the street 295's would be fine as long as you don't get very crooked so widening it is a good thing. She's looking really good and the wheels are sweet.
 
I figured 275 or so is the widest out back in a stock wheelhouse system. The Plymouth B Body 68-70 has the Qtr panel that dips over the tire area a bit, with this fattie out back, the qtr will have to be widened a bit to accommodate this phattie.
 
Don't know how much difference there is between the Charger and Satellite but 285's give me about 3/4" on each side with only the dehumping done. It's going to look great with those under it.
 
Auto Transport Service
Back
Top