• When you click on links to various merchants on this site and make a purchase, this can result in this site earning a commission. Affiliate programs and affiliations include, but are not limited to, the eBay Partner Network.

For the Love for my Father, My 69 GTX Restoration

Status
Not open for further replies.
Originally the hubs were "swedged" onto the drums. I don't swedge them because I can service the brakes easier if need be....just pull the drum off....

The "L" hand wheel studs are from Frank Badalson...

The "R" hand studs are originals sent out and got phosphated..
IMG_1769.JPG
IMG_1770.JPG
IMG_1771.JPG
IMG_1772.JPG
IMG_1773.JPG
IMG_1774.JPG
IMG_1775.JPG
IMG_1776.JPG
IMG_1777.JPG
IMG_1778.JPG
 
Last edited:
Original torsion bars were cleaned up with degreaser only and a few spots sanded...The factory drips are the original drips the day it rolled out...That is how clean these bars are...

HD suspension numbers are 780/781

Pics below was taken after they were cleaned up with degreaser only
DSC03316.JPG
DSC03317.JPG
DSC03318.JPG
DSC03319.JPG
DSC03320.JPG
DSC03321.JPG
DSC03322.JPG
DSC03323.JPG
DSC03324.JPG
 
Restored...

The brown paint stripes ensured the correct bar and end was pit into position.

781 has 2 stripes

780 Has a single stripe
IMG_1788.JPG
IMG_1789.JPG
IMG_1790.JPG
IMG_1791.JPG
IMG_1795.JPG
IMG_1796.JPG
IMG_1797.JPG
IMG_1798.JPG
IMG_1799.JPG
IMG_1800.JPG
 
Repro torsion bar boot set with clips,,,Correct look and PN's
IMG_1785.JPG
IMG_1786.JPG
IMG_1787.JPG
 
Original Z bar was sent to Bill Meerholz who got the correct zinc plating done! These are dated hence the picture showing the date of 42nd week of 68

The Original pedal rod and adjuster rod were not reusable due to excessive wear, opps...So I ordered a kit from Brewers and a new pedal rod. The bend in the adjuster rod is not even close and I am very disappointed in Brewers, The Mopar 4spd specialists allowing these to be sold. After talking to a member here whom recently ran into the same issue I had to bend it back to get the correct angle.. Sounds easy but this is thick hardened steel. I used a vice and a two foot pipe....

Also in the first picture is an original ball stud and hardware vs the new one in the kit. The stud was the same but I reused the original hardware.
IMG_1780.JPG
IMG_1781.JPG
IMG_1782.JPG
IMG_1783.JPG
IMG_1841.JPG
IMG_1842.JPG
 
Installed....

You can install the z bar as one unit with both ball studs in the shaft...It is easier to tighten the stud on the bell housing out of the car and just as easy to install the z bar with the outside ball stud in the shaft....
IMG_1871.JPG
IMG_1872.JPG
IMG_1873.JPG
IMG_1874.JPG
 
This positive battery cable came from Bill Rolik and the page came from ECS...
IMG_1784.JPG
IMG_1806.JPG
 
Front suspension bump stops came from Bill Rollick with correct PN's and hardware
IMG_1845.JPG
IMG_1846.JPG
IMG_1847.JPG
IMG_1848.JPG
IMG_1849.JPG
 
Show hardware. I am searching for my top washers, lol....

The bolts/nuts and the large hex nuts are originals. The washers came with the NOS shocks(correct type but a superseded number) The upper bushings are NOS and came with the NOS shocks.

IMG_1850.JPG
IMG_1852.JPG
IMG_1853.JPG
IMG_1854.JPG
IMG_1855.JPG
IMG_1856.JPG
 
Last edited:
Special thanks to Darrin, BIGDA12 for getting me the correct dated/PN heater hoses. The hose itself is the correct hose and is an NOS hose. He cut the exact lengths, stamped perfectly and dated appropriately. These were all based on the loch road plant variations...

Hose clamps were sent out for the correct plating..Original inner fender bracket was replated, That is the screw that held the bracket in place.
IMG_1826.JPG
IMG_1827.JPG
IMG_1828.JPG
IMG_1829.JPG
IMG_1830.JPG
IMG_1831.JPG
IMG_1832.JPG
IMG_1833.JPG
IMG_1834.JPG
IMG_1835.JPG
 
I forgot about these pics so a little backtracking...

This is the original brake hardware that was sent out for painting/plating. The brake shoe are NOS 11 x 3 brake shoes. Notice the pentstar...

I applied a correct rust preventative coating to mimic the original coating.

Original manual adjusters has a specific look, see pic!
IMG_1743.JPG
IMG_1744.JPG
IMG_1745.JPG
IMG_1746.JPG
IMG_1747.JPG
IMG_1748.JPG
IMG_1749.JPG
IMG_1750.JPG
IMG_1751.JPG
IMG_1752.JPG
 
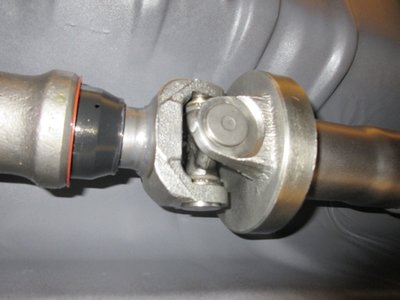
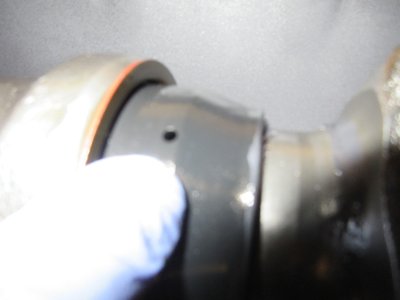
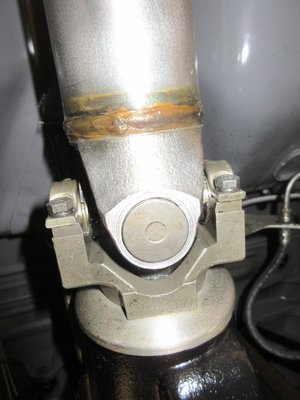
Original driveshaft was in mint shape. No pitting, scratches, dings, or dents...And readable PN's....I bought a 6ft PVC pipe and soaked it in evaporust. Then the work began. I cannot even fathom the hours spent on this one part but it turned out great. Special chemicals were used to create the weld look on the ends and tubes.

The NOS U joints are correct and very rare to runs across and extremely expensive....I also luck out on getting the cup strap clips for the rear joint. The factory used these during assembly so the cap didn't fall off. I am waiting for the strap to come some...
IMG_1875.JPG
IMG_1876.JPG
IMG_1877.JPG
IMG_1878.JPG
IMG_1879.JPG
IMG_1880.JPG
IMG_1881.JPG
IMG_1882.JPG
IMG_1883.JPG
IMG_1884.JPG
 
Status
Not open for further replies.
Auto Transport Service
Back
Top