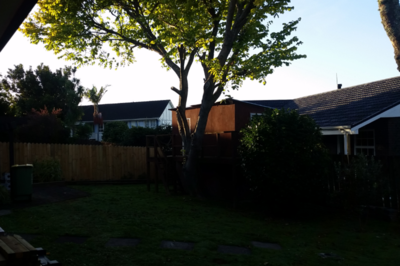
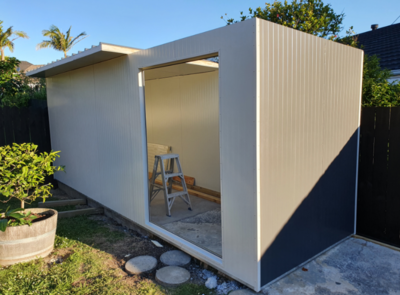
Here are some pictures of the shed build....started with the part slab that was hand mixed by my brother about 18 years ago - he built a two-story playhouse for my kids. The underneath was used to store the lawnmower and firewood etc. Sadly, the plywood starting going bad, and the tree wreaked havoc upon the roof eventually. There once stood a huge Elm that spanned both sides of the boundary, as well as touching the peak of the house roof behind us. My wife and I took to it about 4 years ago, and then I got the Pro's in 3 years ago when the local authority announced open season on any trees of no interest. Chop and gone now.

See how much higher the tree is compared to our house....the rear gutters rotted out due to the continual dropping of leaves...
After a severe trimming 4 years ago...chainsaw and a ladder...that entire yard was 6 feet high was branches stacked everywhere...ready for chipping
and then the Pro's came in and removed the three big trees for me....all over in 4 hours....instead of the 4 days it took my wife & I to do some initial trimming.
It took another year to get all the fences replaced slowly - I di it all myself....neighbours were conveniently inconspicuous
the entire time. Then when I had the driveway and pathways around the house replaced, I had the guys extend the original playhouse slab for the shed...
First job after the fences were done was to dig in a drain coil around the perimeter...we get one or two downpours of rain a year, and the yard fills up fast. I didn't want to take any chance...so I started at the bottom corner around 2'6", and tapered up to about 1' behind the shed corner. Pre-socked drain coil was used...it was hard going - all by hand with a pick and trench spade. Took me about 2 weeks each night after work.
Back-filled the trench with scoria rock. All barrowed in from the driveway...by me.

Tree roots made the digging most entertaining...
The original slab hadn't fared too well over the years....so I dealt with that just last week or so. Framed up with treated 2"x4", and long galvanised screws into the existing posts, then edged all the gaps with the foam, and screed mix....with final coat of self-levelling compound...pics of that later on.
At the beginning of November just gone, I got a call to say the shed components were ready.
So it was time to start the assembly...


 lucky he didn't get you, he have a sad life story, captive as a baby, sold and pretty much spend his hole life in a zoo, he was beautiful because he's still the only albino gorilla in the world, that made him unique, i think.
lucky he didn't get you, he have a sad life story, captive as a baby, sold and pretty much spend his hole life in a zoo, he was beautiful because he's still the only albino gorilla in the world, that made him unique, i think.


 Thanks Kiwi!
The protective plastic film is your best friend here....

