You are using an out of date browser. It may not display this or other websites correctly.
You should upgrade or use an alternative browser.
You should upgrade or use an alternative browser.
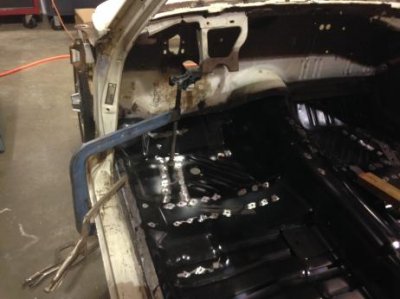
Help please, need pics of firewall lip area!
- Thread starter morrow_jacob
- Start date
flypaper
Well-Known Member
- Local time
- 1:50 PM
- Joined
- Jul 17, 2008
- Messages
- 16,870
- Reaction score
- 26,818
yea,someone trimmed that down good
it will evenly follow that contour around the corner
what car are you working on? 68-70b i'm guessing
i can get you some pics tomarrow if nobody else chimes in
you will have to find yourself a patch of lip with that same shape
its not that hard to do
it will evenly follow that contour around the corner
what car are you working on? 68-70b i'm guessing
i can get you some pics tomarrow if nobody else chimes in
you will have to find yourself a patch of lip with that same shape
its not that hard to do
morrow_jacob
Well-Known Member
Thank you
Thanks a million, I cant seem to find a good pic of the area in my searches. I need to start saving way more pics so I have it when I need it!
It is a 68 Charger.
I just want to make sure I have it right and original now.
Thanks again!
yea,someone trimmed that down good
it will evenly follow that contour around the corner
what car are you working on? 68-70b i'm guessing
i can get you some pics tomarrow if nobody else chimes in
you will have to find yourself a patch of lip with that same shape
its not that hard to do
Thanks a million, I cant seem to find a good pic of the area in my searches. I need to start saving way more pics so I have it when I need it!
It is a 68 Charger.
I just want to make sure I have it right and original now.
Thanks again!
morrow_jacob
Well-Known Member
Nobody?
Cmmopar
Well-Known Member
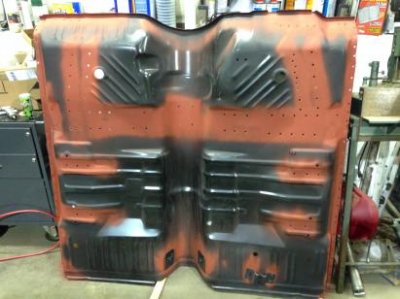
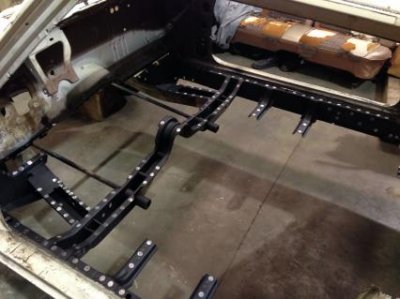
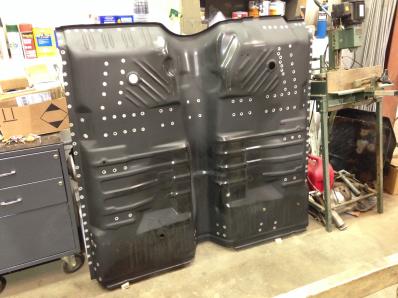
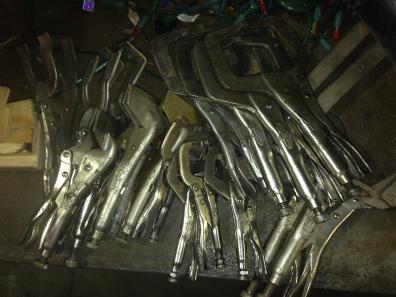
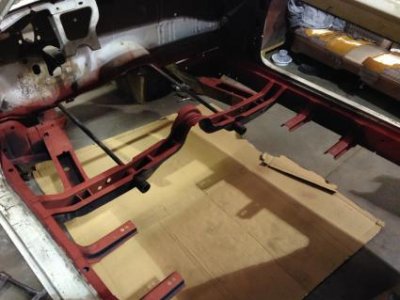
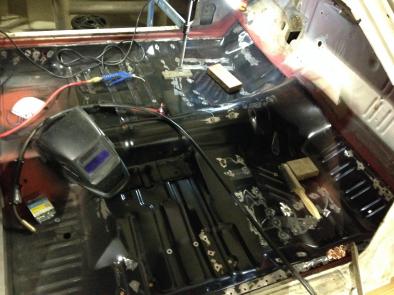
I don't think your firewall area was "ground" down. I installed a floor pan in my 67 belvedere survivor and it looks the same as in your picture. For the low cut area I bumped the area flat, made in clean and welded along the edge to the new pan. Originally at the factory in my car this area was very roughly welded with a rough bead every couple of inches on the inside seam. If you concentrate getting the firewall floor pan seam perfectly level and lined up on the inside you can weld the edge of your area that is low cut like mine. Make sure transmission hump is centered too. After leveling car don't forget to use old scissor jack and wood blocks under trans hump at rear of new one piece pan to raise floor to proper position. This is essential in my opinion for correct alignment. Lots of clamping pliers and some self tapping screws are needed.I made 2 large clamps cut from steel plate and threaded rod/nuts that had 20 inch throat and let me reach of rockers and get nice tight welds.
i didn't take too many pics but here are some of the ones I have:
i didn't take too many pics but here are some of the ones I have:
Attachments
Last edited:
morrow_jacob
Well-Known Member
I don't think your firewall area was "ground" down. I installed a floor pan in my 67 belvedere survivor and it looks the same as in your picture. For the low cut area I bumped the area flat, made in clean and welded along the edge to the new pan. Originally at the factory in my car this area was very roughly welded with a rough bead every couple of inches on the inside seam. If you concentrate getting the firewall floor pan seam perfectly level and lined up on the inside you can weld the edge of your area that is low cut like mine. Make sure transmission hump is centered too. After leveling car don't forget to use old scissor jack and wood blocks under trans hump at rear of new one piece pan to raise floor to proper position. This is essential in my opinion for correct alignment. Lots of clamping pliers and some self tapping screws are needed.I made 2 large clamps cut from steel plate and threaded rod/nuts that had 20 inch throat and let me reach of rockers and get nice tight welds.
i didn't take too many pics but here are some of the ones I have:
So you basically didnt spot weld that lip you welded the two together on the inside? And trimmed down the new floors lip? That makes sense. Thanks a million!
Your pics also helped answer a couple other smaller questions I had as well. Also,I think I'm going to make those giant clamps too, great idea.
Cmmopar
Well-Known Member
So you basically didnt spot weld that lip you welded the two together on the inside? And trimmed down the new floors lip? That makes sense. Thanks a million!
Your pics also helped answer a couple other smaller questions I had as well. Also,I think I'm going to make those giant clamps too, great idea.
I spot welded the lip at least every two inches except for that spot that the firewall appears trimmed. I drilled the holes in the firewall lip and left the floor pan lip solid then plug welded holes from engine compartment/ front of car.The spot in your picture I lap welded from inside engine bay because mine looked identical to yours. I didn't trim metal. If during final assembly of car clearance issues don't dictate trimming I will leave extra metal for extra rigidity in that area.By adjusting and aligning pan and supporting rear with scissor jack everything lined up perfectly and seam came out better and stronger than factory. If you make clamps measure off your rockers, I should have made mine longer. You can support them with blocks so weight of clamps doesn't bend metal. Also pad out clamp shoe to increase clamp effect, metal on top, wood on bottom.Block of wood scrap and hammer helps position pan too. Take your time and make sure car is level and pan positioned perfectly. Mine came in and out countless times before welding but it came out great. I recommend you buy a few cans of this before welding; after spraying weld should be done in day or two and it will work great. This is same stuff Craig Hopkins recommends:
http://www.medallionrefinish.com/Editor/assets/tds/rs-512_tech.pdf
Last edited:
morrow_jacob
Well-Known Member
I spot welded the lip at least every two inches except for that spot that the firewall appears trimmed. I drilled the holes in the firewall lip and left the floor pan lip solid then plug welded holes from engine compartment/ front of car.The spot in your picture I lap welded from inside engine bay because mine looked identical to yours. I didn't trim metal. If during final assembly of car clearance issues don't dictate trimming I will leave extra metal for extra rigidity in that area.By adjusting and aligning pan and supporting rear with scissor jack everything lined up perfectly and seam came out better and stronger than factory. If you make clamps measure off your rockers, I should have made mine longer. You can support them with blocks so weight of clamps doesn't bend metal. Also pad out clamp shoe to increase clamp effect, metal on top, wood on bottom.Block of wood scrap and hammer helps position pan too. Take your time and make sure car is level and pan positioned perfectly. Mine came in and out countless times before welding but it came out great. I recommend you buy a few cans of this before welding; after spraying weld should be done in day or two and it will work great. This is same stuff Craig Hopkins recommends:
http://www.medallionrefinish.com/Editor/assets/tds/rs-512_tech.pdf
Cant thank you enough! This helps immensely!
I havent had much luck with weld through primer, I was thinking I was going to mark the holes and just grind off the marks to minimize the exposed metal. Weld through makes my welds look like garbage. However, I think I will try one more time with this stuff.
I also didnt even think about lifting up the tunnel. I will have to eyeball it since I didnt get a measurement off the old one as to how high it should be, level is what I will shoot for.
Thanks again.
gtxno1
Well-Known Member
Looks correct to me just installed drivers floor patch on my 67x looks exact
Similar threads
- Replies
- 18
- Views
- 2K
- Replies
- 29
- Views
- 3K
- Replies
- 7
- Views
- 1K
- Replies
- 8
- Views
- 606
- Replies
- 13
- Views
- 1K


