• When you click on links to various merchants on this site and make a purchase, this can result in this site earning a commission. Affiliate programs and affiliations include, but are not limited to, the eBay Partner Network.

Malicious's 68 Coronet

I commend you for your choice in auto's:naka: Muscle does not come cheap.What powertrain have you chosen to power your new toy??
You bring back memories of when my car was sprayed black.:eek:ccasion14:
 

Attachments

  • 110-1087_IMG.jpg
    110-1087_IMG.jpg
    51.4 KB · Views: 391
Basket case that is good to know. Malicious that is going to be a mean machine keep the pics coming.
 
I like the body lines on that model and year. Once you get hooked on these Mopars, you'll never be the same. It's a form of insanity.
 
Of course a circuit board! I was thinking of using thin wood or maybe perspex, but a circuit board is a great idea! Thanks for the heads up!

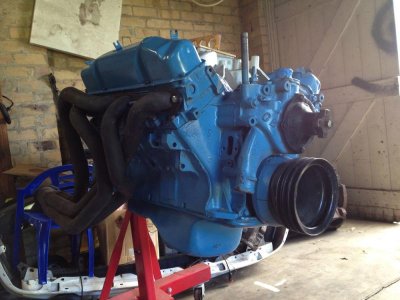
So here's a bit more, I picked up a recent rebuild 440 from a mid 70's C-body from memory. Unknown cam, but it all looks pretty stock. Not too stressed, as I'll tweak it down the road, right now I just want to DRIVE! Haha.

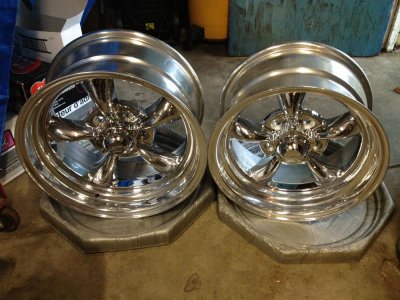
Also picked up a set of rims for a good price. I was going to wait until near the end, but when an opportunity pops up, ya grab em! So Torque's 15x7 front 16x7 rear. I'll wrap them in some raised white letter tyres. Also going to keep the steelies, paint them satin black and use them as well. Have a day2 and day 1 look!


MC-440.jpg
MC-Wheels.jpg

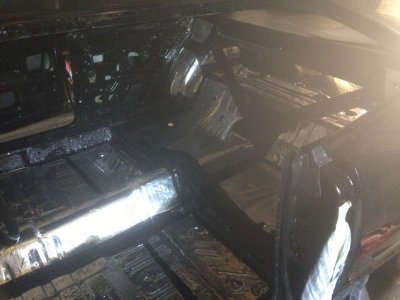
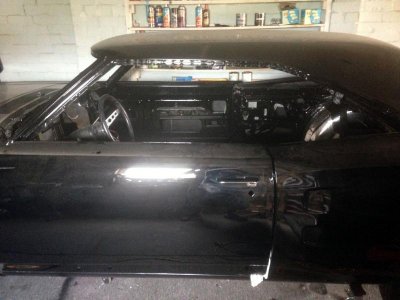
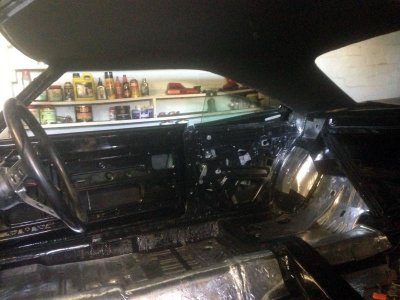
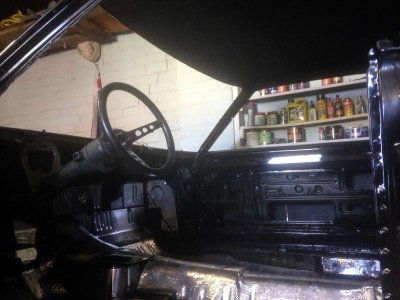
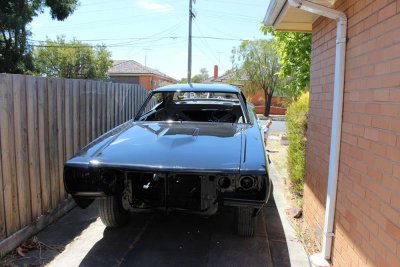
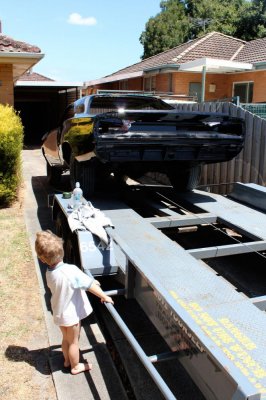
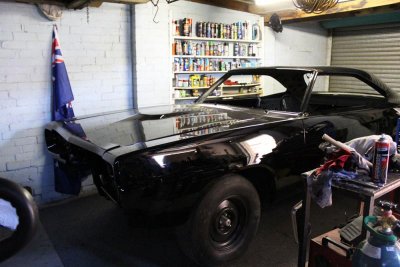
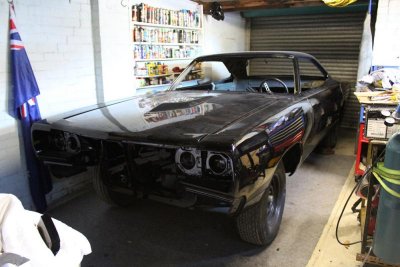
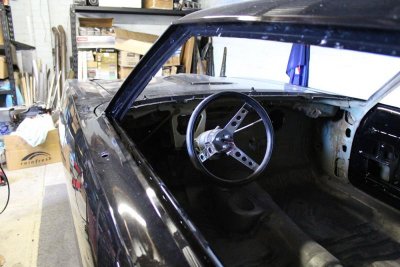
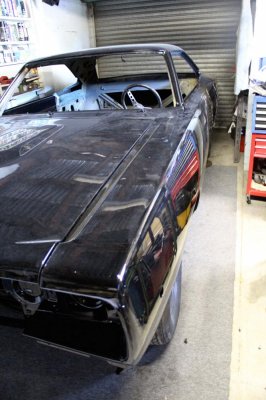
Here's a few pics from the day it came home around Feb this year and a couple in the garage before I painted the interior
MCoronet13.jpg
MCoronet12.jpg
MCoronet14.jpg
MCoronet15.jpg
MCoronet16.jpg
MCoronet17.jpg

I need to get some more pics of where I'm up to now, but usually end up working on the car rather then taking pics of the work!
 
Nice work your car in looking great. I know what your saying about taking pics, I always get so buisy on the car that I forget too.
 
Or when I do remember its on my phone and the quality is crap! Plus the car is always dusty, my garage is like a dust magnet, so I feel like I'm neglecting it!

I brought som e3-point seat belts form Year one during the sale, but just realised that I'd already installed the deadener in the roof and I doin't want to go ripping it up and replacing it. So I'm in the process of trying to get them to swap the 3-point over for the original style before shipping. We'll see how that goes!

I've also got a long weekend coming up so I'm going to try and get 2 days in the shed, I'll try and take some decent pics then of where I'm up to.
 
Year One is usually real good at working with us, it would surprise me if they wont work with you, of course i haven't bought anything from them in a few years. Good luck!
 
looking pretty good :blob1:
 
A quick update:

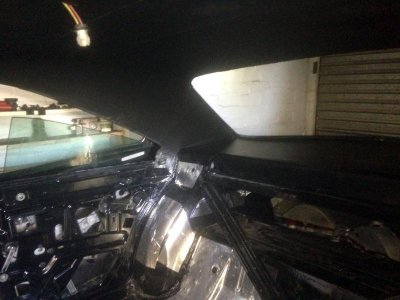
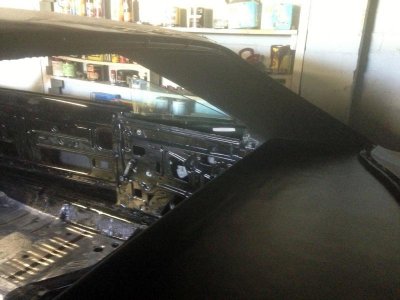
Laid down all the resonate matting, doors, quarters and roof have the sound barrier installed. Installed the door handles. Installed the roof liner. And got one of the rear quarter windows in.

So the hicups: the D!ck that pulled my rear windows sheered the bolts that hold the glass in place, I managed to drill and tao the passangers but I just spent the arvo trying to re-drill and tap the drivers side only to have it snap on me.

Looking for the aluminum plate that the glass bolts too. Happy to buy the whole regulator if needed. Heres some one elses pic of one:
http://www.26liter.us/gallery/albums...0/IMG_0007.JPG
Please note I need the Drivers side!


I also need the plate that bolts to the heater box that the blower motor bolts too. Mine is missing, No idea what it looks like!

I'm in Australia, so please be willing to post!

Here's some pics:
The resonate matting, I have some interesting thoughts around this if any one is keen to hear them ;)
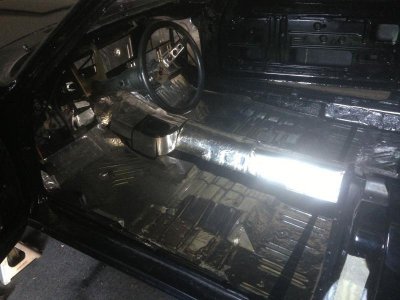
C-Dampener1.jpg
C-Dampener2.jpg

Shot of the sound barrier on the roof:

- - - Updated - - -

Fkn computer is pissing me off!!

Try again!

Shot of the sound barrier on the roof:
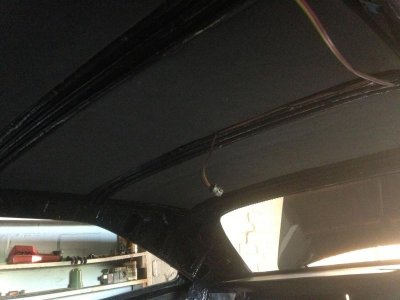
C-Deadener1.jpg

C-Handles.jpg

Also stripped re-polished and painted the tail panel. That RT is going to be the only badge on the car. I would have left that off to if I could of!
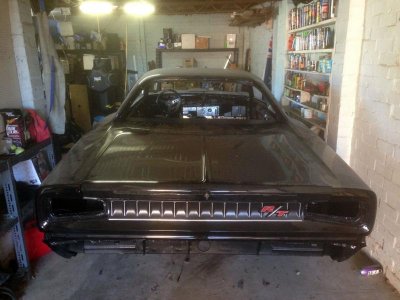
C-Trunk.jpg


Lastly head liner, pass rear quarter window and you can see the parcel shelf cover I made up. Postage on that and the door cards from the states is insane, so I'm making them for the moment. Maybe when I win the lottery I'll buy some repos!
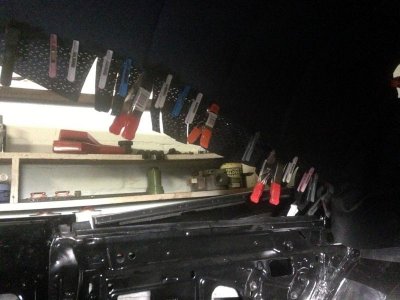
C-Headliner1.jpg
C-Headliner2.jpg
C-Headliner3.jpg
C-Headliner4.jpg
C-Headliner5.jpg

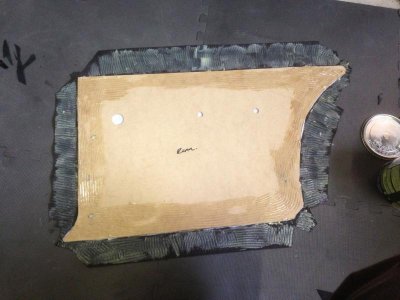
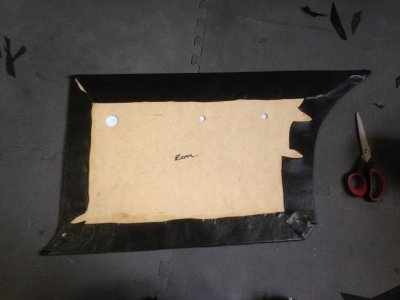
Heres a couple of shots of the making of the rear cards. Its 3mm MDF, with a layer of wadding and a wrap of Pleather/PU. For got to take a front shot, but they've generally turned out well. Need to finish the front door ones soon.
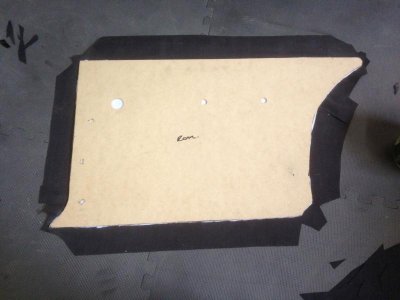
C-Rear Card 1.jpg
C-Rear Card 2.jpg
C-Rear Card 3.jpg

- - - Updated - - -

Thinking I need to seal the back fo the cards to prevent moisture getting to them. Was thinking of an epoxing spray paint. but if you have any ideas. I'm happy to hear em!
 
Please Malicious, tell us your interesting thoughts on the resonate matting. I, for one, am all ears.

For the rest of your build, I like what I'm seeing. Hope you're enjoying your summer.

-=Photon440=-
 
Gaawd I love a thread like this...3 months and a dozen posts and this bad *** is painted and being reassembled! Freakin' awesome job and your color choice is perfect...definitely keep the black steelies. Nothing looks bad-***-er than black steel wheels.

Lizard-skin will keep your new fiber-board panels safe, but I think regular old spray paint will do the trick too depending on how porous the material is...it may just soak in. Latex (house) paint is a cheap alternative, can be mixed in any color, and brushed on controllably without all the absorption of spray enamels.

I rarely get excited over a build-thread, but I can't wait to see this car finished. Thanx for sharing it.
 
Please Malicious, tell us your interesting thoughts on the resonate matting. I, for one, am all ears.

For the rest of your build, I like what I'm seeing. Hope you're enjoying your summer.

-=Photon440=-

Me too !

- - - Updated - - -

A quick update:

Great update and i really like the shot of the back of the car. Can't wait to see more !
 
Nice updates "your going to be on the road before you no it". Did you sew any designs in the panels or just leave them flat????
 
Thanks for the props. Trust me it hasn't gone that quick! but I want it on road for next car season which starts around October here... got to finish a solo art show and go away to get married in the States for a few weeks so its gonna be a slog...

Nah the door panels etc are all just plain. Thought about stitching, actually I thought about heat pressing some lines in them, but I'm not a massive fan of the stock pattern and I wasn't sure how it would all end up once mounted with hardware. So plain for now, then I might redo them once it's together and I can see how it looks. They were pretty cheap and easy to make, so no biggy. Its easy to add touches and complexity but harder to remove it! haha


As for the matting; I know with the rebuilding scene its custom to slather as much 'dyna' mat down as possible but I have done some digging and learnt a bit from the audio-philes, I'm hoping for a good result...

The 'Dyna' mat style product is a vibration dampener. Meaning that it cuts out and noise generated by the piece it's stuck to. Example is that stick it to a weaker panel like a roof skin, and when you tap on it, the sound generated will be a duller quieter one. It's NOT a sound barrier or absorber! Key difference. Think about when its displayed, on metal drums with big bass speakers in them. One with out matting vibrates like a mofo and makes an awful racket. The one with matting is only the noise from the speaker, but yo can still hear the speaker clearly!

I'm not saying don't use it, I have! But you only need enough to cut out any noise generated by the car from vibrations. What I've read says that any more then a 50% AREA (important) coverage of dampening matting will give no benefit. Its also expensive as hell, so you can save a few bucks there.

How ever if you want to quieten the cabin down from road, engine, out side noise, you still need something to absorb or block it. Absorbing is not an option because noise is absorbed through area volume, you'd basically have to fill the whole cabin with foam to absorb enough noise. SO you have to block it.

Th product of choice is MLV or Mass Loaded Vinyl. It's pretty new, comes in sheeting and is used to block noise in recording studios etc. Google or ebay it, its pretty easy to find state side. Was a little harder to find in Australia on its own. But I got enough to line the doors and quarter panels, and a piece left over to divide the boot from the cabin. Also found a 'premium' underlay that is basically a layer of open cel foam, a thinner layer of MLV and another layer of open cell foam. I'm using that in the roof and on the door cards. Lastly I found a heat shielding used in trucks that is a reflective heat barrier, foam, thick MLV layer and foam again, that I'll use agains the fire wall and cabin floor. Because I've heard the heat off of a big block exhaust can be pretty intense on the feet. My 'Net will be a family cruiser/bruiser so I need to make it lady & kid friendly!

I've stuck it all down using a Sealies gel contact adhesive, same as I used on the door cards as above. So its down good. Probably ended up costing more, but I think the results are gonna be worth the extra effort/$$.
 
Before you install your door panels, install plastic sheathing on the metal of the door. The factory did this using a sticky rope caulk. I'm assuming to keep the moisture out. I know I saw someone was repoping it but you can cut your own.

Nice car!
 
Man what a bad@ss project, how did I miss this one? Good choice on picking the 'net and you're doing some outstanding work! Also digging the hell out of the wheel choice and color scheme, starting to get jealous of all the gorgeous black paint on the forum these days :icon_thumleft: I'll be looking forward to a smoky burnout video here shortly haha cheers from across the pond!
:eek:ccasion14:
 
Really looking great! Cool color and i think that R/T badge will make nicer looking yet when its all done.. 68 has a great body style!
 
Thanks guys, its pretty slow going but I'm enjoying it.

Thanks for the plastic backing idea! never thought of it, but it makes sense! I'll dial in the fit then coat it. I'll look into the latex house paint too. Paint seams to just soak into this stuff usually, so that might be a winner.
 
I'm about 6 weeks out from our trip to America, so funds have been tight and I've been concentrating on getting some commissioned artwork out of the way before we leave. So progress has been slow, no pics but the quarter windows are finally in.

I'm struggling at the moment with the front windows, mainly the Vent window frames. Because of how far away the painter was, I left the windows in to travel (no air dam) and he removed them to paint. So I'm having a fun time working out where everything is and how it goes back together.

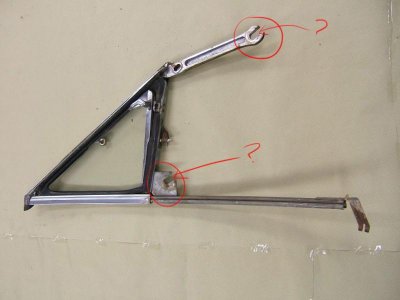
I have the vent windows in place, but I'm at a loss as to how they secure in place. The bolt hole closest to the front edge of the door just below the window is obvious but the other two I have no idea. The manual mentions a bracket, but i don't seam to have anything in the door, not sure if it got removed, Or I never had one. Here's a pic showing the two mounts I'm talking about:

Vent-Window-Frame.jpg

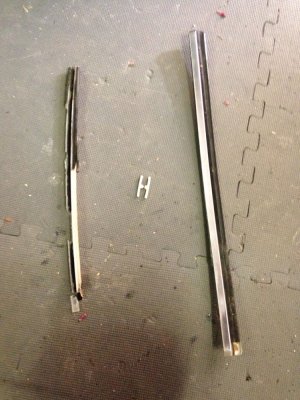
I'm also missing some weather seals from the door glass. I've emailed Classic Industries, but thought I'd ask here as well. The seals I'm looking for are the seal that runs up the vent window channel where the door glass contacts the vent window and the clips that hold it in place. These are the seal and clip on the left of the attached picture.

The other is the furry insert and rubber channel that are part if the stainless steel trim that attaches to the rear of the door window, this is the trim that seals the door glass to the rear quarter glass. It's the piece on the right of the attached picture.

Window-Seals.jpg


I'm also going to attempt to make the missing heater box motor plate after the piece I got sent was for a NON AC box, not my AC box. If anyone has one they could measure for me, including the height of the rubber insulators on the motor, that would be great!

Once the door glass is in and I have the door lock trim rings in, I'll get the door mechanisms in and I can start cleaning up underneath before installing the rest of the interior.
 
Auto Transport Service
Back
Top