• When you click on links to various merchants on this site and make a purchase, this can result in this site earning a commission. Affiliate programs and affiliations include, but are not limited to, the eBay Partner Network.

Many problems at once - will ground wire kit help?

I'm back. Thanks for all the input. Sorry about the delay, work had me up till the wee hrs of the night. Here are the results to my tests using a multimeter:

At the battery + to -
Engine off: 12.2v
Key to "on" position: 11.2
Engine on: 11.2v
w/ parking lights on: 11.64v
w/ full lights on: 11.49
After turning engine back off: 12.01v

Voltage drop tests
Engine on and revved to about 1000-1300rpm
From negative battery lead to:
Alternator case: 2.1v
Alternator bracket: 2.2v
Engine block: 1.3v
Chassis ground point: in the mv range

From the positive battery lead to the alternator lead: .33v

From the looks of thing it seems like my alternator is shot? Had no idea it was this bad since the battery hasn't been straining on start ups.

If your droping 2.1 to 2.2 volts from battery ground to the alternator case ground, then there is really bad connections of the alternator to battery.
 
Check the:
bulkhead connector engine side and compartment side. Pull apart and clean and I coat the connectors with a coating of grease to protect from oxidation.
Amp guage. I've had one melted but not melted into pieces and the wires burnt and coroded but not melted into that caused resistance like you described.
Light switch wiring and connector had one melted and would work for a min then get hot and slowly stop.
I agree you can't have to many grounds if your original wiring is in good shape.
 
Back, sorry to keep ya'all in suspense. I appreciate all the input, I'm reading it all even though I'm not commenting it! OK back on track, the results for the alternator test:
I grounded the field spade (#1 in the photo) to the alternator case, with the engine running I jumpered the power side spade (#2) to the 12v stud (#3) and nothing happened with the voltage readings, they were steady at 11.6v at the battery terminals. For poops and giggles, now knowing for sure which is the 12v stud, I took a reading from that stud and it's pretty much the same reading I was getting from the battery. 11.6v.

The blue wire brings 12 volts to the alternator's rotating field; green wire completes the circuit back to the regulator which, thru an internal transistor, completes the circuit to ground, which is why the regulator MUST be securely grounded. The regulator's internal transistor turns on - off to regulate the alternator's field supply and ultimately its output. By following the previously suggested test connection, this would force the alternator to deliver it's maximum. Since there was no change in battery terminal voltage, this shows a detective alternator. Suggestion: replace BOTH the alternator and regulator..... just my opinion of course.
BOB RENTON
 
.... just my opinion of course.
BOB RENTON
Ah, thanks for the detailed explanation Bob. Yea like anything else in this car the regulator is looking pretty weathered. Now would be a good time to get it a nice shiny new regulator along w a new/refurbed alternator.

I'll do some preventative maintenance on that bulkhead connector as long as it's not too hard to disconnect. Plastic has got to be pretty brittle by now. I want to be able to at least solve my current problem before going and creating a new one :poke:

Sounds like a good plan. B4 getting into the bulkhead issues, suggest that you do the alternator/regulator first. Then check for functionality. If OK, then investigate the bulkhead connections. B4 disconnecting ANY bulkhead connections, disconnect the battery before proceeding, just in case a connection is compromised and something shorts to ground. Yes...you are correct in your assumption that the bulkhead connectors/connections may have deterriorated over time.....just proceed slowly.
As far as the new/rebuilt alternator, ask your supplier about EXACTLY what was replaced/tested and by whome and the assurance that it will produce the same performance as the old unit, and what is my guarantee. A copy of the test results and tests performed would be nice but.....they'll likely say: "no one ever asks for the report" or "its not available"....WHY? Good luck with your undertaking.....be careful.....
BOB RENTON
 
Wiring is best checked under load. The easy way to check any circuit is the voltage drop test. Follow with me as it sounds confusing. But its not. Get a digital voltmeter. They're cheap. You don't need anything fancy. Now to test the ground side. It's easy. One lead to the negative battery cable post. The other to the item that you want to check the ground at. Do this with the vehicle running so the circuit is loaded. Now by all rights the volt meter should read zero because you are connected negative to negative. But if we have a poor connection the voltmeter will have a reading of how bad the circuit has failed. If you see 2 volts, you have a 2 volt loss in that circuit. Now where is the loss? Backtrack one connection at at time towards the battery. You may have multiple issues or only one. .1-.2 volt drop per connection is acceptable. You can test the positive side in the same manner. Many people use the ohm meter to do this test. But the ohmmeter provides no load on the circuit. Shoddy connections can pass the ohmmeter test. So you can test neg post to the cluster, alternator, (yes its bolted to the block but is it corroded), cluster voltage regulator, body itself. All these could be the issue. If these check out then we'll talk about the next step. I spent 8 years at independent shops, 27 years at dealerships, 10 years at the Chrysler engineering electrical lab. repair is just logical steps. I can walk you though it.
Doug
 
Wiring is best checked under load. The easy way to check any circuit is the voltage drop test...
Doug
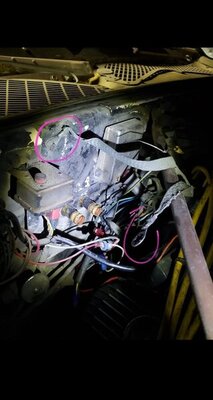
So that's how that works, thanks Doug. Ill work on cleaning up the wiring and grounds while my parts come in. I found this grounding strap undone. Anyone know where it goes too?

Screenshot_20220219-202516_Gallery.jpg
 
*Update: My parts came in! Installed both the remanufactured alternator and new voltage regulator. That combined with the cleaned up engine bay grounds and this puppy is purring. Easier start, brighter dash lights, stronger blinker performance. Voltage drop tests come in the mV range as it should. Multimeter reads 13.86v at the battery while running. Everything checks 4.0. Thanks for the help everyone.
 
Auto Transport Service
Back
Top