• When you click on links to various merchants on this site and make a purchase, this can result in this site earning a commission. Affiliate programs and affiliations include, but are not limited to, the eBay Partner Network.

My 68’ Rustic Charger Resto

I know the feeling I'm 27 and "weird" or harsher names for believing that we should NOT LS swap the world.

Keep it up! We are the people to bring this hobby into the future. The last of a dying breed.

You have a good point, it’s sad to see that the passion for building things with your hands is going by the way side.

Advantages to LS swaps is that there is plenty of small/big blocks available now!

Keep it up! its awesome! Love watching what folks can do that are not scared and have the skills to do this work in our hobby. Especially in our garages......:thumbsup::thumbsup::drinks:

Thank you! I know what you mean there, I definitely look forward to running out to the garage after work!
 
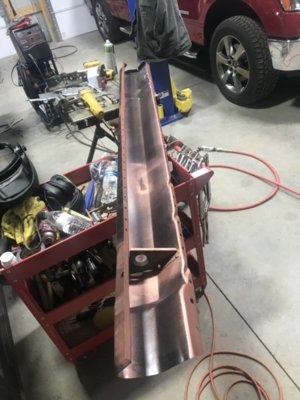
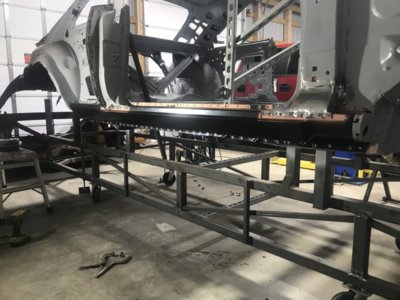
Alrighty, now onto the passenger side rocker section. I already did the drivers side.

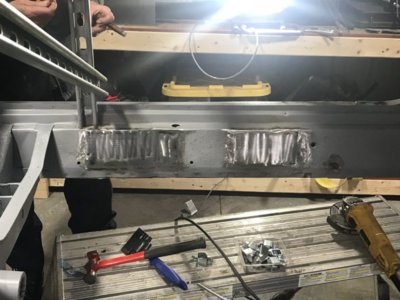
Man.....Getting that old rocker removed was a 12 beer job! I had to weld in two patches in the inner rocker where the seat supports were spot welded on. I didn’t want to get into replacing the inner rocker over two small sections. After that a Painted the inner rocker with Eastwood rust encapsulator.

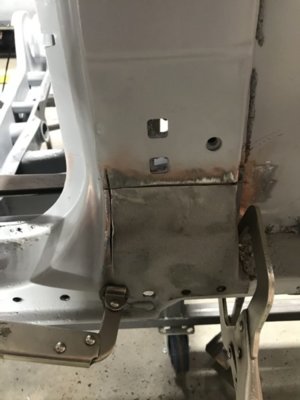
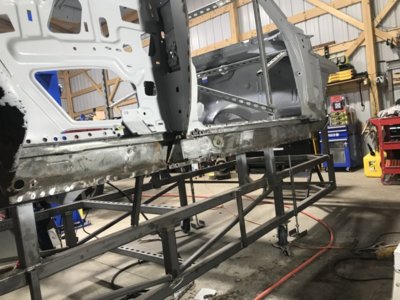
After some tweaking, the rocker fit pretty good. I used self tappers to hold the rocker on until I get the door, quarters and fenders on to make sure the alignment is correct.

378C3936-119C-424E-BBD5-8DD4DDC73319.jpeg B8BED6DC-612D-4B2D-B66F-2CE062F5FCA1.jpeg 16B743CB-8070-4F45-9E66-FD85D6D51F63.jpeg 473880CD-B85B-4B61-85D5-C064C3774595.jpeg 77469A0A-FE2B-4F51-B2D6-782F5606109F.jpeg
 
Awesome work man.very inspirational for all of us thanks for sharing love this kind of work
 
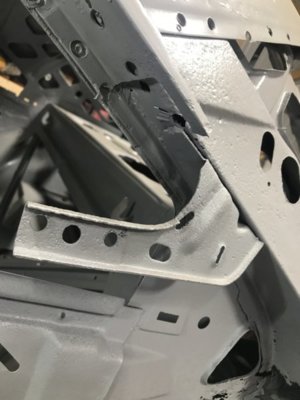
The next thing to tackle is the C Pillar supports. The drivers side is worse than the passenger rust wise. Luckily the donor coronet I picked up had a perfect set! Here it goes, drivers side.


53058D61-BDC2-497D-91F2-9E7835C0EEAE.jpeg
17822EA2-A79B-4D17-BB10-B06A643FBECC.jpeg


Cut out the rotted section behind the roof support.

29FB4FD1-9116-4FA2-AFAA-7929DBF7DCBB.jpeg


Welded in the good section from the donor car. Not the prettiest but, turned out decent.

ED66BCCD-D857-42A7-9A28-9C269D8FAD15.jpeg


After that, I sanded down the area and painted the metal with rust encapsulator and weld through primer.

809A8EC8-2348-41AA-AEC3-BB898B6C325B.jpeg


Just as an added precaution, I thought it was a good idea to spot weld this plate behind my weld seam for added support.

0A97642F-B238-4016-B89A-995B130E4F4B.jpeg


Welding her up!

AE78BBC0-4047-49FA-8D5D-A7C94BA6DB5E.jpeg


Little patch where the drip rail was. The roof on this car is perfect and don’t want to remove the only good panel on the car. Besides this area, the rest of the roof structure seems to be in good shape.

8ECFCDC3-C6B9-4C18-AD2F-01264F3BF2F9.jpeg


All done

FEB93420-AB3D-43C9-BE70-1FA6851BB355.jpeg


7868F1BC-A422-42D9-AC23-005D890058DA.jpeg
 
Onto the passenger side. This side was in better shape.

7052F426-0617-44C5-9B9E-5115CE21B93A.jpeg
7CA26F2F-7AAC-4B9C-87D4-A7021555A7B7.jpeg
F0ED547D-785D-4C8B-BAB8-F6F736198FAD.jpeg
CA8694B2-9C87-4EA3-A2F0-EE96BC046931.jpeg
7DBC5BD6-14F6-4E43-A9F5-DE2E78738504.jpeg
550CA167-FCC6-40FD-843F-9B81CC0EBCD3.jpeg


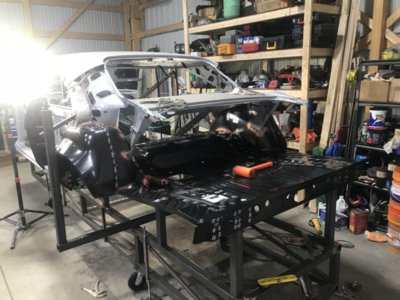
The next step (I believe) would be to replace the inner/outer wheel wells then, cut out the floor & rear frame rails. I added some bracing to hold the rear of the car up while I work on the rear section.

I’d anyone has any input on if I should start on the wheel tubs first then frame/floor or opposite, that would be appreciated.

8E1FC4F0-31E9-433A-AC4C-8B76A3D0C663.jpeg
6E3F7992-CA06-4EBC-BE6E-328AD6B98536.jpeg
 
Wheel wells, trunk extensions and then rear hump and trunk pan. At least that's the way we put mine back together..
beeresto2016bodyshop 877.JPG
beeresto2016bodyshop 321.JPG
beeresto2016bodyshop 879.JPG
beeresto2016bodyshop 350.JPG
beeresto2016bodyshop 352.JPG
beeresto2016bodyshop 916.JPG
beeresto2016bodyshop 918.JPG
 
The next thing to tackle is the C Pillar supports. The drivers side is worse than the passenger rust wise. Luckily the donor coronet I picked up had a perfect set! Here it goes, drivers side.


View attachment 899018 View attachment 899026

Cut out the rotted section behind the roof support.

View attachment 899019

Welded in the good section from the donor car. Not the prettiest but, turned out decent.

View attachment 899020

After that, I sanded down the area and painted the metal with rust encapsulator and weld through primer.

View attachment 899021

Just as an added precaution, I thought it was a good idea to spot weld this plate behind my weld seam for added support.

View attachment 899022

Welding her up!

View attachment 899024

Little patch where the drip rail was. The roof on this car is perfect and don’t want to remove the only good panel on the car. Besides this area, the rest of the roof structure seems to be in good shape.

View attachment 899023

All done

View attachment 899025

View attachment 899017
NICELY DONE! Great work you're doing....:thumbsup:
 
It’s like Christmas all over again. Placed a order with AMD for all of the metal I need to get it looking like a car again!


01D75620-9093-4203-AF88-6F3A716E0653.jpeg
5364C0E2-DE59-4EBF-90D4-5D7D499E7903.jpeg


Cut out the inner wheel tubs.

8CBCA1F5-789B-4980-84A9-8D15AA0A636B.jpeg
2B41C6DE-7005-4A71-A9CE-3EA07284AA1B.jpeg


Then the rest of the floor and frame rail assembly.

C21ADE66-B659-4350-B43A-C4E71D4EFDBA.jpeg
00F34170-70BD-4DAE-BC82-A9F5A7057CD2.jpeg
 
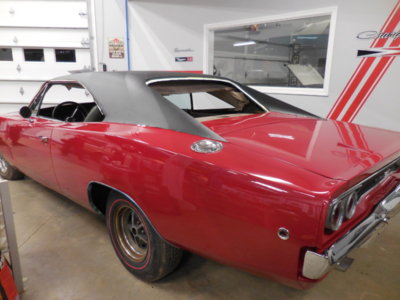
Looks like you've made alot of progress in just a few short months. I'm 40 minutes away from you in Virginia, and I'm a bit farther along on my 68 Charger project. The new vinyl top just went on last week. But, my 68 was a long time getting to this point. Every exterior sheet metal panel (including the roof skin) had to be replaced. It was in the body shop for several years. Hoping to have mine on the road in time for Carlisle in July. I love that you're getting so much done on yours already.

DSCN0099.JPG
 
Looks like you've made alot of progress in just a few short months. I'm 40 minutes away from you in Virginia, and I'm a bit farther along on my 68 Charger project. The new vinyl top just went on last week. But, my 68 was a long time getting to this point. Every exterior sheet metal panel (including the roof skin) had to be replaced. It was in the body shop for several years. Hoping to have mine on the road in time for Carlisle in July. I love that you're getting so much done on yours already.

View attachment 900955

That’s awesome Jim, She looks perfect! Wow, I guess what they aren’t lying when they call it “Body Shop Jail” haha. Did you use mostly AMD metal for all of your rust repair? I’m about 5 mins from Lovettsville VA.

I plan on going to Carlisle this year, I’ve only been to the Spring swap meet and Ford national. Look forward to going to the Chrysler nationals this year, I’d love to see your 68’ there!

Yes. A combination of AMD, NOS, and good used parts. When my project started, there wasn't the vast amount of reproduction parts available. I'm about 25 minutes from Lovettsville, and in the spring and summer I often do the Friday evening cruise in at Charles Town/Ranson, WV (which is 20 minutes drive for me).
 
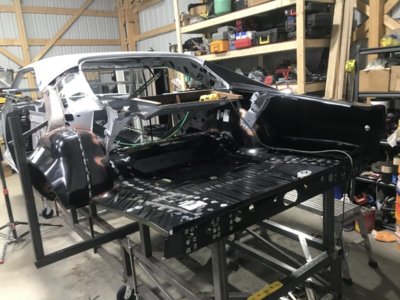
Now that most of the rusted rear section of the car is removed, it’s time to start fitting up the rear frame rails.

The frame mounting plates were in rough shape and bubbles out from the rust but, the donor frame has some decent plates to harvest.

83BB5CB9-F21D-4F07-96B5-D4D9622A9FDD.jpeg


New plate cleaned up and welded in.

361B3A06-4017-4919-9EEE-A738221DFB68.jpeg
10698F87-473A-491D-9CA1-DD4DC3C77585.jpeg


Set the rear frame on the jig, it fit pretty decent.

80403BFD-5C12-409E-99BC-B053166E006E.jpeg
D4B57AF8-C3BD-4845-B837-44C311FD4B64.jpeg
B4EF5FF9-0286-4148-B229-0267410C4F02.jpeg


Set the rear floor in place as a test fit.

26E9CFD9-A0E4-44F5-815F-D5FE63669DFB.jpeg


Squared up the frame and got it within a 1/16” of an inch from the factory diagram. Then, I clamped on the rear crossmember and self tapped it in place.

8ED958E7-9A04-4E03-9298-B54C69FE3D8E.jpeg
946ED783-1F06-4F12-94F2-224093630EAA.jpeg


Fitting up the inner and outer wheel houses. These were definitely a treat to get in place. The passenger outer wheel house doesn’t fit all that great, I may have to modify it slightly. They are just screwed in place for now.

7A0EF8A5-CE9C-4E2E-AAA6-5D0F52CF0FF7.jpeg
 
I decided to try setting in the trunk floor and seeing how it fits. Everything looks decent besides the very back where the rear crossmember meets the back lip of the trunk pan. I’ll have to dig further into this. It appears that the trunk floor pan itself is off.

Would anyone have a 68-70 Charger that could help me with this measurement? From the wheelhouse to the trunk 90° lip.
C207B8F0-58A1-4089-A737-099A8397B57E.jpeg
458FB880-5704-4198-99E7-FFB0A7F73442.jpeg
EEAD6035-041A-4FA5-AA12-02F4F0EB29A7.jpeg
D80D29D8-BBD9-49DE-8199-22F1A146E1FB.jpeg
769437A8-82ED-46F9-A168-0D37B5086818.jpeg
4457846D-7EF3-44D2-A6CD-C2AD056080C6.jpeg 8A6D4FF9-DA06-4E7E-8C1F-370D1DF240D1.jpeg 7FCE7BA8-4A3D-446A-8BA2-97B7E51FAAB4.jpeg
 
My 68 has had every exterior panel and part of the trunk floor replaced. It may not be the best one to measure, and its a bit difficult to get a good measurement. But, I measured the edge of the trunk floor from the wheel house to the rear along the seam for the trunk extension. I got 31" or maybe a fraction under that. The trunk extension doesn't extend all the way back as far. Still working on assembling my 68. You aren't far from me if you need to come take a closer look.
20200218_191016[1].jpg
 
Auto Transport Service
Back
Top