• When you click on links to various merchants on this site and make a purchase, this can result in this site earning a commission. Affiliate programs and affiliations include, but are not limited to, the eBay Partner Network.

My 69 Coronet project

It probably would run cooler with the 7 blade fan and clutch. That 5 blade clutch setup looks like the one Summit sells. I've forgotten what they call it.

I like your way of illustrating the air flow with he Mopar Mag.
Roger, you bring up an interesting point about clutch fans; I was going to start a thread in the Heating/Cooling Forum on the subject but this is as good as place as any. My understanding of thermal clutches is that they lock up when the air temp elevates, and free-wheel when the temp drops. So in stop-n-go traffic, airflow is diminished, temp goes up and clutch kicks in, turning the fan. My original fan was direct drive so it was spinning all the time. So everything else being equal, just adding a clutch will not improve low-speed temp creep because the fan is spinning in both instances. The benefit of the clutch is at highway speeds with reduced drag.
Then there's the fan itself. I agree that it seems 7 blades would draw more air then 5. But then there's the width and length of the blades, and the pitch angle. The way to test the theory is to install a Mopar 7 bladed clutch fan and note the temp.
Side note: last night Maria and I cruised around for an hour after work. It was still over 90*, pockets of stop-n-go traffic. On the highway, still hanging around 185*. On surface streets stopping at some long lights the temp got up to 195* but would settle back to 188 - 190 after just a couple of blocks of cruising. So for now the car is running cooler with the new setup.
 
Sweet! Nothing like getting a problem solved - overheating issues can really take the fun out of driving the car. I have a clutch fan as well - I forget what my fan looks like but it is at least close to what you put in. Glad it is working well for you!

Funny, I can't help but think about that both of us have had to fix transmission gremlins when we got our cars on the road. On the positive note, maybe that means you are now done!!! :rolleyes:

Please say hi to everyone from the crazy cross country guy!!!:usflag:
Maybe not done, but feeling confident about the car's reliability. Still having a hot-start fuel delivery issue. Talked to an FiTech and he coached me up some programming steps to take.
And I'll give a shout out for you. Likewise, remind Barry we still have some nice, solid pickup trucks out here.
 
I wouldn't change anything if you're consistently getting those temps. Those 7 blade fans fetch a hefty price these days. Just sayin.
 
Did you see Dennis' post a few days ago about Hayden's new shallow mount fan clutch? I may swap mine for one since my clutch sits too close to the radiator for my comfort level.
 
Did you see Dennis' post a few days ago about Hayden's new shallow mount fan clutch? I may swap mine for one since my clutch sits too close to the radiator for my comfort level.
I did, good information to file away for now
 
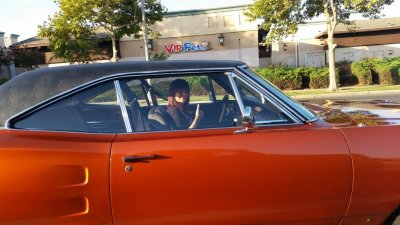
Planned on driving the Coronet to work yesterday but Maria called dibs.

20160805_072134.jpg

Trying to keep up
20160805_071510.jpg
 
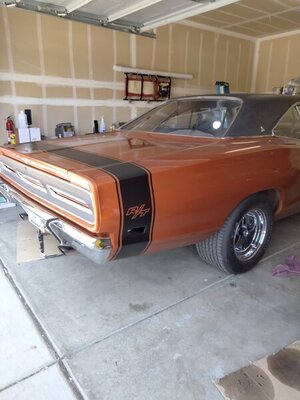
The Coronet has been on the road for five years now, but is the restoration ever really done? Case in point, I finally added a R/T rump stripe.
The stripe kit is from Dale's Cuda Shop. I ordered the matte black stripe because I thought it would more compliment the flat black hood and rear tail panel than a gloss black.
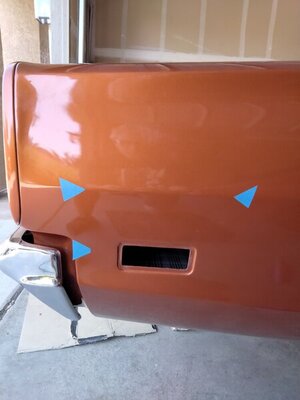
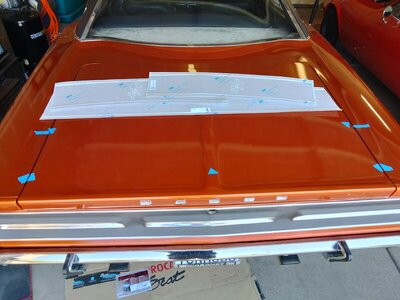
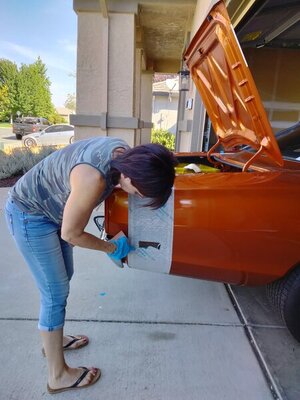
First thing to do is decide where you want the R/T to fall on the quarter panel. if you Google '69 R/T Coronet' you'll get dozens of pictures with the R/T emblem above and below the crease line. I decided to place the bottom of the R just above the crease with the top of the T just below. Next measurement is centering the stripe in the middle of the bezel. Measuring both quarters and bringing the stipe up to the trunk lid, I measured 4 1/4" up from each quarter panel edge. To me this is the most important measurement because it defines how the trunk stripe is positioned. After the trunk stripe is laid down, the quarter stripes have to line up regardless of how the sticker drapes down the quarter.
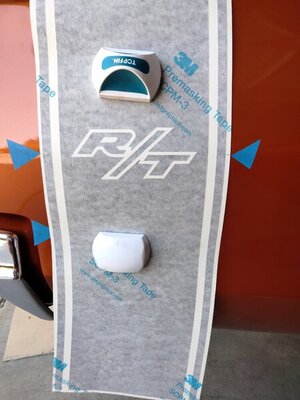
Original measurement for the R and T. The bottom arrow marks the leading edge of the rear-most stripe to center in the bezel.
IMG_20210905_120635.jpg
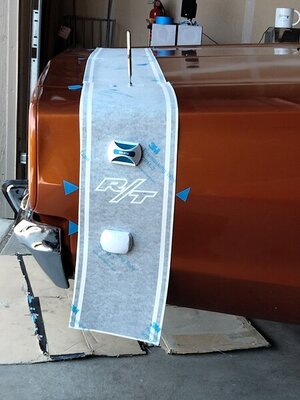
Measured the center of the trunk and the stripe
IMG_20210905_120701.jpg
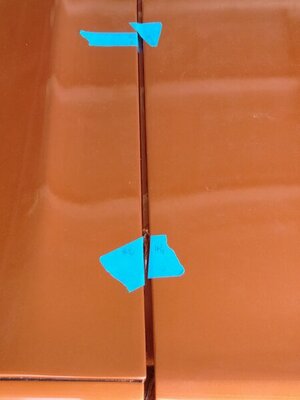
Hard to see, but after I measured for the 4th or 5th time I wrote down the measurements on the tape. Once the tape was marked I knew I was done with that section.
IMG_20210905_121546.jpg
 
Last edited:
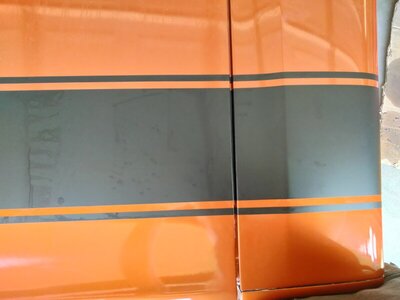
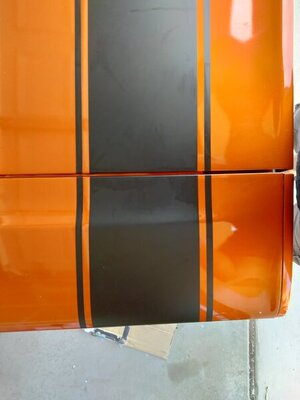
Measuring took about 2 1/2 hours; a 1/2 hour was wasted after I realized my R and T markings wouldn't work. I wanted the bottom of the R directly above the crease with the top of the T directly below the crease. The problem when lining up the quarter decal to the trunk stripe is that the crease is not parallel to the top of the quarter panel and/or trunk line. When lining up the R and T at the crease, this is what it looks like at the trunk:

IMG_20210905_122347.jpg

So, the trunk/quarter stripes have to line up and then position the quarter decal down the side so the R meets the mark at the left edge. Here's the sticker with the R and T lined up with the arrows, prior to adjusting for the trunk.
IMG_20210905_122241.jpg
IMG_20210905_122332.jpg
 
Last edited:
I just stumbled upon this thread...I didn't know you had a build thread on the forum. I have to get to bed soon but I'll check out more of it tomorrow.
 
I made the measurements on Sunday morning and floated the stipes this morning. After locking in the measurements I cleaned the paint with Goo Gone and soapy water. Dale recommends naphtha but it's unavailable in CA. Sunday morning I wiped the paint down with rubbing alcohol and ran a tack rag.
Here's where watching Wayne's (dadsbee) 69 Super Bee resto thread paid off. The trunk was floated first. With all the stress and anxiety of wondering how it was going to turn out, floating the stripe was almost anti-climatic. The stripe laid down beautifully between the tape marks. For the amateur its a two person job and I couldn't have done it without Maria's help.
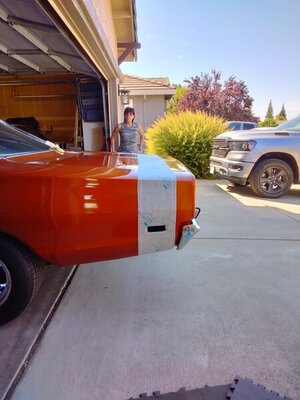
Once the trunk stripe is laid down, position the quarter stripe, one person keeping an eye on the trunk alignment while the other positions the R at the tape mark. This part takes some adjustments to align both marks.


IMG_20210906_104245.jpg IMG_20210906_100948.jpg
 
Last edited:
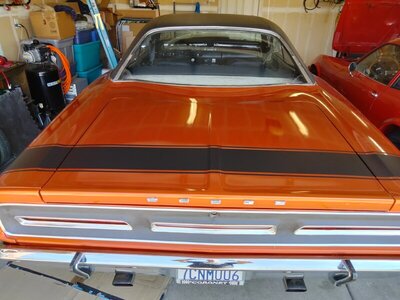
It took about an hour and a half to float the stripes; took longer to measure. The results are stunning. I am ecstatic how it turned out. Next up is painting the bezels.

IMG_20210906_125951.jpg IMG_20210906_130003.jpg IMG_20210906_130010.jpg IMG_20210906_125935.jpg
 
Last edited:
Looks perfect Rich. Matte black would have been my choice as well.
 
These cars look natural with the BumbleBee stripes.
 
Man that looks great! I used to do all the stickers at the resto shop. Doing an AAR stripe or a 71 cuda billboard will just flat wear you out. Have any issues with bubbles? Did you use soapy water to float the sticker?
 
Rich, that looks amazing and has transformed the car! Nice work. I could learn a lot from you on patience and taking your time.

I sure wish the Plymouths had some sort of trunk stripe like that. The Dodges with the stripe look SOOO much better.
 
Looks perfect Rich. Matte black would have been my choice as well.
Thanks Joel. It does look perfect in the pictures but there are some minor flaws. The passenger side decal, which we floated after the trunk, came out just about perfect; there's a minor crease in the decal below the bezel. You'd think that floating the driver's side would go just as well with all the practice. Truth is, we missed the mark on the bottom of the R; it sits about 1/4" above the crease instead of directly above.
Scattered about the decals there are some micro-bubbles that I hope will flatten out.
In retrospect I recommend sweeping an LED flashlight across the decals to pick up any bubbles because when the decal is wet they're hard to see in natural light.
 
Man that looks great! I used to do all the stickers at the resto shop. Doing an AAR stripe or a 71 cuda billboard will just flat wear you out. Have any issues with bubbles? Did you use soapy water to float the sticker?
Per the instructions I added two teaspoons of dish soap to a gallon of distilled water and used a spray bottle. It's hot and dry here and I wound up refilling the bottle once. There are some micro-bubbles scattered randomly across the decals. The instructions say to leave the car out in the sun for a day or two and they may flatten out. If not then I'll have to decide whether to pop them or not.
 
Per the instructions I added two teaspoons of dish soap to a gallon of distilled water and used a spray bottle. It's hot and dry here and I wound up refilling the bottle once. There are some micro-bubbles scattered randomly across the decals. The instructions say to leave the car out in the sun for a day or two and they may flatten out. If not then I'll have to decide whether to pop them or not.
That is the hard part about putting them on. I use a bondo spreader, a hard rubber squeegee and a plastic windshield tool when I do stickers. They can be very frustrating. You took your time and did the best you could. It'll turn out fine. I like how you did your measurements.
 
Rich, that looks amazing and has transformed the car! Nice work. I could learn a lot from you on patience and taking your time.

I sure wish the Plymouths had some sort of trunk stripe like that. The Dodges with the stripe look SOOO much better.
Thanks Dwayne. Now with the black six pack hood and the rump stripe the car has taken on a whole new attitude. I've had the decals for two months now and mostly because of a lack of time, but also partly out of anxiety I waited until this weekend to apply them. That, and I wanted to show the stripe at the Mopars at the Park show next weekend.
 
Auto Transport Service
Back
Top