• When you click on links to various merchants on this site and make a purchase, this can result in this site earning a commission. Affiliate programs and affiliations include, but are not limited to, the eBay Partner Network.

Painting the engine

Mark1972

Well-Known Member
Local time
1:05 AM
Joined
Jun 26, 2018
Messages
361
Reaction score
289
Location
Winnipeg
So in the next few weeks, I'll be dropping off all the parts I've ordered to the machine shop for engine assembly. Some parts, like the new water pump and housing, valve covers, timing chain cover, and intake manifold, are bare metal, or in the case of the valve covers, coated in that black EDM coating like how body panels are shipped. I've seen people paint the engine after assembly, minus the carb, distributor, and headers of course. I've seen people paint everything piece by piece and then assemble. Is there a right way, or a better way? This engine will be fully assembled and dyno'd before I get it back on my engine stand. So should I paint everything first or wait until it's dyno'd and then spray it before install? Also, if anyone has opinions other than just Google on a good engine paint, please let me know the brand.
 
I would spray right before installing it.
Any leaks can be addressed after the dyno.
There is a good chance that the dyno setup will result in minor scrapes.
 
I would agree with JimCoronette, paint t after you get it back from dyno. as far as paint, go to the auto paint store and get a small amount of sealer and single stage body paint and spray the engine with a spray gun.
 
I apply naval jelly and rinse it off (and dry, of course) so the surface is super clean. I would paint it up before dyno so you're good to go. You could touch up any dyno scratches easy enough.
 
You may want to "pre-paint" some of the items, that are hard or impossible to get at, like the timing cover, water pump back side, or areas hidden after assembly...
 
How do want it to look? Pre paint allows better detail. Stainless bolts, etc. Pre paint will leave some bare areas around gaskets. Easily touched up with a brush. Painting afterwards will give a factory type appearance. Either was single stage urethane body paint will outlast any spray bomb on the planet. Clean it well. Using primer allows better color coverage in either case. If you really want to get carried away grind the castings smooth. A little body filler here and there and you'll be able to wax it.
64 Engine.JPG

Doug
 
Clean the parts with some Eastwoods pre-paint prep, then I'd get some lacquer thinner in a can and brush as much of the engine I can, blow it off and lay down some epoxy primer. Get your dyno session done then get it back on your engine stand and make it pretty. Mancini has your engine paint
mopar-performance-engine-paint-169.jpg

Of course this all depends on the level of detail you want. Painting the whole engine at once will give you the "factory" look. Doing what Doug say's is the next level of detailing, lots of work but the end result is second to none.
 
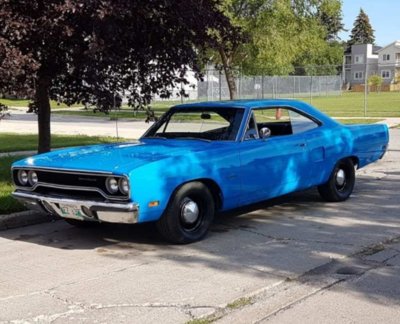
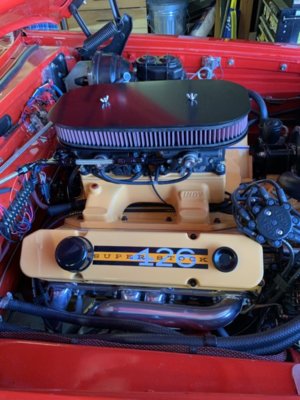
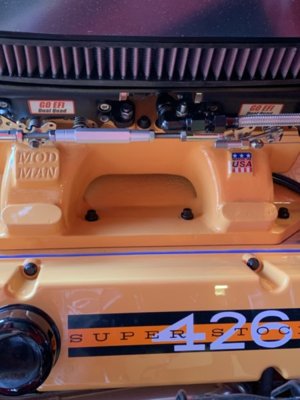
Hey guys. As always, thank you for the advice. I called my local autobody coating store and have ordered a kit from KBS Coatings in Street Hemi Orange. It's good for up to 450F and I can spray it out of my gun. Not sure how it will look against the blue, but we're going to find out.

IMG_20191110_192255.jpg
 
I painted some pieces before assembly, ran it on the dyno, then final cleaned and painted.

IMG_1315.JPG


IMG_1329.JPG
 
After 50 years of painting my engines with spray cans using the top brands (VHT, Duplicolor, Sem, Eastwood, etc.) I changed tactics. All looked good for a while, but after many miles, a few fuel spills, etc., the finish just didn't hold up. I was so impressed with Doug's (dvw) engine, I asked him for help, and am thrilled with the results. Thanks so much for helping me out, Doug:
1) Super clean everything with cleaner/degreaser. We are limited by the chemicals we can buy in California, but I found one that worked great. It's a slower drying product than acetone or lacquer thinner. Clean, then clean, then clean again. As Doug said, stop when the white rags stay clean...
2) Epoxy primer. I brush painted the block in the car. The heads, pan, timing cover, valve covers, water pump/housing, etc. I took to a local body shop to spray.
3) Single stage urethane top coat, brushed on block; sprayed on other items by shop.
This paint flows so well you cannot tell the block is brush painted. The shine is great, and it seems to be impervious to gas and cleaners. I would have loved to spray the parts myself, but with the absence of half my lungs, I thought it best to let the pros do it. Here are the products I used:
*Restoration Shop KW901 Grease and wax remover (great cleaner that doesn't remove the old paint).
*Restoration Shop Gray Epoxy Primer/sealer
*Restoration Shop Single Stage Acrylic Urethane, (I blended Daytona Yellow/ Hemi Orange)
I purchased all the above from TCP Global via Amazon.
It worked for me. Thanks again, Doug...
IMG_1015.JPG
IMG_1023.JPG IMG_1031.JPG
 
I did my 440 in the Bird some 30 years ago now... 30 and a month to be exact with a spray can. It's held it's paint on most of the engine but of course not in places like the intake from fuel, thermostat housing etc form heat. My body and paint guy painted my Bee's engine with urethane as a birthday present to me and I'm glad he did.
superbirdboughtfeb2020 002.JPG

Present day.. after 30+ years..
superbirdcleanup2019part2 310.JPG
beerestoration2017 324.JPG
beerestoration2019part2 640.JPG
 
Used two-pack PPG paint on my engine and auxiliary components. Cleaning & prep work are the most important ingredients. :thumbsup:

upload_2020-3-19_9-1-50.png
 
THeres some first class engine paints in this thread. I painted mine predyno. Turned out fine and installed fine. A little touch up and good to go
 
I would do it fully assembled if your going for an OE look. If you have fancy nuts and bolts you’ll paint piece by piece. PPG epoxy primer and Shop Line acrylic enamel.
EE171E6A-01DF-4D9A-BDEC-F5583B7CAB7C.jpeg
69D76A98-EAE2-4113-BF62-98C29AF5C501.jpeg
 
Auto Transport Service
Back
Top