• When you click on links to various merchants on this site and make a purchase, this can result in this site earning a commission. Affiliate programs and affiliations include, but are not limited to, the eBay Partner Network.

Polishing Aluminium and Stainless Trim Parts

Chargerjase

FBBO Gold Member
FBBO Gold Member
Local time
3:49 PM
Joined
Oct 16, 2013
Messages
1,586
Reaction score
2,666
Location
Kiel Germany (back again)
This has probably been discussed many times before but has anybody got a foolproof method how to restore trim parts? I have completed the hood trim with pretty good results using Mothers metal polish and 320, 800 and 1500 grit sandpaper. I have started on the aluminium rocker panels and they are pitted and dull. Am I doing the right thing and just need to persevere?
Also, after I have finished the polishing, do I need to clear coat the parts?
 
No clear coat required. Are you not using a buffing wheels on a bench grinder? My method really depends on how bad the parts are but I've had some with deep scratches that I've actually had to use a file on. I can say I really suck at working the dents out of trim but I try my best. So if I've used a file I will start my sandpaper at 100 grit and work up from there. Once I've reached 1000 grit I use a polisher with the velcro attachment for 1000,1200,1500 grits. Then I hit the part with a buffing wheel with black compound first a cutting action (moving the part against the rotation of the wheel) then a polishing action (move the part with the rotation of the wheel). After that I use white compound and just do a polishing action. Do not use the same wheel for different compounds, each one needs it's own wheel.

Sometimes my pieces come out almost perfect but other times I can still see faint scratches. They are hard to see until you've polished. I figure it looks way better than factory anyway so if it's barely noticeable my job is done otherwise I go back to sanding.
 
The stainless is easy...start with a 320 grit paper and work your way up (400, 600, 800, 1000) to 2000. Then using a dedicated buffer or 4" buffing wheel on a bench grinder and some white rouge, it will look like chrome when done. If you want that brushed stainless look, stop at the sanding grit that gives you the result you are after. No need to 'coat' stainless.

As for the aluminum, I know it was originally coated with clear annodize. I bit the bullet and sent mine off to King of Trim to get the old coating removed, dings removed, re-annodized, and painted where paint was supposed to be.
Others have sanded and polished their own. Aluminum will (eventually) oxydize and need to be re-polished if not annodized (coated). I suppose one could try a rattle can clear-coat. Don't know what the long term would produce. Maybe you could be the test case? Good luck with which ever route you choose. Keep us posted as to your results!

There are a couple of members who have worked over their own aluminum trim. Maybe they will add to this thread.
 
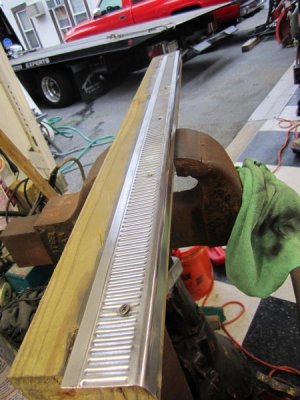
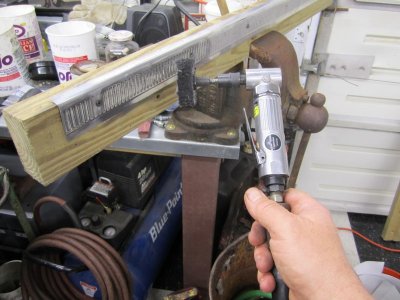
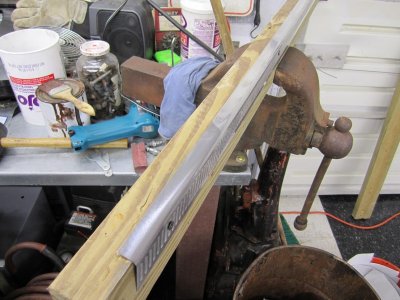
Pretty much the same here. Just watch how you hold the trim on the buffing wheel. It will rip it out of your hand and send it flying so fast it will make your head spin! I also use a die grinder with some small buffs on it for the areas I can't get at with the big buffer. Some of the deep pits may not come out, just something to keep in mind. If you have any longer flat pieces(door sill plates, etc)screw them to a board to keep them rigid and easier to handle. I have used the Mothers polish but last year tried Flitz metal polish and lately that is my favorite. I don't clear coat my parts because if it starts to peel you have a big job on your hands removing it. Good luck.
 
No clear coat required. Are you not using a buffing wheels on a bench grinder? My method really depends on how bad the parts are but I've had some with deep scratches that I've actually had to use a file on. I can say I really suck at working the dents out of trim but I try my best. So if I've used a file I will start my sandpaper at 100 grit and work up from there. Once I've reached 1000 grit I use a polisher with the velcro attachment for 1000,1200,1500 grits. Then I hit the part with a buffing wheel with black compound first a cutting action (moving the part against the rotation of the wheel) then a polishing action (move the part with the rotation of the wheel). After that I use white compound and just do a polishing action. Do not use the same wheel for different compounds, each one needs it's own wheel.

Sometimes my pieces come out almost perfect but other times I can still see faint scratches. They are hard to see until you've polished. I figure it looks way better than factory anyway so if it's barely noticeable my job is done otherwise I go back to sanding.

This is the same way I polish mine. And eagleone is absolutely correct, do not use the same wheel for different rouges! The only thing I would add to this is in the choice of wheels. Use a spiral or sisal wheel for the black cutting rouge and a loose wheel for the final white rouge. I believe the last time I polished my stainless back in Novemeber I got some great results using the green rouge also. Somebody might want to chime in that has used this color. I cannot recall in what step I used it. Can't remember if it was the final rouge or the second to last rouge. Mine looked like it was brand new when I finished.
 
Pretty much the same here. Just watch how you hold the trim on the buffing wheel. It will rip it out of your hand and send it flying so fast it will make your head spin!

Ha Haaaa! Know how that goes! I also wear welding gloves at the same time as well.


I taught myself how to buff out metal not that long ago. Local chrome shop wants about $40 dollars a foot to do it, so that's when I decided to just do it myself. Watched a couple youtube vids, Went down to the local boneyard and got some ratty old trim to practice on. Then off to the hardware store and bought a bench top buffer for $75 bucks. I also bought an Eastwood Stainless buffing kit with three 6" wheels (sisal, spiral sewn and loose), and three compounds black, brown and white (Emery, Tripoli and Rouge), for about $30 bucks. I usually start with 80-100 and end at 1000 grit. For removing dings, dents and deep scratches, I use set of small precision files, a couple Matrin body hammers with different ends, and a small shot peen bag for tapping the dings/dents out. One thing is for certain....It's time consuming!! But, you'll end up with trim that literally looks like chrome.

q.jpg

qq.jpg
 
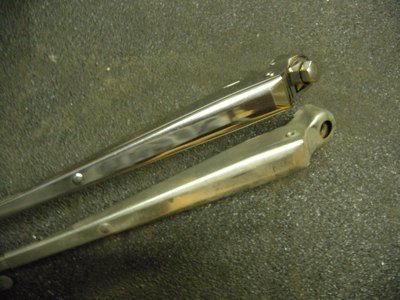
3X on everything said. before and after on wiper arms using the same tools as in Prop's picture...
 

Attachments

  • door latches204.jpg
    door latches204.jpg
    29.9 KB · Views: 729
Thanks guys, I have been using a buffing wheel in my battery drill, but I think I will need to invest in a bench top buffer. Nice work Propwash and 2059. I want my trim to look nice so I am happy to take my time.

- - - Updated - - -

Finish aluminum off with flour. That takes the last tiny scratches out. I haven't tried it on stainless yet.

Will look at that. Also, I have heard of cream of tartar and vinegar.
 
You will not regret investing in the bench top. I started with a hand held drill and that lasted for about one piece of trim. I was working with trim like this size. Finished piece by the way. Sorry, had to show it off :)

image.jpg

It was a lot of work, but I couldn't have imagined doing all of my trim without a bench top.
 
You will not regret investing in the bench top. I started with a hand held drill and that lasted for about one piece of trim. I was working with trim like this size. Finished piece by the way. Sorry, had to show it off :)

View attachment 176306

It was a lot of work, but I couldn't have imagined doing all of my trim without a bench top.

Haha, show it off all you like PlumcrazyRR. Looks amazing. I was feeling a little bit dejected about the process not looking as good as it should, but the pictures in this thread have given me new confidence. I have buffed a similar piece of trim to yours, and that's why I created this thread because I needed advice. I am off to buy a bench top right now lol.
 
I have also done the polish work on my trim, and it is very time consuming. As you work it, check it in the bright sun if possible, it will show the scratches. Aluminum is much easier then stainless as its a softer metal and responds much quicker to sanding. Cudachick really helped me understand the sanding and polishing process, however, I have seen two different approaches to polishing. If you have a buffer with the horse power (at least 2 to 4), you can sand up to 600 grit then use black compound to remove the 600 grit scratches. If you don't, you can go up to 2000 grit then use white compound for final polish on aluminum and green for stainless. Sisal wheels are tricky so if you can get away with out using one it will save some sanity. Some mentioned $40 a foot, but around here its $75 a foot, so I spent the money for a bench grinder an buffing wheels and compound and a crap load of sand paper. Larger pieces like the windshield lower bottom trim are a pain in the ***, but it can be done.

Here are a couple of examples.
Windshield stainless trim
20140222_171222small.jpg

Grille trim - aluminum
20131208_132846small.jpg


By the way, to remove the anodization from aluminum trim, soak in heavy duty oven cleaner, keep it wet, this will reduce the amount of sanding required. All of my aluminum trim is raw, no coating or anodizing has been re-added, I suspect it my start to oxidize, but should be easy to re-polish and wax to keep it looking good.
 
When I'm polishing, I only sand to remove the pores on a material (mainly cast ali). Sometimes I sand more if there is alot of scratches light or other wise. After that, its black compound on the hard sissle wheel, brown on a rag wheel then white on a different rag wheel.

Add a small amount of wax constantly, try to avoid too much on at a time as it'll slow you down. if you find its taking a while to cut, add more wax. Sometimes you are under using the wax, but you are better to under use then over use.

Each cut will take a lot less time. The first will take ages, second quick is, last is just for added shine!

In between cuts, wipe the old wax off with thinners or 'prep wash', it will melt it off without damaging the fresh metal. DON'T USE DEGREASER!

Also note that the first black/sissle wheel will literally cut away material, more evident on ali. So it will 'soften' or round edges, slightly reshape pieces. Very very slightly. Its one of the reasons I like polish over chrome, it cuts the harsh look of chrome out. You get a soft liquid like mirror effect instead
 
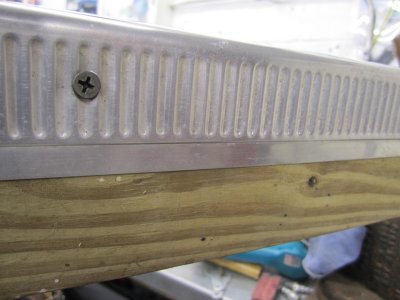
:blob1:Making up "jigs" to hold the part while polishing are a great help.I have a lot of BLING to poish!!!!!!!
 

Attachments

  • 1.19.13 026.jpg
    1.19.13 026.jpg
    161.3 KB · Views: 573
  • 5.27.12 018.jpg
    5.27.12 018.jpg
    93.8 KB · Views: 574
  • 5.27.12 012.jpg
    5.27.12 012.jpg
    120.3 KB · Views: 547
  • 5.27.12 011.jpg
    5.27.12 011.jpg
    96.1 KB · Views: 576
  • 5.27.12 010.jpg
    5.27.12 010.jpg
    133.3 KB · Views: 592
  • ALT (2).jpg
    ALT (2).jpg
    63.4 KB · Views: 574
  • 4.27.11.jpg
    4.27.11.jpg
    58.9 KB · Views: 529
  • Baby Smokey (2).jpg
    Baby Smokey (2).jpg
    92.6 KB · Views: 554
:blob1:Making up "jigs" to hold the part while polishing are a great help.I have a lot of BLING to poish!!!!!!!

That's a great tip Hemi-itis. Gonna use that one as well. Lots of great ideas here thanks to everybody for their help. If anybody else has some ingenious ideas, please share here.
 
For those of you who are polishing with a power or air drill, you'll do a lot better justice by keeping the tool at a consistent speed throughout. Variable speeds are great for some things but trim polishing is not one of them -- you want it smooth and steady at all times.

I'm digging on the results in this thread!! :D Keep it up fellas.
 
Auto Transport Service
Back
Top