• When you click on links to various merchants on this site and make a purchase, this can result in this site earning a commission. Affiliate programs and affiliations include, but are not limited to, the eBay Partner Network.

Rust revival

Black63

Well-Known Member
Local time
11:08 AM
Joined
Nov 13, 2010
Messages
146
Reaction score
8
Location
Canada
Hi guys...
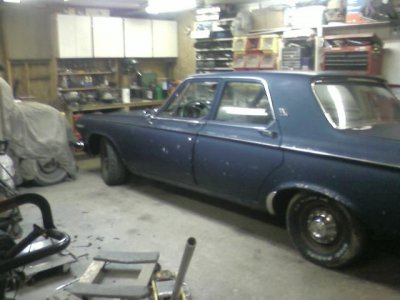
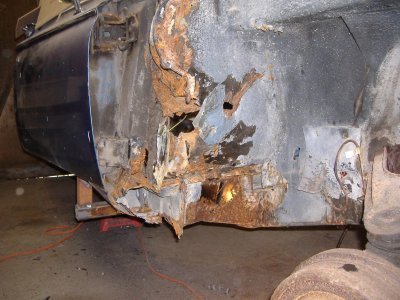
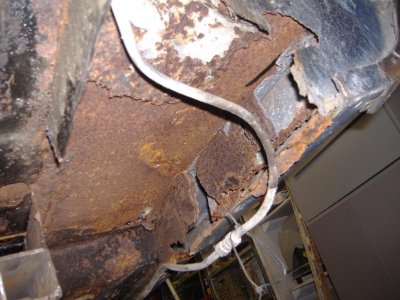
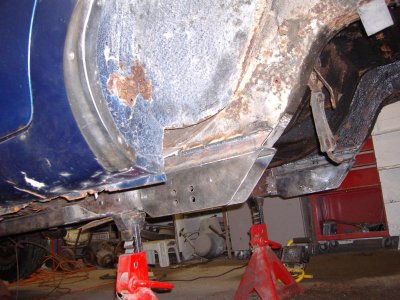
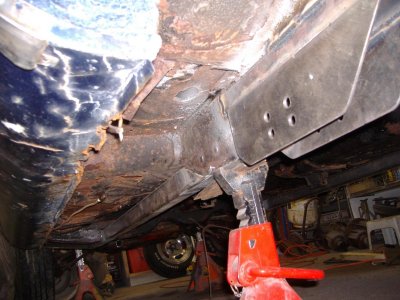
I'm a Newbie to the Mopar world and have a rusty 63 that I'm reclaiming from the grave.
Shes just a 6 cyl-4 dr (for now) but that doesn't matter as far as the story goes.
Hopefully you'll all find it interesting and maybe even helpful for some. :)

When I get the body back in shape she'll be going satin black with either aluminium slots or maybe 15" steels, widened in the back, with DD caps.

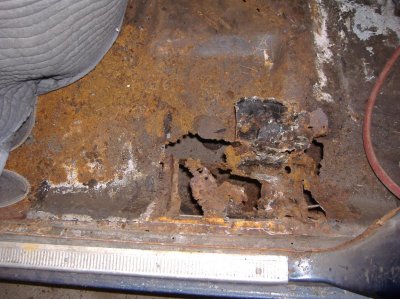
WARNING...not for the weak of heart! :puke: LoL
 

Attachments

  • 014.jpg
    014.jpg
    55.4 KB · Views: 2,631
  • 011.jpg
    011.jpg
    134.7 KB · Views: 2,572
  • 010.jpg
    010.jpg
    121.6 KB · Views: 2,532
  • 001.jpg
    001.jpg
    195.2 KB · Views: 2,572
  • 005.jpg
    005.jpg
    196.1 KB · Views: 2,409
  • 004.jpg
    004.jpg
    182.7 KB · Views: 2,430
  • excess pics 049.jpg
    excess pics 049.jpg
    179.8 KB · Views: 2,382
Whoa! Why are those pics coming up so big!?!? Do I have to resize them all???
 
Well it's a good thing you have long cold winters up there, looks like you have your work cut out for you. Good Luck, and welcome to the site.
 
Beware.......a lot of money to repair all that, good luck and post lots of pics.
 
Wow - must have been a Wisconsin car - LOL. Good luck with it - and have fun as much as you can!
 
A fun project for sure!
 
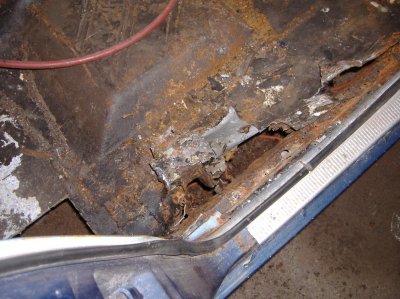
Ouch! judging by those pics.......your also in for a pandoras box of cowl rust issues???
 
keep us updated on the repairs black 63- I love the body style and its good of you to bring this one back from the grave!!....:icon_hang: :eusa_boohoo:
That frame/innerfenderwell look rough..damn

Do you plan to fabricate the pannels yourself or new peices or possibly from a donor car?
 
PUSH BUTTON TRANSMISSIONS RULE!!! I wish I had one. Awesome car. good luck with it.
 
Thanks guys! Appreciate the good wishes...she's obviously very rough but its coming along.
I've been at it since early January and I'll be putting up the progress pics as I get a chance.

keep us updated on the repairs black 63- I love the body style and its good of you to bring this one back from the grave!!....:icon_hang: :eusa_boohoo:
That frame/innerfenderwell look rough..damn

Do you plan to fabricate the pannels yourself or new peices or possibly from a donor car?

A bit of both actually.
I was lucky enough to get a really nice front section and torsion bar crossmember for a good price from a local racer who had it as a spare.
I'm using just the torsion member as my front rails are really nice despite how everything looks.
The center floor section under the seat back to the rear floor seam will be 67 B body. I was given whatever I needed from it (GOOD friend)...including the 8 3/4 and the V8 crossmember and pwr steering setup.
Everything else I'm fabricating myself.
I'm NOT a purist...especially when it comes to a 4 dr-6 cyl car, but that said...it still has to look good and work well as a family driver once its done.

I know I'm preaching to the choir, but man these are cool cars!
 
OK...first thing was to get her up higher and give it some strength in the underbody.
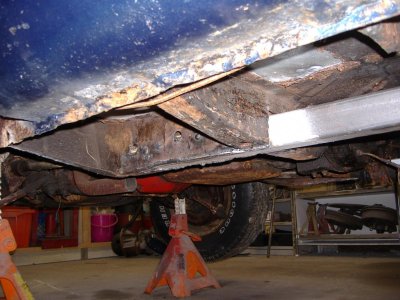
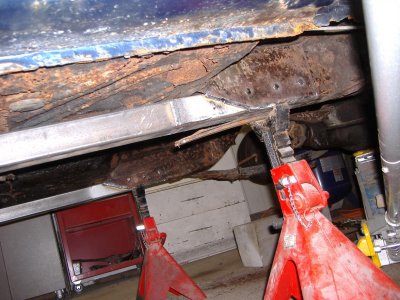
I decided to use 2x2 1/8 wall for subframe connectors, but put the tube deep into the front and rear factory rails by cutting out the bottoms and slipping the full length connectors in. The original rails needed a bit more strength than just butt welding to the edge.

I had to pie cut the connectors to get the right angles to make everything go together. The connectors are plug welded as well as bottom welded.
The bottom welds are a bit crappy looking as I was having trouble with the old undercoat leaching out of the metal even though I cleaned it off fairly well.

I turned up the power and the hot beads kinda sagged a bit...but penetrated well. I'll clean it up later when I'm grinding everything else.
The connectors really stiffened things up and I felt much better about lying under the car after they were in!

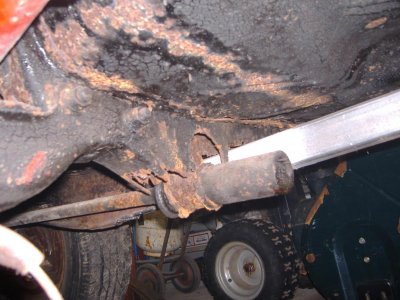
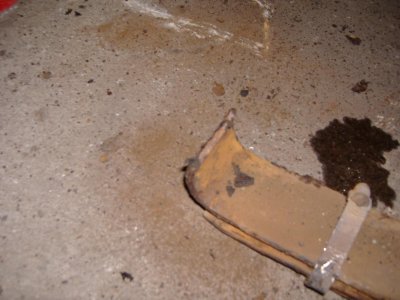
Pulled the old rearend and as I was dragging the housing out one of the main leaf bundles came crashing down!
The front spring eye had broken in half!!!
Guess rust got in between the rubber and spring, swelled up and eventually snapped the spring.
Looking at the other spring showed that one to be split as well, but still locked in place somehow.
Keeps getting better....LoL

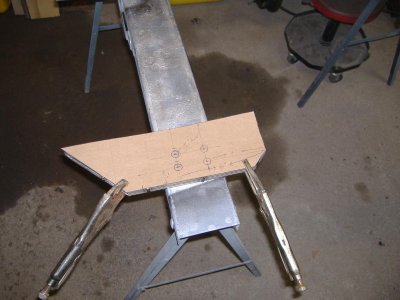
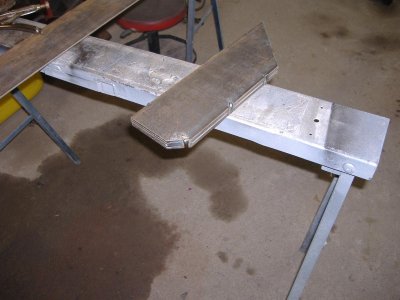
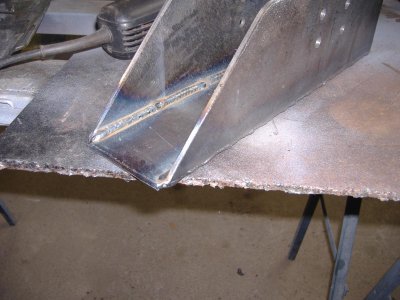
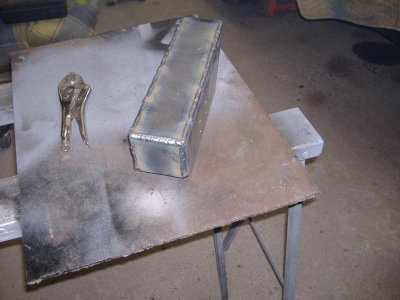
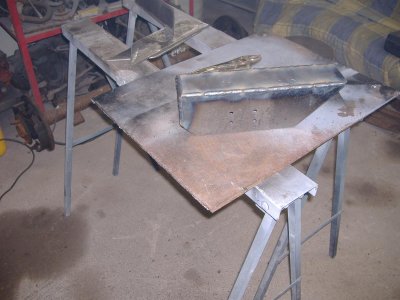
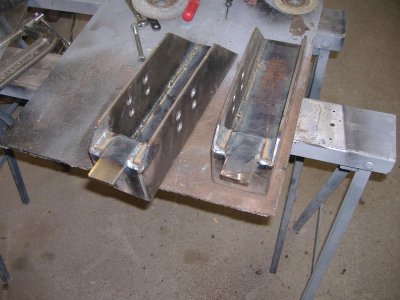
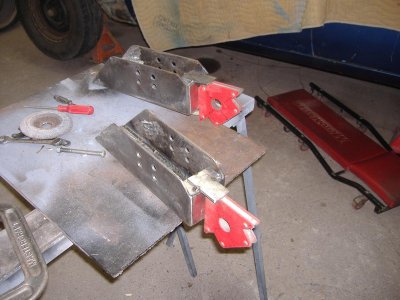
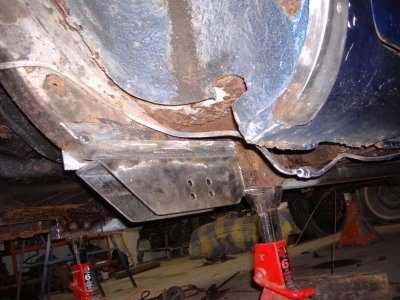
Made up some 3/16 plate spring boxes to relocate the rear springs into the rails.
I made them longer to reach right to the subframe connectors for additional strength.
 

Attachments

  • 057.jpg
    057.jpg
    102 KB · Views: 2,207
  • 045.jpg
    045.jpg
    151.9 KB · Views: 2,259
  • 044.jpg
    044.jpg
    177.8 KB · Views: 2,285
  • 017.jpg
    017.jpg
    109.5 KB · Views: 2,219
  • 015.jpg
    015.jpg
    114.1 KB · Views: 2,241
  • 007.jpg
    007.jpg
    146.2 KB · Views: 2,168
  • 006.jpg
    006.jpg
    125.5 KB · Views: 2,155
  • 005.jpg
    005.jpg
    126.8 KB · Views: 2,148
  • 002.jpg
    002.jpg
    132.6 KB · Views: 2,200
A fella that hand fab's rails/connectors for a rotted out 4 door.. Now that's a true car guy!!!

Pretty welding and Kudo's for taking on such a project!!!
 
Thanks guys!

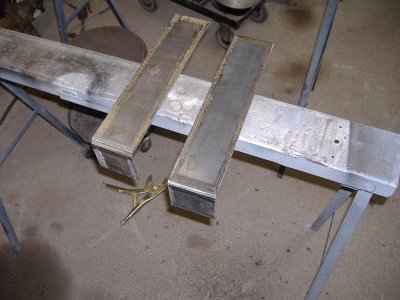
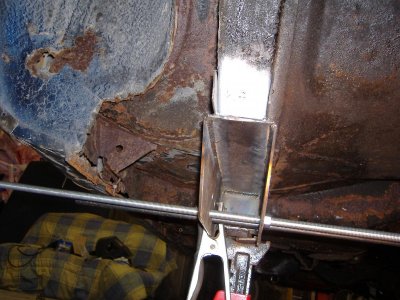
Made some tabs and welded into the boxes to spread the load along the tube instead of across the weld.
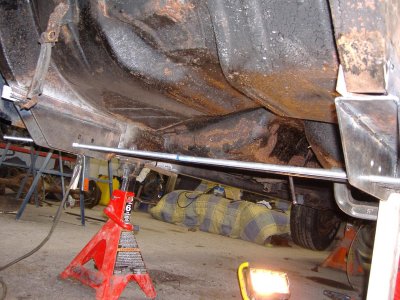
The boxes weld directly to the connectors because the lower sections of factory rail were a bit rough and I couldn't really trust them.

Put some strips along the top of the boxes so I could bench weld the attachment and also give myself a bit of adjustability while they were being aligned to the rails.

I used some threaded rod and a full length piece of steel dowel to act as a guide to align the boxes to the car.
No original spring mounts left to work from!
 

Attachments

  • 005.jpg
    005.jpg
    195.7 KB · Views: 2,043
  • 004.jpg
    004.jpg
    137.5 KB · Views: 2,080
  • 002.jpg
    002.jpg
    148.3 KB · Views: 2,156
  • 001.jpg
    001.jpg
    140.5 KB · Views: 2,095
  • 012.jpg
    012.jpg
    157.7 KB · Views: 2,049
  • 019.jpg
    019.jpg
    190.7 KB · Views: 2,050
  • 022.jpg
    022.jpg
    186.7 KB · Views: 2,041
  • 023.jpg
    023.jpg
    179.3 KB · Views: 2,037
  • 026.jpg
    026.jpg
    139.6 KB · Views: 2,052
you are starting to make me think the revival of my 64 ford galaxy might not be impossible. :grin:
keep going man! this is good stuff!.
 
Auto Transport Service
Back
Top