• When you click on links to various merchants on this site and make a purchase, this can result in this site earning a commission. Affiliate programs and affiliations include, but are not limited to, the eBay Partner Network.

Seat cover "How Too"

Speedbird

Bird of Pray
Local time
7:56 AM
Joined
Jun 24, 2013
Messages
4,145
Reaction score
4,817
Location
Status Quo
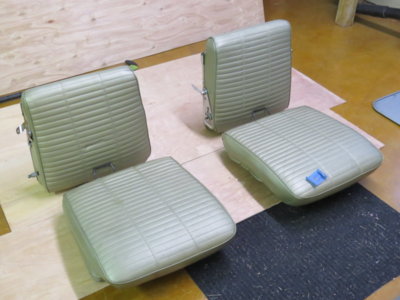
There are a few differences in these cars.
I don't think there is any guidance on the internet about some of the peculiar things about 66-67 Charger interior.

I just finished and would like to ask if:

Is there enough interest in sharing what I learned?
I did somethings better than factory.
I got good deals through local sources.
And I found out that all "hog rings" are not created equal.


Everything I had was pretty trashed, even the "Mother In Law" Seat.
I had repair most all the frames too.
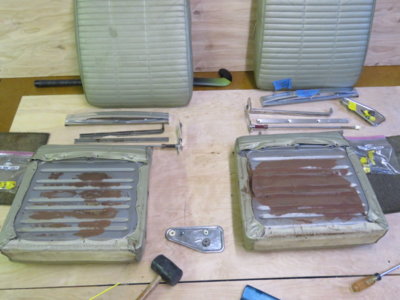
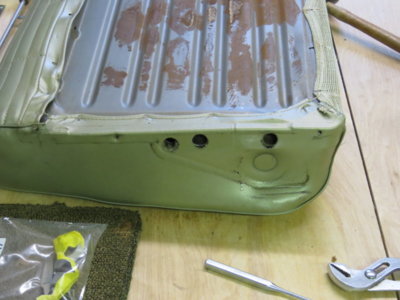
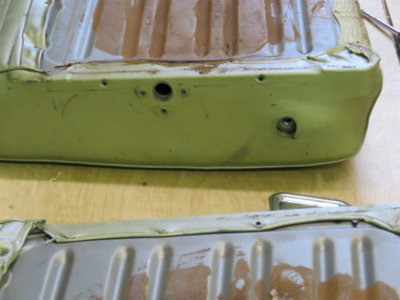
Both back bottoms required welding.

20180714_131258.jpg
View attachment 638707

20180714_140709.jpg
20180725_165754.jpg


20180725_165521.jpg

20180725_161724.jpg
20180726_141827.jpg

20180718_165241.jpg
 
Last edited:
I'd go for it. It's what this site is all about, sharing what we've done to our cars and learning from others. Looks to me like you did a good job.

I paid over two grand to have a professional recover my front buckets. I supplied all the materials, they had to use the original covers for patterns because no one else makes them. No way was I about to tackle that job.

The job turned out great, they even copied the factory stitching. If the covers would have been available, I might have tried to tackle the job but I would have had to research how its done. I havent seen much documentation showing how.
 
Last edited:
There are a few differences in these cars.
I don't think there is any guidance on the internet about some of the peculiar things about 66-67 Charger interior. i think you've done really nice job, did you use foam factory for supplies. They manufacture many grades of foam.

I just finished and would like to ask if:

Is there enough interest in sharing what I learned?
I did somethings better than factory.
I got good deals through local sources.
And I found out that all "hog rings" are not created equal.


Everything I had was pretty trashed, even the "Mother In Law" Seat.
I had repair most all the frames too.
Both back bottoms required welding.
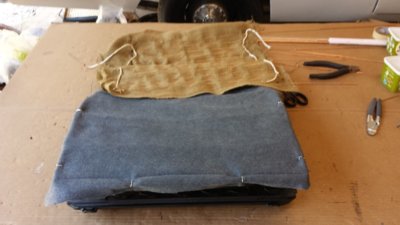
View attachment 638704 View attachment 638707

View attachment 638717 View attachment 638718

View attachment 638719
View attachment 638713 View attachment 638721

View attachment 638722
 
I'd be interested in anything you had to offer. I'm starting my seats as soon as I get all the materials for my 66 Charger.
 
There are only one or two sources for pre-made covers.
I'll let people guess which one I used.:rolleyes:
There was a little initial confusion about whether or not they could supply the front armrest/seat.

20180330_164457.jpg


Since it was not listed, earlier this year I contacted "tech support" via email and was told they did not reproduce that item.
A little while later, I decided to just go ahead and order the seats and deal with the front problem later locally.
I called and gave the order directly to them and again inquired about the armrest.
The sales person asked me if it had the console or the fold down arm rest.
I said it had "the mother in law seat".
He laughed and said he had never heard it called that but they did make it.
I sent this to them.
Don't know if you can read it with the reduction. First column, second paragraph.

Scan10004 (2).JPG


Their web site seems to have some new things on it now.
I did not know it at the time, but the same middle seat seems to have been used on 73 and 74 Chargers.
Check it out.


I'll post some information about getting some supplies together first.
 
Last edited:
Absolutely, in fact with credit to you, I would like to post some if not all on my website which feature help about 66-67 Chargers.
 
None of this is rocket science.

Hog rings and pliers.
Get a good set of pliers that are spring loaded.
These are Ion.
These are good pliers.
They came with a few hog rings that are a little large and tend to go katty wompused.
Get the Eden Farms pack of 450.
They are good and are reasonable.
Exactly what you need for most of this.
Don't be afraid it will be too many.
It won't be a lot too many, especially if you have to re-position some places if you don't like the way it looks.
If you have a good pair of dykes you can snip the rings once they are installed and redo if necessary.
Of course, after reading this you may not make as many mistakes as I did. :)

20180726_142743.jpg


The real "hog rings".
I got mine at the local ACE.
These things are wicked.
You won't get these off easy.

20180726_142747.jpg

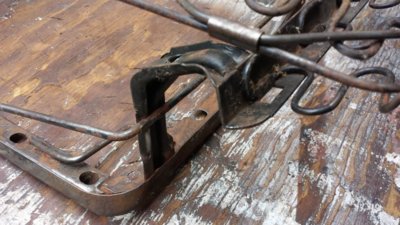
One place I used them was to repair the frames.
Whoever made the seats for Chrysler used some "bands" to hold cross bracings against the wavy springs.
Some of the little paper wrapped cross wires were too rusty.
One was even broken.
More on that later.

Some of the frames just needed wire brushing and priming with Rustoleum Rusty Metal primer.
20180727_102357.jpg

20180725_112532.jpg


The front bases and bottoms needed blasting.

20180412_184049.jpg
20180413_191944.jpg
20180714_135603.jpg
 
Last edited:
This is why no one makes molded foam for the rear seats.
It isn't molded.

I had never shopped at JoAnn Fabric before.
If you have one near you it's worth a trip.
The cutting table lady told me they had a 50 percent off in store coupon I could download on my cell.
When I got to checkout I had trouble doing it.
But a lady in front of me handed me a coupon and then the register spit out some more.
So, I got 50 percent off on my foam and other things.
Hobby Lobby will come up later.

20180723_095524.jpg


(You can get one of these at JoAnns. They are by the cash register.)
s-l225.jpg


The rear bottoms are one piece of 1 1/4 inch think foam.
If you get the 1 inch and 1/2 inch sizes you can glue them together.
I just bought the whole sheets since I didn't know exactly what I needed.

upload_2018-8-15_17-9-11.jpeg


Put the complete piece where any seam isn't in a "fold" on top.
I may be getting ahead of the process on that but here's a picture.
20180725_164051.jpg

Measure your old foam.
I can't remember the dimensions. But I used the same dimensions as the factory.
Looks like you will need a little over 2 feet both ways.
So, you can get one dimension in a sheet but will have to piece together the other dimension to get what the factory installed..

20180714_125105.jpg


Let me go ahead and put this here under what you might need but it will be for the front seats later.
You will notice the factory put a piece of "felt" around the edge of the frame. (Well, sort of).

These are back bottoms and in theory they won't see the same use as the front.
So, I'm not going to "upgrade" the springs like I will on the front seats.
This picture is a size comparison.
Original, reproduction and welding rod that I'm going to use.
In the picture you can see where I'm going with this.
There is a kit which I suppose would be good.
It has felt, burlap and wire.
I'm going to do it differently.
Also , I'll use both 20/80 and 35/65 wool/rayon felt blend from Joanns in place of that strip felt like factory.
I happened to get a killer deal on the 35/65 which I used on the front seats.


20180727_143418.jpg
 
Last edited:
I tried to get some hog rings from a local shop, the dude was a real dickfore about it so I wound up having to take 2 needle nose's and twist the old ones back in shape. So yeah, I recycled them. Talk about keeping things stock!
2 sets of hands is better then 1, take your time, pay attention. It's almost like making a bed! Good Luck
 
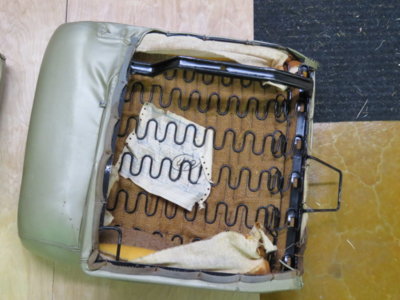
All the seat bottoms and the front seat backs had some variation of little rods through burlap.
Many of mine just fell in half. So rusty.

20180714_124449.jpg


Secured with some rotten natural cord.
(This is a front bottom in better shape.)

20180714_130058.jpg


I only used the rods on the bottoms, not the front backs.
I guess the little rods were Chrysler's way of spreading the load across the wavy springs.
I would say they were not spring steel.
1/6 welding rod?

20180724_163054.jpg

On the rear bottoms I put a layer of felt, then burlap and another layer of felt around the appropriate edges.
So that's double felt on the front edge. Mine is better than what was on there.
And that wool/rayon felt material is anchored on the edges as well.
Tough stuff.

20180724_170152.jpg


Notice that I put more where the person's rear is going to actually be in the seat.
I tried different ways of duplicating this.
May not be absolutely necessary.
But I liked it.
The best way I found was run the rods through burlap and use needle nose to curl the ends around the cord.
Then squeeze it tight on the cord.

Fasten to new cord to the best places for you.
You can work it tight with the hog rings.
Again, this may be more trouble than is really necessary.
But in each of the bottoms I tried to make a firm base and not make any one wavy spring do more than the others.
I've seen them broken.
Maybe that causes it?

20180725_144848.jpg


Pull the new foam around like the old was.
(The old foam is all compressed and age squeezed.)

20180714_124639.jpg


20180725_164856.jpg
20180725_154215.jpg


It may be obvious.
But I didn't see anyway to attach the rear first and the roll the front over the foam like other seats.
I believe that is the recommend way so you don't tear the rear.
But the front "pocket" on these is so deep, I slipped the front over first and then attached the rear.
Then attached the front.
Plastic helps things and you can pull it out before putting the rings in.
I was using those killer pig rings on the rear bottoms before I found the lighter weight ones at Eden Farms.

20180725_165952.jpg


There were rusty rods in the rear edge of the original covers to spread the load.
I think those are called "listing" rods.
I used new welding rods of the same size as the old rods.
You will have to cut a slit to slip the new rod in the new covers and curl the exposed end like the old rods..

20180725_174013.jpg
 
Last edited:
If you are watching this thread, I just ran up to Joanns for some vinyl for door trim.
I'm going to put new carpet on the door panels to match the rest of the carpet.

70 percent off on the foam through tomorrow?
I got 50 percent off on all my foam, burlap and muslin.

joanns.jpg


20180821_101012[1].jpg
20180821_101044[1].jpg
 
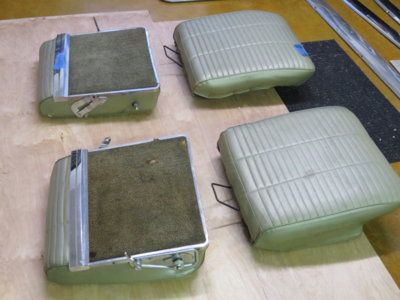
This car had that plastic/chrome piece in the center of the rear backs but not the front.
I wonder if that is common?
Let us know what your car came with.
This is a 67.
I'm not going to reuse the trim piece.


The rear backs had some type of cotton batting like you would find in a chair.
Everything was in good shape since it was sort of sealed up.
So I didn't disturb that.


20180706_163159.jpg
20180707_103910.jpg


I guess this is the big difference.

20180707_102134.jpg


BE CAREFUL with those little tabs on the back.
DO NOT bend them more than enough to get the cover on.
The are delicate and will break.
Use a leather punch make the holes.

Mine only had some surface rust.
Took care of that.
Getting ready to use spray adhesive to glue the board to the metal.
20180713_160821.jpg


My wife had some paper that is for "matting" framed pictures.
It seemed like a good thing and very much like what was on them.
If you want something different, more "plastic", Hobby Lobby would be a place to get some absolutely water proof board.
But it is pretty expensive compared to free.
I learned what "oil board" is.
But is only thin for stencils.

20180713_152333.jpg


You want to leave just carpet for the stainless trim to cover the edge.

20180713_154259.jpg


My plastic bushings were toast.
I had a piece of nylon that I was able to turn down.
Took some belt sanding to make the lip thin enough.


20180714_163316.jpg
20180718_161723.jpg
20180718_165718.jpg


20180713_190514.jpg


I thought the front seat back covers would be the easiest to do.
(And get them on "right" with the molded foam.)
I was wrong.
 
Last edited:
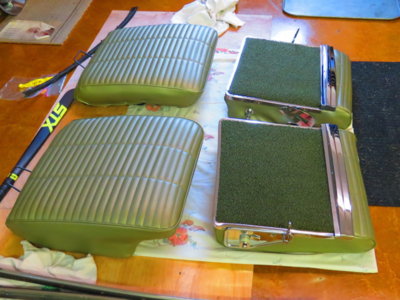
I'm restoring my 66 Charger now. It's in the paint shop. Here's some pics of the back seats. All the pictures are the original seats except the last. The last picture is the seats recovered and recarpeted.

001.JPG 002.JPG 004.JPG 003.JPG 004.JPG 005.JPG 008.JPG
 
Last edited:

It looks like your 66 had vinyl all the way around to the back side instead of a cloth mesh like the 67.
I wonder if Chrysler contracted out the seats to various shops or did it in house.
Did you replace the covers and the carpet?
It looks like you did not have the trim piece in the middle of the back.
 
This car had that plastic/chrome piece in the center of the rear backs but not the front.
I wonder if that is common? Let us know what your car came with. This is a 67. I'm not going to reuse the trim piece.

The decorative center piece was installed on all (4) seats in 67.
 
Auto Transport Service
Back
Top