• When you click on links to various merchants on this site and make a purchase, this can result in this site earning a commission. Affiliate programs and affiliations include, but are not limited to, the eBay Partner Network.

What am I missing here? REAR VIEW MIRROR HOLES/ VISOR TIPS

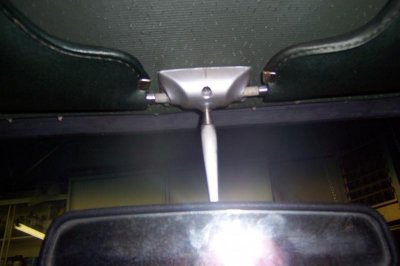
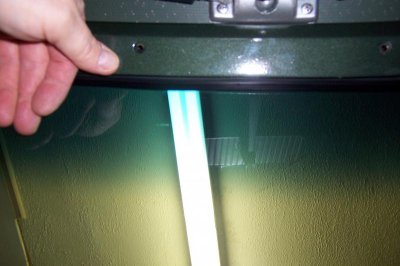
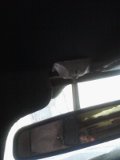
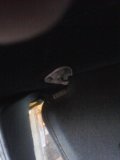
On my `66 Belvedere there are two separate pieces for each visor. I doubt they changed the design. They were a bit of work to get out for polishing (mine are chrome)...but they did come out. They were also a bit of work to get back in. You can even push them too far in if you are not careful. As long as there is sufficient room between the visors themselves to clear the mirror, then it's just a matter of twisting these pegs in far enough to clear the mirror base. There are no 'tricks', just a good grip with a pair of pliers and some twitsing/ pulling motion. Do this with the rubber tip removed so you can re-use them. Stay at it. You'll get them out.

Thanks. I am going to have to push those things in. I cant believe I would have to do this but maybe the guy I bought the car from had them this way and I dont remember 12 yrs ago because I only drove the car 1 yr. before the restoration.
 
hey Dave, just thought of something...could the piece of trim be upside down or something?? i cant remember if it only goes one way, or it could be the wrong piece of trim??

i dunno...just spit-balling here!
 
hey Dave, just thought of something...could the piece of trim be upside down or something?? i cant remember if it only goes one way, or it could be the wrong piece of trim??

i dunno...just spit-balling here!

Well thanks to everyone's help the visor tips are in and done. Cant believe this pushes in that hard ( I know I would of fixed this 10 years ago. maybe I figured I would fix it when I restore it ). As far as the trim piece MARPAR. It is funny but I think it only fits one way. I took a picture and you can see it is pushed right up against the rear view mirror and if you put a pencil thru the hole it does not even hit the roof. All the holes line up when I push it back by removing the mirror.
 

Attachments

  • 100_2503.jpg
    100_2503.jpg
    34.1 KB · Views: 188
  • 100_2504.jpg
    100_2504.jpg
    48.4 KB · Views: 146
Thanks. I am going to have to push those things in. I cant believe I would have to do this but maybe the guy I bought the car from had them this way and I dont remember 12 yrs ago because I only drove the car 1 yr. before the restoration.

I know what you mean about remembering. Shoot...there are things I don't remember between the tear-down and assembly and some things have barely been a year on mine! Praise the shop manual!

Trying to get that trim in after installing the headliner was aggravating to say the least(!) At one point I even pulled the headliner back to see what angle I needed to put the screws at to get them in the holes! Attached isn't the best photo, but I backed one screw out and as you can see they are actually angled a bit forward. my trim butts right up against the rear view mirror and covers most of the windshield seal. The photo looks goofy because the hood is resting on top of the car and is overhanging the windshield...I had no where else to put it while the engine goes in! There is a nice thick, doubled up, moving blanket protecting the new paint. If it's any consolation, I had more trouble re-installing interior pieces than putting any other part of the car back together.
 

Attachments

  • DSC_0613.jpg
    DSC_0613.jpg
    24.2 KB · Views: 140
Glad you got it figured out...
 
glad you got 'er done Dave! scratch one more off of the list!!!!!!!
 
I haven't put that trim up yet, sounds like it is going to be fun. When I got my car it only had the end screws on the trim. What does the middle screws screw into?

Dave F
 
I know what you mean about remembering. Shoot...there are things I don't remember between the tear-down and assembly and some things have barely been a year on mine! Praise the shop manual!

Trying to get that trim in after installing the headliner was aggravating to say the least(!) At one point I even pulled the headliner back to see what angle I needed to put the screws at to get them in the holes! Attached isn't the best photo, but I backed one screw out and as you can see they are actually angled a bit forward. my trim butts right up against the rear view mirror and covers most of the windshield seal. The photo looks goofy because the hood is resting on top of the car and is overhanging the windshield...I had no where else to put it while the engine goes in! There is a nice thick, doubled up, moving blanket protecting the new paint. If it's any consolation, I had more trouble re-installing interior pieces than putting any other part of the car back together.


Thanks I will keep trying on that trim piece.. I hope People not finished with there car can benefit from this like DFARMERCSE.
 
I haven't put that trim up yet, sounds like it is going to be fun. When I got my car it only had the end screws on the trim. What does the middle screws screw into?

Dave F

Dave. Check your roof very close and you should see all the other holes along the front were the rest of your trim screws go.
 
Hey guys. I saw something very important on the trim piece I am talking about. Just happened to be checking threads and stumbled across this. LOOKS LIKE CLIPS ON THE BACKSIDE OF THIS TRIM I NEVER KNEW ABOUT BUT HAVE THEM HOME AND LOOKS LIKE THE SCREWS DONT EVEN HIT THE ROOF PICTURED HERE ( LOOK CLOSELY ).
 
I started a new thread on these clips called ( Found clips. Now were do they go? 68 gtx trim ). NEED HELP HOW AND WERE THEY GO. THANKS.
 
Auto Transport Service
Back
Top