• When you click on links to various merchants on this site and make a purchase, this can result in this site earning a commission. Affiliate programs and affiliations include, but are not limited to, the eBay Partner Network.

1964 Belvedere

I would have given the engine bay a shot of paint before installation. Just a thought.
 
I know, but couldnt find the time to do it, loosing my garage so I had to get the car finished as soon as possible.
 
All I can find is the 15 inch long armrests on their site. I believe The belvedere should have the short 9-11 inch.

I have a thread regarding the armrests on early b body, but it´s a jungle, seems there is 3-5 different bases.

maybe the early A-body bases are the correct ones?????

I probably have what you need...I'll check when I get home later today. You need front and rear?
Please PM me as I do not get on here too often.

- - - Updated - - -

I would have given the engine bay a shot of paint before installation. Just a thought.

exactly what I thought.................LOL
 
I just went and looked at my cars. I am wrong. There are Plastic bases and vinyl inserts with and without ash receivers.
All of mine are 10" all but one are blue. One is blue base with red insert.

I was thinking 62 darts.

two fronts and two rears for $120 + shipping.

I'll assume you do not want them if I don't hear back from you today.
Steve
 
Update: Car works pretty good, I´ve got rid of the window tint, and it looks soo much better.
Have a few bugs to take care of.
Need to change/drill the kickdown lever, transmission woun´t shift the way I like no matter how I adjust it (too early 1-2, and shifts to 3rd at 6000 rpm). Using transgo tf2 and Lookar wires.
Discovered a 4 inch crack in the top tank of the radiator, took 3 hours to get the radiator out of the car, solder and install it in the car.
 

Attachments

  • image.jpg
    image.jpg
    77.2 KB · Views: 402
  • image.jpg
    image.jpg
    103.3 KB · Views: 415
Bases for my 64 Sport Fury are indeed 15" for front, 12" rear.

Tried looking in my 64 parts book...but, might be missing those pages. Off hand, I did a quick search for 64 Belvedere. From one interior photo I looked at, front base is colored, and short of the door handle. Could be possible to look up any photos online, to get a better idea what you are looking for.

I still have the correct bases and pads you wanted .....but you need to come up to my price. Picture and price are listed here for sale..YOU have to pay all of the shipping charges.
 
Hedman 78030 headers installed yesterday, went in pretty easy, just some minor tweaking of the driverside with a hammer. ( needed some more clearance for the ministarter and torsion bar.


Garage time with kjalltrac and his retard a-body brother(65signetsweden on fabo). Drinking beer and some moonshine and building 3" exhaust.
20150703_175951.jpg
20150703_175919.jpg
20150703_180708.jpg
20150703_180017.jpg
 
When the mercury hits 80F it's important to keep the fluid balance in the body and that's what we're doing...
20150703_190537.jpg
And why we're at it why not do som NOS tuning on this beautiful '65 Valiant...
20150703_184944.jpg

Thanx to Niklas it's easy to see whos glass is whos
20150703_190836.jpg
 
Good times yesterday, nothing beats beer, bbq, good music and quality time with our mopars.
 

Attachments

  • image.jpg
    image.jpg
    48.9 KB · Views: 365
  • image.jpg
    image.jpg
    109 KB · Views: 366
Very happy with how the exhaust turned out, little too loud for the long roadtripps but will probably change to better mufflers during the winter.


Also did a roadtripp with evelmopar to an american car salvage yard and got some nice cop wheels.

 
Update.
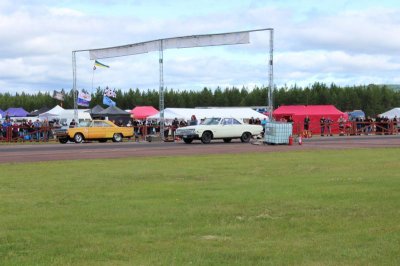
Was able to clock 8.82 and 82mph at 1/8 mile with the belvedere.
60' was 2.2sec
This was with old 205/75r15 regular street tires.
The track was 280 miles from home during classic car week here in sweden. Spent the entire week there with my family and put about 745 miles in the car.
The lack of space made me leave the slicks at home.
My daughter is already in to cars and plays hard with hot wheels.

IMG_1765.jpgIMG_1744.jpg
 

Attachments

  • IMG_1772.jpg
    IMG_1772.jpg
    68.3 KB · Views: 305
Last edited:
speed

Update.
Was able to clock 8.82 and 82mph at 1/8 mile with the belvedere.
60' was 2.2sec
This was with old 205/75r15 regular street tires.
The track was 280 miles from home during classic car week here in sweden. Spent the entire week there with my family and put about 745 miles in the car.
The lack of space made me leave the slicks at home.
My daughter is already in to cars and plays hard with hot wheels.

View attachment 279173View attachment 279174

you can shave some time off by removing all that undercoating ya know. weighs a few hundred pound all together and the first ride without it is like dropping your in-laws off. ROOMAZOOMZOOM. SEE YA'S it's as old as the car and no doubt not doing all it should for ya. buy some better jack stands first though. as for getting the push button mechanism to shift a 727? I don't think you'll get the cable to move as far as you'll need.. it only goes about 1 1/2 inch.. that's not enough to cover even park through drive. you have a cable set up now with the floor shifter.? measure just how far that goes. also the cable set up is 2 cables. park is separate on the ol style. so if you do make up linkage to move enough? you only have so many positions. your gonna be short one..

I went through the same deal with the arm rest too. wanna buy a chrome 15" drivers side. NOS... I had all my broken pieces so I drilled a bunch of small holes to tie it all back together and epoxy's it up. it's an obvious fix. looks like it too but it's one less small detail OFF the to do list....cause I sure aint spending another 50.00 for the wrong one again.
 
I just measured the throw on my old mechanism. it went about 3/4 inch. and I could stop the movement with very little resistance. best option is to find a console and make the hurst look nice.
 
Finaly got the steering wheel done. ALOT of filler and sanding.

image.jpgimage.jpgimage.jpgimage.jpg

image.jpgimage.jpgimage.jpg
image.jpgimage.jpgimage.jpgimage.jpg

I opend up all the cracks with a dremel tool befor I put the filler on it.
I also coated the steering wheel with primer before the final paint.
 
Auto Transport Service
Back
Top