You are using an out of date browser. It may not display this or other websites correctly.
You should upgrade or use an alternative browser.
You should upgrade or use an alternative browser.
1965 AFX Coronet
- Thread starter funnykarman
- Start date
funnykarman
Well-Known Member
A lttle more done .
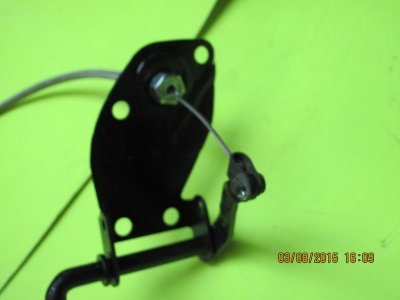
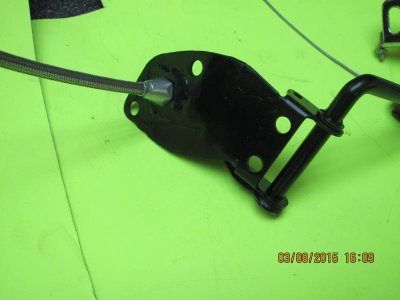
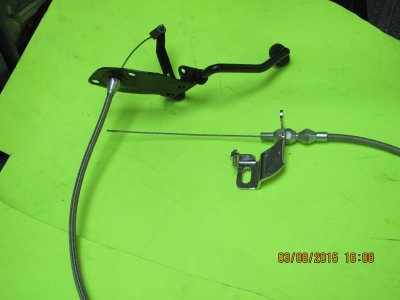
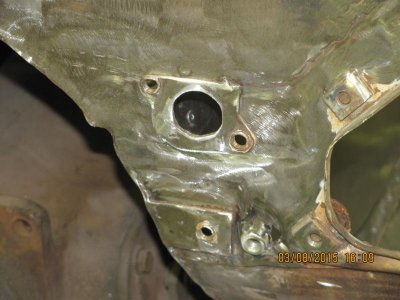
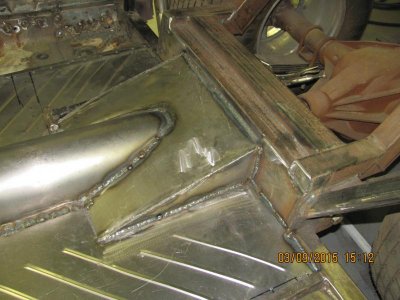
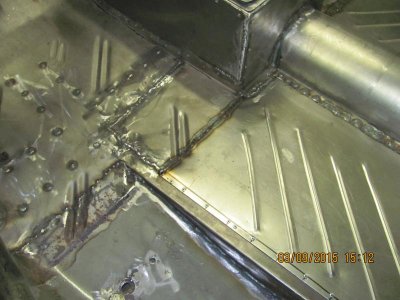
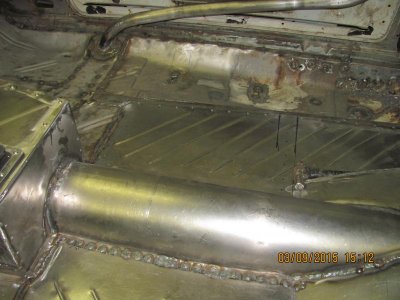
Finished up the small things , the clutch rod was moved higher due to the motor being moved back along with the new Z bar . had to move the clutch rod boot hole up 3/4 of a inch and weld in a small section of an old one I had from the parts car . I put the seat belt plates in the new floor section . I welded a 1 inch piece of tubing from side to side and plug welded it in place , then notched the seat belt plates and welded them in welded up all the seams in the floor .
Next is the front fenders , remember I stated that the fenders were of poor quality , they look like they were pulled from the molds to soon . Both of them are warped from the headlightbucket back over the wheel opening , about 30 inches or so back . So I am giong to try and fix this issue by clamping steel tubing on the outside and glassing in 1/2 tubing in on the inside of the fender ... Hate to buy more I have $700.00 in the pair plus shipping ..... Plus I have to figure a way to attach them to the car with bolts , like a stock fender .... The fun begins next week ..... ink banana:
Finished up the small things , the clutch rod was moved higher due to the motor being moved back along with the new Z bar . had to move the clutch rod boot hole up 3/4 of a inch and weld in a small section of an old one I had from the parts car . I put the seat belt plates in the new floor section . I welded a 1 inch piece of tubing from side to side and plug welded it in place , then notched the seat belt plates and welded them in welded up all the seams in the floor .
Next is the front fenders , remember I stated that the fenders were of poor quality , they look like they were pulled from the molds to soon . Both of them are warped from the headlightbucket back over the wheel opening , about 30 inches or so back . So I am giong to try and fix this issue by clamping steel tubing on the outside and glassing in 1/2 tubing in on the inside of the fender ... Hate to buy more I have $700.00 in the pair plus shipping ..... Plus I have to figure a way to attach them to the car with bolts , like a stock fender .... The fun begins next week .....
Attachments
funnykarman
Well-Known Member
Mounting fiberglass fenders
After a lot of thought on how to mount the fenders , this is what I came up with . Made a parts run to Home Depot , picked up a gallon of fiberglass resin , 4 packs of fiberglass matt , paint brushes and 3 pieces of steel strap . Two 1 1/2 x 1/8 and one 1x1/8, stopped at Copperstates bolts and picked up some 5/16 cert-nuts . I cut a piece of 1 1/2 x1/8 off at 31 inches , clamped it to the splash panel on the car and marked the holes with a sharpie . Them drew a line thru all 4 holes . Drilled the holes out to 31/64 and inserted the cert-nuts . To those that do not know what a cert-nut is , I will try and explain . It's sort of like a pop rivet but with threads . You take the cert-nut and screw it on the gun , then insert it in the hole and squeeze . It may take a secound turn or two on the gun and a secound squeeze but it leaves you a nice set of threads when done . Great for putting threads in thin sheet metal when needed .
Back to the fender , when done I took the strapping and bolted it to the fender thru the holes that were drilled in the fiberglass fender and put 4 bolts thru and snugged them down . Then I drilled 3 holes and put pop rivets in them to hold the strapping in place . They can be drilled out if the strapping needs to be moved . Mounted the fender , looks OK may have to move it around some ....more work for Tuesday ....
Attachments
-
 1965 dodge 200.jpg72.9 KB · Views: 607
 -
 1965 dodge 202.jpg60.2 KB · Views: 583
 -
 1965 dodge 203.jpg53.1 KB · Views: 568
 -
 1965 dodge 204.jpg71.1 KB · Views: 578
 -
 1965 dodge 205.jpg74.9 KB · Views: 572
 -
 1965 dodge 206.jpg41.1 KB · Views: 557
 -
 1965 dodge 207.jpg36.6 KB · Views: 602
 -
 1965 dodge 209.jpg59.8 KB · Views: 597
 -
 1965 dodge 210.jpg68 KB · Views: 601
funnykarman
Well-Known Member
I am still here
I have a little more done to the fiberglass left fender . Had to slow down and do some HONEY DO"S. NOT done Yet . :sad2: We live in the southwest , and we have had a extremely warm and wet winter . I have a lot more weeds and grass than I normally have .. Wife said they need to go , :tied up: so that is what I have been doing .I feel so Sorry for the folks that live up north , I know your winter has been brutal . As far as the fender go's I first thought to just glass in a piece of 1/2 square tubing , after thinking about that I changed to a 1 x 1/4 thick 36 long piece of flat strapping. I put down 2 layers of glass and clamped the 1 inch into it and layed down several strips of glass mat down , came back the next day and sanded it down and moved the clamps and put down more glass mat . Next day the same procedure . I have gone from about 3/8 inch bow in the fender wheel well opening to less than an 1/16 of gap in just one area , a little of filler and some block sanding will take care of this issue , so next week I will work on getting the fender fitted to the car an trying to get the gaps set , wish me luck ... :hatwave:
I have a little more done to the fiberglass left fender . Had to slow down and do some HONEY DO"S. NOT done Yet . :sad2: We live in the southwest , and we have had a extremely warm and wet winter . I have a lot more weeds and grass than I normally have .. Wife said they need to go , :tied up: so that is what I have been doing .I feel so Sorry for the folks that live up north , I know your winter has been brutal . As far as the fender go's I first thought to just glass in a piece of 1/2 square tubing , after thinking about that I changed to a 1 x 1/4 thick 36 long piece of flat strapping. I put down 2 layers of glass and clamped the 1 inch into it and layed down several strips of glass mat down , came back the next day and sanded it down and moved the clamps and put down more glass mat . Next day the same procedure . I have gone from about 3/8 inch bow in the fender wheel well opening to less than an 1/16 of gap in just one area , a little of filler and some block sanding will take care of this issue , so next week I will work on getting the fender fitted to the car an trying to get the gaps set , wish me luck ... :hatwave:
Attachments
Last edited:
- Local time
- 8:51 PM
- Joined
- Jan 16, 2011
- Messages
- 78,620
- Reaction score
- 126,511
- Location
- NorCal Sierras
good luck with the fiberglass stuff,
It can be trying at times for sure...
have fun
It can be trying at times for sure...
have fun
funnykarman
Well-Known Member
Just to let everyone know I am still alive and trying to get started again
Life and family slowed me down a little , one of my wife's sister has been fighting cancer for 10 years , she had to move in with us and I had to be on hand helping with her . Plus summer has been brutal this year here . After 5 months she was able to go back home but we still lost her 2 weeks later. So I am slowly starting to gather parts for the car . I picked up a 1978 440 block from a motor home with low mileage . The cyclinders still show hatch marks , will have it checked for cracks and sonic tested for cyclinder thickness . I want to go .030 o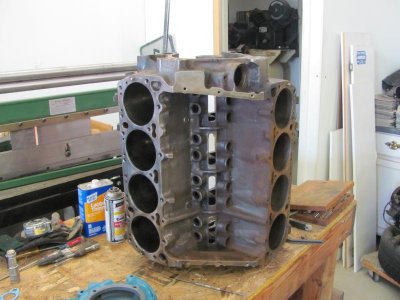
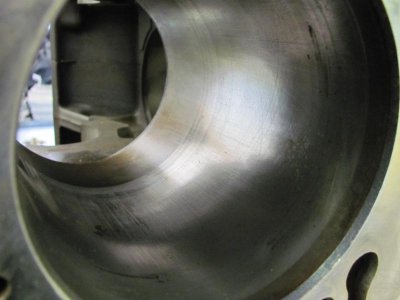
 ver with a 4.25 stroke Molnar crank and rods , pistons will be 10.5 to 1 compression with the new Trick Flow heads .
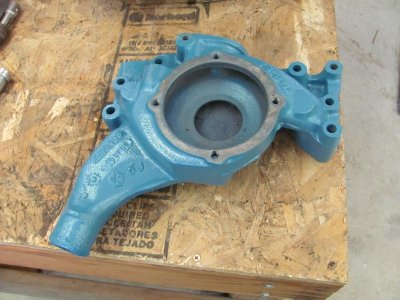
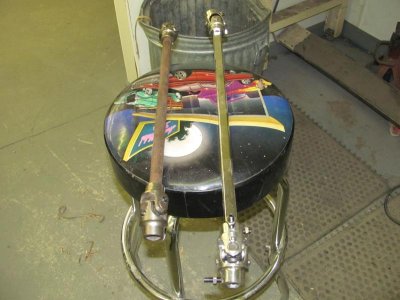
Also picked up a water pump housing with the lower outlet on the passenger side . This needs to be done in order to miss the steering box on the driver side , I will use a chevy style radiator with the bottom hose on that side . I also picked up new stainless u-joints for the steering shaft along with a piece of double D stainless shaft , this way I can can take the steering column out by undoing the nuts on the shaft , the old ones were weld on joints and would make removal harder.
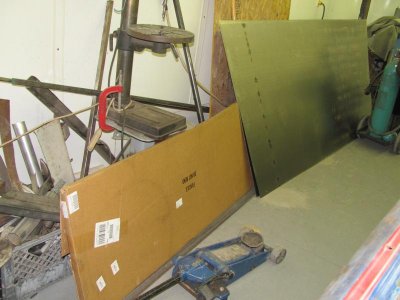
also picked up 2 pieces of sheet metal and a set rear tubs for the car .
A far as the fiberglass work on the fenders went , my idea did not work so I will split the fenders and try and move the affected area's one at a time , only time will tell !


Life and family slowed me down a little , one of my wife's sister has been fighting cancer for 10 years , she had to move in with us and I had to be on hand helping with her . Plus summer has been brutal this year here . After 5 months she was able to go back home but we still lost her 2 weeks later. So I am slowly starting to gather parts for the car . I picked up a 1978 440 block from a motor home with low mileage . The cyclinders still show hatch marks , will have it checked for cracks and sonic tested for cyclinder thickness . I want to go .030 o


 ver with a 4.25 stroke Molnar crank and rods , pistons will be 10.5 to 1 compression with the new Trick Flow heads .
 Also picked up a water pump housing with the lower outlet on the passenger side . This needs to be done in order to miss the steering box on the driver side , I will use a chevy style radiator with the bottom hose on that side . I also picked up new stainless u-joints for the steering shaft along with a piece of double D stainless shaft , this way I can can take the steering column out by undoing the nuts on the shaft , the old ones were weld on joints and would make removal harder.
also picked up 2 pieces of sheet metal and a set rear tubs for the car .
A far as the fiberglass work on the fenders went , my idea did not work so I will split the fenders and try and move the affected area's one at a time , only time will tell !


funnycar65
Well-Known Member
I find it odd that Diane Sox would tell you no.I know a couple of guys that have asked the very same question and she was more then gracious.
funnykarman
Well-Known Member
Sorry that you think that , Diane Sox is a super nice lady and I enjoyed every minute that we shared taking about Ronnie . He was one of my Hero's and a hell of a nice guy . But I asked and she did say no due to the fact that someone might think that it was his old car. It's one of the few that has never been found . I still might paint it that way , there are over 30 things that are different on the 2 cars ... it was being build to honor Ronnie and to give the younger mopar folks what a AFX altered wheelbase streteched nose car looks like ... Thanks John
funnykarman
Well-Known Member
Well I am still alive , not dead yet , worked on my sister-in-laws house last year , took a trip off a ladder , messed up a knee and shoulder , had to have surgery on shoulder in Jan of this year so I have been on the mend . While looking for parts for my 66 funnycar I did little checking and found that the Spal fans on the 66 car only moved 1700 cfm of air They were 12 inch fans , wanting more I found Spal fans that moved about 1350 each or about 2700 cfm that were the same size . the new ones were listed at $150.00 each but I ran across Dillon Radiators that were offering a radiator , 2 12 fans and a shroud for $299.99 with free shipping . The radiator was 19 inch by 31 inch with a Chevy hose set up . This was needed on the 65 car due to the steering box being moved up and the Chrysler set up ran right into it . First pic shows old problem with hose set up , second one shows new radiator . It looks great and has quality welds thru out . By using a water pump housing for the pass . side problem solved ! Just have to swap the fans out from 65 to 66 and 66 to 65 should work !


funnykarman
Well-Known Member
Changed out the fans on the two radiators , put the 2700 cfm set on the blown 66 car and put the 1700 cfm set on the radiator that will go into the 65 AFX car , been slow going , had surgery on right shoulder in late January , getting better but have to watch what I pick up still sore . Next step is to make mounting brackets for the 65 radiator ... slow going

Best wishes for a speedy and full recovery!
funnykarman
Well-Known Member
Well I am back , was talked into getting a Motorhome and doing a little travel . 30k miles and we are back home . Picked up a Hihborn injector set with stacks . Might use them on the 66 Cuda funny car and use the blower on 65 AFX car to look like the old Grand Spalding Dodge .


funnykarman
Well-Known Member
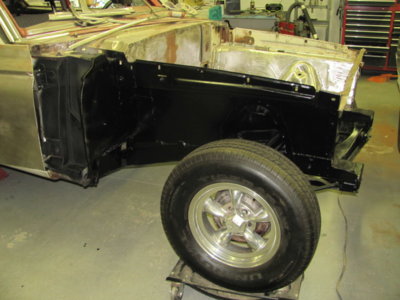
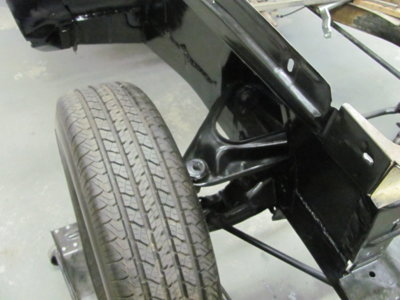
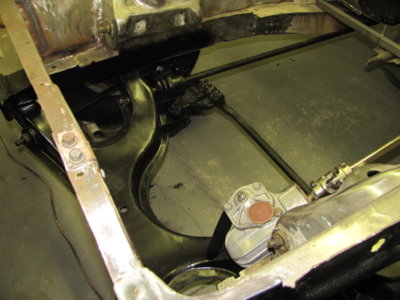
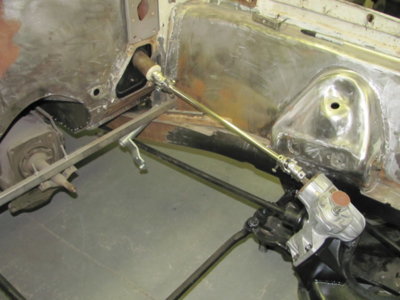
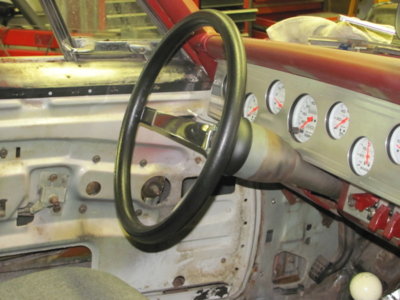
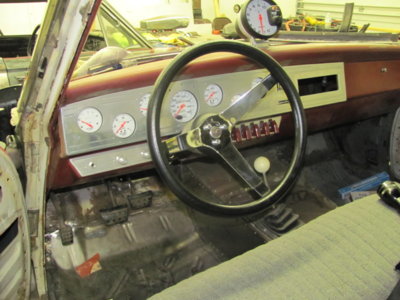
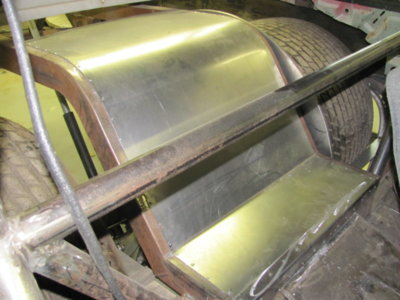
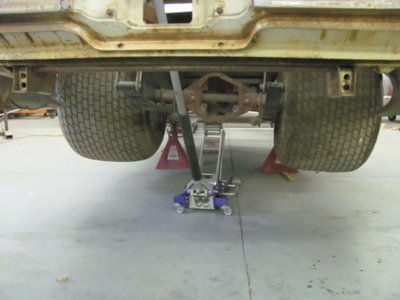
Ok , I have started back on the 65 AFX car , the front end was rebuilt in 2015 and just needed to painted and installed back on the car . I then finished up the steering column , Had to take the shaft to a machine shop and have them cut the end to accept the double D ujoint . By using this type of joint the shaft to the steering box could removed with out taking the column out . With that done the steering wheel was installed . Then I bent up and rolled a piece of 18 gage sheet metal to start filling in the rear of the car . Next will be the wheel tubs . The pic with the Green piece is the color I want to paint the car . The last shot is of the super stock springs , dana 60 and the and the hoosier tires 33x22.5x15

 [AT
[AT


 TACH]735498[/ATTACH]


 [AT
[AT
funnykarman
Well-Known Member
Managed to get a little more done in the car . I knew that I would have to install the side windows before putting the tubs in place . Took the windows and had them tinted , I remember the AFX cars in 1965 had colored lexan windows and liked the look . I dug thru my junk box and came up with 4 inch 3/8 studs along with nuts , flat washer and lock washers . Using the old window track I placed it under the window in the car and found that there were 2 holes that lined up perfectly for me to use . I put a small amount of windshield sealer in each track to hold it in place .


 Using nuts flat and lock washers I was able to get the window in place and secured . The I installed the tubs , that took me quite a while , to get a good fit . Then I made up sheet metal and filled in the rear section of the trunk from the tubs back to the trunk . All is needed is a good sealing with RTV . Tub #2 is next wish me luck .
funnykarman
Well-Known Member
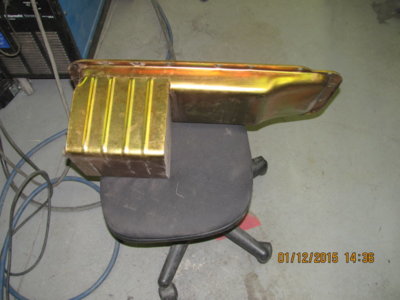
Ok also bought a motor plate from Mancini racing . Measuring the block and the scatter shield the motor plate will fit in the center of the upper clam shells . I also will gasket match the plate to the water pump gasket to get good water flow thru this area . Have already done this to block and water pump . The motor will have a rear sump oil pan that was for a 4x4 truck . In order to get the engine in the car I cut out the radiator support and replaced it with one I removed from a parts car . Using riv-nuts it can be removed and replaced putting the bracing back into the car in this area.



funnykarman
Well-Known Member
Got the second wheel tub in and right side almost boxed in . Also working on placement of the 20 gallon fuel cell . Looking at shock mount place . tryin to finish up the rear end of the car .


funnykarman
Well-Known Member
Ok finished up the tin work and got the fuel cell mounted and built and welded in the shock mounts . I pulled the Hemi out of the 66 cuda and changed every thing back over to the carb. set up . Put the Lakewood shield back on the block and put the Milodon rear sump pan back on . Rest On bottom of page .


 the Hemi went back in with the TTI headers and I am working on the motor plate install . Let's see a Level on the car , one on the motor and one on the motor plate and all show level so it's time to weld in the mounting tabs . One last pic . It's not quite a Mopar just a distant relative . I built this Willys 30 years ago and Have passed it on to a grandson . He wanted to keep it in the family . I have put over 50 thousand miles on this car plus a trip from NC to AZ . And no it does not have a mopar motor but not a Chevy , used the shortest motor that would fit . The reason for the motor swap is because I am just getting to old to try and build 2 cars so I picked the one I had the most parts for . I am also moving back to the East coast soon .
Last edited:
funnykarman
Well-Known Member
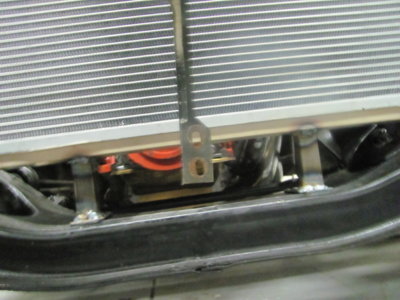
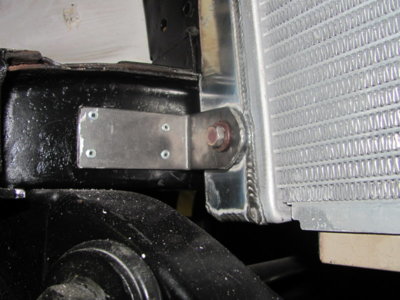
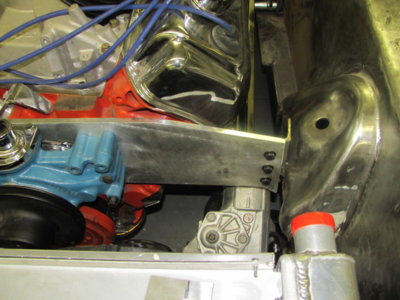
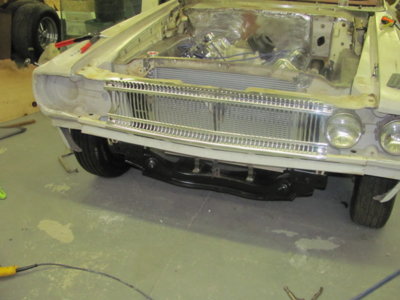
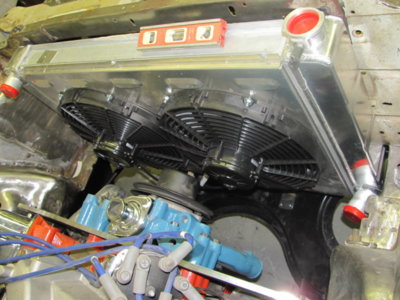
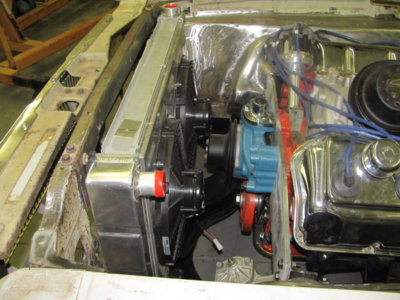
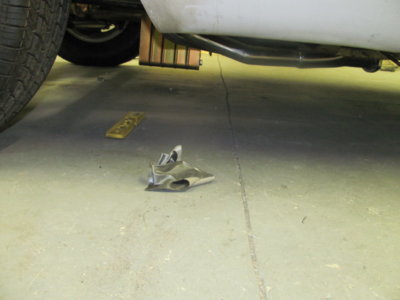
Did a little more work on the 65 car . Welded in 2 pieces of angle to hold the motor plate . Will add more to them when I pull the motor back out to paint everything in the engine bay . Built a stand to hold the radiator used thick foam rubber to pad the bottom of the radiator . Made brackets to hold the radiator in place on the lower end and drilled holes in the upper brace and bolted the radiator in . working on the grill placement along with the head lights mounted to the glass fenders . Oil pan looks to have about 5 inches of road clearance . Will get a custom pan built , Oil Pans By Charlie is a good place to start , they do great work had them make one for me a while back . Better safe that sorry when going over a tall speed bump . LOL !


Last edited:
gtxracer
Well-Known Member
- Local time
- 8:51 PM
- Joined
- Nov 24, 2011
- Messages
- 656
- Reaction score
- 512
- Location
- Lake Stevens, Washington
I sat here for over an hour, looking and reading, following your progress thru the past few years. I must say, I am impressed. I look forward to seeing your '65 Coronet come too fruition. Thanks for sharing. 
Bob

Bob

Similar threads
- Replies
- 4
- Views
- 287
- Replies
- 0
- Views
- 208
- Replies
- 3
- Views
- 301
- Replies
- 2
- Views
- 641

