• When you click on links to various merchants on this site and make a purchase, this can result in this site earning a commission. Affiliate programs and affiliations include, but are not limited to, the eBay Partner Network.

1966 Satellite restomod street toy

Hi Rocketman, Patience, that's funny the guy's at the shop just call it slow! Yah it will probably get to a summer cruise........but I don't know which summer that would be. Thanks Brian.

- - - Updated - - -

Hi HYRDGOON, I don't know much about automatic transmissions. All of the cars I've played with in the past were sticks. I'm really open to all advice. I thought that a pro street style 727 with a manual reverse valve body and a 9.5 inch TC might be appropriate. I don't have any idea what stall would be street drivable. The car currently has a 3.73 gear in it and I believe it will weigh 3650 lbs. when finished. Thanks Brian.

That's one amazing "pile of parts" you got coming together!! :) Keep the pics coming this whole build is just TOO COOL!

I'm not much help with trans advice for a 727 b ut here's a link to a thread with the race guys talking about 727's for high horsepower applications. A lot of what's discussed would be overkill but this may put you onto a good supplier http://www.forbbodiesonly.com/mopar...-or-who-built-it-High-Horsepower-transmission

Cheers!

Mike
 
Build issues and convoluted parking brake.

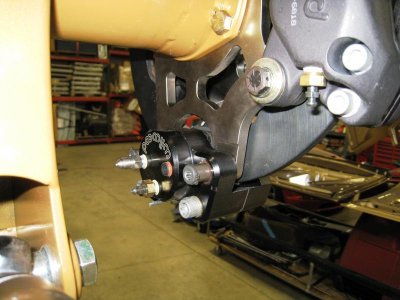
Hi Guy's I've been working on my project but I discovered some build issues..........one step forward two steps backward! First the wheel studs in the front spindle are not long enough. I'm using a steel wheel and I would have thought that would require about the shortest stud of any configuration possible, regardless they aren't long enough! The front knuckles, spindles, hats, rotors and caliper assemblies were about the only part of this car that I didn't think I would have to touch again....LOL. The way the Wilwood kit assembles everything has to come apart to install the wheel studs. I put them together three months ago and I just now got the red stains off my hands from the synthetic grease, not to mention the holes in the ends of my fingers from the safety wire. Then I discovered that the rear axle didn't droop far enough in full rebound to allow me to get the tires on the car. In addition the small single piston caliper that that I mounted straight up to perform the parking brake function was also in the way. It's been so long since I've worked on a vehicle that the wheel well lip covered the top of the tire, I never even considered this might be an issue......dummy, dummy, dummy........ So longer shock eyes, a relocated parking brake caliper, longer front wheel studs and we are back to making progress.

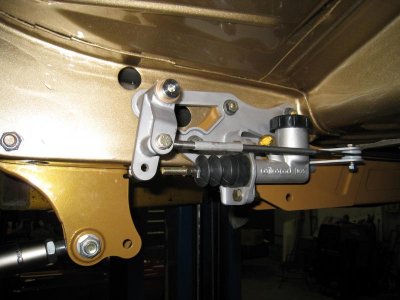
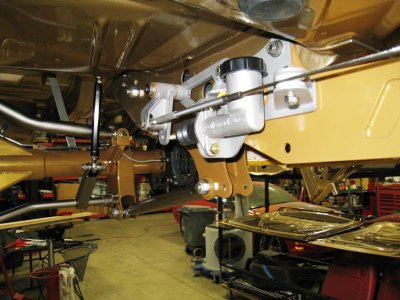
I normally don't post until I have finished parts to show but in this case I needed to feel like I was making progress for my sanity. I wanted to use the original parking brake pedal assembly in the car so in order to integrate it with hydraulic calipers I built this little cable operated master cylinder assembly. The ratio needed to be increased as the cable only pulled about an inch and the caliper stroke is 1.375 in. I'm pretty sure that the system would have worked without the ratio change but then again I thought the tires would go on the car too. The roller is to align the cable for a straight pull and the coupler and clevis still have to be made. The piece of tube between the cable stud and the solid rod end is just a place holder. Actually I've been having fun but I got a little lazy and I was humbled for it! Thanks brian. IMG_0493.jpgIMG_0492.jpgIMG_0494.jpg[

IMG_0494.jpg IMG_0493.jpg IMG_0492.jpg
 
Assembly Progress........a little.

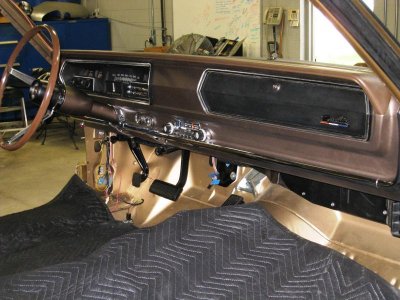
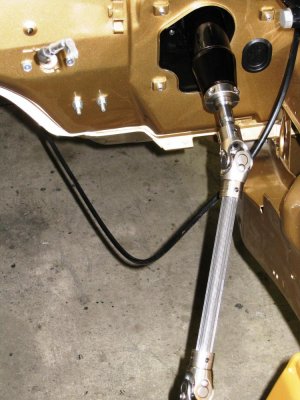
Hi Guy's I thought I would post, as we've made a little progress on my 66. We have the column and the intermediate shaft in place. The splined shaft in the photo will be covered when the car is complete but I'm waiting to build the headers before I finalize the shaft. If the header packaging will allow it, I will shorten the upper end of the column to improve the upper u-joint angle. The instrument panel is in but I'm still working on some under dash wire routing. The glove box door isn't perfect but it does not look like it appears in the photo.IMG_0502.jpgIMG_0500.jpg
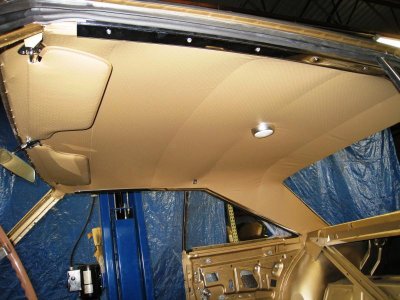
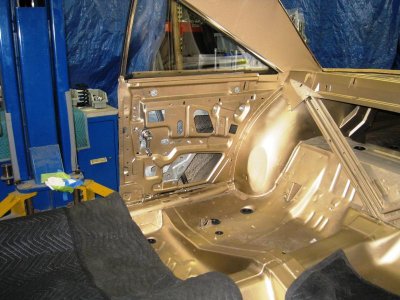
I never thought I would be excited about getting rear quarter glass or a headliner in the car but I guess as we get older the requirements for exciting are muted. I've been told that the wrinkles in the headliner will relax when the car sits in the sun.......we'll see.IMG_0513.jpgIMG_0512.jpgIMG_0504.jpg
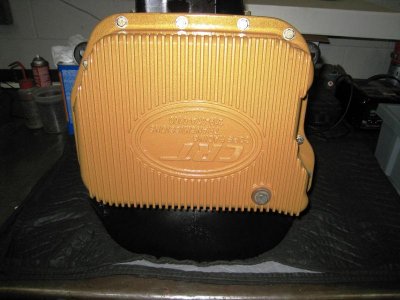
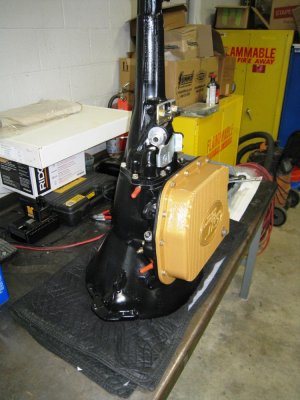
My oldest son and I took a road trip to Indiana to Cope Racing Transmissions. I purchased a "pro street" 727 with a billet front drum and other assorted magic from CRT. John went out of his way to explain the product, answer my questions and help me make the proper selections. John shipped the trans pan to me so I could powder coat prior to the build and the trans was ready when he said it would be and at the quoted price. I haven't run the trans yet but if it works as well as John's customer service it will be outstanding.IMG_0508.jpgIMG_0507.jpg
I did finish the parking brake master assembly and cable guide.
IMG_0517.jpgIMG_0516.jpg
Next stop brake lines, fuel tank and lines. Thanks for looking Brian.

IMG_0500.jpg IMG_0502.jpg IMG_0504.jpg IMG_0512.jpg IMG_0513.jpg IMG_0507.jpg IMG_0508.jpg IMG_0516.jpg IMG_0517.jpg
 
Man , This is a real labor of love right hear. Everything about it has a real crisp machined quality. Very impressive. Also some great color choices. The components really pop.
 
Hi Brian, amazing build you have going, top notch first class sir. I am thinking you are going with a floor shift? Any idea what kind?

What are your plans when finished? Track? Cruise? Shows?

We love your progress pics and keep up the great work!

TU.jpg
 
Man , This is a real labor of love right hear. Everything about it has a real crisp machined quality. Very impressive. Also some great color choices. The components really pop.
Hi Stevearino, thanks for your comments. I've taken a lot of heat about the color combination around the shop. When I started this project I built the rear suspension first and when I got it back from powder coat one of the guy's dubbed it "Gold Member". Every day, without fail, I hear "Gold Member" to the tune of gold finger. One of the principals in our show vehicles organization says that between the exterior color, interior paint color, dash color, seat color, carpet color and the suspension color that I've used all of the available mismatched golds..........LOL Brian.
 
I hope you drive this thing to the Nats some year because I'd love to see it in person, amazing build! Even the parking brake is a work of art!!!!!!
 
Hi Brian, amazing build you have going, top notch first class sir. I am thinking you are going with a floor shift? Any idea what kind?

What are your plans when finished? Track? Cruise? Shows?

We love your progress pics and keep up the great work!

View attachment 257281

Hi MT Mopar, thank you for the nice comment. I'm planning on using the stock console mounted shifter. I purchased a bolt in gate plate kit that reverses the shift without being a permanent change. The interior of the car other than some minor color differences is stock and I wanted to retain all of the interior hard parts. I'm not planning racing the car so I'm hoping that the re-gated stock unit will suffice. Planned usage for the car is probably likely an occasional spontaneous cruise. Thanks brian.
 
Hi 747mopar, I don't think it's likely I will drive it that far. If I ever get it finished you could come to the Woodward cruise and I'll give you a ride. Thanks for your kind comments, Brian
 
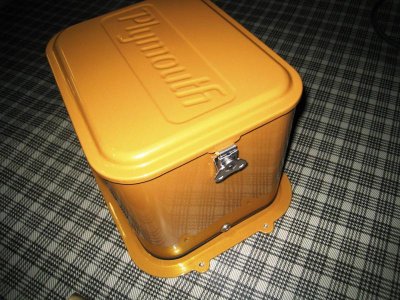
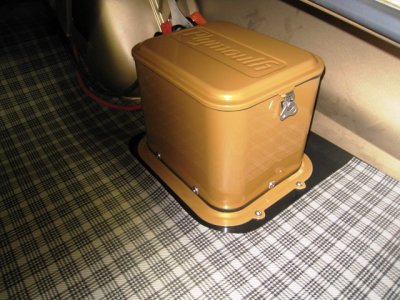
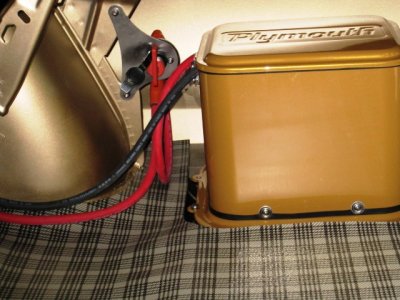
Hi All, I haven't posted lately, I've been busy getting the Satellite ready for the Woodward Cruise.....2017. I have been working on her but like all grand ladies with the confidence of maturity she will not be rushed! I have been trying to finish some of the systems on the car as I was installing the mountain of parts I have laying around. I decided to trunk mount the battery but didn't much care for any of the battery boxes that I could find. Hence another project. IMG_0518.jpgIMG_0522.jpgIMG_0529.JPGIMG_0542.JPGIMG_0543.JPG I still have lots to do. I'm hoping to start on the fuel system next. Thanks Brian.

IMG_0518.jpg IMG_0522.jpg IMG_0529.JPG IMG_0542.JPG IMG_0543.JPG
 
Fuel Tank Fabrication

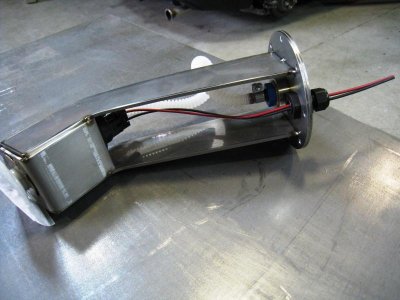
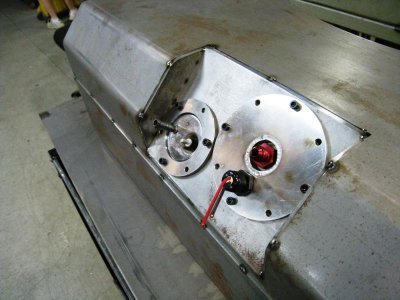
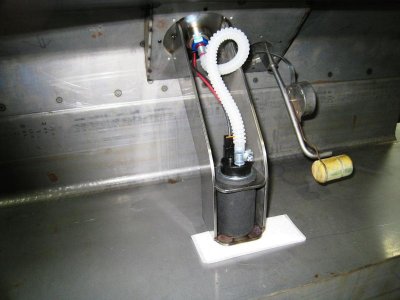
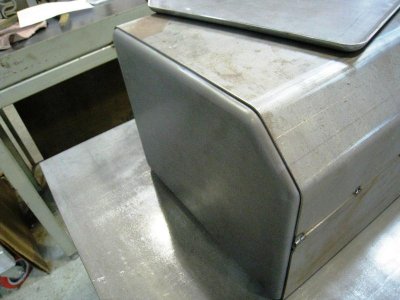
Hi guys' I've moved on to the fuel tank for my car. Originally I was planning on using the stock fuel tank with some modifications. The rear end housing that was built for the car is deeper than the stock unit, as it employs a H.D. "back strap" to stiffen the housing. The stock fuel tank needed to have clearance mods made for the rear end and my desire to have an in-tank pump really kind of nudged me into fabricating a new tank. I wanted an in-tank pump and a return in the system because I wished to protect for an EFI unit in the future, it just seemed to make sense to do it now. The plan I'm working to now has a fabricated steel tank with a GSS 304 Walbro, an original style fuel sending unit to provide the fuel gauge input and will utilize the original pick-up as the return. The new tank is deeper than the original by 3" and will have a slosh baffle to help keep fuel at the pumpIMG_0556.jpgIMG_0557.jpgIMG_0560.jpgIMG_0561.jpgIMG_0563.jpgIMG_0564.jpgAs you can see in the photos fabrication is in process. Nothing has been welded yet I'm still test fitting the parts. I have to raise the pump up a little as the sock is resting on the tank bottom. I was planning on venting the tank with a 3/4 line to the fill tube just like the stock set-up. Do you think it needs additional venting? If anyone sees any problems or issues your comments would very welcome. Thanks for looking, Brian.

IMG_0556.jpg IMG_0557.jpg IMG_0560.jpg IMG_0561.jpg IMG_0563.jpg IMG_0564.jpg
 
Well you certainly don't have any shortage of fabbing skills that's for damn sure.
 
Love that battery box you built. Wow, that's looking fantastic. Maybe you'll have it ready next year for Gilmore (Mopars at the Red Barns) or Woodward cruise. Look forward to seeing more of the build.
 
Hi Guys'

Well you certainly don't have any shortage of fabbing skills that's for damn sure.

Superfreak,
Thanks for your nice comment! I've worked with some very talented people, maybe some of their skills have rubbed off on me. The part of this project that has been the most difficult for me is the restoration side. My not understanding the process has led to me making a lot of mistakes. There is a lot of talented guys' on this site that are doing truly incredible work. It's great to have a resource like this to learn from.


Love that battery box you built. Wow, that's looking fantastic. Maybe you'll have it ready next year for Gilmore (Mopars at the Red Barns) or Woodward cruise. Look forward to seeing more of the build.

Riverdawg,
Thanks I appreciate your comment. Not all of the parts that you make come out like your vision, I am pleased with the battery box. The guys' in the shop liked it too, so now we have different lids to match-up to their projects. The bases are all the same but now we have lids for Dodge, Lincoln, Mustang, Chevrolet and even a "Mister Bubble Head" VW. If I ever get it finished I will get it out but I have no idea when that will be!

Thanks again, Brian
 
Hi 747mopar, I don't think it's likely I will drive it that far. If I ever get it finished you could come to the Woodward cruise and I'll give you a ride. Thanks for your kind comments, Brian

Michigan too Ohio far???? Great work on the gas tank, you are one seriously talented dude.
 
Hi 747mopar, I didn't say Michigan to Ohio was to far, I said it wasn't likely I'd drive it that far! If I ever finish this "Hanger Queen" I'm not sure I'll have enough money left to purchase fuel for that trip. If I were to make that trip, I'd be found on an exit ramp somewhere south of Toledo with a sign that read "will work for premium fuel". Thanks again Brian.
 
Carry a spare? What do you think?

Hi Guys' I have been pondering for some time the need to carry a spare or a small 12v compressor and some "fix-a-flat". I like the idea of a spare but I think a that only tire of the needed diameter that will fit in the spare tire well is a temp-spare. Anybody have an idea what vehicle application would use a 27" diameter temp spare with a 4.5 B.C. wheel? I haven't finished re-plating and powder-coating the bumper jack yet, but I'm pretty sure it's just a trunk decoration. I can't picture myself using that jack on the re-chromed bumpers, nor would I want to use a bumper jack to lift this car enough to get the rear tires off. Any thoughts you have would be appreciated, thanks Brian
 
All I can say is wow....all the detail. I am not worthy. :) thanks for taking the time to post and share your vision. I would be interested in your spare solution also. I carry a racing jack, necessary for rear tire removal.
 
Hi Guys' I have been pondering for some time the need to carry a spare or a small 12v compressor and some "fix-a-flat". I like the idea of a spare but I think a that only tire of the needed diameter that will fit in the spare tire well is a temp-spare. Anybody have an idea what vehicle application would use a 27" diameter temp spare with a 4.5 B.C. wheel? I haven't finished re-plating and powder-coating the bumper jack yet, but I'm pretty sure it's just a trunk decoration. I can't picture myself using that jack on the re-chromed bumpers, nor would I want to use a bumper jack to lift this car enough to get the rear tires off. Any thoughts you have would be appreciated, thanks Brian

I just made sure my insurance had towing included haha.
 
Auto Transport Service
Back
Top