• When you click on links to various merchants on this site and make a purchase, this can result in this site earning a commission. Affiliate programs and affiliations include, but are not limited to, the eBay Partner Network.

1966 Satellite restomod street toy

Thanks 747mopar, I'm not sure this vehicle will ever be "done" but it is nice to see it moving along. My intention has always been to get the car to the point where it is a nice driver and then continue to work on small projects as upgrades. For me trying to accomplish everything that you might desire in a vehicle in the first pass, seems overwhelming. An example would be fuel injection, it's been part of the plan from inception. The fuel system was built to accommodate F.I. and when I feel I have the car fully sorted out, I hope to install one of the self learning systems. An added benefit to my slow motion methodology has been favorable cost changes on some components. The new F.I. systems are substantially less expensive that when I started this project........LOL. Thanks again, Brian
I know what your saying, between the time I bought mine and the time I finished it there was a drastic amount of parts that became available and a lot that got cheaper as well.
 
Hi Guys', as my project moves along I find myself receiving lots of conflicting advice. Now I know why I avoided cars that needed body and paint work like they were Anthrax carriers......LOL. In the planning stages of this project I was told by the "experts" to do all of the fabrication, assemble the vehicle minus the trim, shake the car down and then take it all back apart and paint it. When I told them "that ain't gonna happen", it was suggested that we paint the bottom of the car, the inside of all the panels and "cut in" all of the openings, prior to assembly. That made sense to me, so I proceeded on that path. after we spent a great deal of time sanding and scuffing all of the necessary locations we sent it to the paint shop to get "cut in". Now do you think that the painters were happy with this path.......no,no,no! Apparently painting all of the components in their entirety, as a pile of parts, is the only way to do it properly. Now please keep in mind that I was following their "experts" advise for project direction and he indicated that this was often done on cars that were long duration mechanical/fabrication projects. I was told that an added advantage to this was the rubber seals on the doors and the deck lid could spend time in compression allowing easier final adjustment. So now the car is assembled, running, lightly test driven and the seals are compressed. The next step is to align the panels "exactly" where you want them prior to surfacing and paint. We spend lots of time getting everything to a best fit condition as I was told "the fit is on you".

The car goes to the paint shop, the initial surfacing is done and the next step is high build primer, so what do you think the painters do next? Take off the doors and deck lid of course! Apparently You can surface a 84" long quarter panel on the car but not a 48" door, I'm also sure that the hood on a 66 B body is a foot longer than the deck lid. Now I'm not the sharpest knife in the drawer but I would think that easier masking of the engine bay and the bottom of the hood would make it the preferred panel to remove from the car.

I'm really just having fun at body/paint guys' expense. Your opinion, paint first or last. Thanks for looking Brian.
P.S. I can't wait to tell them that the passenger door doesn't fit right!
IMG_7280.JPG

IMG_7285.JPG
 
Last edited:
well designed ride . 66 sat is one of my favorites , had a 66 sat commando 383 4spd in h/s back in 72-3 , hell i've still got parts of it hanging out . just saw the deck lid in my dad's garage rafters .lol . and i hung on to the power train in it modified form . parts just seem to carry on from car to car , lol .

DSC03403.JPG
 
Hi Guys', as my project moves along I find myself receiving lots of conflicting advice. Now I know why I avoided cars that needed body and paint work like they were Anthrax carriers......LOL. In the planning stages of this project I was told by the "experts" to do all of the fabrication, assemble the vehicle minus the trim, shake the car down and then take it all back apart and paint it. When I told them "that ain't gonna happen", it was suggested that we paint the bottom of the car, the inside of all the panels and "cut in" all of the openings, prior to assembly. That made sense to me, so I proceeded on that path. after we spent a great deal of time sanding and scuffing all of the necessary locations we sent it to the paint shop to get "cut in". Now do you think that the painters were happy with this path.......no,no,no! Apparently painting all of the components in their entirety, as a pile of parts, is the only way to do it properly. Now please keep in mind that I was following their "experts" advise for project direction and he indicated that this was often done on cars that were long duration mechanical/fabrication projects. I was told that an added advantage to this was the rubber seals on the doors and the deck lid could spend time in compression allowing easier final adjustment. So now the car is assembled, running, lightly test driven and the seals are compressed. The next step is to align the panels "exactly" where you want them prior to surfacing and paint. We spend lots of time getting everything to a best fit condition as I was told "the fit is on you".

The car goes to the paint shop, the initial surfacing is done and the next step is high build primer, so what do you think the painters do next? Take off the doors and deck lid of course! Apparently You can surface a 84" long quarter panel on the car but not a 48" door, I'm also sure that the hood on a 66 B body is a foot longer than the deck lid. Now I'm not the sharpest knife in the drawer but I would think that easier masking of the engine bay and the bottom of the hood would make it the preferred panel to remove from the car.

I'm really just having fun at body/paint guys' expense. Your opinion, paint first or last. Thanks for looking Brian.
P.S. I can't wait to tell them that the passenger door doesn't fit right!View attachment 445326
View attachment 445327
I always painted the trunk floor and inner quarters, first, with the deck lid removed. Then mask and paint the floor pan, then mask and paint the engine compartment, with the fenders removed, and the underside of the hood, with the hood removed. Leaving the hood decklid and fenders removed, refinish the hinge pillars, cowl, roof, quarters and striker pillars, with the doors slightly open. I refinish the hood, fenders, and decklid next. I then install the painted panels, fit them, without weatherstrips, and put a final refinish on the car, masking the jambs and other areas, carefully....
 
I always painted the trunk floor and inner quarters, first, with the deck lid removed. Then mask and paint the floor pan, then mask and paint the engine compartment, with the fenders removed, and the underside of the hood, with the hood removed. Leaving the hood decklid and fenders removed, refinish the hinge pillars, cowl, roof, quarters and striker pillars, with the doors slightly open. I refinish the hood, fenders, and decklid next. I then install the painted panels, fit them, without weatherstrips, and put a final refinish on the car, masking the jambs and other areas, carefully....

Hi 440jimr, thanks for your very complete and detailed reply, Brian.
 
IMG_0860.JPG
Hi Guys' Just a quick update. The car is in color, it has been cleared but the photos are base coat only. The color looks dark in the spray booth lighting but it's really quite warm in the sunlight.

IMG_7343.JPG


IMG_7347.JPG


IMG_7350.JPG


In a couple of weeks when it's wet sanded and rubbed and we can get it in better light I will post more photos. I told one of my friends (Tony Dunlop) at the shop that I didn't like the wing-nut on the air cleaner....this is what he thought it should look like! Do you think that his wing-nut is over the top?

IMG_0864.JPG


As always, thanks for looking, Brian
 
Car looks great! Friend of mine has a gold 66 looks great. If those 4 Pentastars are wing nuts, not on my car, MyOpinionOnly. . Vanity plate if they let you put 8 digits "GOLD RUSH". If 6/7 is the limit AU RUSH, AU is the chemical symbol for gold.
 
Car looks great! Friend of mine has a gold 66 looks great. If those 4 Pentastars are wing nuts, not on my car, MyOpinionOnly. . Vanity plate if they let you put 8 digits "GOLD RUSH". If 6/7 is the limit AU RUSH, AU is the chemical symbol for gold.
Fran, I was thinking maybe FLS GLD. The color is actually "Gold Rush" 2012 Dodge truck. Thanks Brian.
 
Hi Guys', The entire time I've been working on this car I was concerned about the color choice. I've always thought some body shapes looked better in some colors than others. I do like this body in sliver and red but I really wanted something different. In the metro Detroit area most of the 66-67's I've seen that are not straight restorations are silver, I think that this was made popular by the "Silver Bullet", the rest are mostly red, both great colors on this body IMO. Like I said I wanted something different. Originally I was considering a dark root beer with heavy gold metallic to go with the gold interior but then I saw a 67 with almost the exact color I was considering and I did not care for it. At that time the interior was completely redone in gold and ready for installation, so that drove my "second guess" color choice that's on the car now. I have never been very comfortable selecting colors and I am soliciting your opinion on my color choice. I understand that it's subjective and a matter of personal choice, what I'm asking is do you think this color shows well on this body? Thanks for looking, Brian.

IMG_0873.JPG


IMG_0875.JPG


I could not get this photo of the trunk lid to show the color as it appears no matter how many times I re-took it. The actual color is closer to the other photos, but I believe they show slightly more gold than I see.

IMG_0876.JPG


IMG_0879.JPG


Thanks again for looking brian,
 
Last edited:
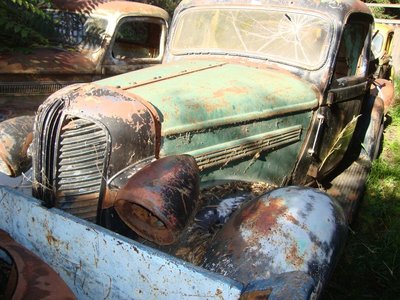
i like it , doing a street roadster pick up out of a 37 dodge p/u . using a rb 383 sonic intake golden lion engine . it will be the goldenrod , it will be tones of gold from paint , interior , hotrod headers , even the rims . still collecting .

DSC08305.JPG DSC01476.JPG DSC08169.JPG
 
Hi Guys', The entire time I've been working on this car I was concerned about the color choice. I've always thought some body shapes looked better in some colors than others. I do like this body in sliver and red but I really wanted something different. In the metro Detroit area most of the 66-67's I've seen that are not straight restorations are silver, I think that this was made popular by the "Silver Bullet", the rest are mostly red, both great colors on this body IMO. Like I said I wanted something different. Originally I was considering a dark root beer with heavy gold metallic to go with the gold interior but then I saw a 67 with almost the exact color I was considering and I did not care for it. At that time the interior was completely redone in gold and ready for installation, so that drove my "second guess" color choice that's on the car now. I have never been very comfortable selecting colors and I am soliciting your opinion on my color choice. I understand that it's subjective and a matter of personal choice, what I'm asking is do you think this color shows well on this body? Thanks for looking, Brian.

View attachment 492221

View attachment 492222

I could not get this photo of the trunk lid to show the color as it appears no matter how many times I re-took it. The actual color is closer to the other photos, but I believe they show slightly more gold than I see.

View attachment 492223

View attachment 492225

Thanks again for looking brian,
I love the gold!
 
i like it , doing a street roadster pick up out of a 37 dodge p/u . using a rb 383 sonic intake golden lion engine . it will be the goldenrod , it will be tones of gold from paint , interior , hotrod headers , even the rims . still collecting ..

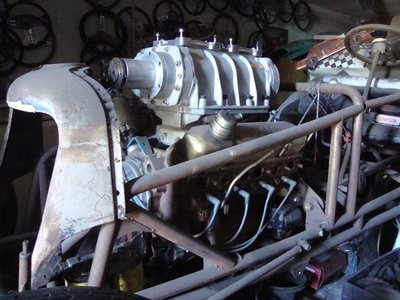
POMONAMISSEL, sorry it took so long to reply to your post, I was trying to figure out what the "heck" a 383 golden lion engine was. I never realized that Chrysler made a 383 RB engine, learn something every day. The "B" engines have a main bearing diameter of 2.625 and the "RB"s are 2.750, did Ma Chrysler accommodate the difference in the block or crank?

In your post you mentioned that you were in H.S. 72-73, that makes you my age. Unless you work a whole lot faster than I do You better stop collecting parts and build your project, before you're too old to drive it...........LOL. Thanks, Brian
 
Last edited:
rb 383 has a 3.75 stroke like 413 426 440 with same sized mains , but a small bore , like the 350 b motor , smaller bore then the 361 b motor and there all different blocks . but the crank has no threads , its nut n bolt like the earlier engines . but it only used for a couple years . yes on the building and using my collection of parts and pieces . between fab equipment , cars and parts . space and time are short . lol .
 
Hi Guys, We've been assembling the "hanger queen" and it's proceeding slowly. The pile of parts waiting to be installed is getting much smaller! That doesn't mean that there is not a ton left to do, but it's more fun to look at. I thought I'd post progress photos. Thanks for looking, Brian.

IMG_0894.JPG


IMG_0896.JPG


IMG_0897.JPG


IMG_0899.JPG


IMG_0903.JPG
 
Auto Transport Service
Back
Top