• When you click on links to various merchants on this site and make a purchase, this can result in this site earning a commission. Affiliate programs and affiliations include, but are not limited to, the eBay Partner Network.

1969 GTX....The T stands for tetanus

Memories or nightmares? Lol, I hate cutting and buffing. Plenty of runs to deal with thats for sure, cannot wait until I am DONE with the body. The whole car for that matter....so I can drive it :)

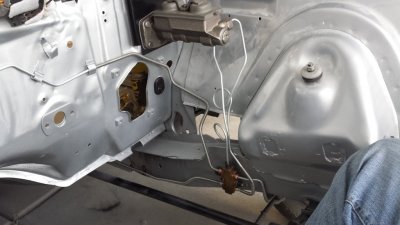
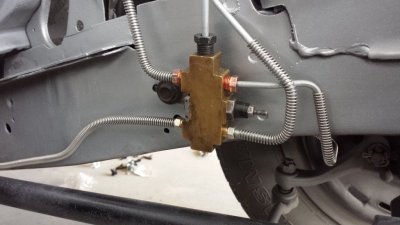
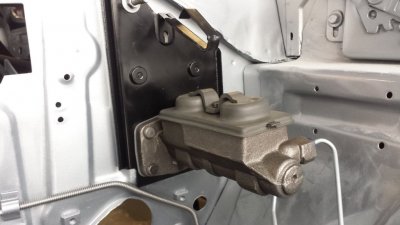
But while I wait for the clear to harden, throwing the brakes on it. Got the prebent kit and it has been easy to put together. Couple of tweaks. Will try and get the front drum hardware together as well. Here is where I am...

20170110_171146.jpg 20170110_171156.jpg 20170110_171208.jpg
 
Memories or nightmares? Lol, I hate cutting and buffing. Plenty of runs to deal with thats for sure, cannot wait until I am DONE with the body. The whole car for that matter....so I can drive it :)

I am where you are right now ;) I am wanting to be done and it is hard to not take shortcuts right now. Keep the focus, it takes a lot longer to reassemble than it took to disassemble for sure.
 
Just getting parts off the dining room table and onto the car. Mounted the front bumper brackets and fender struts, radiator, horns and anti sway bar. Pulled out my headliner (came with the car) and laid it out with the rods inserted so hopefully the wrinkles are minimized. Ordered some sound deadening material ( Noico 80 mil with butyl adhesive) for the roof, firewall and floorboards. Thought about going with stock insulation on the firewall but decided to go with advanced technology lol.
20170111_110335.jpg

20170111_110350.jpg
20170111_110553.jpg
20170111_111243.jpg


And I got to scraping some clear runs and sags. I have the nib file and fine sandpaper on order to finish it up, but I used this little trick to get it close. Took my razor blade and taped up both ends which leaves the exposed razor in the middle higher than the tape. Pretty easy to use and makes it difficult to take anything off except the high spots. Once my paper gets here I will get it closer with Jim's tip of taping the sides and sanding with a hard, wood block.

Worked on a few runs and drips and it may be tedious but it isn't half bad, just taking my time.
20170111_110425.jpg
20170111_110452.jpg
20170111_110526.jpg
 
You've been restoring items in the background and not sharing that information haven't you :)
 
You've been restoring items in the background and not sharing that information haven't you :)

LMAO. I'm not trying to be sneaky, thought I posted pics of about everything. But I did get a bunch of stuff cleaned and refinished when the car was at the blaster.
 
Sweet looking work. Been watching this thread and admiring your work. I'm impressed. I'll bet you can't wait to put that heartbeat in her and go do some cruising.
 
Are you using SPI black epoxy primer for the under body detail part?

No, it is a rattle can epoxy. Brownells Alumahyde II in semi gloss, used it on guns for years. It can be baked for a quick cure and is tough as nails.
 
Spent most of the afternoon cleaning up the garage. Got the motor parts sorted and all together, tore down the plastic, swept, etc. I did get some odds and ends done. With the painted marker light housings, I cleaned the 2 old red lenses and affixed them to the housings. I used Acraglas Gel and scuffed the surface for adhesion. This stuff sticks to anything.
20170113_193941.jpg


I also re attached a wiring strap back to the heater box with the same stuff. The box is in great shape except for being dirty. I will probably clean it up tomorrow. My plan is to get a Vintage Air system but I am going to hold off for now so I can get my motor squared away.
20170113_200041.jpg
20170113_200047.jpg
20170113_200100.jpg
20170113_200117.jpg


And finally, I modified my ballast resistor with a straight piece of wire. I am going to use a Pertronix II ignition and coil which doesn't use the resistor but I like to maintain the factory look. Cleaned the old housing up and pulled it apart. Pretty simple, the resistor is just crimped on. I cut a length of wire, stripped the ends and soldered them into the terminal ends. To keep the terminals in place, I used the left over bit of Acraglas to hold the wire in the ceramic housing.
20170113_194009.jpg
20170113_194344.jpg
20170113_194522.jpg
20170113_195923.jpg
 
Ah yes, time for the details and more details :)

I have a big pile of details to work out. Also got in my sound deadener material so I can start working on the firewall and get it put on the roof. The stuff is heavier than it appears. I have a 4 day weekend coming up to get stuff done. I have my sandpaper in so I can start wetsanding.
 
And finally, I modified my ballast resistor with a straight piece of wire. I am going to use a Pertronix II ignition and coil which doesn't use the resistor but I like to maintain the factory look. Cleaned the old housing up and pulled it apart. Pretty simple, the resistor is just crimped on. I cut a length of wire, stripped the ends and soldered them into the terminal ends. To keep the terminals in place, I used the left over bit of Acraglas to hold the wire in the ceramic housing.
View attachment 387681 View attachment 387682 View attachment 387683 View attachment 387684

So is that like aluminum foil around the fuze? :)
 
Got the sound deadening installed on the roof. Working above your head is kind of a pain but it laid out pretty good and just tapping on the roof is a night and day difference. It needs to be rolled with a roller to get it to stick per directions. Firewall should be easier. Again, it is Noico brand. Looks like every other sound deadening but less expensive.
20170114_190753.jpg
20170114_190807.jpg
20170114_190817.jpg
 
She has a face! I had been working on the heater box and got bored, saw the grill on the shelf. So I started looking for headlights local.....no one has em. Then I remembered I ran into the same issue with the Belvedere so I had ordered 2 of each. Kind of like I had a premonition of buying the GTX lol. So I got the lights and grill in. It is in pretty good shape, fixed a couple of mounts. Didn't paint it or restore much just cleaned it up for now. I might go back out and fiddle with the headliner.
20170115_183040.jpg
20170115_183101.jpg
 
And the headliner is wrong. The guy I bought the car from is a big A body collector so it may be for that body. So, ordered a new one with sail panels last night and cleaning on the heater box resumed. Wire wheeled the metal down and coated with corroseal rust converter. Need to get back out there and put the new foam pieces in place. Cleaned and re flowed the heater core, still holding pressure.

Today I dropped ghe bottom end off at the machine shop. It is a NAPA but they have a really nice shop and the guy that runs it is a huge A body guy and knows his Mopars so I feel it is in good hands.
 
Auto Transport Service
Back
Top