You are using an out of date browser. It may not display this or other websites correctly.
You should upgrade or use an alternative browser.
You should upgrade or use an alternative browser.
68 RT Charger
- Thread starter 68Moparmaniac
- Start date
showard
Well-Known Member
Looking Good!
6PKRTSE
Well-Known Member
Looking awesome and I am not even a fan of yellow but it works on Mopars.
68Moparmaniac
Well-Known Member
Molded parts installed, clips fit nce
68Moparmaniac
Well-Known Member
showard
Well-Known Member
Great!
68Moparmaniac
Well-Known Member
Trying to catch up with youGreat!

GetX'd
Making Life Great Again!
- Local time
- 6:22 PM
- Joined
- Jul 20, 2014
- Messages
- 11,896
- Reaction score
- 13,143
- Location
- Laguna Beach, CA
You’re doing some inspiring work bro. Encourages a lot of guys to keep the one to the grindstone. The payoff looks like where you’re close to. Very nice
Taillights look great. I have a 68 440 R/T 4 speed that is far from being completed. It is my next project. Were you able to clean and recondition your tailllights or did you purchase new or replacement units? I have two that are pretty good, but would love to understand how best to restore them.Finally finished up the taillights last night. Been quite a few years since these were fully assembled. More stuff to put on the "finished pile"
View attachment 716683 View attachment 716684 View attachment 716685
Brad
68Moparmaniac
Well-Known Member
The tail light housings are original to the car, they weren't mint but in real good condition with some pitting. I sent these out to a plating shop and they did what they could as far as cleaning up surfaces and pitting. The bezels and lenses are new. I finished out the detailing with some hot rod black and argent silver.Taillights look great. I have a 68 440 R/T 4 speed that is far from being completed. It is my next project. Were you able to clean and recondition your tailllights or did you purchase new or replacement units? I have two that are pretty good, but would love to understand how best to restore them.
Brad
Thank you for the details.The tail light housings are original to the car, they weren't mint but in real good condition with some pitting. I sent these out to a plating shop and they did what they could as far as cleaning up surfaces and pitting. The bezels and lenses are new. I finished out the detailing with some hot rod black and argent silver.
Nice stuff. Good job and good luck!
Back in the day when I restored my yellow 70 Charger R / T SE, I primed the roof with lacquer primer and had the vynal top installed, then painted the car. And it probably would have been fine had I left the car in the garage, but I was painting an engine compartment in a friend of mines 69 Charger, so I put my Charger outside, and we got about 6 inches of snow, well the snow melted and water penetrated the vynal top, and the porus primer allowed water to get to the metal, and I got rust bubbles under the vynal top. Lesson learned, I always paint the roof on a vynal top car before having the top installed!
68Moparmaniac
Well-Known Member
Main reason vinyl tops failed back in the day. I've always painted and clear coated the roof before installing the vinyl top, if water does get under it the paint will keep it from corroding the steel. Just need to scuff the paint so the glue has something to bite into and go about the usual install.Back in the day when I restored my yellow 70 Charger R / T SE, I primed the roof with lacquer primer and had the vynal top installed, then painted the car. And it probably would have been fine had I left the car in the garage, but I was painting an engine compartment in a friend of mines 69 Charger, so I put my Charger outside, and we got about 6 inches of snow, well the snow melted and water penetrated the vynal top, and the porus primer allowed water to get to the metal, and I got rust bubbles under the vynal top. Lesson learned, I always paint the roof on a vynal top car before having the top installed!
68Moparmaniac
Well-Known Member
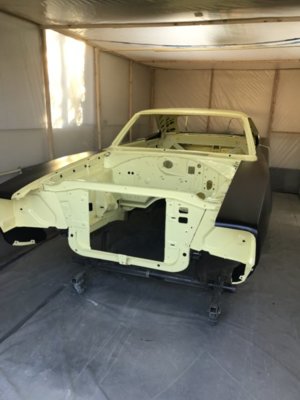
That yellow really looks sharp on a Charger. I have to ask though, why didn't you paint the quarters and dutchman panel with the rest if the car?
68Moparmaniac
Well-Known Member
68Moparmaniac
Well-Known Member
Last edited:
68Moparmaniac
Well-Known Member
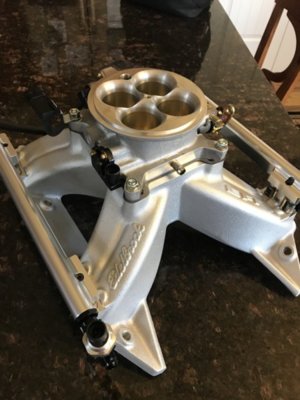
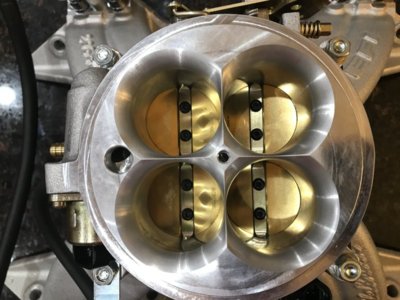
I am kind of in the same boat with the fuel injection system. I bought the Fitech dual quad fuel injection system for my Hemi engine, in the Daytona stock car. I am concerned that the fuel injection system might run lean during break in of the engine. I asked my engine builder if he wanted to break the engine in on the dyno with carbs instead of the Fuel injection, and he said that he wanted to break the engine in with the system that will be run on the car. I agree with you, they look great,I hope they run as good as they look! You are making great progress on the car!

Similar threads
- Replies
- 9
- Views
- 958
- Replies
- 3
- Views
- 1K

