• When you click on links to various merchants on this site and make a purchase, this can result in this site earning a commission. Affiliate programs and affiliations include, but are not limited to, the eBay Partner Network.

B Body stiffening

This thread was what got me to join and be active in FBBO! Thanks Darius for bringing this dead thread back up! Business has been busy with me too lately, so much that I'm hiring a 2nd guy to do some of the workload! Skilled work and workers are (is) hard to find!
 
Glad to see things are going good for ya Darius. A side note....more **** please, I want to see how bad *** that car is looking!!!
 
Finally-more progress!

As mentioned .I am bummed about not having time to work on the car, however, I am stoked about what my friend Dean has accomplished since I told him to get after it.
Here are a few oics of the custom radiator expansion tank, brake line hook-up to the Charger master cylinder, fuel system, and an in progress shot of how the cold air intake is going to work out. He fabbed the cold air "tube" from some exhaust pipe he had around. The computers will be on the pass side and all the fluid containers on the driver side.
He also installed a hand brake on the floor between the driver seat and rocker . The cables from the Charger including the cross-over link all worked perfectly, just had to trim the length after repositioning the connector piece.
There is some really cool stuff under the car in terms of how the lines were routed, fuel filter location , etc. Next time I am over and it is on the lift I will get some shots
 

Attachments

  • Engine bay 001.jpg
    116.3 KB · Views: 1,497
  • Engine bay 002.jpg
    130.6 KB · Views: 1,514
  • Engine bay 005.jpg
    135.1 KB · Views: 1,451
  • Engine bay 004.jpg
    120.6 KB · Views: 1,476
A few more pics...amazing how the e-brake cable fit from the Charger. With the Corbeau seats I used there is about 6" between the edge os the seat and the rocker and ZERO room left up under the dash for a foot operated e-brake so this is my solution. This is a simple Lokar brake handle...chrome.
 

Attachments

  • Engine bay 007.jpg
    125.4 KB · Views: 1,519
  • Engine bay 006.jpg
    106.1 KB · Views: 1,523
  • Engine bay 003.jpg
    116 KB · Views: 1,502
B Body Stiffening....IT"S ALIVE!!!!

Well boys and girls, we fired that baby up today....YEEEE HAAAAAAA!!! It purrs like a kitten!
No easy feat, some serious tinkering and modifications to the fuel pick-up and sending units to get them to work with the XV B Body tank with EFI set up in it. We used the sending unit from the Charger, well parts of it. I did not do this work and was not there when it happened so I cannot explain it again as it was explained to me. All I know is I turned the key and it fired up!
Unfortunately, my camera battery died right when I was going to film the start up so I have nothing to show.
Now to take it all apart and get after the finish body work and paint!
The target is to have it at Spring Fling, keep your fingers crossed.

- - - Updated - - -

Don't know if I mentioned it but.....This is the entire wiring harness right out of the Charger and the computers as well. No mods to any of it other than lengthening a few wires. Next big challenge will be the transmission computer I'm thinking. As relates to speed /wheel sensors and such.
 
darius what angle did you set your pinion at on the rear end.
i ahev just put the magnumforce pro link in my charger and it is adjustable but wondering if you worked out the correct angle
 
It was a long time ago when we did that but I think we started at 3 degrees down. I honestly don't remember exactly what we set it at but I know it wasn't much. I also know it was tweaked a little when working out the final transmission mounting position so again, I am not positive what the final angle is. Sorry.
 
The car is now disassembled and back on the rotisserie. Some final welding to complete then sand blast and prime it and get after fitment and body work...it is definitely "over the hump".
Still shooting for Spring Fling!
 
Wow, can't wait to see the final product, your car is going to be amazing!
 
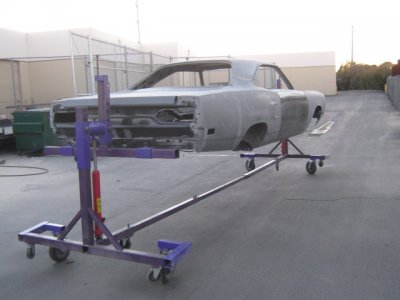
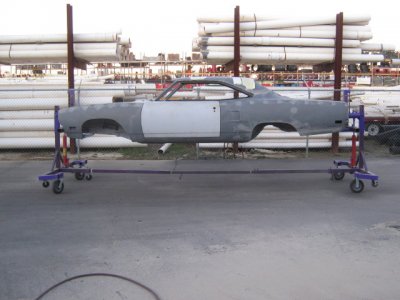
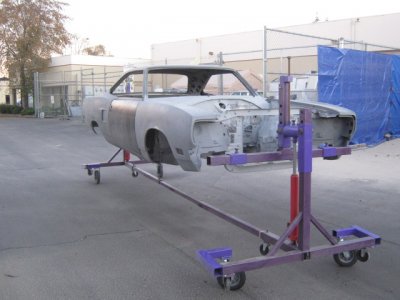
Spent yesterday sandblasting all the welds. Pretty much every seam and panel connection point on the car seeing as how every panel was replaced, plus all the custom fab places. Use 550 pound of sand to get thru it! I am going to try to post a video here, not sure if it will work, it is of the car being "spun" on the rotisserie.
Awesome tool and it sure made getting all the sand out of the car easier.
Video won't work so here is a pic at least
 

Attachments

  • IMG_1189.jpg
    IMG_1189.jpg
    80.6 KB · Views: 1,180
  • IMG_1187.jpg
    IMG_1187.jpg
    105 KB · Views: 1,228
  • IMG_1188.jpg
    IMG_1188.jpg
    102.8 KB · Views: 1,180
Darius - The transmission will give you some BS with shifting as it uses the ABS module (with wheel sensors) for shift loads and firmness --- You will either have to A) use the factory wheels sensors or B) use a truck differential sensor and splice it to the front and rear ABS signal wires --- that way you'll be good to go and the transmission will work as factory.
 
Hi Guys
A little update. The car is still on the rotiss and is about two weeks from being painted! VERY frustrating to be drawn away from working on it and having to have someone else be finishing it up. At least work is back to being very good so I can pay for it. I totally trust Dean to do an excellent job also. Probably not going to make Spring Fling with so I will have to shoot for Mopars in the Park in June.
 
Hi kids!!!!
No I did not drop off the earth . Sometimes life gets in the way. At this point I am where so many guys get to.....waiting for someone else to get some work done on the car. I completely trust the guy doing the work. He is a one man shop and has 3 projects going plus does bread and butter stuff to keep cash flowing so while he isn't lighting any fires, he IS getting stuff done.
The body work is almost done and by the end of this week it will be primeblockprimeblockprimeblock...you know. We have lizard skin to spray inside and out also then off to paint.
I'm taking the seats to the upholstery shop this week so all they will have to do is the carpet, and install the headliner and vinyl top once the paint is done. It is coming!
I'm a little disappointed to have to let someone else finish the build but I did get to do MOST of the custom fab and fitting. I don't think I'm going to mind not having to install power windows!
I will post up some pics when the lizard skin is applied.
 
Progress is progress. Great thread. Can't wait to see more pics and updates.

Thanks for sharing.
 
This is a great thread, you're doing some seriously innovative work. I will definitely use some of your ideas as my car progresses. Thank you for the detail!
 
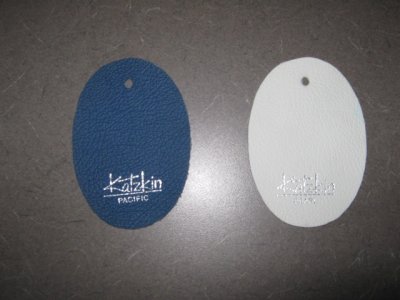
I dropped off my seats, door panels,and a few other items at the upholstery shop yesterday to get that stuff going. I had in my mind a different shade of blue leather than what the color actually turned out to be. Too long since I looked st it I guess.
Anyway, my original plan was to paint the car B-5 Blue but i don't think it will look right with this leather. I looked at every sample these guys had....and there were TONS...and this is the nicest shade.
So now I am thinking B-7Jamaica Blue instead. I always liked that color anyway and you don't see a ton of cars painted that color.
What do you all think??
Does this site have a "poll" feature??
 

Attachments

  • IMG_1260.jpg
    IMG_1260.jpg
    92.5 KB · Views: 883
Auto Transport Service
Back
Top