• When you click on links to various merchants on this site and make a purchase, this can result in this site earning a commission. Affiliate programs and affiliations include, but are not limited to, the eBay Partner Network.

B Body stiffening

I have scheduled myself OFF for the next two weeks...which means I WILL get at LEAST 1/2 of those days to work on my car, YOO HOO!!!!
I will be posting progress as it happens.
Very close to taking it all apart and getting after the body and paint now. On tap next is final fitment of brake actuator rod, steering linkage,radiator from Charger fit in GTX, route fuel lines and e-brake, lay in wire harness to make sure no cutting/fabbing required. That is about all the fab/fitment issues I have left.
I'm sure hoping for Spring Fling...it will be tight and totally dependent on how business is after the new year. It is all about time now, all my stuff is bought except the actual paint and I have the "car stash" to buy that.
I may luck out on the upholstry as the guy I have selected to do it wants to trade some bathroom remodeling for labor......I LOVE trades like this!
 
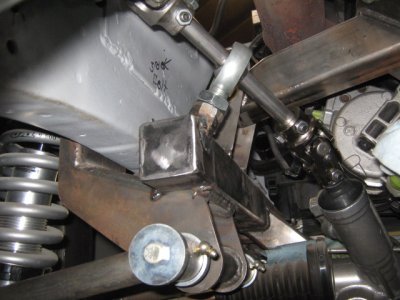
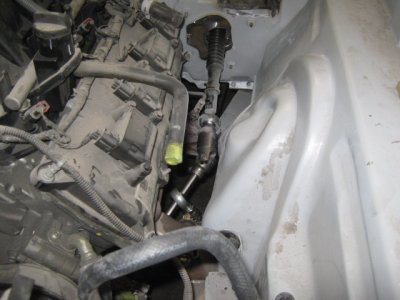
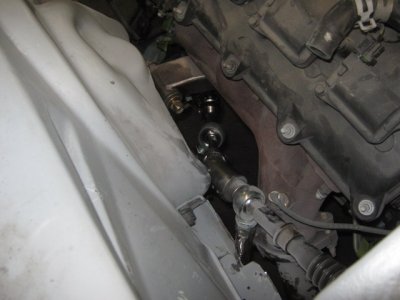
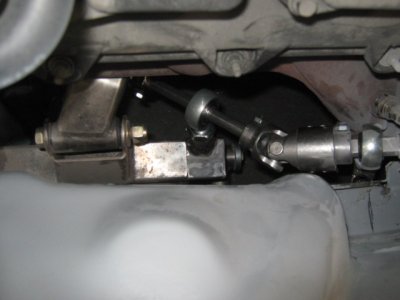
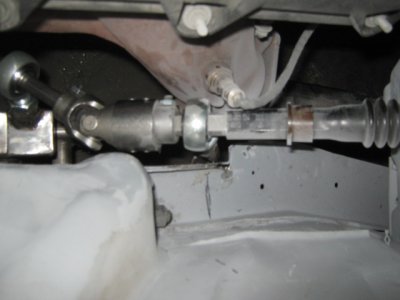
I spent all week at the shop working on the car. Got the brake linkage done which was pretty easy. The BIG challenge was the steering column. I wanted to use the column from the Charger. It is a wierd contraption designed with several joints to allow for steering wheel adjustments as well as the off center positioning in the Charger. Anyway, here is what I came up with and it took me about 2 days of in-and-out fitting attempts. I have a dampner double D joint and a Heim joint on the way from Summit to complete the install. I still may use the rubber boot that came out of the Charger.
It has been an interesting process to get all this stuff to fit....I think I will post on the general forum about it and the time involved vs cost/price to pay to have it done.
Here is the brake pedal/linkage install

Steering column brake linkage 004.jpg
 
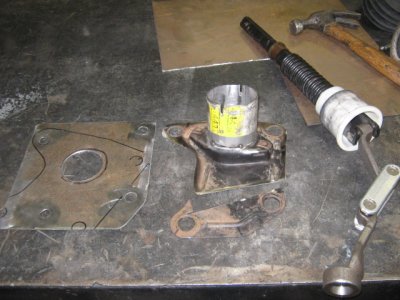
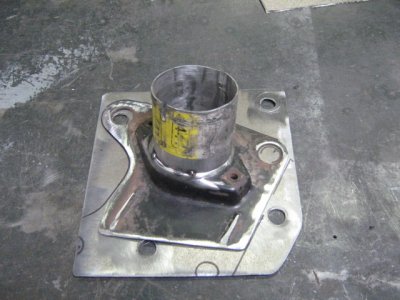
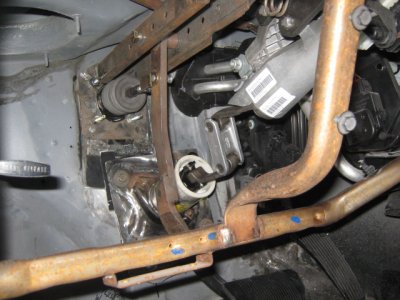
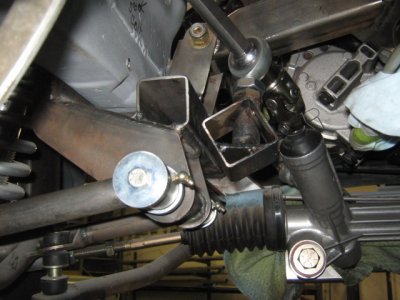
Here are some pics of the steering column. I used the GTX mounting plate and modified it by trimming it down and mounting the attachment angled portion on a new plate so I could position it at the correct angle to allow free movement. Finding this angle was a bitch because of the articulation of the shaft. This is what took most of the time.
I will post more pics when I get all the joints and support on the engine bay side done.
 

Attachments

  • Steering column brake linkage 001.jpg
    Steering column brake linkage 001.jpg
    129.2 KB · Views: 1,587
  • Steering column brake linkage 002.jpg
    Steering column brake linkage 002.jpg
    121.7 KB · Views: 1,571
  • Steering column brake linkage 003.jpg
    Steering column brake linkage 003.jpg
    127.5 KB · Views: 1,550
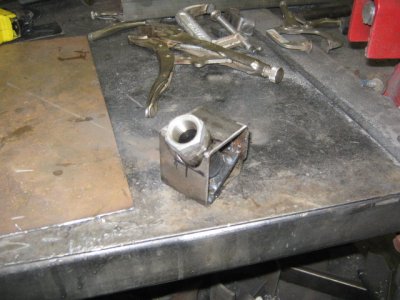
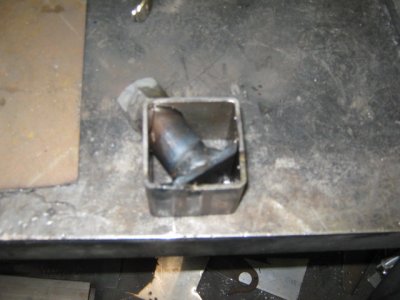
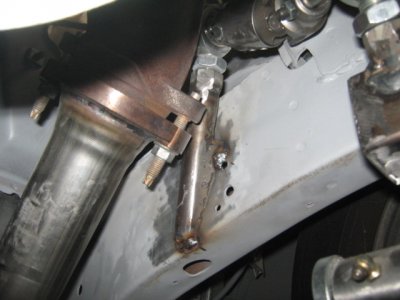
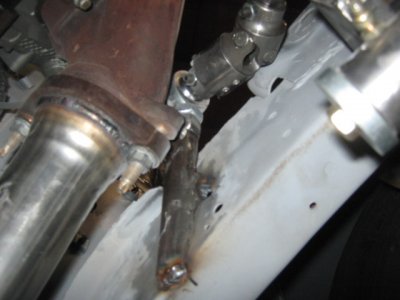
That is a piece of tail pipe connector flange we used as a receiver/support point for the Charger column nylon pivot flange.....I am calling it that because I could not find a nomenclature for it in the 5 volume manual set for the Charger!
We used a flaring tool to get the inside diameter of the flange to be just right....it was actually very close from the get go.
 
Thats nice and all but when i was delaing with XV they were rubbish also thats why i went with magnumforce there products seem to be alot better quality as well chromoly tubing not this crushable box tube and they kept in full communication with me the whole time letting me how the build was going i would definetly go back to them just thought i would let you guys know the great service they did for me.
 
Good to hear that your still wrenching on it Darius. The fab work is awesome!!
 
I got the steering linkage done today! It takes 2 1/2 turns of the wheel full right stop to full left stop!!!!
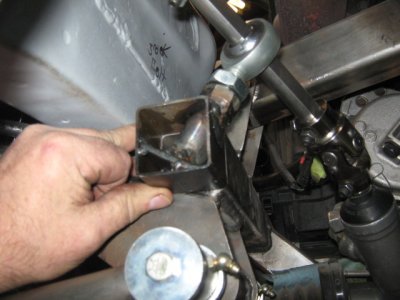
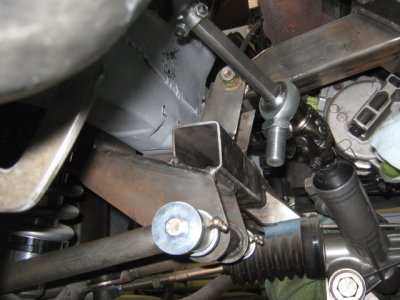
here are some pics of the brackets I had to make to support the Heim joints.
BIG fun!!!!
I "extended" the rail on the Alterktion for the lower mount and that allowed me to cap the square tube off clean so no crap gets in there. I'll cap the other side when we take it all out for finish.
 

Attachments

  • Steering install 005.jpg
    Steering install 005.jpg
    97.3 KB · Views: 1,511
  • Steering install 004.jpg
    Steering install 004.jpg
    116.3 KB · Views: 1,519
  • Steering install 003.jpg
    Steering install 003.jpg
    124.9 KB · Views: 1,521
  • Steering install 002.jpg
    Steering install 002.jpg
    85.2 KB · Views: 1,526
  • Steering install 001.jpg
    Steering install 001.jpg
    111.1 KB · Views: 1,525
Here it is tacked in place...will finish the welds when the engine is out of the way
 

Attachments

  • Steering install 006.jpg
    Steering install 006.jpg
    113.2 KB · Views: 1,467
Here is the mount closest to the firewall . The large fitting is a dampner.
 

Attachments

  • Steering install 007.jpg
    Steering install 007.jpg
    89.7 KB · Views: 1,471
  • Steering install 008.jpg
    Steering install 008.jpg
    80 KB · Views: 1,483
View from the top
 

Attachments

  • Steering install 009.jpg
    Steering install 009.jpg
    100.6 KB · Views: 1,474
  • Steering install 010.jpg
    Steering install 010.jpg
    85.3 KB · Views: 1,477
  • Steering install 011.jpg
    Steering install 011.jpg
    72.7 KB · Views: 1,475
  • Steering install 012.jpg
    Steering install 012.jpg
    70.6 KB · Views: 1,500
Great info and great car. But now I wish I could flip my C body on it's side to work on it.
 
Well Boys and Girls, I just had to bump this back from the depths of "Non-activity" in my effort to remain motivated. Actually, I am motivated as hell to get this baby done. It is so close to just getting after the body work and paint I can taste the bondo dust!
Business has been very slow , which prevented me from working on the car because I had to lay off almost my entire staff. The dam has broken however and business is actually incredible right now. Hopefully by June I will be in a position to take some more days during the week off to go get some work done.
This car WILL get done, I just hope this is the year!
 
Darius, good to hear that your still kick'n. Now get to work, Im jonesen for more ****, lol!!
 
I had the same ordeal installin my U S Car Tool frame connectors & I also installed the 1 piece front pan from AMD.From the looks of things we are doing almost the same mods to our B bodies.Ive thought of tryin to incorperate a drive shaft loop & attatching it to my frame connectors.I thought it would help tie together both sides of the car in the middle.Has anyone tried this & had any luck? Also Im a beginner at welding,the 1st thing I ever welded was my rotisserie my car is currently on.Keep us posted cause Il be lookin for tips & advise.
 
Darius, good to hear that your still kick'n. Now get to work, Im jonesen for more ****, lol!!


Hey Zach
Are you coming to Spring Fling with your DONE car????? Sure would be nice to see it in person. I will be there with my 69 Dart GTS. F-8 with a white vinyl top if I don't see you first.
 
I'm on the fence about bringing it. Waiting to see if I get my speedo back, had to send it in to be looked at cause it was counting on the trip with the key turned on and the car not moving!!
 
Didn't see you there Zach, bummer. Maybe next time? How about bringing your car to Mopars in the Park in Sacramento 13 June!
 
Well boys, been workin my azz off stayin alive in business and it is paying off. Unfortunately I have had ZERO time to work on the car so I reluctantly asked my friend to start working on it. I say reluctantly NOT because I have even the slightest doubt this car will be a masterpiece when he builds it out,rather, I am bummed I will not be able to see it through myself. I was at a point where it was going to take a LOT of his involvement anyway- so be it.
So far he has run some stainless fuel lines, fit the factory A/C lines and is working on the e-brake system.
I have set a completion date for him of 1 March so I will be sure to have it by Spring Fling.
I will post more pics as interesting stuff happens -as often as I can get to the shop and check things out.
 
Auto Transport Service
Back
Top