Mike 67...the valve springs are the comp cam 911s that come in the Package with the 23-224 cam. That is the same cam I took out and replaced. high performance street, very strong mid-range with headers, 2200 stall. I don't think the valves were ever "floating", it sounded more like low octane ping on a couple of them. I think I found that noise problem today. The roller rockers have "worn in" and there was some "slop". I put a .030 spacers inbetween 3 of them to tighten them up. I think they were rattling and that is what I was hearing when I accelerated. I hope so. What do you think? Could this have been the "noise"?
I'm still learning this stuff and by no means am I an expert at Mopars but have been looking at the components you have listed...I'm building my first 440 so I'm trying to avoid any pitfalls such as this...
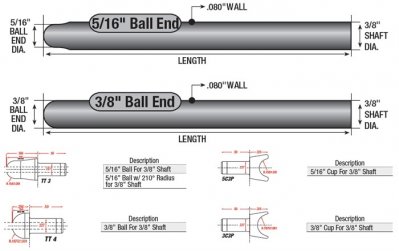
So back to your valve train you stated that you have the 1621-16 ultra pro mags, those require a min .030 clearance, they also state that they require the 5/16 push rod...and by no way do I mean to be insulting but the Hi-tech push rods are 3/8, but do they have the 5/16 taper?
I also down loaded this directly from Comps site regarding preload and your lifters
"Section I. Setting pre-load with ADJUSTABLE ROCKER ARMS
Turn the engine in the normal direction of rotation. Start with cylinder number one (1). When the
exhaust valve begins to move, adjust the intake valve to the correct pre-load. To reach zero, take
the pushrod between your finger tips and move it up and down while you tighten the rocker arm.
Once you feel the pushrod has no more vertical slack, you are at zero pre-load. Make sure the
pushrod is in the lifter and the rocker arm seat when making valve adjustments. As stated before,
the recommended setting is .045" or 1 turn of the wrench past zero. Now, you can move on to the
exhaust valve on the same cylinder. Begin by rotating the engine over again until the intake valve
reaches maximum lift and is almost all the way back down. Then set exhaust valve using the same
method as the intake (.045" or 1 turn of the wrench past zero). Continue adjusting the valves on
each cylinder in this manner until all valves are adjusted"
Hope this helps!


