• When you click on links to various merchants on this site and make a purchase, this can result in this site earning a commission. Affiliate programs and affiliations include, but are not limited to, the eBay Partner Network.

Don's 1969 Charger Restoration

Don just proves that where there is a will there is a way!! This is an amazing thread, can't wait to see more! :headbang:
 
I am always amazed how you are not afraid to chop and patch. You have it down and do a great job. Keep that good work up.
 
Looking good Don, keep up the great work
Thank you sir, I aim to please

Don just proves that where there is a will there is a way!! This is an amazing thread, can't wait to see more! :headbang:
Kinda funny I remember mot all that long ago reading some of the other members threads here, and thinking the same thing!

I am always amazed how you are not afraid to chop and patch. You have it down and do a great job. Keep that good work up.
Afraid? not me! I figure if I mess it up, I can always buy new metal!:yes:

- - - Updated - - -

I was going through my pics and found this so I thought I would share.
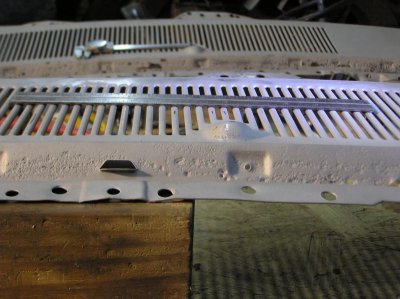
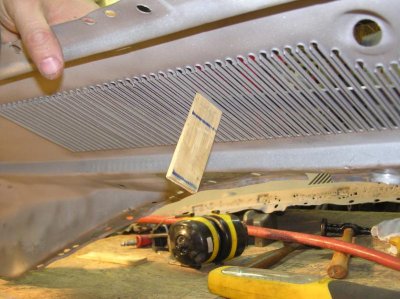
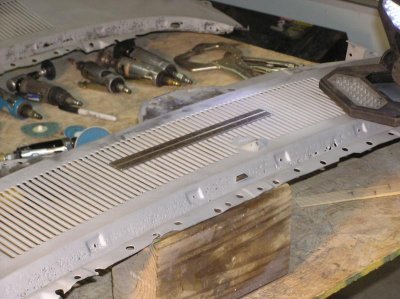
This is how I straightened the louvers on my cowl.

1st I cut a shim till it fit inside the louver from the backside
P2140042.jpg

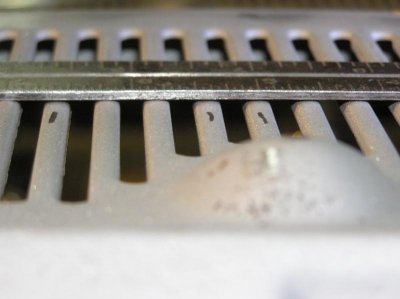
I layed a straight edge across the louvers and checked to see which ones needed to be pushed up
P2140039.jpg

P2140040.jpg

Here you can see the gap on the louvers that are marked
P2140041.jpg

I would then gently push up on the shim from underneath, then check the gaps, and repeat. This worked really well for me.
(Just so ya'all know, the pitted up cowl in these pics, was not used, I ended up using the cowl from the 4 door coronet parts car) (I just got back from South Carolina and now I'm talking / typing like them :icon_frown:)
 
Don, Extraordinary.. Everything you've done is un-real, Im one who cant wait to see this one done man...
 
More parts blasted

Took all these parts and blasted them.
It took me about 4 hours

P3150072.jpg

P3150073.jpg
 
Wow, lots of work. Keep up the great work, the car is coming along nicely. It's gonna be sweet!!!
 
Hi new to this forum. I'm rebuilding a 1970 dodge charger and currently replacing the trunk pan. Does anyone have the location of the trunk braces? When I bought this car the trunk was missing already. Any information would be awesome
 
There's nothing better than freshly blasted parts! Sure beats fixing something only to find a missed spot down the road.
 
Very nice Don . . . does that mean they're Dang Blasted parts ? ? ( SMILE )

As always, great to see progress on your car - keep up the great work ! !
 
I've been following your thread and have to add my :icon_pray: to your work. Your patience and attention to detail will make this dawg better than factory for sure. I think about what I had to work with and compare to some others such as yours and I just marvel. Hats off and continued good luck and God speed!
 
more parts in epoxy

Been a while since I posted.
Here are all those parts epoxy primed.

P3230018.jpg
 
Been a while since I posted.
Here are all those parts epoxy primed.

View attachment 259426

Looking good Don . . . very nice . . . I think I might be starting getting parts in primer too, how cool is that ! !

My old stomping grounds - Lane Automotive was a sponsor on my Uncle's dragster and alcohol funny car for years !
Looks like a great show - sure you had a lot of fun there !
 
Here is a video of a car show I attended this past weekend at Lane Automotive!
They say it had 1700 cars there.

https://www.youtube.com/watch?v=cebzUDXHocA&feature=youtu.be
Don, Thank you sir for a great video! Some good looking old cars there and some good music to boot.. I love all the old cars and how i wish i seen more of them when im out, very seldom though.. Last week i took my 73 to get some fuel at a small place right in Ohio not far from me (Bushnell corner) and i didn't wash the car so i went there thinking noone would even notice BUT, as i got out of the car and reaching for the pump handle i heard tires ripping and turning around seen some "Bowtie" dude that had just turned from the main road onto 226 and was heading east, didn't sound bad at all and ill bet he had to get on it because another old car was setting at the pump lol, I do have to admit that 67 Chevelle SS (blue) looked like it came from the wax shop!, If that would have been me in the opposite position i would have to stop and talk, i guess he doesn't see things that way, but, by accident coming and going this last week i found where he lives, im not shy and im going to go up and check the guy out, well, that Chevelle anyway... My wife said shes seen more then that sitting there on that paved, but back road, I guess the only reason i mention it is, a car show does have to have different brands, other wise Mopar wouldn't mean as much, The elite has to be at the front, or close lol... I love them all, Mopar just tops the list :) Thanks again, good video!!! And your parts look like they came out of a ordered brand new box from some place! GREAT work....
 
4 speed hump fix

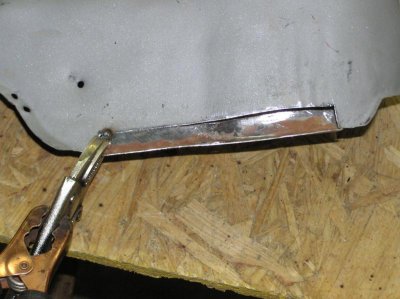
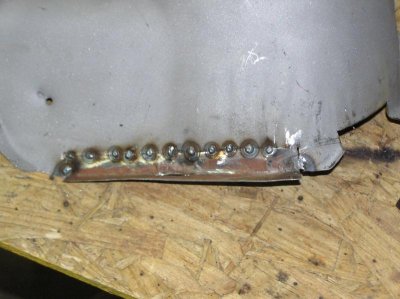
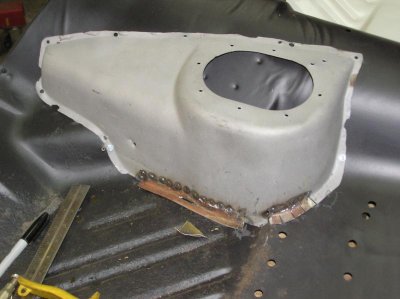
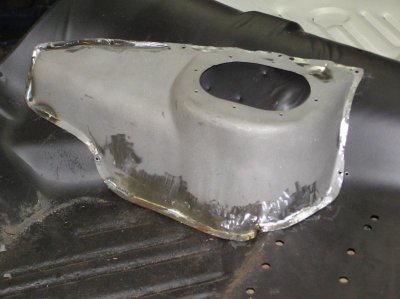
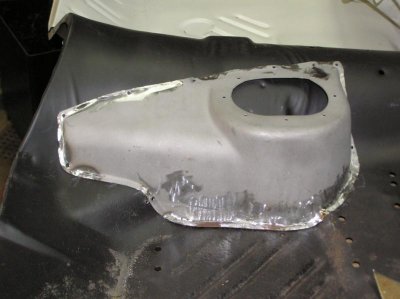
Did a little patching on the 4 speed hump
P3230023.jpg

P3230024.jpg

P3230025.jpg

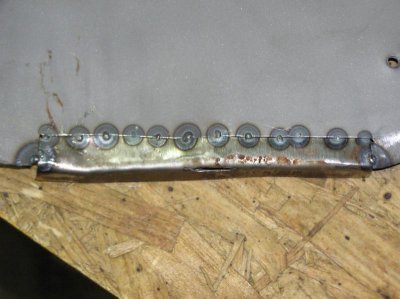
this shows good weld penatration on the back side. (I always like to check this)
P3230026.jpg

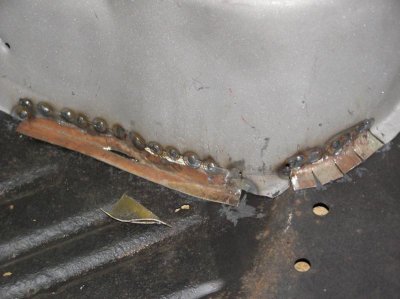
I dont have a shrinker strecher (maybe someday)
P3230027.jpg

so I find that splitting the metal into pie shapes works pretty good.
P3230028.jpg

just add weld
P3230029.jpg

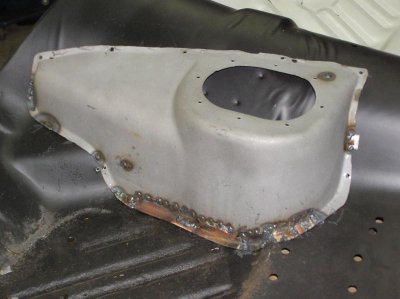
grind
P3230030.jpg

and just as good as new
P3230031.jpg
 
If you lived just a bit closer I'd let you borrow my shrinker and stretcher. They are nice to have.
 
If you lived just a bit closer I'd let you borrow my shrinker and stretcher. They are nice to have.

Me too . . . I'm just a little bit further away . . . dang it ! ! !

You're making it look easy Don . . . good work !
 
Man it really feels like the metal work will never be done with you fixing every single little piece, you got some serious patience!
 
Auto Transport Service
Back
Top