You are using an out of date browser. It may not display this or other websites correctly.
You should upgrade or use an alternative browser.
You should upgrade or use an alternative browser.
Filler Secrets 101
- Thread starter Bladecutter
- Start date
- Local time
- 5:19 PM
- Joined
- Mar 14, 2012
- Messages
- 20,027
- Reaction score
- 43,399
- Location
- Surrey, B.C. Canada
Bladecutter is banned? Great, now what?
- Local time
- 5:19 PM
- Joined
- Mar 14, 2012
- Messages
- 20,027
- Reaction score
- 43,399
- Location
- Surrey, B.C. Canada
Well, Bladecutter ain't here any more, but he's still at it. Although some of his work in this thread was trial and error (how else do people learn things?) he's been in contact with a glass supplier in Ontario, California who agrees with just about everything that he's tried on here so far. Keep the Cab-O-Sil mix fairly rich (as in lots of glass-to-resin ratio), keep layers to a 1/8" max, and using epoxy resin will yield better results due to the stronger adhesion. The result will be a great filler and molding product, super tough and water-tight.
Bladecutter is living without much in the way of computer gear; when he gets access to someone who can get the pictures off his phone for him in a few days then I'll be able to upload some examples.
Bladecutter is living without much in the way of computer gear; when he gets access to someone who can get the pictures off his phone for him in a few days then I'll be able to upload some examples.
Bladecutter is banned? Great, now what?
Really, what did I miss?
Superfreak
Well-Known Member
Read his last post.
- Local time
- 5:19 PM
- Joined
- Mar 14, 2012
- Messages
- 20,027
- Reaction score
- 43,399
- Location
- Surrey, B.C. Canada
Alright then. Jimi sent along a stack of pictures that describe some of his work, so I'll get started on putting them up here along with the descriptions in his own words. Here are the first ten pics:
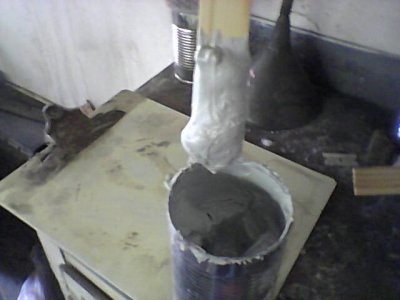
The cab old batch, little clumpy, some chunk...i strained it prior to mixing...like the way that paint stick stands at attention init?
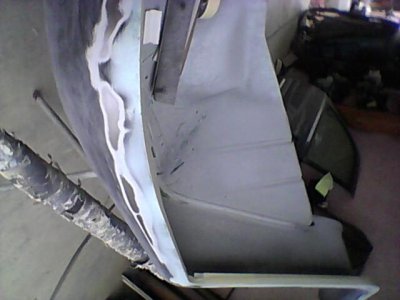
second spread along side...note continuity from end to end...the work time is a vacation i'll tellYou and it all equates to less movement
in end result...#5.... tape on inner edge to spread face and keep edge clean. jim


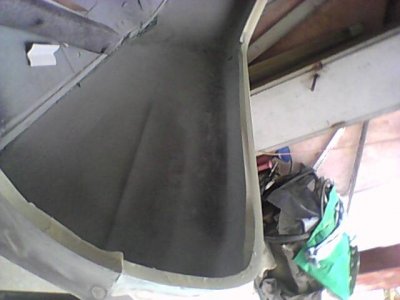
Third spread on sides and face. #8 to show uniformity #9 tape along peak to spread face left of peak....pull tape as kick begins, when
buttery...lay tape back in place to guard...block to tape edge w/o ragging tape edge...#10 is after the fact.
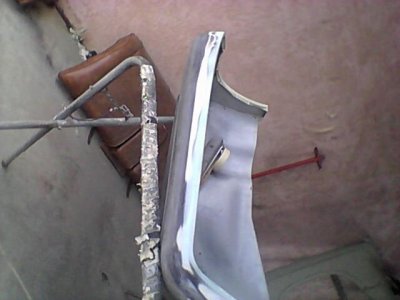

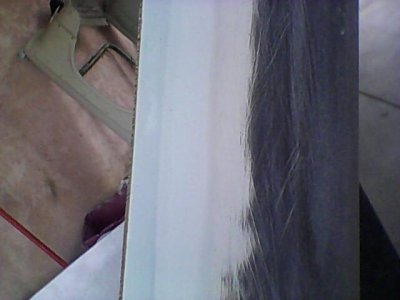

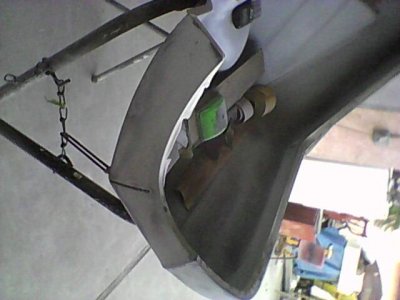
And more to follow soon. I like his photo showing just how stiff you can make this Cab-O-Sil mix and still have it be completely workable. Nice feather edges shown too.
The cab old batch, little clumpy, some chunk...i strained it prior to mixing...like the way that paint stick stands at attention init?
second spread along side...note continuity from end to end...the work time is a vacation i'll tellYou and it all equates to less movement
in end result...#5.... tape on inner edge to spread face and keep edge clean. jim


Third spread on sides and face. #8 to show uniformity #9 tape along peak to spread face left of peak....pull tape as kick begins, when
buttery...lay tape back in place to guard...block to tape edge w/o ragging tape edge...#10 is after the fact.


And more to follow soon. I like his photo showing just how stiff you can make this Cab-O-Sil mix and still have it be completely workable. Nice feather edges shown too.
satman72
Well-Known Member
- Local time
- 8:19 PM
- Joined
- Oct 14, 2012
- Messages
- 2,499
- Reaction score
- 1,447
- Location
- Stoney Creek, Ontario
Good stuff! Thanks.
- Local time
- 5:19 PM
- Joined
- Mar 14, 2012
- Messages
- 20,027
- Reaction score
- 43,399
- Location
- Surrey, B.C. Canada
And some more...
#11. showing feather to metal.
12. 3rd spread on side blocked in 80
13. Masking side to spread inner lip (Stud in bkgrnd)
14, Inner lip spread
15. sanding inner lip
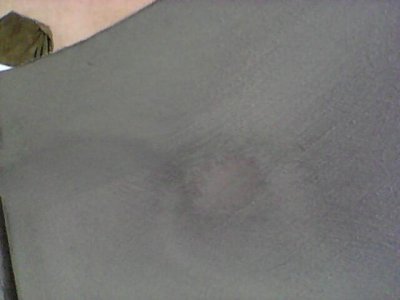


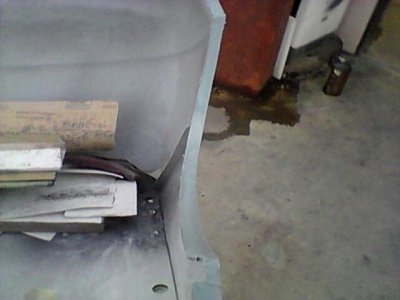
16. Black is 2 pt urethane primer spread unreduced as finish putty...blocked in 120 ....THIN spread overall entire area and block w/
120....done twice.
17-20 Ready for spray prime......fenders were in PPG del fleet urethane etch seal topped w/ black evercoat feather fill.....so the cab is on
top, blocked fenders in 80 prior to any spreads....only feather to metal in areas i broke through myself during stages. About 4 spreads
overall each time X 2 thin spreads with Urethane prime Pro-Form all blocked in 120 for primer. Note radius of new edge, note the
transparency of filler in areas....the heaviest build is the apex of fender edge which probab;y is in between 1/16" - 1/8" most of the
skims are no thicker than a sanded primer coat. Also, pic showing face with pools of black putty/primer were cut down further...those
became transparent.
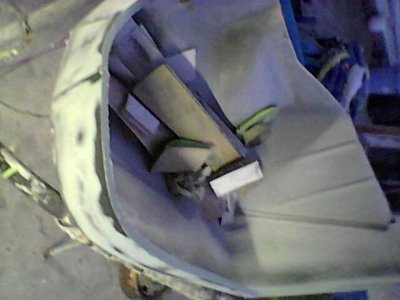
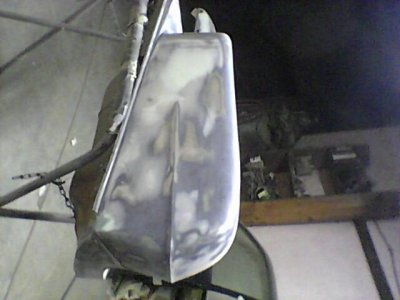
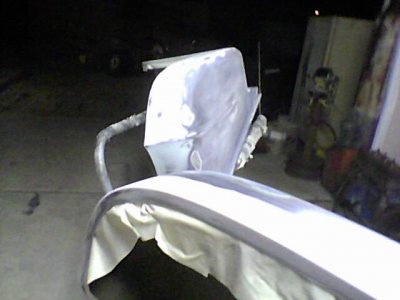


#11. showing feather to metal.
12. 3rd spread on side blocked in 80
13. Masking side to spread inner lip (Stud in bkgrnd)
14, Inner lip spread
15. sanding inner lip


16. Black is 2 pt urethane primer spread unreduced as finish putty...blocked in 120 ....THIN spread overall entire area and block w/
120....done twice.
17-20 Ready for spray prime......fenders were in PPG del fleet urethane etch seal topped w/ black evercoat feather fill.....so the cab is on
top, blocked fenders in 80 prior to any spreads....only feather to metal in areas i broke through myself during stages. About 4 spreads
overall each time X 2 thin spreads with Urethane prime Pro-Form all blocked in 120 for primer. Note radius of new edge, note the
transparency of filler in areas....the heaviest build is the apex of fender edge which probab;y is in between 1/16" - 1/8" most of the
skims are no thicker than a sanded primer coat. Also, pic showing face with pools of black putty/primer were cut down further...those
became transparent.


- Local time
- 5:19 PM
- Joined
- Mar 14, 2012
- Messages
- 20,027
- Reaction score
- 43,399
- Location
- Surrey, B.C. Canada
21 -23. 1st prime That's Pete spraying
24. adjusting peak, was a little dogged one way, so tape it straight and push the material to edge of tape, i used 220 to be gentle....firm but pliable pad for block
25. Pete spraying prime on DeSoto front bumper filler
26. Same fender in second prime after peak adjustment
27. A whole lotta time! And it's not even a rotiss. Panels are getting very straight, lines have lost some definition...Pete is Straight, but He doesn't cut lines like me an area we have a problem with eachother...see things different, nature of applied science...opinions and procedures will vary drastically one shop to next.


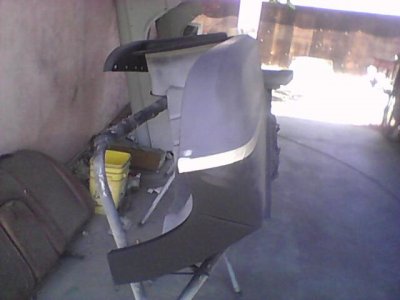
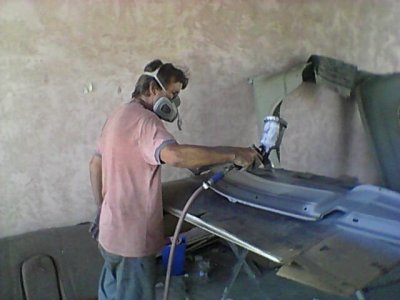

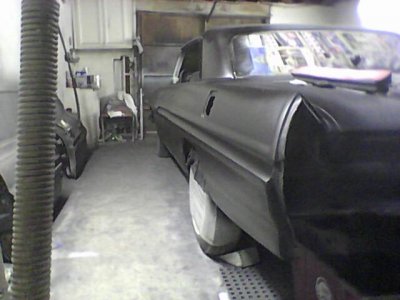
Last project pics for now. These fenders were never absolutely accurate...they have a lot of stress pressed in with those two extreme bends...the energy, like water, follows path of least resistance, so there are natural buckles in them around the bends....not exactly maserati skins, but the deck to sides is still a tricky transition to carve....and the fenders have a gap in production and little differences between two.

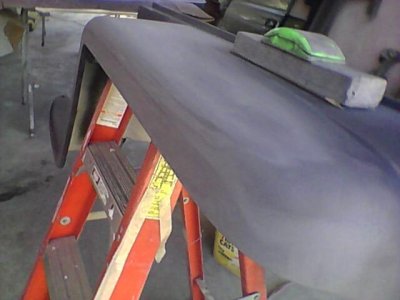

From Jimi AKA Bladecuter
24. adjusting peak, was a little dogged one way, so tape it straight and push the material to edge of tape, i used 220 to be gentle....firm but pliable pad for block
25. Pete spraying prime on DeSoto front bumper filler
26. Same fender in second prime after peak adjustment
27. A whole lotta time! And it's not even a rotiss. Panels are getting very straight, lines have lost some definition...Pete is Straight, but He doesn't cut lines like me an area we have a problem with eachother...see things different, nature of applied science...opinions and procedures will vary drastically one shop to next.


Last project pics for now. These fenders were never absolutely accurate...they have a lot of stress pressed in with those two extreme bends...the energy, like water, follows path of least resistance, so there are natural buckles in them around the bends....not exactly maserati skins, but the deck to sides is still a tricky transition to carve....and the fenders have a gap in production and little differences between two.


From Jimi AKA Bladecuter
Superfreak
Well-Known Member
Excellent tutorial. Thanks to Bladecutter for taking the time to keep doing this for us viewers and thanks to Photon for taking the time to post this info.
I like the looks of this cab-o-sil and to have a longer working time is a frustration reliever for the average joe.
I like the looks of this cab-o-sil and to have a longer working time is a frustration reliever for the average joe.
- Local time
- 5:19 PM
- Joined
- Mar 14, 2012
- Messages
- 20,027
- Reaction score
- 43,399
- Location
- Surrey, B.C. Canada
As well as Jimi's words in the 'Bladecutter' thread, he sent along this paragraph to add to the filler secrets:
[Dr. Nick from Simpson's] Hi Every Body! Hey hey, all these nice comments from You Guys....pretty warm & fuzzy! Really Nice Mopes. Thanks to the Graciousness of Photon, there is a bridge.. I guess all i can say in regards to the ban.....it's my nature to push envelopes....i do impose my views. but it was all good, no hostility, just disagreement. Hopefully this foot work with the filler thread will prove beneficial for some of You.
I posted often i am experimenting, but have been asking questions of glass suppliers, mainly if they see any reason that a filler used in boat & composite aircraft industry shouldn't be transitioned into auto body and questioning reasoning of why the auto body industry doesn't have jobber EPOXY resin based fillers..the two sources i've questioned so far just resigned along with me that it does not make good logic...EPOXY is superior in several manners, low shrinkage rate being one....polyester resin has a given, go to the bank on it, shrink up to 10%.....every body in refinishing deals with shrinkage as routine, often having to redo....only the symptoms get addressed, but the suppliers promote no cure to paint houses and paint shops...brain fart or scam?...the inferior product is cheaper to make..poly based, and people have to buy more when they have to address a backfire...like bankers keeping everybody in debt.
Anyway, a plus is both sources told me that my prudence about build of cab to exceed not more than 1/8" is well in safety zone and that my practice of making chop fills to build the foundations is sound, said with poly res be sparing with cab in heavy ,continuous vibration areas, but with epoxy, not a woorry, also the second source turned me on to fillers other than cab-o-sil and a superior glass to use in the chop fills, so i'm learning a lot. He is going to send me some samples of material, and some cured samples to do strength tests on. He claimed part to part that EPOXY res was 20 times stronger and as Photon had posted early on thread, that the bond and feather to metal is far superior, and You cannot pry it from metal, grinding is only method of removal. I have yet to sift thru the tech sources He sent me.....so this is looking pretty good.....
He did identify which Epoxy He felt would best serve this need, not cheap, 100.00 for 1.5 gallon W/ metering pump..the cab was 31.00 for a gallon by volume approx 8 oz weight that should make 4 qts with an abundance of resin left over,..so looking in the area of 50.00 a gal for homegrown epoxy filler....20 times as strong as polyester , so i think there is still significant savings for a superior product.
ECS
Well-Known Member
As well as Jimi's words.....
Time to bring Jim back so he can continue with the information being taught here!
- Local time
- 5:19 PM
- Joined
- Nov 22, 2010
- Messages
- 17,382
- Reaction score
- 21,258
- Location
- Muroc Dry Lake Bed
I'm trying to set up a "date" with Jimi, soon, very soon.
I am picking up the 8 3/4" third member from forum member "Sunset"
(I purchased it here on the forum, 3:23 Suregrip)
When I do, Jimi and I will hook up, I'll get pics!
PS: What happened to Bladecutter's other thread?
It got pulled?
I am picking up the 8 3/4" third member from forum member "Sunset"
(I purchased it here on the forum, 3:23 Suregrip)
When I do, Jimi and I will hook up, I'll get pics!
PS: What happened to Bladecutter's other thread?
It got pulled?
- Local time
- 5:19 PM
- Joined
- Nov 22, 2010
- Messages
- 17,382
- Reaction score
- 21,258
- Location
- Muroc Dry Lake Bed
Bladecutter's recent e-mail to me:
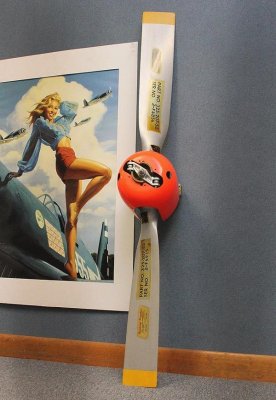
"Mark....below is an image of a zero time new one of these props mfg'd by Beech...they are in fact drone props....in mid 50's Beechcraft built 2200 target drones for USN solely...ship board launched on short trestle (catapult?) & JATO or other type of rocket assist...aluminum birds w/ tip tanks, V tailed...power was McCullough 2 stroke opposed six, air cooled that made 125 HP...they went 350mph!
Under the image is ebay link.......the one pictured here is listed for 4500.00, more clean pics highlighting hub and exterior linkage.but continue scrolling and there's a handful of Navy archive shots showing the birds being launched, worked on, one carrying lot of some type of ordnance under wing.
Mine doesn't look like more than 10 hrs on it, clean except for corroded blades, shot decals and dried seals(outside hub) plus i have the extra new blade....i scored here. not a dime out....flip it w/o turning a tool...i already contacted the Guy listing the zero time new, who seems to be doing a moto-art thing and gave Him first refusal. 2200 is low production. probably weren't much in spares made. it's antique...might get the motor built for Bakersfield & Fresno. Tell Bruzilla about it, since He's USN, He probably knows the program, Maybe He's actually been around them in His earlier service career.....This pup is just so cute, i can't help it, it is, but apparently pushed some air....350mph is not chopped liver.
I have the revised archive on the Toronado program from concept to roll out if You're interested....told You i've been corresponding w Dick Ruzzin w/ Corvette Mangusta...Mr. Ruzzin was on that team of 15...the rear panel & fast back line were some of his areas of theme. I know i told You about His Goose article on deansgarage.com....written by Dick, there is also another article by Him on His Opel Bitter CD (395 hand made) w/ 335hp 350 w/ aluminum heads. Mr Ruzzin was also on that team w/ Eric Bitter...if You don't know the car...the CD.....it's very soft & elegant exotic...i'm not sure of body medium but glass would not be my first guess...it's blacklight blue and reflects very clean...looks like real tight, time consuming body work to me. Both articles are very good imo L8R..see below....jim
See Pic:
Attachments
- Local time
- 5:19 PM
- Joined
- Nov 22, 2010
- Messages
- 17,382
- Reaction score
- 21,258
- Location
- Muroc Dry Lake Bed
Bump
BarrsRestoration
Well-Known Member
- Local time
- 8:19 PM
- Joined
- Jul 4, 2013
- Messages
- 158
- Reaction score
- 100
- Location
- Greenville, North Carolina
And another bump.
#jimisinfomatters :icon_super:
#jimisinfomatters :icon_super:
Habib
Well-Known Member
Some words of Wisdom.
I have played with the new epoxy formula....epoxy resin with equal proportions of milled fibres & cab-o-sil and it is "THE BOMB" bondoe is outdated antique crap.....this filler is almost as strong as layed up glass, coats can be piggybacked before any sanding...you can apply to vertical & upside down surfaces, spread thin or mold build ups by hand and it will NOT sag, move.......the milled fibres are the main strength component, the cab-o-sil is also structural but is the ant-sag agent. Also the epoxy, albeit a longer cure time, does not get near as hot as poly resin in kick off and there is hardly any smell, does not even mildly irritate skin....truly a new day for someone who wants far better than what bondoe can give.......i can make a gallon of this for $60.00....i quart of evercoat kitty hair(long hair chop in poly resin) is avg 50.00 and is nothing close to being as strong as this mix i've formulated. These materials have been around a long time....thank the insurance companies for these techniques never having been introduced fully to autobody trade....get out of the box people....this is something old that is truly a new wave that is winwinwinwinwinwinwinwinwin....f the illuminati pact of insurance & material companies...You can seriously beat them down if You learn this.....do some experimenting. A qt & 1/2 of epoxy resin cost 100.00, a gallon of cab-0-sil is 31.00 and a 1/2 gal of the 1/32" milled fibres is 33.00...the cab weighs 8 oz, while the 1/2 gal of milled fibres weighs between 2 & 3 lbs, very dense....You will NEVER be able to penetrate this cured filler with a thumbnail....just ai'n't going to happen, end of story....Bondoe is BS.....if You don't experiment with this, You'll cut your nose off to spite your own face.. anything from skim coats to hog it on cheap rust repair...one mix does it all right up to the most minor pinholes.....thick builds can be done a 1/4" at a time, let cool back to 90 degrees and throw another 1/4" on top before any sanding. The reason to not exceed 1/4" apps is to prohibit "Resin Boiling" at center.....volumetric density has much to do with how hot stuff gets when kicking and boiling in center can compromise some of the structural integrity.....this stuff can be used to fill up well prepped cancer areas...done with some finesse, i guarantee You You can do cheap rust repairs where the car will rot around the repair before it gives up......The shrinkage rate is less than 1%. poly in hot climate is going to lose 10%....a given, go to the bank on it.....so i hope some of You will take advantage of this info and put Your thinking caps on....shrinkage does NOT have to be a problem. You know the definition of insanity right?....."Doing the same thing over & over again & expecting a different result each time" Kinda like elections Next installment will be after i get Binks 2 qt pressure pot Gel-Coat gun rebuilt and begin experimenting with adding cab-o-sil and milled fibres to the epoxy primer....there are no compatibility issues whatsoever. just the problem of getting it out of gun....but a gel coat rig will push concrete so stay tuned for fiberglass stressed primer coats...remember a key word...waterproof and that matters very much...moisture will find a way in between substates and metal and if the back of your substrate isn't waterproof, only a matter of time before blistering,bubbling, peeling flaking etc. I'm getting into the propeller overhaul business now, so i'll be even more scattered from here on out.....but...."ah''ll be Bach
I have played with the new epoxy formula....epoxy resin with equal proportions of milled fibres & cab-o-sil and it is "THE BOMB" bondoe is outdated antique crap.....this filler is almost as strong as layed up glass, coats can be piggybacked before any sanding...you can apply to vertical & upside down surfaces, spread thin or mold build ups by hand and it will NOT sag, move.......the milled fibres are the main strength component, the cab-o-sil is also structural but is the ant-sag agent. Also the epoxy, albeit a longer cure time, does not get near as hot as poly resin in kick off and there is hardly any smell, does not even mildly irritate skin....truly a new day for someone who wants far better than what bondoe can give.......i can make a gallon of this for $60.00....i quart of evercoat kitty hair(long hair chop in poly resin) is avg 50.00 and is nothing close to being as strong as this mix i've formulated. These materials have been around a long time....thank the insurance companies for these techniques never having been introduced fully to autobody trade....get out of the box people....this is something old that is truly a new wave that is winwinwinwinwinwinwinwinwin....f the illuminati pact of insurance & material companies...You can seriously beat them down if You learn this.....do some experimenting. A qt & 1/2 of epoxy resin cost 100.00, a gallon of cab-0-sil is 31.00 and a 1/2 gal of the 1/32" milled fibres is 33.00...the cab weighs 8 oz, while the 1/2 gal of milled fibres weighs between 2 & 3 lbs, very dense....You will NEVER be able to penetrate this cured filler with a thumbnail....just ai'n't going to happen, end of story....Bondoe is BS.....if You don't experiment with this, You'll cut your nose off to spite your own face.. anything from skim coats to hog it on cheap rust repair...one mix does it all right up to the most minor pinholes.....thick builds can be done a 1/4" at a time, let cool back to 90 degrees and throw another 1/4" on top before any sanding. The reason to not exceed 1/4" apps is to prohibit "Resin Boiling" at center.....volumetric density has much to do with how hot stuff gets when kicking and boiling in center can compromise some of the structural integrity.....this stuff can be used to fill up well prepped cancer areas...done with some finesse, i guarantee You You can do cheap rust repairs where the car will rot around the repair before it gives up......The shrinkage rate is less than 1%. poly in hot climate is going to lose 10%....a given, go to the bank on it.....so i hope some of You will take advantage of this info and put Your thinking caps on....shrinkage does NOT have to be a problem. You know the definition of insanity right?....."Doing the same thing over & over again & expecting a different result each time" Kinda like elections Next installment will be after i get Binks 2 qt pressure pot Gel-Coat gun rebuilt and begin experimenting with adding cab-o-sil and milled fibres to the epoxy primer....there are no compatibility issues whatsoever. just the problem of getting it out of gun....but a gel coat rig will push concrete so stay tuned for fiberglass stressed primer coats...remember a key word...waterproof and that matters very much...moisture will find a way in between substates and metal and if the back of your substrate isn't waterproof, only a matter of time before blistering,bubbling, peeling flaking etc. I'm getting into the propeller overhaul business now, so i'll be even more scattered from here on out.....but...."ah''ll be Bach
Similar threads
- Replies
- 4
- Views
- 3K
- Replies
- 14
- Views
- 2K
- Replies
- 21
- Views
- 4K

