• When you click on links to various merchants on this site and make a purchase, this can result in this site earning a commission. Affiliate programs and affiliations include, but are not limited to, the eBay Partner Network.

Filling/Bleeding a Dry Disc/Drum System

Because my system components are all stock, maybe I should just stick with DOT 3. I don’t know if the stock rubber seals in the system will have a problem with DOT 5 (the ONLY fluid that is silicon based and non-corrosive). DOT 5 has a thicker viscosity than the others, don’t know if that will be a problem in a stock system either. It is also apparently more difficult to bleed the air out of a DOT 5 system.

It appears the only real difference between 3, 4 and 5.1, is their boiling points, which get higher as you move up in DOT number. Those three are all glycol based, being they all absorb moisture, and are all corrosive and damaging to paint.

https://www.engineerine.com/2022/01/dot-3-vs-dot-4-vs-dot-5-vs-dot-51-brake.html?m=1
 
Well, I bled the brakes today, with the assistance of a local man, in my area, who owns a 1967 GTX.

I attempted to do it myself last Sunday which was a failure. I’ve never bled or worked on brakes before, this was my first time. I had always had brake work done at a shop..

The GTX owner immediately told me what I did wrong when I told him how I did it. I was pressure bleeding with the pedal, using a hose/bottle on the bleeder screws while the master lid was OFF…. He informed me you need to have the lid on to build pressure through the lines. It was a total Simpson’s DUH moment. Or perhaps the Kelly Bundy brake bleeding technique. Or just the idiot’s way to bleed brakes..

So, he and I bled the system, rear followed by front.. After, we had a firm pedal, no leaks, pedal DID NOT go to the floor..

Next we hook up the Booster to engine manifold vacuum. Start the engine. I push on the pedal.. It goes ALL the way to the floor.. No brakes. I rev and hold the throttle at 2500 RPMs for a while, to build up max vacuum. Then while holding the throttle there, push on the brake pedal. Same thing, goes all the way down to the floor, no brakes.

The GTX owner did not know why the pedal kept going to the floor when the booster was connected to vacuum, nor did I. I’ll start part two with a new post..
 
I call Jeff at Karps, who rebuilt the booster, master, calipers and cylinders. Told him what is happening.

He says if the booster wasn’t working, the pedal wouldn’t be traveling to the floor when it’s connected to engine vacuum. He said I got a problem somewhere else in the brake system.

He then asked how is my rear drum tension? Again being inexperienced, I never tensioned the rear drums.. Never touched the Star wheels after installing the rebuilt wheel cylinders.. So, I think the shoes were totally untensioned at the start of the bleeding process. I cannot apply the parking break because I don’t have a hook.. I cannot find a correct 1971 3-inch hook for the parking brake cable..

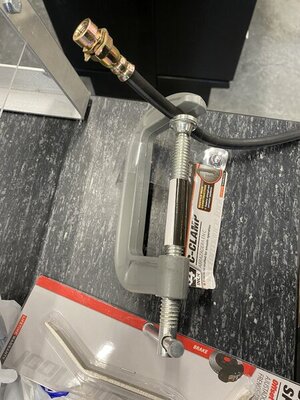
He told me to test the system by applying clamps to all 3 hoses. With all three hoses clamped down to severely restrict fluid flow to them, see if the pedal has less travel with vacuum applied to the booster. Then remove one clamp at a time starting at the rear to determine what part of the system has a problem.

He suggested using vice grips for clamping of the hoses. I tested a vice grip on a test hose I did not install on the car. The teeth on the jaws of the vice grip cut into the hose damaging it..

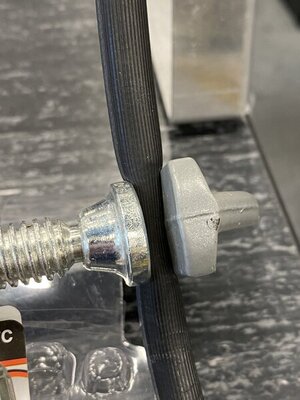
I tried a large C-clamp at an auto parts store. This clamped the hose without cutting it or visibly damaging it. They only have one clamp in stock, so I had to order two more from their warehouse. Will get the other two tomorrow and perform the test..

Also bought a brake spoon to adjust the drum Star wheels..

D257777A-E4BB-4554-B59B-D6788E190540.jpeg 545F33CC-A3AA-477F-AA89-A4A5BC54C0E7.jpeg
 
Just get the shoes adjusted outward.
I've always done this by spinning the adjuster until I can just get the drum on.
I wouldn't clamp the rubber lines to me thats a bad idea it gets you no closer to working brakes and potentially damages the hoses.
With the engine off the pedal needs to be very still near the top. You shouldn't be able to press it more than a third even with a lot of foot pressure.
Lastly you certainly can bleed the system with the cover off the master it is just a reservoir. I do it all the time.
To confirm, should I be spinning the shoe adjusters with the drums removed? Then test slide the drum over the shoes, until I just get it to slide over? After getting the shoes moved further outward, will I need to re-bleed the rear brakes? Will I not have enough fluid in the rear circuit after the adjustments?

Currently, with the engine off, I think the pedal may be going down about half way to the floor. I’ll have to check it again, as I don’t remember exactly how far down it went.

You say the pedal should only go about 1/3 to the floor with engine off. With engine on and vacuum applied to the booster, how far should the pedal be traveling toward the floor?

I should mention that, yesterday, I did back the car out of the garage onto the street, then drove it very slow and cautiously around the block ONCE. The booster was disconnected from engine vacuum when I did this. I was just barely able to stop the car, pressing as hard as I could on the pedal. I equate the braking effort when doing this to the effort required to drive a Power Steering car with the pump belt disconnected. Both being extremely difficult. They both rely on the power assist to be usable.

I was/am worried about damaging the hoses by clamping them..

Regarding the lid, he was wrong then about pressure building in the reservoir. He also said that if the lid is off, while pumping the pedal, fluid can shoot up in the air. Keeping it on will stop it from squirting out onto the car. Is he incorrect about that too? He is 75 years old, been working on these cars for a long time, so I’m surprised to hear he told me the wrong thing.
 
Its best if the pedal is rock hard right at the top.
But sometimes you just need to drive it a bit and the pedal will firm up.

Forward stop and then back up and stop will let the adjusters ratchet tighter.
You can use a brake spoon on the adjuster if you like. Just adjust them out until they drag a little when you try to turn them. Even if it's a little difficult to turn with your hands. They should quickly seat once it's driven and braked a bit.
 
He's right about the fluid shooting up. When bleeding everything should be done slowly.
 
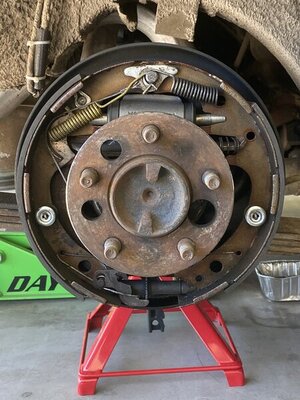
Today, I’ve removed the passenger drum and when doing so found that it is still very loose fitting. Apparently the one lap drive around the block, on Friday, didn’t do any self adjusting.

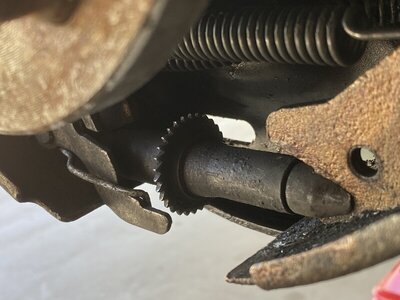
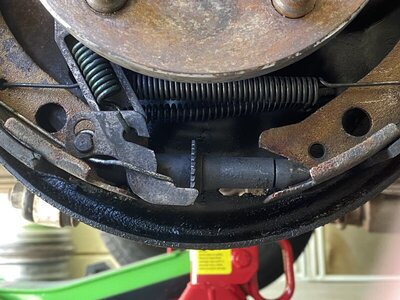
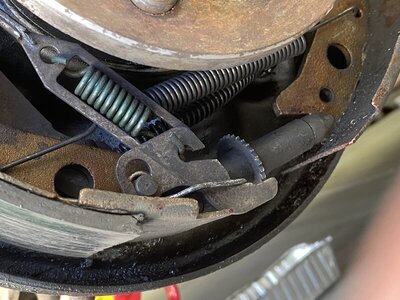
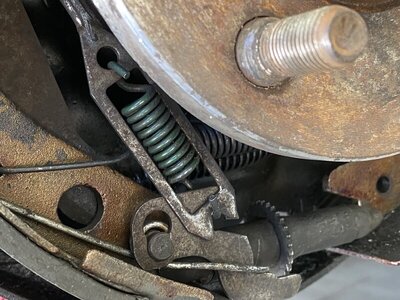
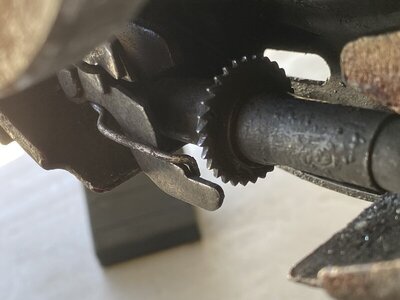
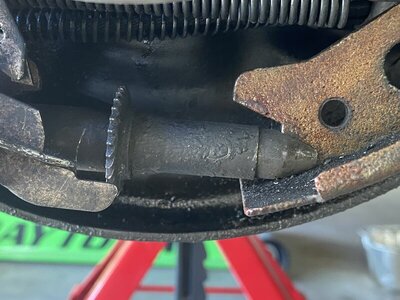
There is a metal bar, that is supposed to engage with the star wheel teeth, preventing it from rotating in one direction. As the assembly is now, there is quite a big gap between this bar and the teeth, allowing me to turn the star wheel in either direction.

Is it suppose to be like that when there is no tension between the shoes and the drum? Then as I tighten, the bar will move towards and engage the teeth?

3E0BA437-A969-4134-97F4-DF1892681CDC.jpeg FD5F52AB-629A-43AB-AA34-CB6350FBD1F9.jpeg F7F47966-AC21-4B29-A2E7-726DB7D4E1A6.jpeg 8386AE7C-9C37-4ABF-93D2-226C02ECDF9A.jpeg 562BD7B2-324B-4E60-8E93-FF0BE0C20AB1.jpeg 48E05951-BF0E-4262-991A-DC92D0DB6B43.jpeg
 
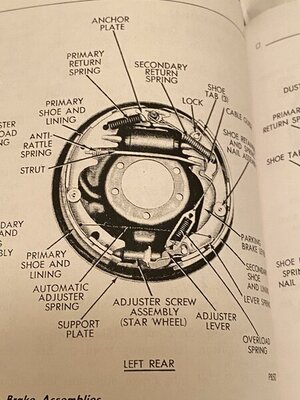
Okay. I broke out the service manual and looked at the 10” drum assembly drawing. I had the spring connected incorrectly to the metal arm that engages the star wheel teeth. The tension on the shoes was as loose as could possibly be too. So I do think this is the source of my pedal going to the floor problem. The other side was in the same state.

Service manual says to back off parking brake adjustment so that there is slack in the cable, which I currently have..

Then to adjust star wheel pushing up with the brake spoon from the inside of hub until a slight drag is felt when wheel is rotated.

Next push the metal adjusting lever arm out with a screwdriver, then back off the star wheel just enough so that there is no drag.

Lastly, adjust parking brake after brake shoes have been adjusted. There is another section in the manual for that.

The instructions to push the adjuster arm away from the star wheel with a screwdriver to loosen the tension, makes me think the adjuster arm should always be engaging the teeth. It is not engaging the teeth on my car..

Could someone clarify when the adjuster arm should engage the teeth? All the time, only when the shoes are contacting the drum, or when?

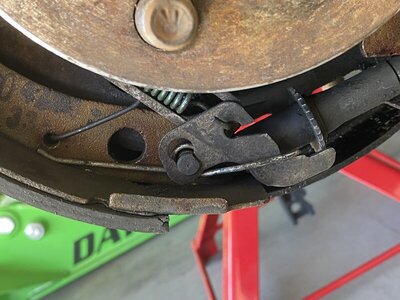
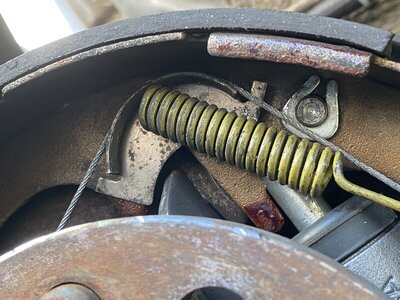
06B85DE9-102D-4B08-ACA7-ACE1D2AAE6B9.jpeg AD277ECA-10D2-4C1C-A137-E25C33C7E6F2.jpeg 0EA23386-2026-4C80-B001-EBAE5E45B88E.jpeg 529D8F0B-6AC5-4899-B1BD-1E0E074F34EA.jpeg
 
After actually removing the driver side drum, I can now see that the adjuster arm is ALWAYS in engaged with the teeth on that side of the car. I’ll need to replace the adjuster arm spring on the passenger side, as I guess it is no good..
 
Further investigation shows the post on the brake shoe, that the adjuster arm and spring attach to are not the same length on each side.. The post on the passenger side is 14mm tall. The driver side post is 12mm tall. Sounds like horrid quality control by whoever manufactured the shoe on the passenger side. The post is too damn long! This allows the adjuster arm to flop sideways on the post, and therefore to not engage the arm properly with the teeth. A chunk of the flared head is missing from the post due to the unwanted movement.

I went back to the car before posting this message. I adjusted both sides until there was some noticeable drag on both rear wheels. Probably adjusted too tight, but wanted to see if this made any improvement on the pedal travel with engine off.

The result, is that it doesn’t seem like it is any better.. with the engine off it is moving 1.25” inches. I measured it with a ruler to see exactly how far it’s going down. I didn’t measure it with a ruler on Friday, so I don’t know exactly how far it went down before. I just know it didn’t go to the floor.

Next I will try running the engine with vacuum to the booster. To see if the pedal still goes all the way to the floor..
 
Ran the engine and to my amazement the pedal actually stopped before hitting the floor! I was fully expecting it to hit the floor again. The pedal goes firm now before bottoming out! It’s about time…

I backed off the star wheels about 2 clicks and drove this big bitch of a Bee for the first time, with functional brakes, in 10 months!!!! Just as it was starting to get dark too.

Put gas in the tank, at a gas station, for the first time since 4th of July weekend last summer.. Over the past 10 months I kept having to haul gas home in a container, then pump it in the tank with an electric fuel pump.

Poured some 360 Stabil in the tank, because who knows for how long it will be mobile this time around.
 
Auto Transport Service
Back
Top