• When you click on links to various merchants on this site and make a purchase, this can result in this site earning a commission. Affiliate programs and affiliations include, but are not limited to, the eBay Partner Network.

For the Love for my Father, My 69 GTX Restoration

Status
Not open for further replies.
I send all my chrome parts to Paul's myself prior to dispersing elsewhere. For one I am in charge of the order. Two I receive the pictures they receive, the quote and a signed contract for work. That way I retain a hardcopy of the warranty for myself. Then off to the next vendor they go. Also, keep in mind I pack my parts to withstand an earthquake, lol....Pay extra to have your choice of carrier to pack them up when they come back to you. Paul's packing is of no concern.....

As far as price goes TA is very fair and especially more fair the more work you send them or if you are a repeat customer....I have used TA on 10 restorations over the years and I have not one complaint....
 
Headliner Got installed today!

Took him about an hour and a half....
DSC04750.JPG
DSC04751.JPG
DSC04752.JPG
DSC04753.JPG
DSC04754.JPG
DSC04755.JPG
DSC04756.JPG
DSC04757.JPG
DSC04758.JPG
 
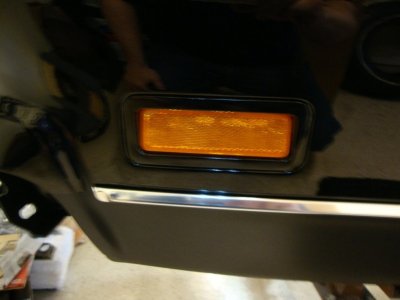
Side marker lights

Comparison of NOS and new repops. Just the initial look of the lenses are different in the first picture. The new set the amber lenses are actually orange where the NOS are an Amber. The other noticeable difference is the Pentstar. The second pic is the NOS and the third pic is the new. The backside of the new lenses are a different color, no part numbers, no double sided tape and no washers around the tabs.

If anyone wants to buy the new set shoot me a PM!

DSC04691.JPG
DSC04692.JPG
DSC04693.JPG
DSC04694.JPG
DSC04695.JPG
DSC04696.JPG
DSC04697.JPG
DSC04698.JPG
DSC04699.JPG
 
My side marker housings had a green coating on the back that was an olive color. SEM makes a sprayable EDP coating in olive and I gave it a try. It was a great match in color and sheen. Lets talk about the cap nuts. 69 cap nuts are a one year only size. 70 and forward are a smaller stud and unusable on 69's unless you want to break a stud off. No one has them in stock. However, i got lucky and acquire NOS ones.
DSC04759.JPG
DSC04760.JPG
DSC04761.JPG
DSC04762.JPG
DSC04763.JPG
 
NOS front inner fender splash shields. After cleaning off the dos dust they look sweet. Original hardware withe "sems" head stamped were silver zinc plated. too bad they will have to get shot with undercoating.:BangHead:
DSC04764.JPG
DSC04765.JPG
DSC04766.JPG
DSC04767.JPG
DSC04768.JPG
DSC04769.JPG
DSC04770.JPG
DSC04771.JPG
DSC04772.JPG
 
Orignal dash hardware for the top of the dash was silver zinc plated. Notice the correct head marking..

DSC04786.JPG
DSC04787.JPG
 
Under dash insulation

Another peeve of mine with the industry. With the volume of these purchased why not make an effort to recreate the factory original ones. I have searched forever for an NOS or even a used one with no luck. So I had to get creative and decided to find a paint that mimics the color of what an NOS one looks like. You cannot go by an old one of a car due to age and the elements. I have seen two NOS ones on recored cars and this color is as close as one can get. So YES I painted my dash insulation, lol....I will say once on the car and the dash assembly on no one could tell the difference!

The factory used a yellow trim adhesive and the 3m sprayable is what I use....and in the sloppy process the underside of the cowl and firewall gets overspray as well. A little fall on the front floorpans....
DSC04673.JPG
DSC04674.JPG
DSC04675.JPG
View attachment 414437
DSC04677.JPG
DSC04788.JPG
DSC04789.JPG
DSC04791.JPG
DSC04792.JPG

DSC04793.JPG
 
Firewall insulation

Purchased from my favorite vendor Mega Parts! Pretty straightforward other than punching out the holes for the air grabber cable and tach harness. I also show the comparison of the push pins NOS vs New. ###FYI the pin on the RIGHT is the NOS one### Got them reversed sorry...Very subtle difference and most would not even pick it out. However, I have an NOS set to use.
DSC04794.JPG
DSC04795.JPG
DSC04796.JPG
DSC04797.JPG
DSC04798.JPG
DSC04799.JPG


Here is a pic of whats left of the original one on the X...My technique is pretty darn close!
DSC02556.JPG
 
Last edited:
The factory "OK" was an assembly line tag that was suppose to be removed once placed on the car. The X had half of the tag left....Thanks to Pete Veight I was able to get an original full tag!

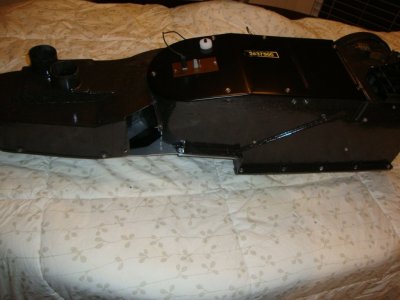
For some reason I have never been able to stamp a heater box cover perfect but it will have to do....Always slides on me partly due to my arthritis...


DSC03487.JPG
DSC03488.JPG
DSC03489.JPG
DSC03490.JPG
DSC03491.JPG
DSC03492.JPG DSC03493.JPG
 
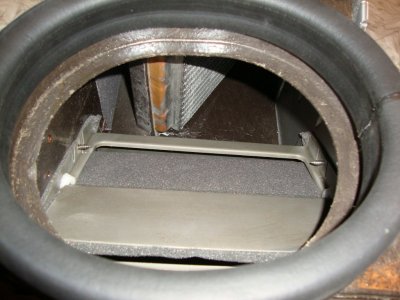
Installing the heater box

All hardware was sent out for plating. One thing I do different than others is I cut a small square of foam to go between the support bracket and the front cover. Not just to protect the paint once tightened but I lightly snug the bracket prior to install. The foam creates a slight gap so I can adjust the bracket for the stud on the cowl and in turn I do not damage the paint. Little trick when you install these yourself. Btw the support bracket is the First thing I bolt on when I get the heater box in. Once snugged up then I attach the 3 nuts in the engine bay and after that I tighten the bracket down!
DSC04803.JPG
DSC04804.JPG
DSC04805.JPG
DSC04806.JPG
DSC04807.JPG
DSC04808.JPG
DSC04809.JPG
DSC04802.JPG
 
DSC04809.JPG
DSC04810.JPG
DSC04811.JPG
DSC04812.JPG
DSC04813.JPG

Crap just noticed one of the cables is backwards...oopps Wouldn't hurt anything as far as functionality but will correct that tomorrow!
 
Status
Not open for further replies.
Auto Transport Service
Back
Top