You are using an out of date browser. It may not display this or other websites correctly.
You should upgrade or use an alternative browser.
You should upgrade or use an alternative browser.
For the Love for my Father, My 69 GTX Restoration
- Thread starter moparnation74
- Start date
- Status
- Not open for further replies.
moparnation74
Well-Known Member
Schumacher kit was used to rebuild the wiper pivots. The arms are natural steel coated with Boeshield. Once the red zinc nuts were installed note the bare threads but black paint on the stud end, it is the little things that matter. Most will touch up the threads but for OE purposes thats a big No No...I coat the threads with Boeshild...I love this wheel armor for protecting the plated finishes..
I have seen people use gold cad on the 3 speed wiper arms. Mine was originally silver plate. The original spacers were plated as well...


I have seen people use gold cad on the 3 speed wiper arms. Mine was originally silver plate. The original spacers were plated as well...
moparnation74
Well-Known Member
The threads on the wiper motor studs in the engine bay have to retain this original look. The factory never touched up threads...


moparnation74
Well-Known Member
Throttle Cable and Mechanism
The mechanism was originally black zinc and this one got black zinc. The throttle cable is a correct NOS part number and date code 289th day of 68.


The mechanism was originally black zinc and this one got black zinc. The throttle cable is a correct NOS part number and date code 289th day of 68.
moparnation74
Well-Known Member
moparnation74
Well-Known Member
MC/pedal support plate
The original nut was sent out and the aftermarket nut is smaller in height and width. The wire loom was restored by TA. Last pic shows again another area where paint is removed when bolted and the tip has black paint. I have the plastic sleeve to cover the threads, somewhere, lol...


The original nut was sent out and the aftermarket nut is smaller in height and width. The wire loom was restored by TA. Last pic shows again another area where paint is removed when bolted and the tip has black paint. I have the plastic sleeve to cover the threads, somewhere, lol...
moparnation74
Well-Known Member
Four speed pedals....Lot of pieces, LOTS!


moparnation74
Well-Known Member
All metal parts soaked in evporust. Then elbow grease with steel wool and coated with Boeshield. The brake switch is NOS. The clutch pedal bearings and seals and rebuild kit are from Brewers. Also, the spring pin is from brewers as well. The hardware and bracket was sent for proper plating. The pads are nice originals with pn's...


moparnation74
Well-Known Member
moparnation74
Well-Known Member
moparnation74
Well-Known Member
moparnation74
Well-Known Member
That is the original paint on the clutch spring...


moparnation74
Well-Known Member
Pedals installed!


moparnation74
Well-Known Member
E brake unit and cable...
What a PITA these are....Release arm and hardware was sent out for plating. NOS knob and switch. The unit was soaked in evaporust and more steel wool utilized and coated with boeshield. The cable was a lot A lot of man hours but turned out beautiful. Nice original pad with part numbers.


What a PITA these are....Release arm and hardware was sent out for plating. NOS knob and switch. The unit was soaked in evaporust and more steel wool utilized and coated with boeshield. The cable was a lot A lot of man hours but turned out beautiful. Nice original pad with part numbers.
moparnation74
Well-Known Member
This unit does not have a date stamp. Typically they are on the large rivet or on the end in front of the 2 studs in the middle. The large rivet has a distinct look and they way it was pressed on. They guys restoring this and taking them apart use an incorrect large rivet and a incorrect release rod rivet!


###Anyone notice the RIVET on the release arm?###
The outfits that redo these units use a standard rivet and are not correct. The original type is no longer available. It has a smooth round head and pressed on, see pic above. I have a little trick to share here. Save your old one and attach the rod with a rivet. The grind the rivet head a little bit and grind the stud on the original one off....A little epoxy and wallah, original again!!!
Last edited:
moparnation74
Well-Known Member
Installed....


moparnation74
Well-Known Member
Driver vent box


moparnation74
Well-Known Member
moparnation74
Well-Known Member
moparnation74
Well-Known Member
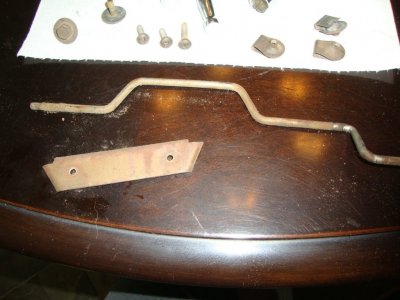
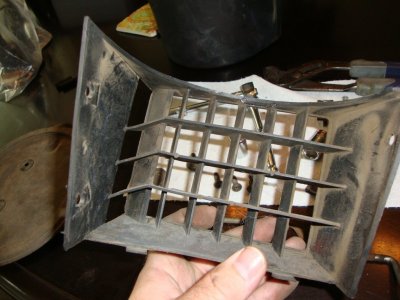
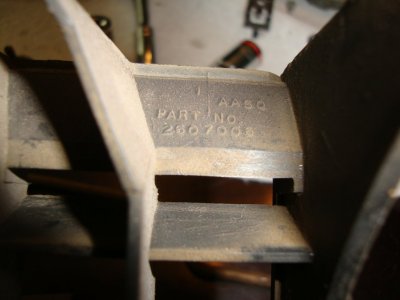
Bracket was not removed just soaked it face down in evaporust along with some of the other pieces. Hardware was zinc plated and the box was cleaned up. That is the original vent cable.


- Status
- Not open for further replies.
Similar threads
- Replies
- 17
- Views
- 922


