• When you click on links to various merchants on this site and make a purchase, this can result in this site earning a commission. Affiliate programs and affiliations include, but are not limited to, the eBay Partner Network.

For the Love for my Father, My 69 GTX Restoration

Status
Not open for further replies.
Could I get a wider screen shot of where the antenna cable goes through from outside to inside the pass compartment? I think I got it but want to be sure.
Thanks
No.problem, pm me your email and I will shoot you a better pic tonight....
 
Non remote mirror. I have been searching for the correct date coded mirror. The original housing is viable but the date coded mirror was not. Came close on a couple NOS ones but the dates were too far apart from the build date. This is an aftermarket one I got from Herb's. The housing is the same but the mirror is not dated. The original gasket was in great shape and shows the pn well. Settle variations between the original and the repro but they are different and even the type of rubber is different. The screw on the left is the original and the other is a new one with the mirror. Original stud nut was sent out for plating.

Eventually, I will find an NOS one or a viable mirror and replace this unit. Until then it will have to suffice....
IMG_0781.jpg
IMG_0782.jpg
IMG_0783.jpg
IMG_0784.jpg
IMG_0785.jpg
IMG_0786.jpg
IMG_0787.jpg
IMG_0788.jpg
IMG_0789.jpg
 
Is the date etched on the outside of the mirror glass?
 
Is the date etched on the outside of the mirror glass?
On the new one, no....The originals/NOS they are etched. Typically, at the 11 o'clock position

Not mine below but an example of the date format
s-l1600.jpg
 
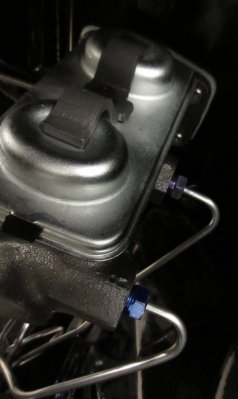
Getting master cylinder installed. The original MC was sent to Brake and equipment warehouse and professionally rebuilt. They sleeve it with stainless steel and the correct internals. All original hardware was sent out and replaced etc.

These are the original studs and they have a large "M" on the face and are silver zinc. The rear plate bolts have a distinct head marking as well. The bolt and the pushrod are from Brewers and are spot on!(notice the original rod is the upper right of the first pick) The nut for that bolt is an original one zinc plated. Did not even have to show a comparison pic!

The cover plate is a true original and one key way to tell is the two small breather holes. The finish is silver CAD and prior to plating it had remnants of that. The majority people out there just do gold cad because it looks better or they follow the norm. It does not mean it is incorrect but not all cover plates were gold cad. The gasket is from an NOS kit along with the boot. The hold down clamp and the bolt are zinc and the bolt has an "H: head mark.

That is a DOT 5 container of grape soda for a brake system, lol....Notice the injector, makes bleeding a MC easy peasy....However, the brakes will be bleed with a power bleeder by Motive....

The red and blue factory marks I have seen on NOS MC's and other restorations in the 69 model year...
IMG_0792.jpg
IMG_0795.jpg
IMG_0796.jpg
IMG_0797.jpg
IMG_0798.jpg
IMG_0799.jpg
IMG_0800.jpg
IMG_0801.jpg
IMG_0802.jpg
IMG_0803.jpg
 
Date code is on the front of the MC and ###edit it is actually 12768*5/6*## Thanks to Darrin's eagle eye!

Not as fast as a press(which I have) but a slow way to prevent damaging the finish to install the studs. I do not have a pic but will add one another time of the original nuts for the firewall. Repops are not correct and the single difference is the locking captive washer....

I dry fitted the lines previously to save some aspirin for other things, lol...
IMG_0804.jpg
IMG_0805.jpg
IMG_0806.jpg
IMG_0807.jpg
IMG_0809.jpg
IMG_0810.jpg
IMG_0811.jpg
IMG_0814.jpg
IMG_0815.jpg
 
Last edited:
Amazing details. I kept my original master cylinder to get rebuilt at some point. What did it cost to sleeve yours?
 
Gas tank is next on the chopping block. Searched forever for an NOS and still no luck and the same for a dated sending unit. Still searching but at this point I will have to have both before replacement. The tank I am using is from Quanta and is a "spectra premium" in the zinc finish similar to the OE tank. The welds are close to the original but not exact. The tank straps are the galvanized ones from Mega parts. The original straps had a lead galvanizing that no one does anymore. I wish they did because I would send my original straps to get done.

The sending unit is from Instrument Specialties and is calibrated with my fuel gauge and is stainless. Fuel tank pad is from Dave Patik at Performance Car Graphics and is the correct tar type material and brownish color. The rear seal for the filler tube is an original part. Sending unit lock ring comparison. The original was sent out for obvious reasons. One it is thicker and two it looks completely different than the repro. The one on the left/top is the original. The seal supplied from IS was thicker than the original and I was all over that to use! In this case thicker is better.
IMG_0827.jpg
IMG_0828.jpg
IMG_0829.jpg
IMG_0830.jpg
IMG_0833.jpg
IMG_0834.jpg
IMG_0835.jpg
IMG_0836.jpg
IMG_0837.jpg
IMG_0838.jpg
 
Amazing details. I kept my original master cylinder to get rebuilt at some point. What did it cost to sleeve yours?
Thanks, I will have to check but I think it was around 350-400....

No different from what The Ram man charges....Wayne, doesn't sleeve them with stainless...He did the MC on my charger but his recent business issues and poor customer service with him and his employees changed my mind.....
 
Thanks, I will have to check but I think it was around 350-400....

No different from what The Ram man charges....Wayne, doesn't sleeve them with stainless...He did the MC on my charger but his recent business issues and poor customer service with him and his employees changed my mind.....

I appreciate the info. I tried to hone it but the pits were too deep and the new ones just look like a sloppy casting.
 
Fuel tank strap bolts and nuts are from Frank Badalson and are nice correct items!

I glued the fuel tank pad to the tank using the yellow spray trim adhesive, serves its purpose well and easy to apply. The yellow coating around the welds is cosmoline. Hard area to discern if the assembly line ones had this originally. NOS ones did and just based on the weld alone it makes sense. So I applied it, lol....even my NOS antenna mast inside had cosmoline on it....

The original filler neck unit and hardware was restored by Totally Auto. Distinctive head marking on the bolt. A little grease and some manpower it installed with no issues.

The gas cap is a correct NOS unit. Has the appropriate markings the "s" on the center rivet and the next post shows the manufacturer mark.

IMG_0839.jpg
IMG_0841.jpg
IMG_0843.jpg
IMG_0844.jpg
IMG_0845.jpg
IMG_0846.jpg
IMG_0847.jpg
IMG_0849.jpg
IMG_0850.jpg
IMG_0851.jpg
 
I appreciate the info. I tried to hone it but the pits were too deep and the new ones just look like a sloppy casting.
I used to do that years ago and when they started sleeving them I have not looked back. Even if I had an NOS one I would still sleeve it. Stainless will last forever in a closed system. My front NOS WC's for the X I had them sleeved...

Face it this way I have had Waynes MC on my charger for over eight years I think....No problem with anything to date on a manual drum system as well.....It is worth the extra coin in my books...
 
Last edited:
Got the lines attached with the wonderful keystone/oeitiker clamps.....Crimped one a little off chock it off to a drunk assembly line worker, lol. I lost out on some NOS clamps, the final bid was stupid money...When I do acquire a set these will get replace but until then these have to do.....The report "KV" stamped hose SUCKS....just because the KV marks are not applied to last, BS!

The ground strap is the original piece that was sent out to TA. All repros in the kits are a short 4" one and the new longer ones are too long.

While I was at it I installed the front lines....Much easier to do with the motor out btw....
IMG_0852.jpg
IMG_0854.jpg
IMG_0855.jpg
IMG_0856.jpg
IMG_0857.jpg
IMG_0858.jpg
IMG_0859.jpg
IMG_0863.jpg
IMG_0864.jpg
IMG_0878.JPG
 
Last edited:
Amazing thread, thanks so much for your knowledge, and especially the comparisons, very informative. Great tribute!!
 
Darrin

Thanks for pointing out the correct date format for my MC. I had it wrong earlier and I didnt even see the 5th digit. It is actually a 5 digit format of 1278"6/5" The last digit is faint and easily missed it looks like a 5 or 6...The MC's are on a 1k day calendar format he said and this makes it a may/june month of 1968....

No doubt the MC is original to the car....They had a short guy next to the bin till he got replace with someone taller:lol:
 
Amazing thread, thanks so much for your knowledge, and especially the comparisons, very informative. Great tribute!!
Don,

Thanks a lot and as you can see there are others behind the scenes with way more knowledge than me helping me on this journey.

It is a team effort and I love that.

Thanks to all so far taking the time to view this thread and helping me thus far! The positive comments and the help are much appreciated and full filling!
 
Don,

Thanks a lot and as you can see there are others behind the scenes with way more knowledge than me helping me on this journey.

It is a team effort and I love that.

X2 Justin


[QUOTE='moparnation74, Thanks to all so far taking the time to view this thread and helping me thus far! The positive comments and the help are much appreciated and full filling![/QUOTE]

Awesome work!
 
Reading this thread makes me thankful that I'm a Hotrodder and not an OEM kind of guy lol. Holy cow does that look like a lot of crazy detail and work!!!!

Believe me this is meant as a compliment to your patience not the opposite. It's going to look like it just rolled off the showroom floor. Great job
Each end of the hobby has equivalent headaches my friend!

Thank you very much for the compliment 747....I always appreciate your posts and seeing pics of your beauty once and awhile (hint, hint) never enough pics! I also enjoyed seeing the work you have done to your garage!

I surf around here more than most realize...

Justin
 
Status
Not open for further replies.
Auto Transport Service
Back
Top