I'll have to take your word on that. 
You are using an out of date browser. It may not display this or other websites correctly.
You should upgrade or use an alternative browser.
You should upgrade or use an alternative browser.
For the Love for my Father, My 69 GTX Restoration
- Thread starter moparnation74
- Start date
- Status
- Not open for further replies.
moparnation74
Well-Known Member
Finally, got the motivation to work on the driver side door and glass....Have I said I HATE doing this...lol
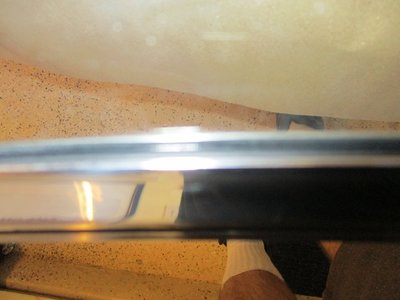
The windshield putty knife works great to install the weatherstrip in the trim channel.
I soak the weatherstrip material that slides in the vent window frame with the black magic interior detailer. Makes a huge difference. I also coat the channel on the vent window frame itself with it...


The windshield putty knife works great to install the weatherstrip in the trim channel.
I soak the weatherstrip material that slides in the vent window frame with the black magic interior detailer. Makes a huge difference. I also coat the channel on the vent window frame itself with it...

moparnation74
Well-Known Member
More


moparnation74
Well-Known Member
More Pics...


moparnation74
Well-Known Member
More pics....


moparnation74
Well-Known Member
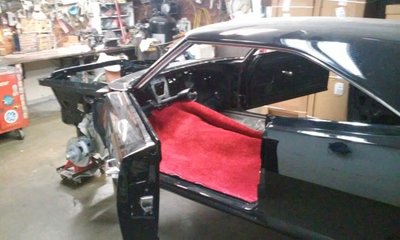
Well, that is it for today...Glass is all in and adjusted properly. Trim is all installed....
Tomorrow will be door panels and other finish parts....I will not be able to finish the drivers door until I get my replacement window regulator mechanism. It is on it's way and should be here some time next week.
Yesterday, I got my cluster back from Instrument Specialties...Once this door stuff is completed my next item to tackle is the dash...stayed tuned things are getting exciting around here....
OMG! Plymouth got this one right on the styling and roofline....What a beauty that is and so pleasant to look at......
moparnation74
Well-Known Member
Thanks Roger!Looking great Justin!
daytona kid
Well-Known Member
moparnation74
Well-Known Member
DKWow, Really helpful pics & info for me soon, I'm starting to reinstall my windows,. BIG THANKS,.. You're the most meticulous guy I've ever seen as far as attention to detail. You also have great taste, I'm going with black and some red inside also..lol..
View attachment 497738
You have got to pm some pics of that sweet black charger! Man a black charger with red interior...Very Very Nice!
So glad my information is helpful for your build! I have restored several chargers....So if you run into a snag, feel free to PM me anytime....If I do not know I know someone else who does....In reaction to parts, vendors, assembly etc...
Justin
As long as the "noise test' on the open road with the windows up is bearable....should be fine.However there will never be a water test, lol...

Just finished catching up on a few pages here. Excellent work and great progress Justin. I only wish this thread had been around some 18 years ago when I was doing much the same thing. Sure would have saved a few hours for me.
Last edited:
Well, that is it for today...Glass is all in and adjusted properly. Trim is all installed....
After tackling the right side, the left side must have been a piece of cake & I'm sure you got all that done by 11:00. That's good, you deserve to have the afternoon off.

Is that rust I see on the square vent window frame nut? If so, that's not like you!
moparnation74
Well-Known Member
Sir Eagle Eye.....No, it is not rust it is red paint left over from 69...Both of them had it on one side....After tackling the right side, the left side must have been a piece of cake & I'm sure you got all that done by 11:00. That's good, you deserve to have the afternoon off.
Is that rust I see on the square vent window frame nut? If so, that's not like you!
View attachment 497859
View attachment 497860
moparnation74
Well-Known Member
RogerAs long as the "noise test' on the open road with the windows up is bearable....should be fine.
Just finished catching up on a few pages here. Excellent work and great progress Justin. I only wish this thread had been around some 18 years ago when I was doing much the same thing. Sure would have saved a few hours for me.
Glad to see you back my friend! I do hope you are felling better today....
Thanks for the compliments! "Noise Test" it will be compressed air and me screaming vrooom, vroooom, lol....
Justin
RT68440
Well-Known Member
Great work Justin! It must be a good feeling to have all of the window stuff in and adjusted properly. I am dreading the job of getting the glass in and adjusted on the Charger. Every post I see on forums shows some sort of complication due to adjustment or weather stripping. Having never done it before, it should be a treat!
moparnation74
Well-Known Member
The main pitfalls for windows are this: People tear the car down years ago. At that time they only marked parts as Passenger or driver side. Tagged and bagged and now it is back from paint prison...Crap the owners manual only says so much and thankfully there are some pics on the web...Assembling it is one thing but adjustments or knowing what to adjust are a whole different story....Great work Justin! It must be a good feeling to have all of the window stuff in and adjusted properly. I am dreading the job of getting the glass in and adjusted on the Charger. Every post I see on forums shows some sort of complication due to adjustment or weather stripping. Having never done it before, it should be a treat!
The first thing people blame are the seals and there is some truth to that. Mainly the rubber door seals(door to body) and the vent window channel seal. Even with that you can still adjust the glass to fit well. The second area people blame is the glass....Gotta be the glass, that dang AMD or ECS stuff doesn't fit right. Those statements are completely untrue. I have used both suppliers and had ZERO problems. Currently, the X has ECS glass and it fitted perfectly and when matched to the original in size, shape, curves and holes it was EXACT to the OE glass. The original glass was scratched bad and the etchings were gone on some is why I did not use the OE glass.
As I said earlier and multiple times I hate doing glass. Mainly due to the time involved, vast amount of parts and the tedious nature of them. When I get to this stage of the restoration including the dash, column, console and seats...I SLOW down...most speed up because that light at the end of the tunnel is near but I have learned from past restorations to do the opposite....
The glass is a process and if you ever need any help I can PM you my number and walk you through the process the best I can. I am not the expert but after 10 restorations I got pretty good at it, lol....
Word to the wise before you disassemble any door/rear glass....Take pictures of the frame itself and each bolt/nut/screw and make note of the placement of the bolts/nuts/screwa on each part before you remove one screw/bolt/nut from anything....Then dissasemble. The parts with the adjusters take pics showing the thread spacing....When installing occurs I put everything back that same way. The passenger side I had to adjust more than the drivers side but again it was easy adjustments. If you do not do any of that it still is easy to adjust but you have to understand what affects what...
Here are some examples of my pre disassembly pics and some disassembly pics....
Last edited:
moparnation74
Well-Known Member
More window pics


moparnation74
Well-Known Member
Finishing off the drivers side today...
The painted roof rail trim goes in with the screw hole forward and the lip for the weatherstrip facing out. The clips go in one way and are pictured below. The roof rail weatherstrip I pull back out to the A pillar and install the trim piece. Once the trim piece is in you may have to adjust the roof rail trim piece that houses the weatherstrip. So the weatherstrip will lap over properly once reinstalled. Notice the area I am pointing out. That trim piece has several tabs and the weatherstrip is notice for those tabs. So be sure to aligned back up correctly. One of my favorite cheap rest tools, the small ice pic....Or my "hole" finder. Saved me headaches many time...Insert through the trim hole and find the other hole and use the tool as a mini pry bar and the trim will slide easily....


The painted roof rail trim goes in with the screw hole forward and the lip for the weatherstrip facing out. The clips go in one way and are pictured below. The roof rail weatherstrip I pull back out to the A pillar and install the trim piece. Once the trim piece is in you may have to adjust the roof rail trim piece that houses the weatherstrip. So the weatherstrip will lap over properly once reinstalled. Notice the area I am pointing out. That trim piece has several tabs and the weatherstrip is notice for those tabs. So be sure to aligned back up correctly. One of my favorite cheap rest tools, the small ice pic....Or my "hole" finder. Saved me headaches many time...Insert through the trim hole and find the other hole and use the tool as a mini pry bar and the trim will slide easily....
moparnation74
Well-Known Member
Getting the rear upper door pad ready to install....


moparnation74
Well-Known Member
Final adjustment on the glass....Do not forget sides have to match...Well, at least for me they have to...Easy adjustment on the lower stop..


- Status
- Not open for further replies.
Similar threads
- Replies
- 9
- Views
- 495
- Replies
- 7
- Views
- 526


