• When you click on links to various merchants on this site and make a purchase, this can result in this site earning a commission. Affiliate programs and affiliations include, but are not limited to, the eBay Partner Network.

Hawk-Rod: The Restoration

Work has been really busy, but I finally got out in the garage today. Today I listened to the engine run for the last time for awhile - both sad and exciting. The car is no longer movable under its own power. Now I have to just get the rest of it stripped down and off the get the bodywork done.

I took out the fuel tank and ran the engine dry, then concentrated on the interior, pulling out the steering column and dash.

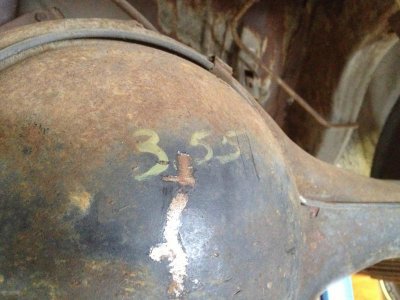
Original marking on the rear.
IMG_1788.jpg

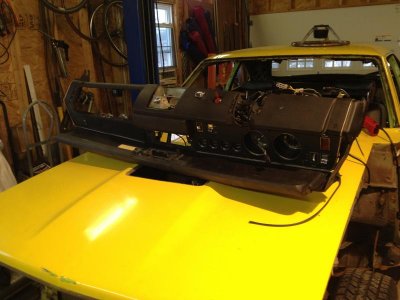
Dash after removal. I left all wiring and switches in the dash and pulled it all out as one assembly.
IMG_1813.jpg

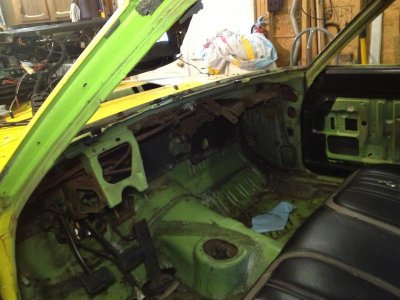
Here is the inside of the car
IMG_1814.jpg

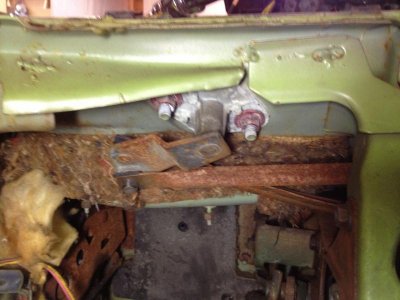
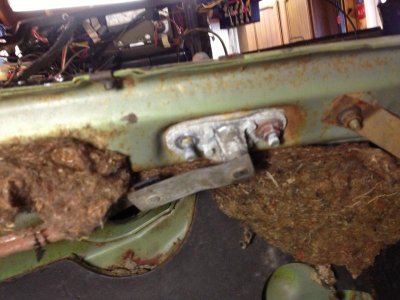
A couple of the wiper arms and how they attach
IMG_1815.jpg

IMG_1816.jpg

IMG_1788.jpg IMG_1813.jpg IMG_1814.jpg IMG_1815.jpg IMG_1816.jpg
 
Thanks Hawk .. you are doing and excellent job with the documentation. Great point brought up about the pass vent with CA system. Wonder if there is a workaround for that as I'm interested in classicair also but I also like the vents .. ladies do too. Thanks for the shots of the windshield pivots .. I'll need to replace my R/T two speed setup with 3 speed and I understand the pivots or levers are diff. More great ref shots.
 
Thanks Hawk .. you are doing and excellent job with the documentation. Great point brought up about the pass vent with CA system. Wonder if there is a workaround for that as I'm interested in classicair also but I also like the vents .. ladies do too. Thanks for the shots of the windshield pivots .. I'll need to replace my R/T two speed setup with 3 speed and I understand the pivots or levers are diff. More great ref shots.

Thanks Tall.

I'd be more than happy to send you some detailed shots of the windshield wiper assemblies if you need them. They are now off the car, but if you need some details to help identify them properly, let me know.

For anyone who may be removing their dashboard: One thing I missed getting pictures of was the dashboard removal. It was actually easier than I expected, but I was alone so I wasn't able to take too many pictures. Removal of the dash is simply to take out the screws at the front of the dash (windshield must be removed), and two inside the car, one under each kick panel. The key is to loosen all connecting wires first: Speedometer, wiring harness from the firewall, tach connector, dome light wires on each side, heater controls, etc.

There is no doubt that the best way to restore the dash is off the car. Get it all perfect and then install the entire assembly. I have removed instrument clusters and parts with the dash installed and it is a royal pain in the arse! It is much nices to be able to get to the parts from the back without a clutch pedal in your ear!!!
 
Anatomy of a Dash

I took some pictures of the dashboard when it was sitting on my kitchen table (the wife was thrilled ;-)

Note that I had already replaced the wiring harness with a Year One harness a few months back. However, I am fairly confident that it is wired as an original one was, since I did the replacement very carefully. The old one had been hacked up for a aftermarket radio (as was my dash too - Grrrrr).

At any rate, below are a whole bunch of pictures. If you don't care what the back of a 70 Road Runner Air Grabber dash looks like, then by all means move along to the next thread! For those of you doing any air grabber or dash wiring, maybe these will help. I'll also toss in a few classic air comparisons too...

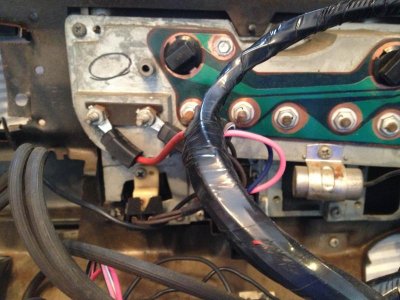
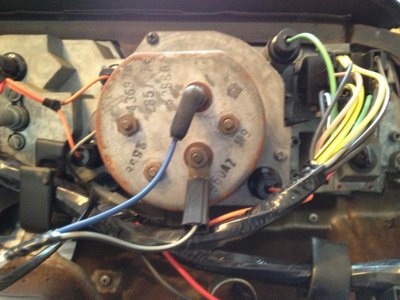
General back of instrument cluster
IMG_1820.jpg

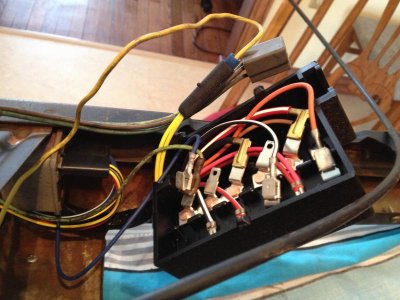
Details of wiring to instrument cluster
IMG_1821.jpg

IMG_1822.jpg

IMG_1823.jpg

IMG_1824.jpg

IMG_1825.jpg

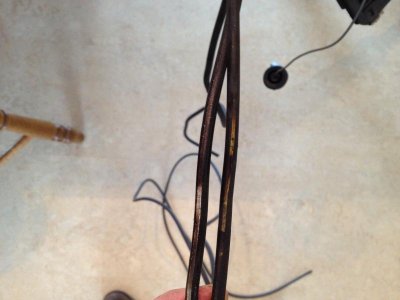
Some Air Grabber details. This first shot is the often missing solenoid. I believe this is used to help close the Air Grabber after the car shuts down. Note small green wire...
IMG_1826.jpg

Note where small green wire connects
IMG_1827.jpg

I hear a lot of talk about what original Air Grabber hoses looked like. Here are a couple. They are dirty, but hopefully you can get an idea.
IMG_1832.jpg

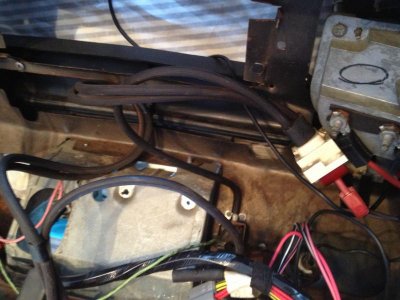
A shot of the Air Grabber hose connections. I removed the switch from the dash to (hopefully) make it reasonable to see where the hoses go. Note that the "closer" solenoid has a hose going in and out of the unit - it may be hard to see...
IMG_1841.jpg


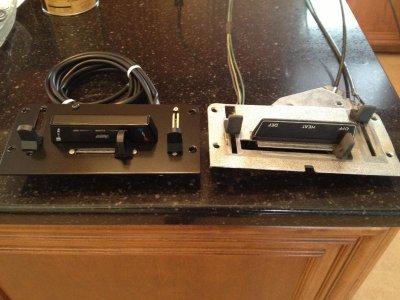
Finally, if your eyes haven't rolled back in your head yet, here are a few comparison shots of the original heater controls compared to the Classic Air DER (Direct Electronic Replacement).
Here is the back:
IMG_1838.jpg

Here is the front. I really don't like that it is painted black - it would have been nicer to have the finish closer to original. If you really hate the fact that this looks different, then if you order the system, DO NOT get the DER option. The standard option connects to your original controls. If I recall, there is a picture of this on their web site...
IMG_1836.jpg
 
Last edited:
Great work Hawk!! Comin right along. I know it probably doesn't matter now , because you have it all the way out. But, if you unloosen and leave the two bolts at the kick panels, you can actually pivot the entire dash down to gain access to disconnects. Also makes it a little easier to install by your self . Keep on keepin on !!
 
Priceless Hawk! Any more details you uncover or can show as you peel back the onion will be much appreciated brother
 
Great work Hawk!! Comin right along. I know it probably doesn't matter now , because you have it all the way out. But, if you unloosen and leave the two bolts at the kick panels, you can actually pivot the entire dash down to gain access to disconnects. Also makes it a little easier to install by your self . Keep on keepin on !!

Great Point, and it is a great tip! I actually discovered that while sitting in the front seat, straddling the transmission hump (benefits of a bench seat car!).

Now either due to stupidity or skill (not sure which), I discovered that once the dash rotated towards me all the key wires were already disconnected. At that point I took the side bolts out and the dash flopped into my lap. It may have been easier to disconnect some of the connectors at that point, but I was by myself so I would not have been able to hold the dash and disconnect wires.

To reinstall, I am guessing that it will be best to have some help and loosely thread in the side bolts and then set the dash in place. I should be so lucky to be at that point in the build!!!

One day at a time...
 
the kitchen table makes for a very nice work bench........... great pics and documentation will make for a smooth reassembly, I had alot of those type pics stored on an old computer, but time goes by and that was a few computers ago....... good to see you gettin her done........ day of rest here; we been doing 60-70 hour weeks with all the bad weather, this winter has been brutal,....... tired, but not complaining, see ya soon........ Mark
 
Some Air Grabber details. This first shot is the often missing solenoid. I believe this is used to help close the Air Grabber. I recall a recent thread about issues with the Air Grabber not closing at highway speeds. Perhaps this solenoid is missing? Note small green wire...
View attachment 168027

Note where small green wire connects

Thanks for the pics, I saved quite a few of them.
As far as the solenoid, my understanding is that when it's energized it holds vacume and when it's not (key off) it causes the system to loose vacume and the door closes even if the switch is left in the open position.
Mine must not work because even after shutting off the car the scoop stays open and I can close it and even reopen it (guess It's holding enough vacume).
I do have the problem of hood not closing over 60 mph or so but I think the actuator return spring is to week ( or maybe they all do this, not sure).

Hi 440+6,

Yes, I think you are 100% correct, and you reminded me with your post. My post above is in error, since the solenoid does nothing while the car is running. The only time that solenoid changes power state is with the ignition.

Thanks for the correction and for keeping me honest! :headbang:

Also, one other thing that I noticed with my Air Grabber when I disassembled the hood: My hinge was rusty. Not horribly rusted as in destroyed, but rusty so it did not move very well. With the power of vacuum, the Air Grabber may open well enough, but when closing that little spring has to overcome that rusty hinge as well. I plan to clean up or replace my hinge; my Air grabber worked, but opened and closed SLOWLY. If you continue to have problems, you may want to check the operation of your hinge. I'm not guaranteeing anything, but it seems logical that it would slow down the works and may even keep the scoop from closing...

Hawk
 
Progress, Plus Live and Learn

Ahhh, live and learn....

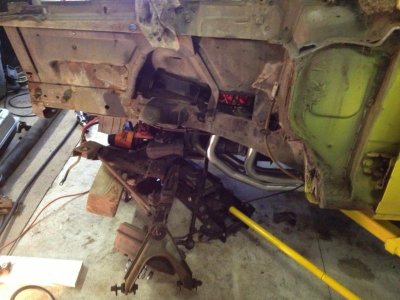
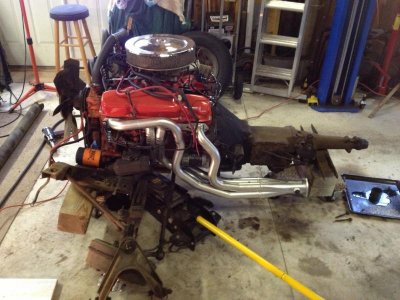
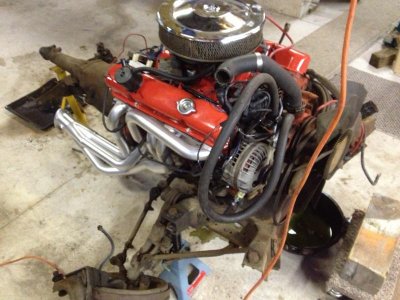
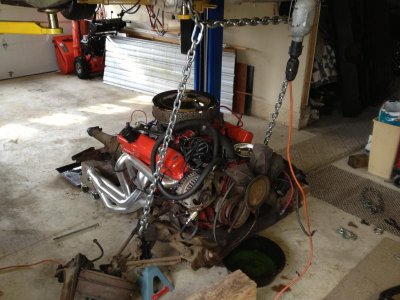
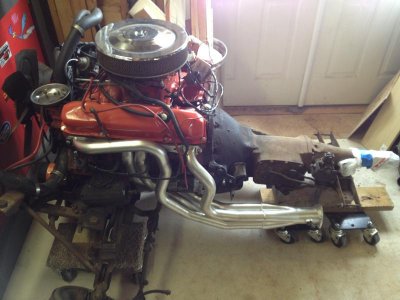
So I made quite a bit of progress today. I got the whole K-member with engine, transmission and suspension out. I didn't have a nice cradle, and didn't have time to make one, so I figured I would use some car dollies I had. I found out the hard way that you cannot support the K member directly under it because it twists upward at the front and tears up the oil filter causing oil to leak out and make a mess. Ask me how I know.... :iamwithstupid:

I NOW believe that the primary support point has to be the rearward mounting holes of the K-member. My K-Member is currently safely supported by jack stands, and no disaster has happened yet, but tomorrow I have to figure out how to make it mobile so I can get it out of the way and get my son's car back in the garage.

For those of you brave enough to look through my jury rigging and fumbling steps forward, proceed to look through the pictures!

To get the K-Member out, first loosen this bolt under the lower control arm. I took the bolt all the way out, but that probably isn't necessary.
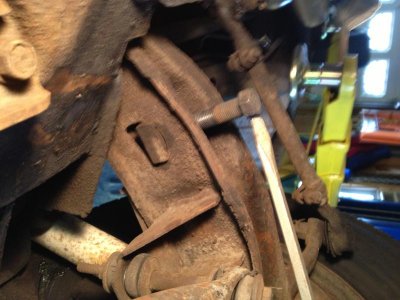
IMG_1861.jpg

The bracket that the bolt screws through looks like this
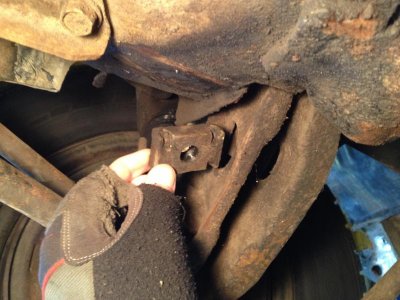
IMG_1863.jpg

Take the spring clips out from behind the bars.
IMG_1864.jpg

There is a special tool to take out K-members, which of course I don't have. So I got some rubber and put it around the bar. Then I clamped vice grips around the rubber and hammered on the side of the vice grip. The bars came out!
IMG_1865.jpg

I took out the battery tray and brake lines, then the shock, and then removed the upper control arm eccentric bolts. That allowed the arm and all the wheel related elements to flop down disconnected from the car.
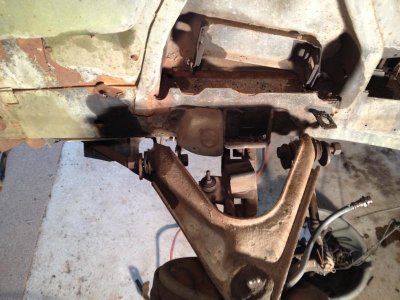
IMG_1878.jpg

I have car dollies that sit under car tires so you can move cars around in he garage. I made "tops" for them so I can use them to move other stuff - kind of like an industrial dolly. I figured these could do the job just fine...
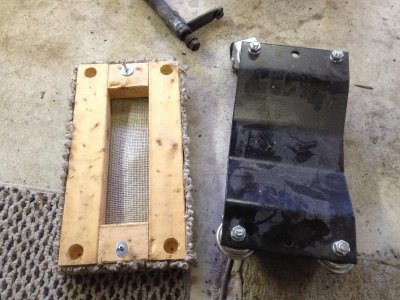
IMG_1880.jpg

IMG_1881.jpg

The assembly on its way down (actually the car body was on its way up...)
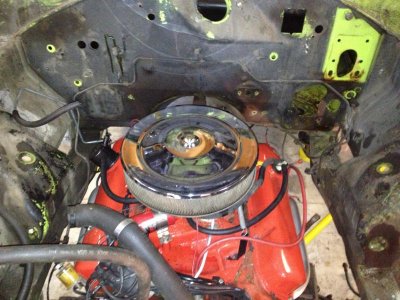
IMG_1883.jpg

From the side.
IMG_1882.jpg

Removed from the car, and a mess!
IMG_1886.jpg

IMG_1888.jpg

Other stuff I removed that may help someone as a reference:
The driver splash panel that allows access to the Z-bar (clutch) and the upper control arm eccentric
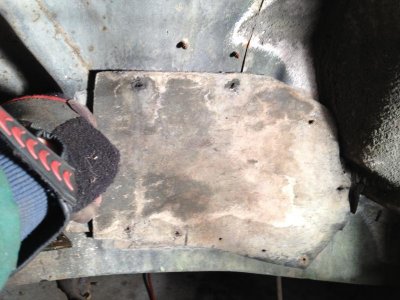
IMG_1875.jpg

The passenger splash panel that allows access to the other side eccentric
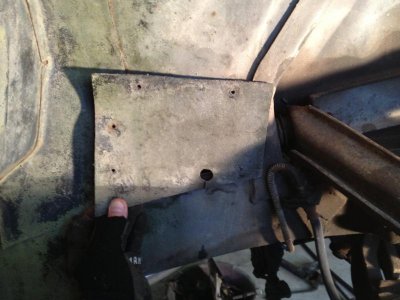
IMG_1879.jpg

Shot of the brake lines and Z-bar area.
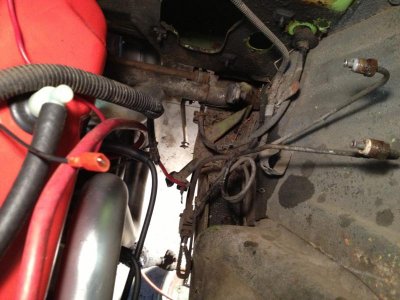
IMG_1873.jpg

This is a shot of the transmission interlock that does not allow the key to be removed unless the car is in reverse. I have mostly disassembled it here, but hopefully it provides some general detail...
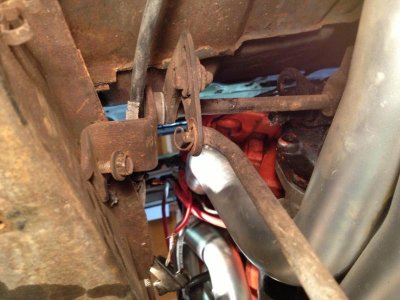
IMG_1877.jpg

Front is starting to look pretty bare.
IMG_1887.jpg

My son's poor car out in the snow since my engine and trans are taking up the floor space...
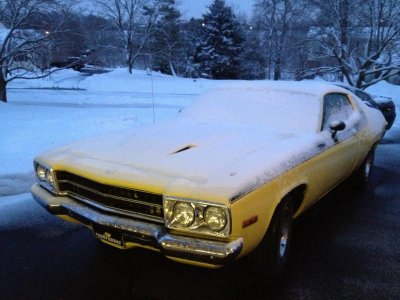
IMG_1891.jpg
 
K-member now out and stabile

Well, I solved my dilemma from yesterday.

The K-member assembly is now stabile and easily moveable around the garage. Now I can concentrate on the rest of the parts removal from the car.

I used the bumper mounts on the car to mount a chain, and then hooked additional chains to the rear K-member bolt holes. The angle of the chains was OK, because it moved the whole assembly forward when it lifted, which was the general direction I wanted it to go anyway. When I raised it with the lift, I stabilized it with a 6x6 post cut to the correct length on two dollies.
IMG_1892.jpg

Once the dollies were under the K-member, I slowly let it down and verified it was stabile. It was rock solid so I then moved the whole assembly to the front of my garage (why didn't I build the garage bigger???)
IMG_1893.jpg

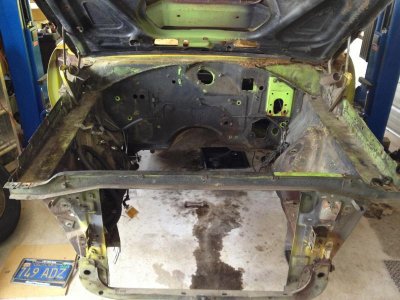
So I consider this part done - now to get the rear and the rest of the parts off the car - but not much left now! Here is the front end...
IMG_1896.jpg
 
Almost Done Stripping Body Shell

Thank goodness for some warmer weather - much nicer to be out in the garage.

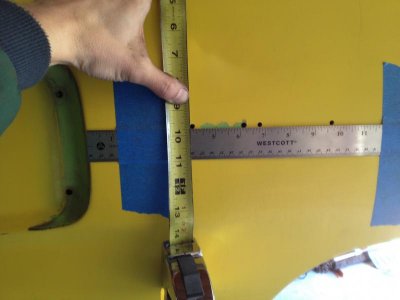
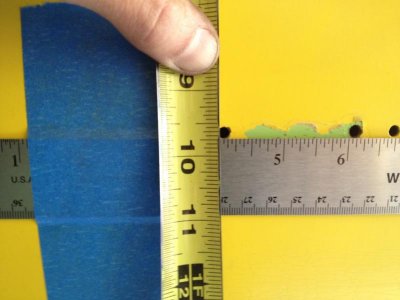
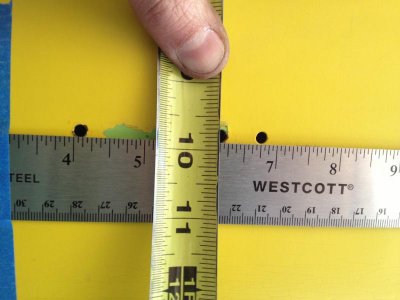
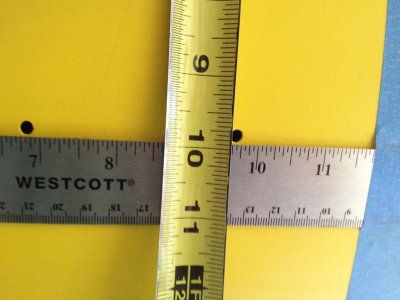
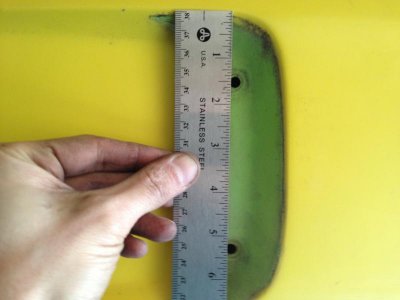
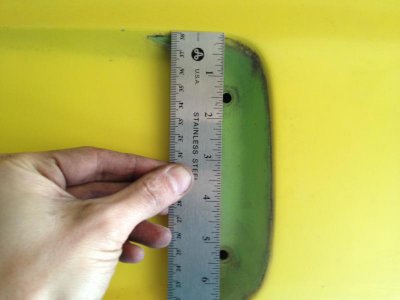
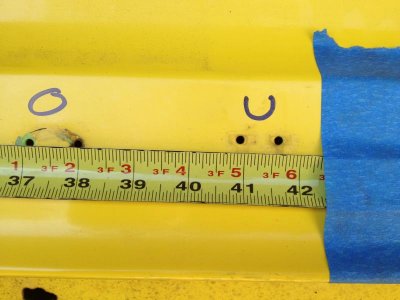
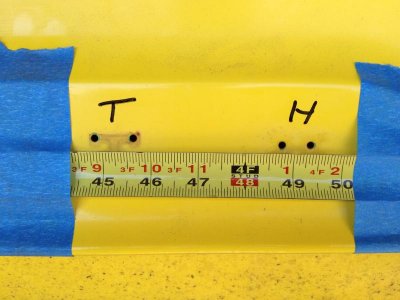
Got most of the rest of her stripped down - lots of small clips, lines and other BS. Most pictures would be really boring and useless to post, but I will post some of the measurement pictures for placement of "road runner" and "PLYMOUTH" emblems. Sorry for all the pictures, but if you are one of the guys who needs this, you'll hopefully get some use out of these.

I also ordered almost $2900 worth of AMD sheet metal - OUCH!!! But if you are going to go for it and get the car really nice, you gotta pay to play...
This just means that my engine budget has pretty much shrunk to zero :angry1:

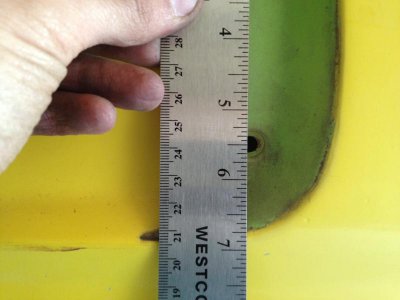
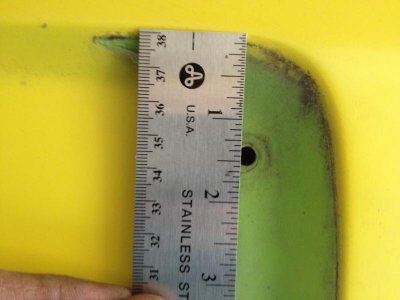
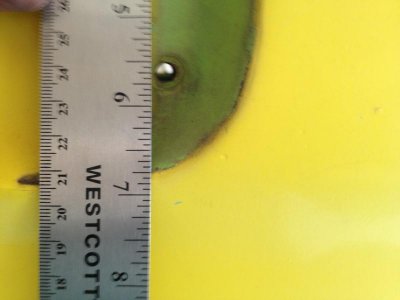
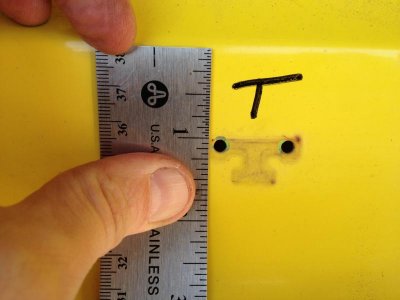
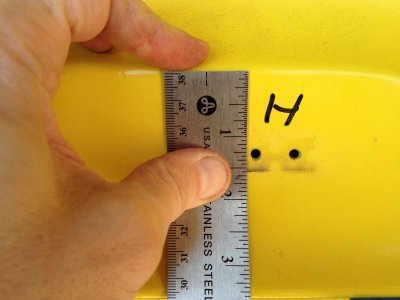
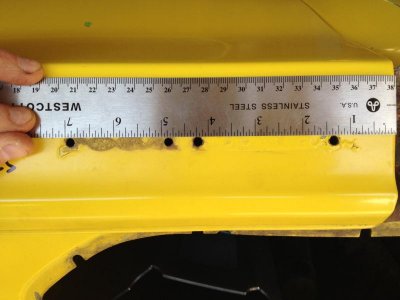
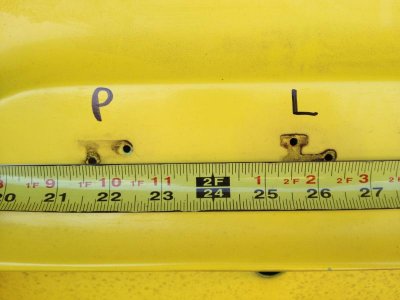
Side "road runner" emblem placement on a 70 (pictures not in order). Note vertical tape measure is from the crease at the top of the fender:
IMG_1959.jpg

IMG_1960.jpg

IMG_1961.jpg

IMG_1962.jpg

IMG_1963.jpg

IMG_1964.jpg

IMG_1965.jpg

IMG_1966.jpg

IMG_1967.jpg

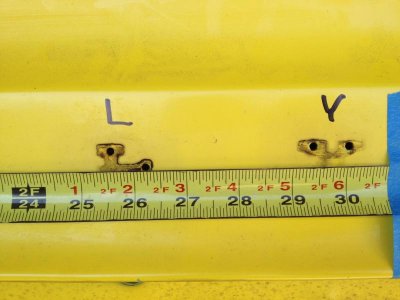
Tail Panel "PLYMOUTH" placement on a 70 (again, pictures not in order). The horizontal measurement is from the left quarter panel edge; the picture showing it looks kind f goofy, but the edge of the tape was right up against the sheet metal of the quarter panel.

Also blended in here are a couple of pictures of the trunk lid when a metal emblem "road runner" was placed on the car. This was done when the car did NOT have the trunk stripe. If a car had the trunk stripe, then the trunk lid was solid and the emblem was just a decal.
IMG_1993.jpg

IMG_1994.jpg

IMG_1995.jpg

IMG_1996.jpg

IMG_1997.jpg

IMG_1998.jpg

IMG_1999.jpg

IMG_2001.jpg

IMG_2002.jpg

IMG_2003.jpg

IMG_1992.jpg

IMG_1991.jpg

IMG_1990.jpg

IMG_1988.jpg

IMG_1989.jpg

IMG_2004.jpg
 
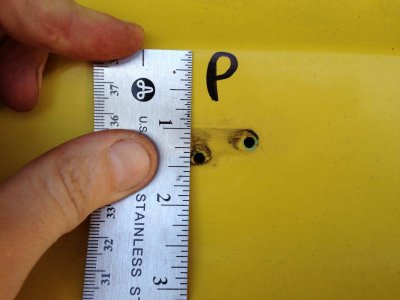
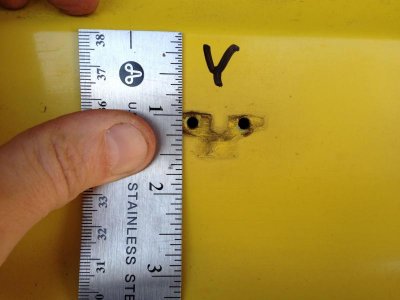
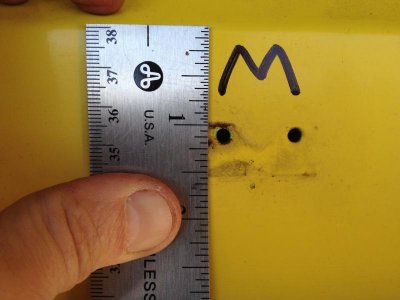
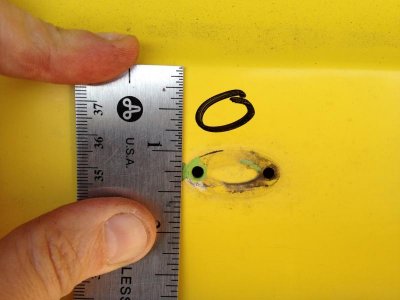
Great car, great thread, great documentation - can you tell I like it? Can't believe someone covered that great color with yellow. I had to laugh when seeing your missing piece on the vent wing window support as I just went through this on my Charger project. At least you are missing the easy one to find, unlike me. Those 2 holes were originally the spot welds holding the bracket on. Moparparts(Don) has a bunch of the side you need if you want to get one now while it is on your mind.
 
Great car, great thread, great documentation - can you tell I like it? Can't believe someone covered that great color with yellow. I had to laugh when seeing your missing piece on the vent wing window support as I just went through this on my Charger project. At least you are missing the easy one to find, unlike me. Those 2 holes were originally the spot welds holding the bracket on. Moparparts(Don) has a bunch of the side you need if you want to get one now while it is on your mind.

Thanks for the note! I will contact Don and see if I can get the side I need. I saw your WTB thread, but then got on to other things. Thanks for the heads up!

As far as the color: Yeah, I can't quite figure it out. The green and yellow are in the same family: both high impact, in your face colors. If you don't like the green, then why paint it yellow? Paint it blue or red.
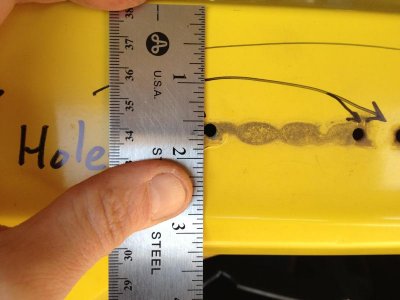
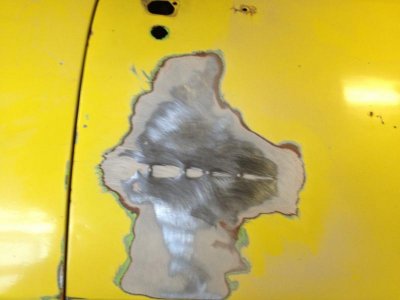
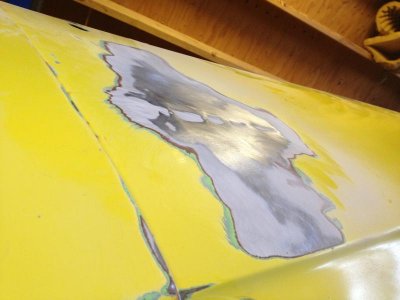
I did find the onus for the painting project though. The car got a "Darlington stripe" down the passenger side - a crease from the front fender all the way down the door and quarter panel. Holes were drilled and it was pulled out, so it needed some major paint work. At that point, most likely they changed the color...

Here is a picture of the door - I sanded off the paint (and a lot of Bondo) and you can see the holes and the crease. It is a shame because the door skin has no rust, but it is really beat up.

IMG_2005.jpg

IMG_2006.jpg
 
I would strip everything off that door to see what you have left. It's amazing what a good body guy can do with a set of dollies and a hammer. Any piece of original metal is far better than the repop stuff imo.
 
I would strip everything off that door to see what you have left. It's amazing what a good body guy can do with a set of dollies and a hammer. Any piece of original metal is far better than the repop stuff imo.

I hear you. The problem I have is that I am not a body guy, and although I had intended to try a lot of the bodywork myself, I do not have time to do so with this project. With the AMD sheet metal being so good, it becomes a balance between the cost of labor to repair (not cheap) vs. the cost to buy a replacement piece and install it. In many cases it will probably be cheaper to replace than to fix, especially if it is an item that would take a lot of hours to do.

In looking at the inside of this door, there are probably 25 holes drilled in the door every 1-2 inches apart. The cost to repair it will likely be way higher than replacing the door skin. But I hear you - and where possible, I will keep original metal. But I am not made of money so I can't spend $$$ more just to save it. I am already blowing my budget on this project... (but I guess I expected that too)

Hawk
 
Cha-ching!!!

That's the sound of more money flowing out of my wallet. I just ordered a custom gas tank from Hot Rod City that incorporates an in tank fuel pump. It's expensive, but the right way to go if I am going to fuel inject the car.

I know the site likes pictures, but I think I posted TOO MANY on this page - it takes too long to scroll down. Sorry!!! :violent-smiley-100:
 
Hello,

I am planning on using this same set up to retro-fit A/C into my 70 RR. I will be anxious to hear your comments about it. I will be starting my project this summer, so I am right here with you. Good luck!! Can't wait to see your finished product.
 
Hello,

I am planning on using this same set up to retro-fit A/C into my 70 RR. I will be anxious to hear your comments about it. I will be starting my project this summer, so I am right here with you. Good luck!! Can't wait to see your finished product.

Hi,

Thanks for the note. I think that is what is great about the forum - we can all learn from each other as well as gain inspiration too.

It just so happens that on the plans for today are to drill the firewall holes for the A/C. Look for some posts late today or tomorrow for some pics on the firewall modifications.

So far, I have been pleased with the overall quality of the unit. We may actually install our A/C units at around the same time, as my car will very soon start some extensive metal surgery to fix a case of tin worms. Hopefully I will be installing much of the dash elements in the summer...

Hawk
 
Auto Transport Service
Back
Top