• When you click on links to various merchants on this site and make a purchase, this can result in this site earning a commission. Affiliate programs and affiliations include, but are not limited to, the eBay Partner Network.

Hawk-Rod: The Restoration

Looking good!

Out of curiosity, did you grease the pivot shafts, where they go into the K frame? It doesn't mention it in the service manual, but seemed like it would be greased just based on the metal on metal contact.

I did, but I don't know if it was right to do it. As you said, the FSM does not specify it, and that is because the pivot shaft does not move (or is not supposed to move) in the K-Member. That part is stationary, while the lower control arm rotates around the bushing at the end of the pivot shaft.

The reason I added just a light film of grease was more to ensure that it wouldn't rust in there. With the nut on the end of the pivot shaft as tight as it is - I hope it won't move...
 
Thanks Hawk, I feel a little stupid...for some reason I had it in my mind that the pivoting part was in the K member..but since it's torqued to 130 ftlbs that obviously makes no sense.
 
Thanks Hawk, I feel a little stupid...

LOL. I feel stupid just about every time I work on my car - there I always something I scratch my head about. I am far from any expert, but half the battle is just diving in and doing the best you can! When I get stuck, I put my tail between my legs and ask the forum... :grin:
 
Starting on the rear

So I have had some challenges at home that have continued to slow me down. My son is home from college and he set to work on starting to clean the rear axle. A few interesting markings were unveiled today. If some of you know what they mean I'd appreciate you chiming in. Here they are:

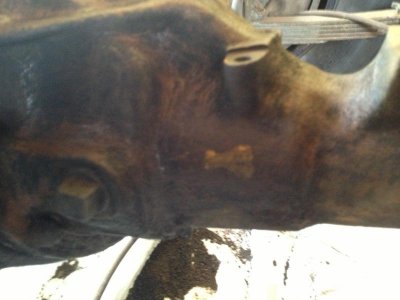
The first was this yellow "hourglass" mark on the passenger side of the pumpkin. I have no idea what this indicates. This picture is not so good, but shows more where it is located.
IMG_2330.jpg

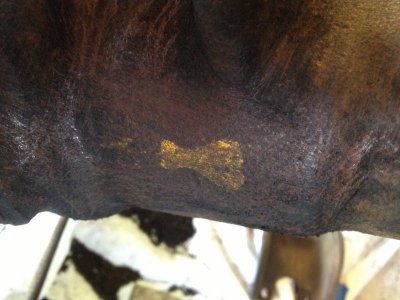
...and a close up.
IMG_2335.jpg

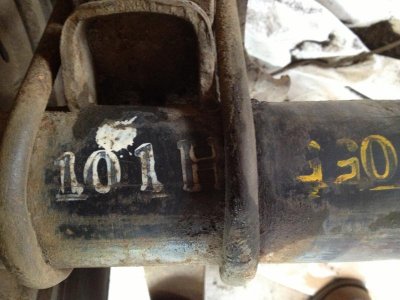
Here are some marks on the driver side tube just inboard of the wheel. In white is "101H" with a white splat of paint above it. These are right side up in this picture. To the right, it looks like 055 in yellow (upside down in this picture).
IMG_2338.jpg

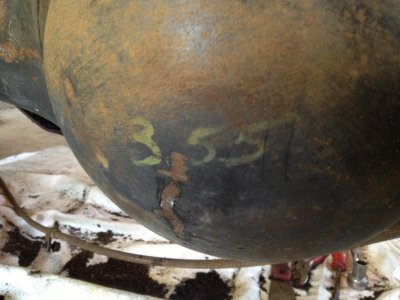
You guessed it - my rear is a 3.55 sure grip...
IMG_2336.jpg

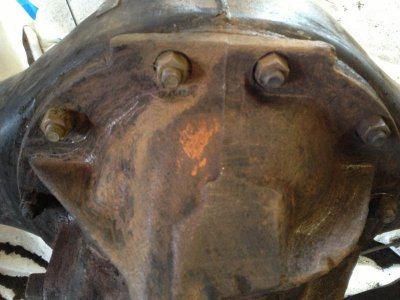
And then there is this strange orange splat on the top of the center carrier. Most looks like it has worn off...
IMG_2331.jpg
 
Those markings are really cool. Are you going to reproduce them? (put them back on)
Maybe someone one here knows what they mean?
 
http://www.mmcdetroit.com/ICCA/References/Inspection_Marks/

Some of them might be listed here...for some reason when I go to the page most the pics are "x"ed out.

Interesting site. The Cuda they use as a reference for the rear is built around the same time as my Road Runner (Nov 69 for the Cuda and Oct 69 for my Road Runner), but the Cuda was built at the Hamtramck plant while my Road Runner was built in California.

At any rate, none of the marks match. It would be cool if someone knows or has seen similar marks. My guess is many are specific to the plant where the car was built, but who knows? :icon_question:
 
Hi Buddy.Great pics.Is there a chance i could phone you on some of the wiring and air grabber pics aswell Thanks Mike.Take care.On the air grabber solinod the green goes to the fuse box and thats it?
 
Hi Buddy.Great pics.Is there a chance i could phone you on some of the wiring and air grabber pics aswell Thanks Mike.Take care.On the air grabber solinod the green goes to the fuse box and thats it?

Hi Mike, welcome to the site.

So first, to a question I can answer easily and quickly: The green wire goes to a switched (ignition) power on the fuse box. In other words, when the car is on, there is power on the green wire. When the car is off, there is no power on the wire. This allows the vacuum to draw down and close the hood scoop whenever you shut the car off.

For your other questions, I see you have a thread - I'll post some pictures there shortly so many can benefit from the thread. Don't get me wrong, if you want to call and discuss something I am glad to help - just send me a PM and we can go from there!
 
steady progress on our end.......... rear end all welded up, stiffeners and torque boxes installed, both door skins on, all stripping and blasting completed with the exception of the bumper filler and the underside.

need to spend a couple days finishing up all the bodywork around the edges and fixing some minor dents on the roof and hood...... then break it down and flip it over

emoticon-pancakeflipper.gif


I will post pics of the underside after its on the rotisserie.......
in the meantime, I will be game planning some lime green :icon_pidu:

hawkfront1_zps0c3769ef.jpg


hawkfront4_zps35929550.jpg


hawkfront2_zpseb89a854.jpg
 
Looks great Mark - Thanks for moving this project along while I tackle some family stuff.

I have made some progress and the rear suspension is getting close to being ready to put back on. To save some bucks, the rear has basically been treated to some new bushings and paint - that's it. It will need to soldier on without a total rebuild. Then again, if it doesn't need it, why bother?

The K-Member is also getting close too. I am waiting for my power steering box from Firm Feel and then I will have the K-Member and suspension largely ready. After that I will turn my attention to the engine and trans...
 
Hi Bro.Thanks.I couldnt see how else it would work.Some guys said i didnt need it.Make all the sence in the world.Iam a learnin.Take care
 
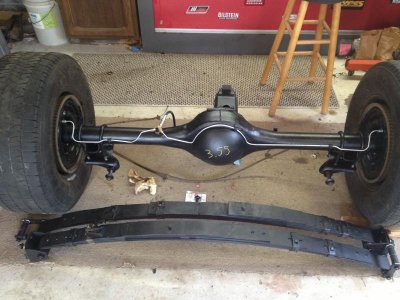
I am finally getting a little bit of time to work on the car. The rear is getting closer. New brake lines are on, and the axle has had some paint slapped on. I do not plan to rebuild the rear, since the car only has 80,000 miles and the rear works perfectly. There is no slop in it, so I figure I will leave it alone and save some time and money.

The springs also got new paint and all new bushings. Like the rear, they seemed to be in good shape. They are the Hemi leaf springs, so they are pretty stout and the rear of my car did not seem to be sagging.

Left to do: Clean up the back brakes, clean/paint the drums, fix a broken leaf spring strap/bracket (in picture: front spring on the left side), and clean up and paint the parking brake cables. At that point, the rear will be ready to re-install on the car!

IMG_2418.jpg
 
really enjoy your thread

Glad you enjoy it. I get a lot of tips and motivation from reading other people's posts, so hopefully mine can help some folks along the way as well. Plus, when I am all done, I will have something cool to check back on and see what I went through!

Hawk
 
That looks sharp Hawk... I like that you are carrying over markings on the diff. That 3.55 screams Road Runner!
 
Your doing an outstanding job on this car, everything is going to look great even from the bottom. Going to be a real head turner
 
Auto Transport Service
Back
Top