I got the bolt on for mine too. No more sneaking one over on people, they see that hood and they know it's all business!
You are using an out of date browser. It may not display this or other websites correctly.
You should upgrade or use an alternative browser.
You should upgrade or use an alternative browser.
Hyrdgoon's - project angrybird
- Thread starter HYRDGOON
- Start date
HYRDGOON
Well-Known Member
- Local time
- 1:08 PM
- Joined
- Apr 20, 2013
- Messages
- 3,372
- Reaction score
- 2,745
- Location
- Breslau, Ontario, Canada
I had 522 callouts on my AG hood 69GTX so I've been sending a message for a while not to mess around hahha but the 6 pak hood does bring a whole new attitude
Ordered some speedhut guages today to replace the trio I had under the dash. Made them to match the Dakota digital cluster so should look alright!
Ordered some speedhut guages today to replace the trio I had under the dash. Made them to match the Dakota digital cluster so should look alright!
HYRDGOON
Well-Known Member
- Local time
- 1:08 PM
- Joined
- Apr 20, 2013
- Messages
- 3,372
- Reaction score
- 2,745
- Location
- Breslau, Ontario, Canada
Well I'm kind of forced into a decision that I wanted to make later than sooner and happy it's getting done but my wallet isn't as happy
I had already purchased Dropped Spindles and double adjustable UCA's from Magnum Force but given the shop that has my car really wants to do away with my torsion bars to put the new cross member where they want it and add frame connectors (which i love the idea) I'm forced into coilover.
Looking at the options and planning for future (thinking about my steering issues etc..) I placed a call to MF and asked if they would take my UCA's and Spindles back on trade for something a little more..... "Problem solving" So you can guess what's coming next
usaroadrunner
Well-Known Member
Welcome to my world goon. After you get the whole front end kit, might as well get a 4 link in the back, then we can both hit the track. He he he lmao. It's only money, can't take with you goon. Wait til you see my next post. Yikes...
HYRDGOON
Well-Known Member
- Local time
- 1:08 PM
- Joined
- Apr 20, 2013
- Messages
- 3,372
- Reaction score
- 2,745
- Location
- Breslau, Ontario, Canada
I'm planning a 4 link in the back too but going to have my buddies chassis shop do it rather than order one of the kits. Once I'm doing the front now I definitely want it done right and this is the way to do it. Just wish I could afford the big brakes I want now too but that's not happening! Oh well!!
Looking forward to your next post now!!! LOL
Looking forward to your next post now!!! LOL
HYRDGOON
Well-Known Member
- Local time
- 1:08 PM
- Joined
- Apr 20, 2013
- Messages
- 3,372
- Reaction score
- 2,745
- Location
- Breslau, Ontario, Canada
is that a nitrous solenoid I see in the engine bay pics?
Nope, no nitrous for me... unless.... nope! Hahah
We don't need no stinkin blue bottle!!!!
I like the new look, will look really good once painted to match. Any pics of the tranny mock up? I'm confused about the no need for relief cuts? Looking good Goon!!!
HYRDGOON
Well-Known Member
- Local time
- 1:08 PM
- Joined
- Apr 20, 2013
- Messages
- 3,372
- Reaction score
- 2,745
- Location
- Breslau, Ontario, Canada
I should have grabbed pics of the tranny mockup but didn't. And I should elaborate now that I've seen more. We will have to notch in a bit for the reverse lockout and lights. And the new whole is set back about 6 inches and to the right of the original hole. (I'll grab pics next time I see)
Once Greg starts on his idea for the frame connectors and added rigidity I think this will all make sense better too and I will definitely grab pics as we go. Going to try to tie in the frame connectors to look as "factory" as possible and the new Crossmember will be more "tube style" so it ties in with the look of the MF K Frame.
The tranny is lying out beside the car on the floor now and we want to wait to see if the MF K Frame moves the engine at all before we can really tie everything in.
HYRDGOON
Well-Known Member
- Local time
- 1:08 PM
- Joined
- Apr 20, 2013
- Messages
- 3,372
- Reaction score
- 2,745
- Location
- Breslau, Ontario, Canada
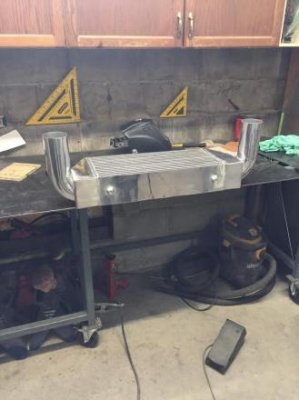
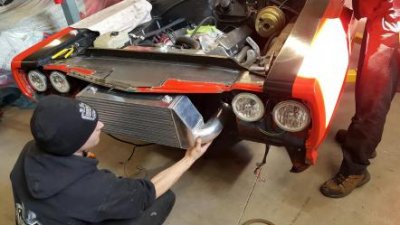
Here's an update pic for today. Some might take issue with this but any part can be replaced and I liked the idea of a clean functional look so here you go! This shroud between the grille and rad supports will look clean once painted but also serve 2 purposes.
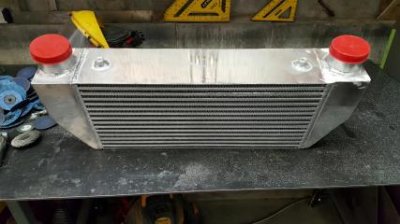
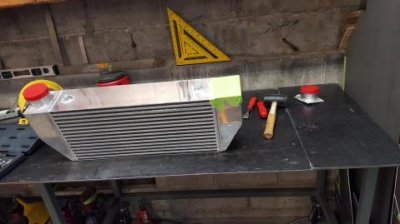
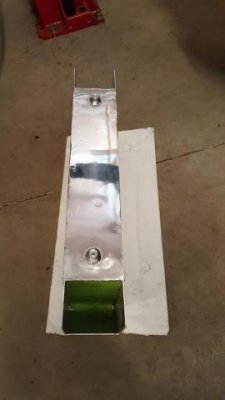
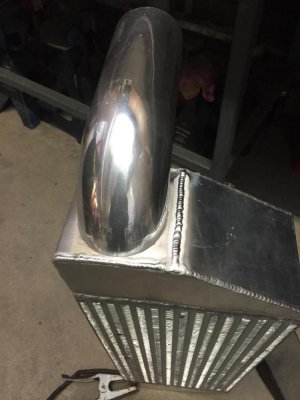
- this will be the support for me intercooler and;
- given the intercooler being in front of the rad we want to make sure this acts as a dam to direct all air where it needs to go
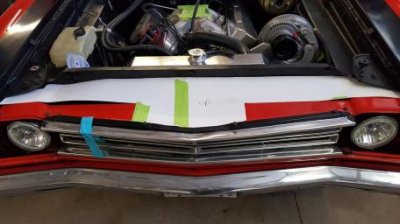
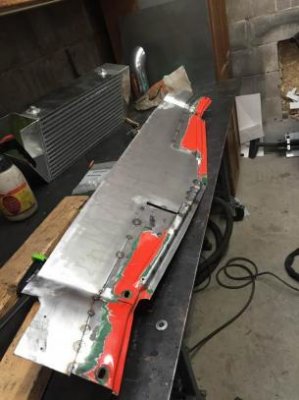
- this will be the support for me intercooler and;
- given the intercooler being in front of the rad we want to make sure this acts as a dam to direct all air where it needs to go


HYRDGOON
Well-Known Member
- Local time
- 1:08 PM
- Joined
- Apr 20, 2013
- Messages
- 3,372
- Reaction score
- 2,745
- Location
- Breslau, Ontario, Canada
HYRDGOON
Well-Known Member
- Local time
- 1:08 PM
- Joined
- Apr 20, 2013
- Messages
- 3,372
- Reaction score
- 2,745
- Location
- Breslau, Ontario, Canada
usaroadrunner
Well-Known Member
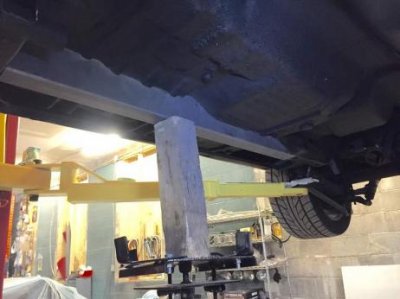
hey goon, before you install those frame connectors you should have the car on its wheels not in the air. thats what a few told me. just checking. wheels are sinister, love them.
themechanic
Oklahoma is OK
- Local time
- 12:08 PM
- Joined
- Nov 11, 2012
- Messages
- 22,187
- Reaction score
- 28,699
- Location
- Moore, Oklahoma
is that a nitrous solenoid I see in the engine bay pics?
[video]https://youtu.be/Dmw5Yyg3C7Q[/video]
Big Sugar
Well-Known Member
- Local time
- 12:08 PM
- Joined
- Feb 4, 2009
- Messages
- 123
- Reaction score
- 43
- Location
- Beeton Ontario Canada
That's right...Car needs to be level and supported..on the lift that motor is pulling down on the front of the chassis.
Ron
Ron
hey goon, before you install those frame connectors you should have the car on its wheels not in the air. thats what a few told me. just checking. wheels are sinister, love them.
Dido although I've seen it done otherwise. Loving the progress! Haven already driven this beast I can't imagine what it will be like now!!! Holy cow... better buy a few sets of tires and some depends!
HYRDGOON
Well-Known Member
- Local time
- 1:08 PM
- Joined
- Apr 20, 2013
- Messages
- 3,372
- Reaction score
- 2,745
- Location
- Breslau, Ontario, Canada
hey goon, before you install those frame connectors you should have the car on its wheels not in the air. thats what a few told me. just checking. wheels are sinister, love them.
That's right...Car needs to be level and supported..on the lift that motor is pulling down on the front of the chassis.
Ron
That was only mock up. These aren't the US Cartool kit these are being made as we go. Will be all stiched in under full weight of the car
I spent a lot of time matching my sub connectors to the floor, made welding them in so much nicer.
HYRDGOON
Well-Known Member
- Local time
- 1:08 PM
- Joined
- Apr 20, 2013
- Messages
- 3,372
- Reaction score
- 2,745
- Location
- Breslau, Ontario, Canada
I spent a lot of time matching my sub connectors to the floor, made welding them in so much nicer.
And looks like something they would have done in the factory. Which of all things shouldn't look like something I'm concerned with given all the changes being made but in some places it seems right!
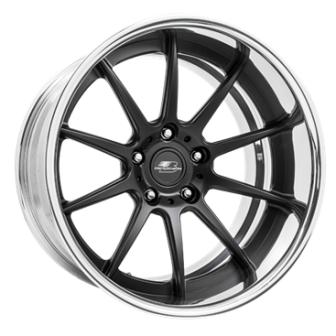
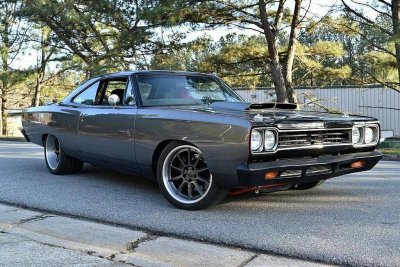
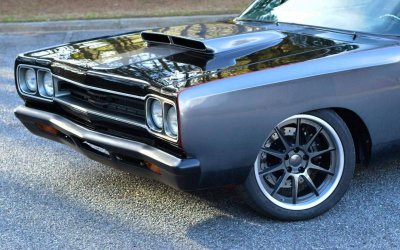
So I just came across this Roadrunner on the Forgeline page. I am SOOOOO Thankful I found this to justify my wheel choice because this is about as damn close as I can get to what the wheels will look like on my car. These are Forgelines and mine are Billet Specialties but very similar style, concave and color choice.
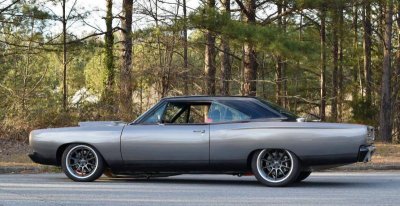
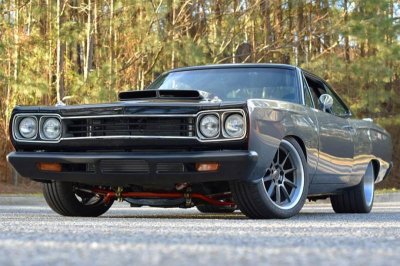
Similar threads
- Replies
- 2
- Views
- 456
- Replies
- 2
- Views
- 326
- Replies
- 2
- Views
- 410

